

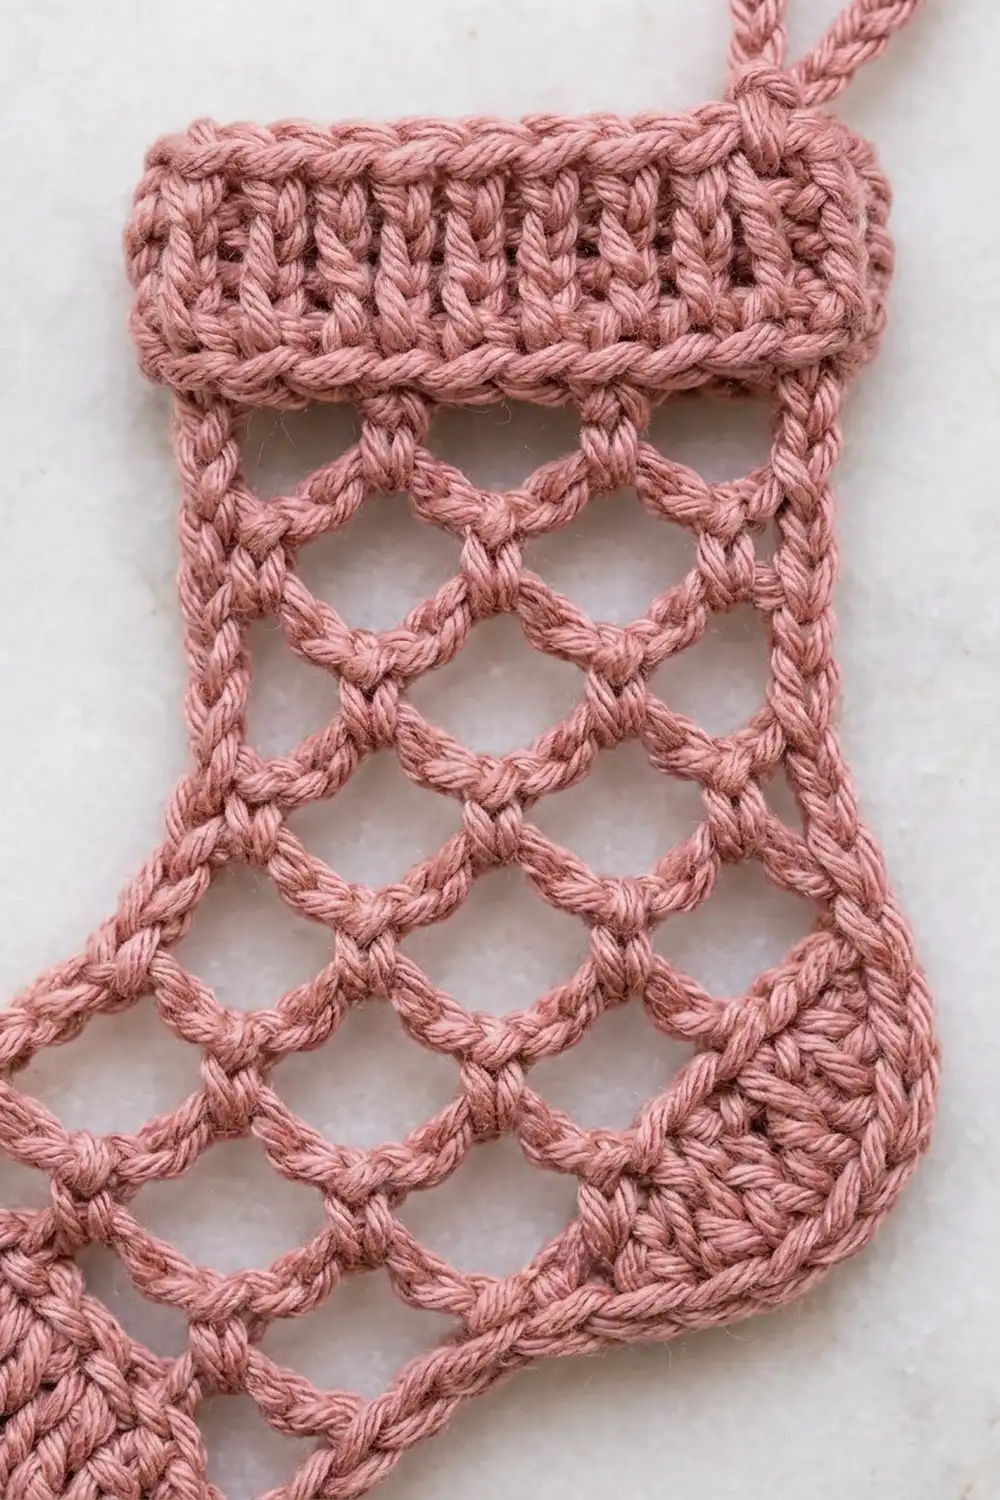
This little stocking is light, lacy and quick to make. The leg and foot are an open fishnet mesh with diamond-shaped holes. The toe and heel are solid, rounded patches, and a ribbed cuff finishes the top. One round of single crochet outlines the whole shape, so it holds its form on a branch.
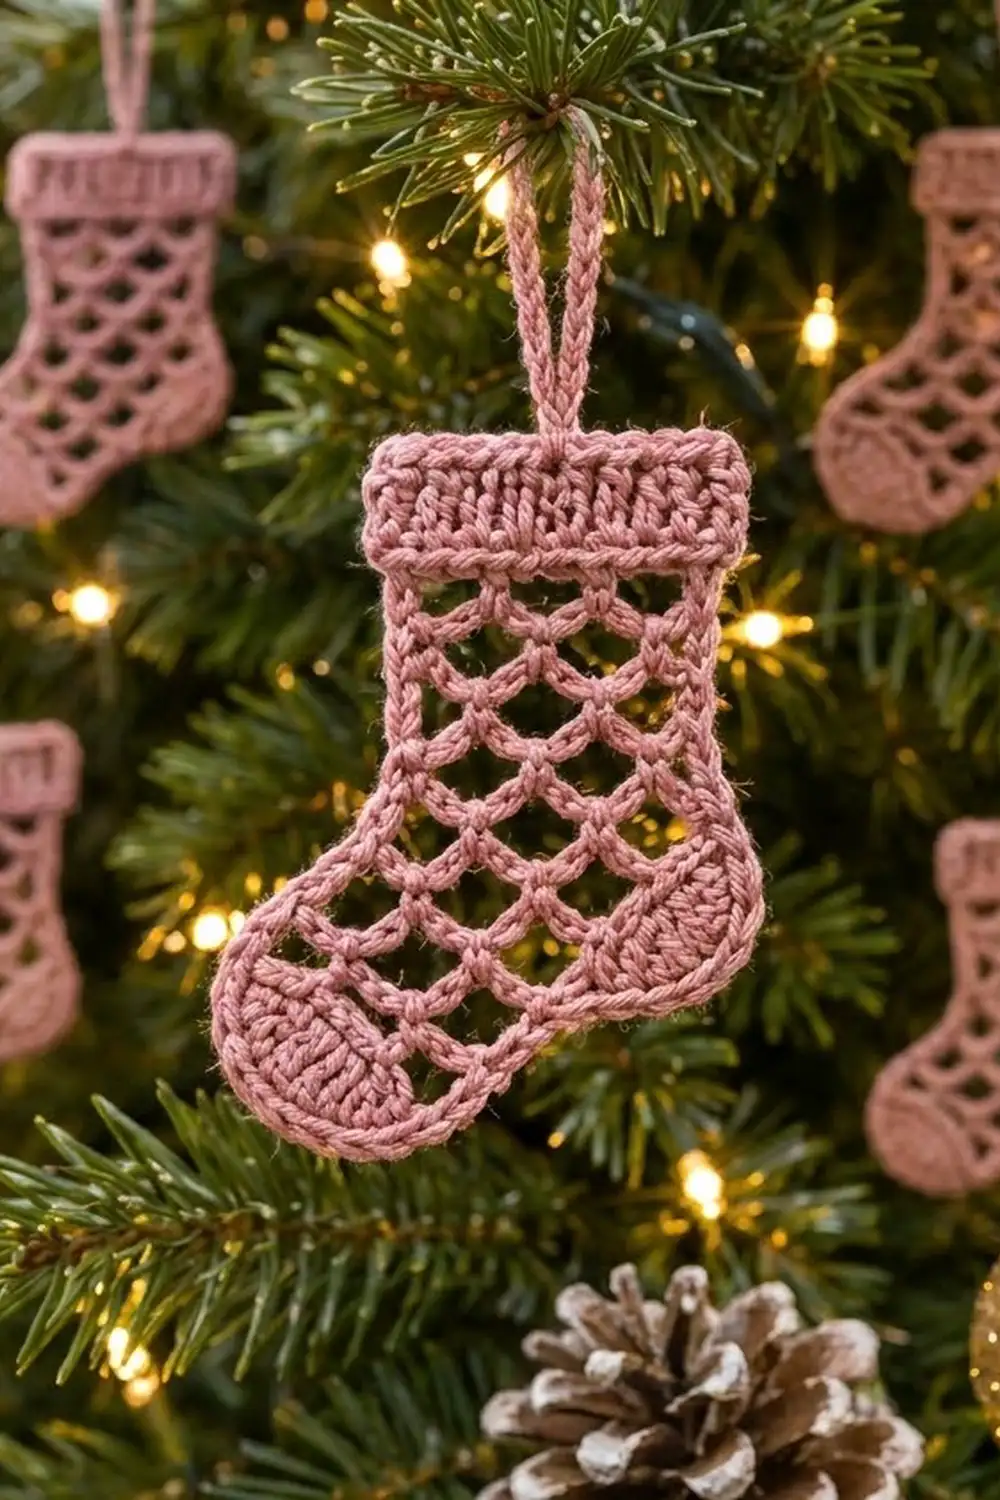
The sample uses a single dusty rose color. Soft pinks look good against green branches and gold baubles, but any smooth solid color will show the mesh well. The style is vintage and delicate, and it works well as a gift topper or a set of matching tree ornaments.
The pattern uses US crochet terms. The finished stocking measures about 3.5 in (8.9 cm) wide across the foot and 4.75 in (12.1 cm) tall, not counting the hanging loop. The loop adds about 1.25 in (3.2 cm).
The stocking is one flat piece worked in rows from the sole upward. The toe and heel patches are shaped in the first rows, and the mesh opens out between them. The leg narrows over the heel side, and the cuff is worked straight onto the last mesh row. One round of edging and a chain loop finish it.
Finished Size and Construction
- Finished size: 3.5 in (8.9 cm) wide at the foot × 4.75 in (12.1 cm) tall
- Leg and cuff width: about 2.4 in (6.1 cm)
- Hanging loop: about 1.25 in (3.2 cm)
- Skill level: Easy-intermediate (simple mesh and post stitches)
- Terminology: US
- Yarn weight: Sport (#2), smooth cotton or cotton blend
- Hook: 3.25 mm (US D/3)
- Number of pieces: 1
- Layout: Single flat stocking, toe pointing left when the right side faces you
- Piece size before edging: about 3.3 in (8.4 cm) wide × 4.5 in (11.4 cm) tall
- Edging depth: about 1/8 in (0.3 cm) on every side
Materials
Yarn: Use a smooth sport-weight cotton or cotton blend. Cotton keeps the mesh crisp and the holes open. Fuzzy or very stretchy yarns will blur the lattice.
- Dusty Rose: 10 g / 35 m per ornament
One ornament uses about 6 g / 22 m. The quantity above includes a margin for your gauge swatch and the hanging loop. If you plan a set, one 50 g ball makes about five ornaments.
Tools:
– 3.25 mm (US D/3) crochet hook
– Tapestry needle
– Scissors
– Stitch markers (2)
– Rustproof pins and a foam blocking mat
– Spray bottle with clean water
– Ruler or tape measure
Abbreviations (US Terms)
- ch – chain
- sc – single crochet
- hdc – half double crochet
- dc – double crochet
- sl st – slip stitch
- sk – skip
- st(s) – stitch(es)
- tch – turning chain
- FPdc – front post double crochet
- BPdc – back post double crochet
- RS / WS – right side / wrong side
Mesh loop (ch-3 loop): Ch 3, then sc in the next ch-3 loop (or the stated stitch). Rows of these loops make the diamond lattice.
FPdc: Yarn over, insert the hook from front to back around the post of the stitch, then out to the front again. Complete as a regular dc.
BPdc: Yarn over, insert the hook from back to front around the post of the stitch, then out to the back again. Complete as a regular dc.
Gauge and Checkpoints
Gauge: 24 sc × 26 rows = 4 in (10.2 cm) in sc, which works out to 6 sc per 1 in (2.5 cm).
Since this is one small piece, the ornament itself is your test. Work Rows 1–2 and measure.
Checkpoints:
– After Row 2: the width is about 3.3 in (8.4 cm).
– After Row 8: the height is about 2 in (5.1 cm).
– After Row 14: the height is about 3.75 in (9.5 cm).
– After Row 18: the piece is about 3.3 in (8.4 cm) wide at the foot × 4.5 in (11.4 cm) tall.
– After edging: the piece is 3.5 in (8.9 cm) × 4.75 in (12.1 cm).
If your piece is too big, change to a 3.0 mm hook. If it is too small, change to a 3.5 mm hook. Also, keep each mesh loop at exactly 3 chains. Loose chains make the stocking tall and floppy.
Pattern
Odd rows are RS rows and start at the heel end. Even rows are WS rows and start at the toe end. With the RS facing, the toe points left.
Sole, Toe and Heel Patches
Foundation: Ch 19.
Row 1 (RS): Sc in the 2nd ch from hook and in each ch across. Turn. (18 sc)
Row 2 (WS, growth row): Ch 1, 2 sc in the first st, sc in the next 16 sts, 2 sc in the last st. Turn. (20 sc)
Row 3 (RS, growth row): Ch 1, 2 sc in the first st, sc in the next 5 sts. (Ch 3, sk 2 sts, sc in the next st) 3 times. Sc in the next 4 sts, 2 sc in the last st. Turn.
(This row has 22 sc in total: 7 solid sc, then 3 ch-3 loops with a sc after each, then 6 more solid sc. Read it as 7 sc, loop, sc, loop, sc, loop, 7 sc. The mesh opens here.)
Row 4 (WS): Ch 1, sc in the first 5 sc, ch 3, sk 2 sc, sc in the next ch-3 loop. (Ch 3, sc in the next ch-3 loop) twice. Ch 3, sk 2 sc, sc in the last 5 sc. Turn. (13 sc, 4 ch-3 loops)
Row 5 (RS): Ch 1, sc in the first 3 sc, ch 3, sk 2 sc, sc in the next loop. (Ch 3, sc in the next loop) 3 times. Ch 3, sk 2 sc, sc in the last 3 sc. Turn. (10 sc, 5 ch-3 loops)
Row 6 (WS): Ch 1, sc in the first sc, ch 3, sk 2 sc, sc in the next loop. (Ch 3, sc in the next loop) 4 times. Ch 3, sk 2 sc, sc in the last sc. Turn. (7 sc, 6 ch-3 loops)
The solid patches step down from 7 sc to 5, 3 and 1 at each edge. This gives the rounded, half-oval toe and heel. Rows 1–2 form the solid sole strip underneath.
Foot Mesh
Row 7 (RS): Ch 4 (counts as dc + ch 1), sc in the first loop. (Ch 3, sc in the next loop) 5 times. Ch 1, dc in the last sc. Turn. (5 full ch-3 loops + 2 half spaces)
Row 8 (WS): Ch 1, sc in the first dc, ch 3. (Sc in the next ch-3 loop, ch 3) 5 times. Sc in the 3rd ch of the tch. Turn. (6 ch-3 loops)
Place a marker in the first sc of Row 8, which is the toe-end corner.
Leg Mesh
Row 9 (RS, narrowing row): Ch 4 (counts as dc + ch 1), sc in the first loop. (Ch 3, sc in the next loop) 3 times. Ch 1, dc in the next (5th) loop. Leave the remaining loop and sc unworked. Turn. (3 full loops + 2 half spaces)
Row 10 (WS): Ch 1, sc in the first dc, ch 3. (Sc in the next ch-3 loop, ch 3) 3 times. Sc in the 3rd ch of the tch. Turn. (4 ch-3 loops)
Row 11 (RS): Ch 4, sc in the first loop. (Ch 3, sc in the next loop) 3 times. Ch 1, dc in the last sc. Turn. (3 full loops + 2 half spaces)
Rows 12–14: Repeat Rows 10, 11 and 10. (Row 14: 5 sc, 4 ch-3 loops)
Measure now. You should have about 3.75 in (9.5 cm) of height.
Ribbed Cuff
Row 15 (RS, conversion row): Ch 1, sc in the first sc. (2 sc in the next loop, sc in the next sc) 4 times. Turn.
(5 sc worked 1 per existing sc + 8 sc worked into 4 loops = 13 sc)
Row 16 (WS): Ch 2 (does not count), hdc in each st across. Turn. (13 hdc)
Row 17 (RS): Ch 2 (does not count), hdc in the first st. (FPdc around the next st, BPdc around the next st) 5 times. FPdc around the next st, hdc in the last st. Turn. (13 sts)
Row 18 (WS): Ch 2 (does not count), hdc in the first st. (BPdc around the next st, FPdc around the next st) 5 times. BPdc around the next st, hdc in the last st. Do not fasten off. (13 sts)
On Row 18, every BPdc lands on a Row-17 FPdc. This keeps 6 raised ribs on the RS. The cuff is about 0.75 in (1.9 cm) deep.
Edging and Hanging Loop
Edging gauge: Same as the body, 6 sc per 1 in (2.5 cm). Work row ends as follows:
– 1 sc in each sc row end
– 2 sc around each dc or ch-4 row end
– 3 sc evenly across the 2 hdc-edged cuff rows
Edging Round (RS): Ch 1 and turn so the RS faces you. You are at the top heel-side corner. Work these sections in order:
- Top of cuff: 3 sc in the first st, sc in the next 11 sts, 3 sc in the last st. (17 sc)
- Front of leg, working down: 3 sc across the ends of Rows 17–16, then 1 sc in the end of Row 15. Then 9 sc across Rows 14–9: 1 sc each for Rows 14, 12 and 10, and 2 sc each for Rows 13, 11 and 9. (13 sc)
- Instep: Sc in the next unworked sc of Row 8, 3 sc in the next ch-3 loop, 3 sc in the marked toe-corner sc. (7 sc)
- Toe side, working down: 2 sc in the end of Row 7, 1 sc in the end of Row 6, then 1 sc in each end of Rows 5–1. (8 sc)
- Sole: Work in the free loops of the foundation: 3 sc in the first loop, sc in the next 16, 3 sc in the last loop. (22 sc)
- Heel side, working up: 5 sc across Rows 1–5, then 13 sc across Rows 6–14. That is 1 sc each for Rows 6, 8, 10, 12 and 14, and 2 sc each for Rows 7, 9, 11 and 13. Next, 1 sc in the end of Row 15, then 3 sc across Rows 16–17. (22 sc)
Sl st in the first sc to join. (89 sc: 17 + 13 + 7 + 8 + 22 + 22)
Why the math works: The top section matches the 13 cuff sts, with 2 extra sc at each corner (13 + 4 = 17). The sole section matches the 18 foundation sts, again with 2 extra sc at each corner (18 + 4 = 22).
Each side follows the row-end rule above. The rule matches each row’s height, so the sides don’t pull in or ripple. The rows that carry a corner (Row 18 at the top and Row 8 at the toe) are covered by their corner sc, so they are not counted twice. The edging adds about 1/8 in (0.3 cm) all around. That takes the piece from 3.3 in × 4.5 in (8.4 cm × 11.4 cm) to 3.5 in × 4.75 in (8.9 cm × 12.1 cm).
Hanging Loop: Sl st in the next sc, which is the center of the top corner. Ch 16, then sl st in the same sc. Fasten off, leaving a 4 in (10.2 cm) tail. Weave the tail back through the base of the loop twice to secure it.
Final Blocking
- Weave in all ends along the solid edging or patches, never through the mesh.
- Lay the stocking RS up on the blocking mat.
- Spray it evenly until it is damp, but not soaked.
- Pin the four outer corners first: the top two cuff corners, the toe tip and the heel tip.
- Pin the toe and heel into smooth curves. Measure: 3.5 in (8.9 cm) wide × 4.75 in (12.1 cm) tall.
- Open each mesh diamond gently with your fingertip. Each opening should be about 0.5 in (1.3 cm).
- Pin the hanging loop straight up.
- Let it dry completely before removing the pins.
Final Quality-Control Checklist
- [ ] The toe points left with the RS facing.
- [ ] The toe and heel patches are solid and rounded, and taper into the mesh.
- [ ] The foot has 6 loops across and the leg has 4.
- [ ] The cuff has 13 sts and 6 clear vertical ribs.
- [ ] The edging has 89 sc, with no gaps at the instep.
- [ ] The size is 3.5 in × 4.75 in (8.9 cm × 12.1 cm).
- [ ] The hanging loop is secure at the top heel corner.
- [ ] All ends are hidden in solid areas.
Troubleshooting
The mesh looks stretched or uneven. Count your chains. Each loop must be exactly ch 3, and the turning chains must be ch 4 or ch 1 as written.
The stocking edges slant. Make sure each B row (7, 9, 11 and 13) begins with ch 4 and ends with ch 1, dc. Leaving out the half spaces makes the edges lean.
The cuff flares. You may have worked 3 sc per loop in Row 15. Use 2 sc per loop for 13 sts.
The ribs don’t line up. On Row 18, work a BPdc around each stitch that was a FPdc on Row 17.
The edging ripples. Use fewer sc per dc row end, or go down a hook size for the edging only.
The instep looks gappy. Work all 3 sc firmly into the loop and pull them snug before moving on.
Care
Hand wash in cool water with mild soap, press out the water in a towel, and dry flat. Re-pin to shape if needed.
Final Notes
The measurement chain is short and easy to check:
- Gauge is 6 sc per 1 in (2.5 cm), so Row 2 measures 3.3 in (8.4 cm).
- The foot reaches 2 in (5.1 cm) by Row 8.
- The leg reaches 3.75 in (9.5 cm) by Row 14.
- The cuff brings the height to 4.5 in (11.4 cm).
- The 89-stitch edging finishes the stocking at 3.5 in × 4.75 in (8.9 cm × 12.1 cm), and the loop adds 1.25 in (3.2 cm) on top.
Check each step as you go, and every stocking in your set will match.
Happy crocheting!