

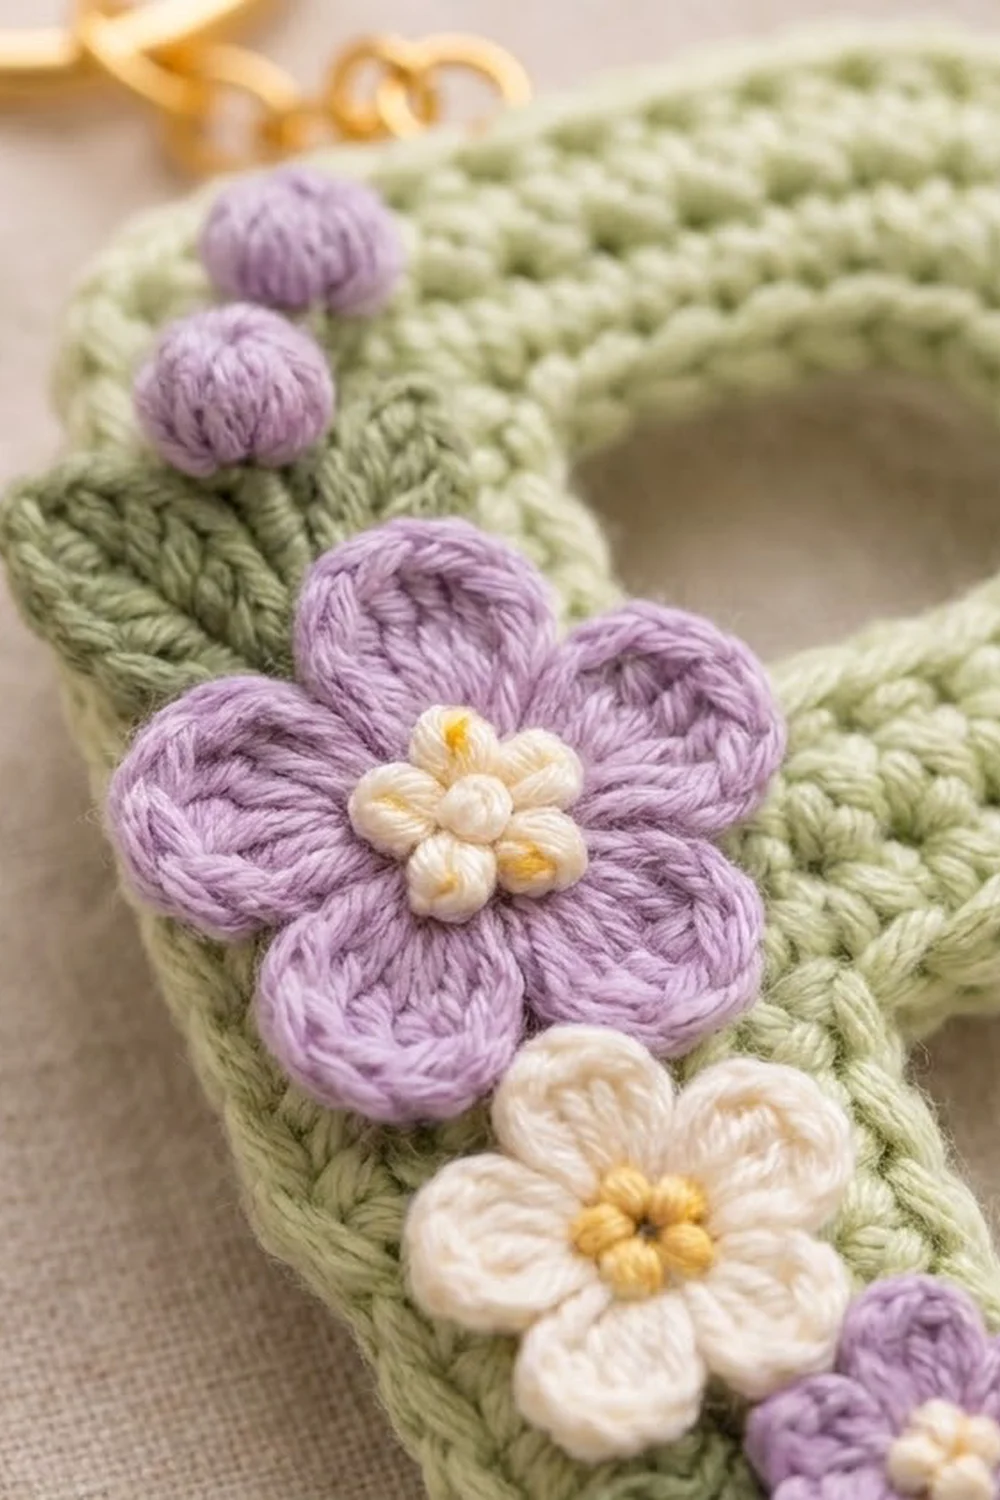
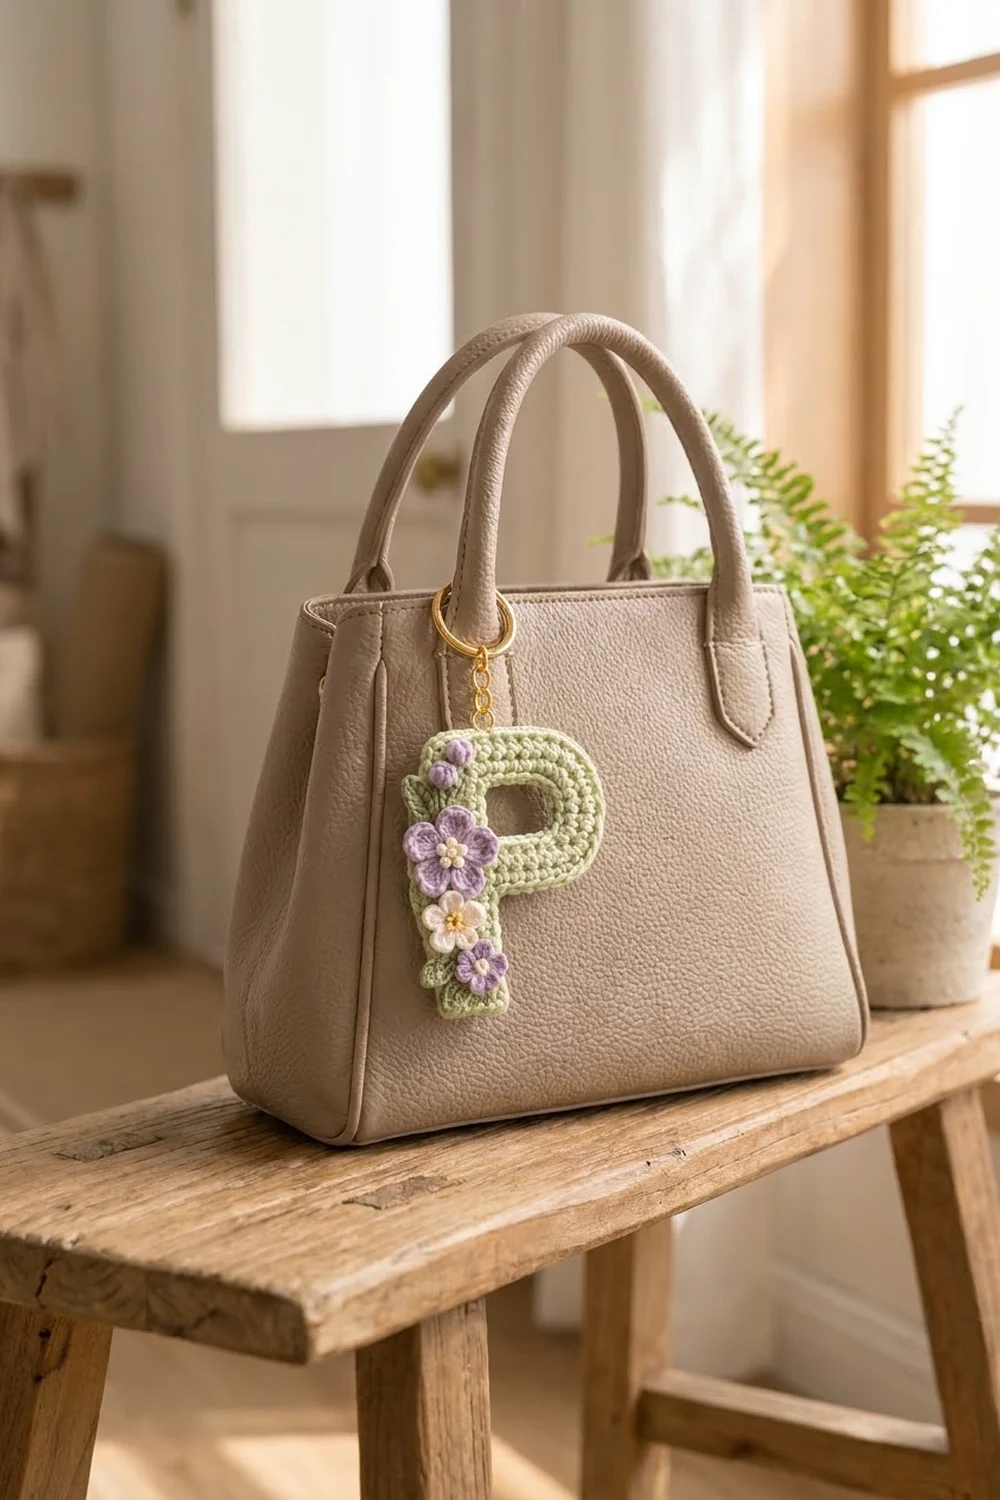
Monograms are an easy way to make an accessory personal, and the Lavender Meadow Letter P Keychain is a small, sweet way to do it. It is a solid sage-green letter P with a neat raised rim. A trail of tiny flowers runs down its left side, like a little spring garden growing up the stem.
The palette is soft: sage green for the letter, lavender and cream for the flowers, buttery yellow for the flower centers and a slightly deeper green for the leaves. A gold split ring and short chain finish it off, so it’s ready to clip onto a bag, a key set or a zipper pull.
The pattern uses US crochet terms. The finished letter measures 3.0 in (7.6 cm) wide and 4.4 in (11.2 cm) tall, not counting the hardware.
The letter is worked flat in rows of single crochet from the bottom up. You make the stem first, add the bowl with a chain extension, and split the rows around the center opening. Next you add a two-round rim, then make five tiny appliqués plus leaves and sew them on after blocking.
Finished Size and Construction
- Finished size: 3.0 × 4.4 in (7.6 × 11.2 cm)
- Skill level: Easy to intermediate
- Terminology: US crochet terms
- Yarn weight: DK / light worsted cotton (#3)
- Hooks: 3.5 mm (E-4) for the letter, 3.0 mm (C/D) for the appliqués
- Number of pieces: 1 letter, plus small appliqués sewn on
- Layout: Single standalone letter, appliqués down the left side of the stem
- Letter size before border: 2.6 × 4.0 in (6.6 × 10.2 cm)
- Border depth: about 0.2 in (0.5 cm) on each outer edge
- Stem width before border: 1.0 in (2.5 cm)
- Center opening: about 0.8 × 1.1 in (2.0 × 2.8 cm)
Materials
Use a smooth mercerized or combed cotton in DK weight. Cotton gives crisp stitch definition, holds the letter’s shape and doesn’t fuzz on a bag that gets handled every day. Avoid fluffy or very stretchy yarns, because the letter needs to stay firm.
Yarn (DK cotton, about 115 m / 50 g):
– Sage green (letter): 15 g, about 35 m
– Lavender (two flowers and the bud): 5 g, about 12 m
– Cream (one flower and two centers): 3 g, about 7 m
– Deeper sage / leaf green (leaves): 3 g, about 7 m
– Soft yellow (centers and knots): 1 g, about 2 m
All quantities include a margin for your gauge swatch and tails.
Tools:
– 3.5 mm (E-4) and 3.0 mm (C/D) crochet hooks
– Tapestry needle
– Stitch markers (2)
– Gold split ring, 25 mm
– Gold chain, about 1 in (2.5 cm), plus two 5 mm jump rings
– Two pairs of flat-nose pliers
– Blocking board and rust-proof pins
– Spray bottle
Abbreviations (US Terms)
- ch: chain
- sl st: slip stitch
- sc: single crochet
- hdc: half double crochet
- dc: double crochet
- sc2tog: single crochet 2 together
- BLO: back loop only
- MR: magic ring
- st(s): stitch(es)
- RS / WS: right side / wrong side
Special stitch: 5-dc bobble. Yarn over, insert the hook, pull up a loop, yarn over and pull through 2 loops. Repeat 4 more times into the same place (6 loops on hook). Yarn over and pull through all 6 loops.
Gauge and Checkpoints
Gauge: 20 sc and 22 rows = 4 in (10.2 cm) with a 3.5 mm hook. That works out to 5 sts and 5.5 rows per inch.
Crochet a swatch of 20 sc by 22 rows before you start, because the letter’s proportions depend on this gauge. Keep your tension firm. A tight fabric gives the letter its smooth, dense look.
Checkpoints:
– After Row 10: stem is 1.0 in (2.5 cm) wide and 1.8 in (4.6 cm) tall.
– After Row 13: piece is 2.6 in (6.6 cm) wide and 2.4 in (6.1 cm) tall.
– After Row 22: piece is 2.6 × 4.0 in (6.6 × 10.2 cm).
– After the border: piece is 3.0 × 4.4 in (7.6 × 11.2 cm).
Too big? Go down a hook size (3.25 mm). Too small? Go up to 3.75 mm. Don’t add or remove stitches, because every count in the border depends on the row counts below.
Letter P Body
Use sage green and the 3.5 mm hook. Ch 1 and turn at the end of every row. The ch-1 does not count as a stitch. Odd rows are RS rows. When the RS faces you, the bowl grows to the right.
Stem
Row 1 (RS): Ch 6. Sc in the 2nd ch from the hook and in each ch across. (5 sts)
Rows 2–10: Sc in each st across. (5 sts)
You finish Row 10 at the right edge of the stem. Check that the stem is 1.0 × 1.8 in (2.5 × 4.6 cm).
Bottom of the Bowl
Row 11 (RS): Don’t ch 1. Ch 8 and turn. Sc in the 2nd ch from the hook and in the next 6 ch (7 sc), then sc in each of the 5 stem sts. (12 sts)
Row 12 (WS): Sc in the next 11 sts, then 2 sc in the last st. (13 sts) This increase rounds the lower-right curve of the bowl.
Row 13 (RS): Sc in each st across. (13 sts)
Check that the piece is 2.6 in (6.6 cm) wide.
Split Rows Around the Opening
Row 14 (WS), stem side: Sc in the first 5 sts. Leave the remaining 8 sts unworked. (5 sts)
Rows 15–19: Sc in each st across. (5 sts) Don’t fasten off. Put a marker in the live loop.
Row 14R (WS), right column: With the WS facing, skip the 4 sts after the stem (sts 6–9 of Row 13). These form the bottom of the opening. Join sage in st 10, then sc in that same st and in the last 3 sts. (4 sts)
Rows 15R–19R: Sc in each st across. (4 sts) Fasten off.
The opening is now 4 sts wide and 6 rows tall, about 0.8 × 1.1 in (2.0 × 2.8 cm).
Top of the Bowl
Row 20 (WS): Put the stem’s live loop back on your hook, ch 1 and turn. Sc in the 5 stem sts, ch 4 across the opening, then sc in the 4 right-column sts. (9 sc + 4 ch = 13 sts)
Row 21 (RS): Sc2tog, sc in the next 2 sts, sc in each of the 4 ch, then sc in the 5 stem sts. (12 sts)
Row 22 (WS): Sc in the next 10 sts, then sc2tog. (11 sts) Fasten off.
The two decreases round the top-right curve. Check that the piece is 2.6 × 4.0 in (6.6 × 10.2 cm).
Appliqués
Use the 3.0 mm hook. Leave an 8 in (20.3 cm) tail on each appliqué for sewing.
Large Lavender Flower (Make 1)
Rnd 1 (cream): Work 10 sc into a MR and join with a sl st. (10 sts) Fasten off.
Rnd 2 (lavender): Join in any st. Work (hdc, 2 dc, hdc) in the next st, then sl st in the next st. Repeat from * to * 4 more times. (5 petals: 20 petal sts + 5 sl sts = 25 sts)
The flower measures about 1.1 in (2.8 cm). With yellow, embroider 3 French knots on the cream center.
Cream Flower (Make 1)
Rnd 1 (yellow): Work 5 sc into a MR and join. (5 sts) Fasten off.
Rnd 2 (cream): Join in any st. In each st, work (sl st, ch 2, 2 dc, ch 2, sl st). (5 petals)
The flower measures about 0.9 in (2.3 cm).
Small Lavender Flower (Make 1)
Rnd 1 (cream): Work 5 sc into a MR and join. (5 sts) Fasten off.
Rnd 2 (lavender): Join in any st. In each st, work (sl st, ch 1, 2 hdc, ch 1, sl st). (5 petals)
The flower measures about 0.75 in (1.9 cm). Add 1 yellow French knot in the center.
Lavender Bud (Make 1)
Make a MR. Ch 2, then work a 5-dc bobble into the ring. Pull the ring tight, ch 1 and fasten off. The bud is a round bead about 0.35 in (0.9 cm) across.
Leaves (Make 4, leaf green)
Ch 7. Sc in the 2nd ch from the hook, then work hdc, dc, dc and hdc in the next 4 ch, and sc in the last ch. Ch 1 and rotate the piece. Repeat the same sts along the other side of the chain, then sl st into the tip. Each leaf is about 0.75 in (1.9 cm) long.
Set all the appliqués aside. You’ll sew them on after blocking.
Border
Border gauge: same as the body, 5 sc per inch, using the 3.5 mm hook and sage.
Rnd 1 (RS, outer edge): Join in the rightmost st of Row 22. Work these sections in order:
- Top: 2 sc in the first st, sc in the next 9 sts, 3 sc in the last st. (14)
- Left side: 1 sc in each of the 22 row ends. (22)
- Stem bottom: 3 sc in the first foundation ch, sc in the next 3, 3 sc in the last. (9)
- Stem right side: 1 sc in each of the row ends of Rows 1–10. (10)
- Bowl underside: sc in the next 6 ch bases of Row 11, then 2 sc in the last base. (8)
- Bowl right side: 1 sc in each of the row ends of Rows 11–22. (12)
Join with a sl st. (67 edge sts + 8 corner extras = 75 sts)
Rnd 2: Sl st in the BLO of each st around. (75 sts) Fasten off.
Opening edge: With the RS facing, join sage at the bottom of the opening. Sl st along it in this order: 4 sts of Row 13, 6 row ends, 4 ch of Row 20, then 6 row ends. (20 sts) Fasten off.
Why the math works: The base sts trace the letter exactly: 5 + 22 + 11 + 12 + 7 + 10 = 67. Adding 2 sc at each square corner and 1 sc at each rounded corner (2 + 2 + 2 + 1 + 1 = 8) lets the rim turn without cupping.
Working 1 sc per row end gives slightly more sts than the edge needs, roughly 10%. The tight BLO slip-stitch round pulls that extra back in, which rolls the rim up into the raised, rope-like edge.
The opening gets slip stitches only. This adds almost no depth, so the opening stays about 0.8 × 1.1 in (2.0 × 2.8 cm).
Final Blocking
- Weave in all ends on the letter. Leave the appliqué tails.
- Pin the letter face up to the board at 3.0 × 4.4 in (7.6 × 11.2 cm), with one pin at each corner and on each curve.
- Push the rim gently upward so it sits as a raised edge.
- Square up the opening to 0.8 × 1.1 in (2.0 × 2.8 cm).
- Mist until damp, but not soaked. Block the flowers and leaves separately and open each petal.
- Let everything dry completely, about 6–8 hours.
- Sew the appliqués down the left side of the stem, working from the top down:
- the bud and one leaf at the top-left corner
- the large lavender flower about 1.0 in (2.5 cm) below the top, with one leaf tucked behind it
- the cream flower directly below
- the small lavender flower near the bottom, with two leaves tucked behind it
- Let each flower overlap the left rim by about 0.2 in (0.5 cm). Tack through the centers and petal tips only.
- Attach a jump ring through both loops of the rim at the top of the stem. Link the 1 in (2.5 cm) chain to it, then link the split ring to the chain with the second jump ring.
Final Quality-Control Checklist
- Size is 3.0 × 4.4 in (7.6 × 11.2 cm).
- The outer rim has 75 sts and the opening edge has 20.
- The stem is straight and its edges are parallel.
- The bowl’s right curves are smooth and have no points.
- The opening is rectangular with clean edges.
- All five appliqués are secure, and the petals don’t flip up.
- Ends are hidden, and nothing shows on the back of the letter.
- All jump rings are fully closed.
Troubleshooting
- The stem leans or twists: your tension is uneven. Block it firmly and pin the stem edges straight.
- The rim ruffles: loosen nothing. Instead, work the BLO sl st round a little tighter.
- The rim cups inward: your Rnd 2 is too tight. Rework it with a larger hook.
- The inner corner puckers (where the stem meets the bowl underside): work those sc loosely and press flat during blocking.
- The opening looks crooked: make sure you skipped exactly 4 sts in Row 14R.
- The flowers look too big: use a 2.75 mm hook for the appliqués.
Care
Spot clean with mild soap and cool water, then reshape and lay flat to dry. Remove the metal hardware before soaking so it doesn’t tarnish.
Final Notes
The measurements build on each other at every stage:
- Gauge: 5 sts and 5.5 rows per inch
- Stem: 1.0 × 1.8 in (2.5 × 4.6 cm)
- Body after Row 22: 2.6 × 4.0 in (6.6 × 10.2 cm)
- After the 75-st rim: 3.0 × 4.4 in (7.6 × 11.2 cm)
Hit each checkpoint, and the flowers and hardware will sit exactly where they should.
Happy crocheting!