

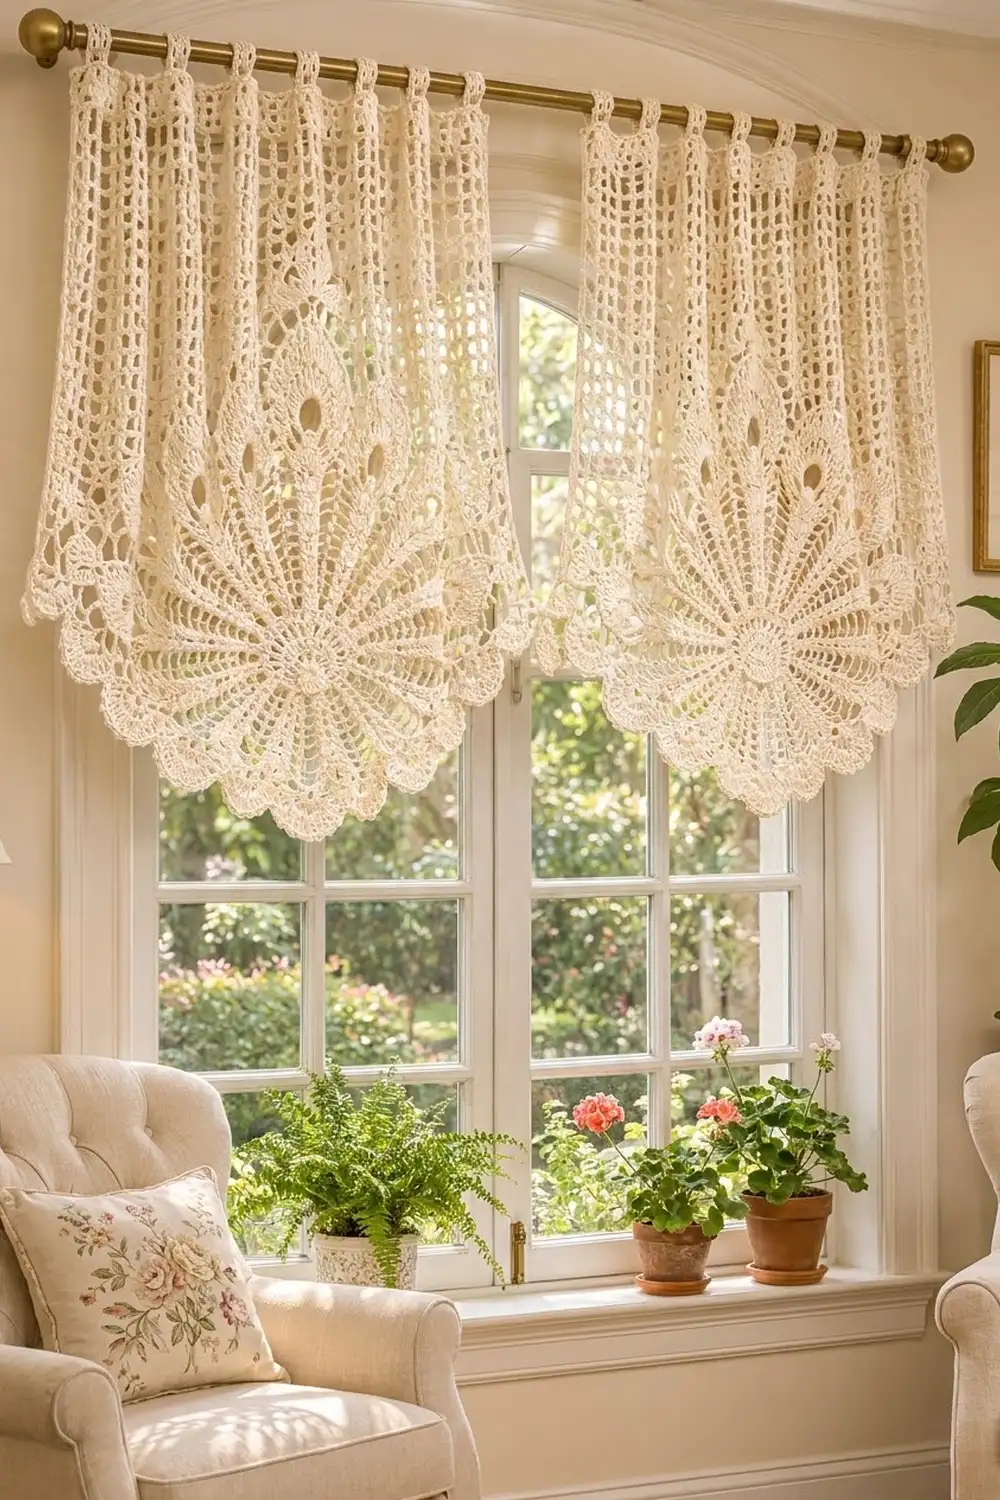
These curtain panels pair a light filet mesh with a large peacock-feather fan at the bottom. The upper part of each panel is an open grid of squares, so it lets in plenty of light. The lower part is a half circle of ten feather rays. Each ray has three stacked teardrop eyelets, and the curved edge is finished with soft scallops.
The design uses one color, a warm cream cotton, which looks like vintage lace in a sunny window. The pattern is written in US crochet terms. You make two identical panels and hang them side by side on a rod using the crocheted tab tops.
Each finished panel is 24½ in (62.2 cm) wide. It measures 32¾ in (83.2 cm) long at the center, from the top edge to the lowest point of the fan. The tabs add about 1¾ in (4.4 cm) above the top edge.
Each panel is one piece with no seams. You start with the fan, working turned rows outward from a magic ring, so the solid center sits at the middle of the fan’s straight edge. Next you pick up stitches along that straight edge and work the mesh upward. You finish with a top band, tabs, and a narrow border down both sides.
Finished Size and Construction
- Finished panel size: 24½ in (62.2 cm) wide × 32¾ in (83.2 cm) long at center, plus tabs
- Skill level: Intermediate
- Terminology: US crochet terms
- Yarn weight: DK / light (#3) cotton
- Hook: 3.5 mm (E-4)
- Number of pieces: 2 identical panels (each worked in one piece)
- Layout: 2 panels side by side on one rod, not joined to each other
- Fan size: 24 in (61.0 cm) across the straight edge, 12 in (30.5 cm) radius
- Panel size before border: 24 in (61.0 cm) wide; mesh section 20 in (50.8 cm) tall
- Border depth: ¼ in (0.6 cm) on each side edge
Materials
Yarn: Use a smooth DK-weight cotton or cotton blend. Cotton holds the lace shape, blocks crisply, and doesn’t stretch much as it hangs. Avoid fuzzy or stretchy yarns because they blur the eyelets and make the panels slowly lengthen.
- Cream: 650 g (about 1,365 m / 1,490 yd), enough for 2 panels at about 295 g each
The quantity includes a margin of about 10% for your gauge swatch and small differences in tension.
Tools:
- 3.5 mm (E-4) crochet hook
- Tapestry needle
- Stitch markers (at least 4)
- Measuring tape
- Rust-proof pins and a blocking surface at least 25 × 34 in (63.5 × 86.4 cm)
- Spray bottle
- Curtain rod up to 1 in (2.5 cm) in diameter
Abbreviations (US Terms)
- ch – chain
- sc – single crochet
- dc – double crochet
- tr – treble crochet
- sk – skip
- sp – space
- st(s) – stitch(es)
- tch – turning chain
- RS / WS – right side / wrong side
- rev sc – reverse single crochet (crab stitch): work left to right (for right-handers). Insert the hook into the next stitch to the right, yarn over, pull up a loop, yarn over, and pull through both loops.
Spoke: In the fan, a spoke is the single dc or tr between two feather sections. Every row from Row 4 on has 11 spokes. The first spoke is always the turning chain, and the last is always worked into the top of the previous turning chain.
Gauge and Checkpoints
Mesh gauge: 6 mesh squares and 7 rows = 4 in (10.2 cm) in filet mesh (dc, ch 2).
Stitch gauge: 18 sc = 4 in (10.2 cm). One dc row is about 0.57 in (1.4 cm) tall, and one tr row is about 0.8 in (2.0 cm).
Swatch: Ch 38. Sc in the 2nd ch from the hook and in each ch across (37 sc). Work 14 rows of mesh as in Mesh Rows 1–2 below, giving 12 squares. Block the swatch, then measure it. It should be 8 in (20.3 cm) wide and 8 in (20.3 cm) tall.
Test one piece first: Make the fan for Panel 1 and check it before you go on. The fan depends on gauge more than any other part.
Checkpoints (measured flat, before blocking):
- After fan Row 3: radius 1.7 in (4.3 cm)
- After fan Row 6: radius 3.4 in (8.6 cm)
- After fan Row 12: radius 8.2 in (20.8 cm)
- After fan Row 16: radius 11.2 in (28.4 cm)
- After fan Row 17: radius 12 in (30.5 cm); straight edge 24 in (61.0 cm)
- After Mesh Row 35: panel 24 in (61.0 cm) wide
If the fan is too big, go down 0.25–0.5 mm in hook size. If it’s too small, go up 0.25–0.5 mm. A fan that cups means your tension is tight, and one that ruffles means it’s loose. Change the hook and start again rather than changing the stitch counts.
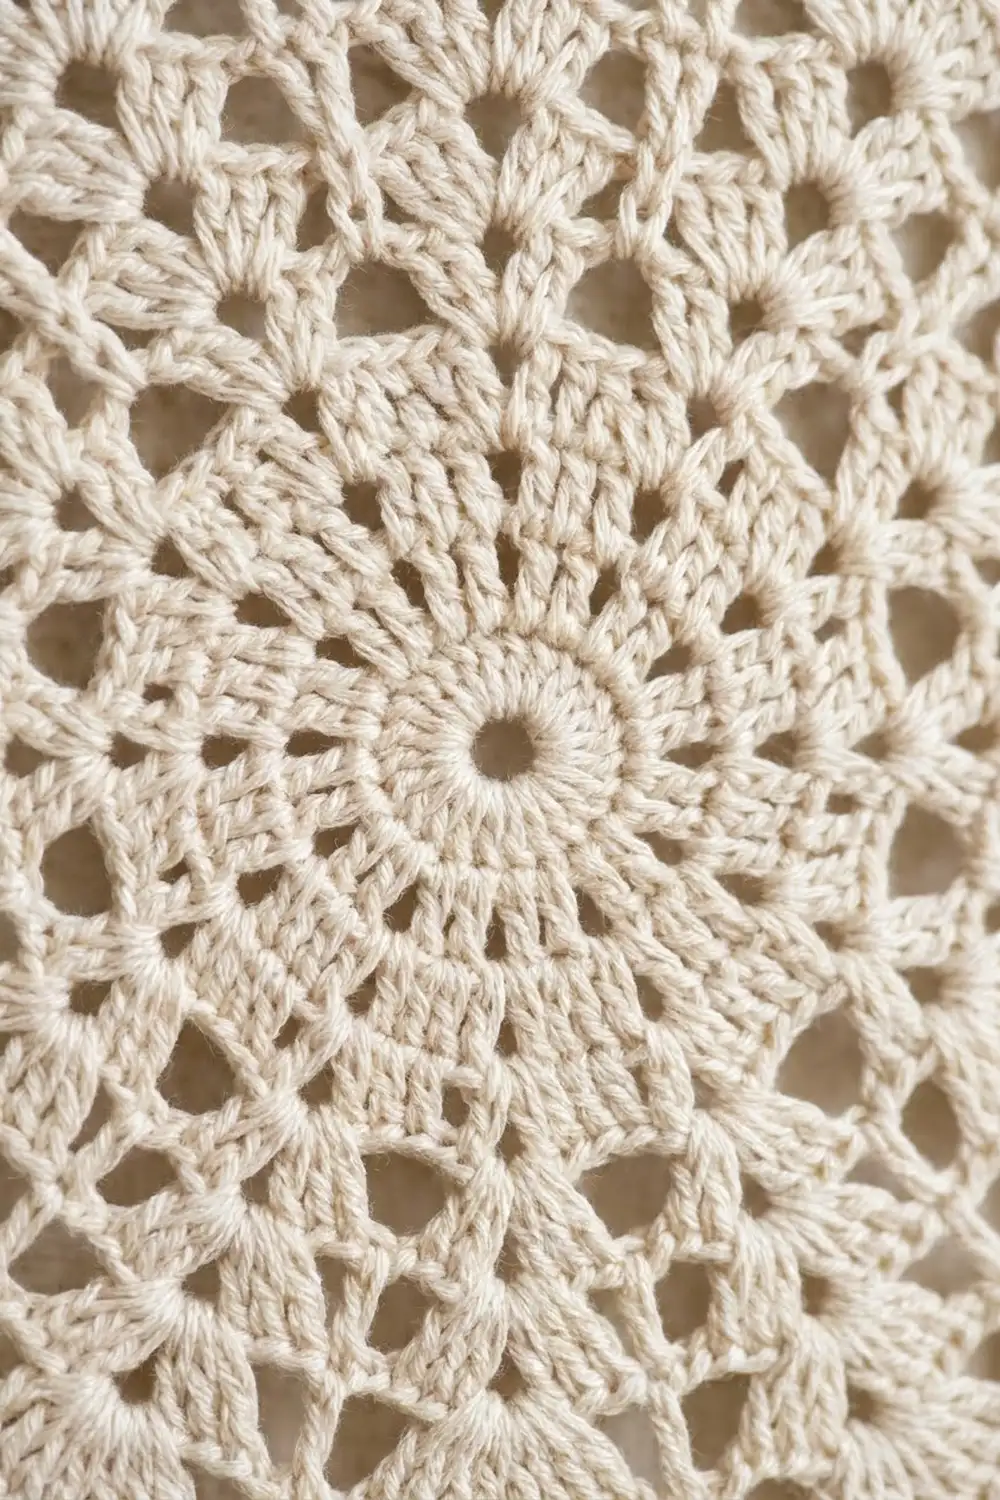
Fan (Make 1 per Panel)
The fan is worked in turned rows. Each turning chain counts as the first stitch. Turn at the end of every row.
Row 1: Make a magic ring, ch 3 (counts as dc), 6 dc in ring. Pull the ring closed. (7 dc)
Row 2: Ch 3, dc in first st, 2 dc in each st across, ending with 2 dc in top of tch. (14 dc)
Row 3: Ch 3, 2 dc in next st, dc in next st, 2 dc in next st; rep from * 6 more times. (21 dc)
Row 4 (set up spokes): Ch 3 (first spoke), ch 2, sk next st, dc in next st (spoke); rep from * 9 more times. (11 spokes + 10 ch-2 sps = 31 sts)
The work is now split into 10 feather sections. In every row from here on, each repeat is one section followed by its spoke.
Row 5: Ch 3, 3 dc in ch-2 sp, dc in next spoke; rep from * 9 more times. (Section = 3 sts; 11 + 30 = 41 sts)
Row 6 (first eyelet opens): Ch 3, dc in next dc, ch 2, sk center dc, dc in next dc, dc in spoke; rep from * 9 more times. (Section = 4 sts; 51 sts)
Row 7: Ch 4 (counts as tr), tr in next dc, ch 3, sk ch-2 sp, tr in next dc, tr in spoke; rep from * 9 more times. (Section = 5 sts; 61 sts)
Row 8: Ch 4, 2 tr in next tr, ch 2, sk ch-3 sp, 2 tr in next tr, tr in spoke; rep from * 9 more times. (Section = 6 sts; 71 sts)
Row 9 (first eyelet closes): Ch 4, tr in each of next 2 tr, 3 tr in ch-2 sp, tr in each of next 2 tr, tr in spoke; rep from * 9 more times. (Section = 7 sts; 81 sts)
Row 10 (second eyelet opens): Ch 4, tr in each of next 3 tr, ch 2, sk next tr, tr in each of next 3 tr, tr in spoke; rep from * 9 more times. (Section = 8 sts; 91 sts)
Row 11: Ch 4, tr in each of next 3 tr, ch 3, sk ch-2 sp, tr in each of next 3 tr, tr in spoke; rep from * 9 more times. (Section = 9 sts; 101 sts)
Row 12: Ch 4, tr in each of next 3 tr, ch 4, sk ch-3 sp, tr in each of next 3 tr, tr in spoke; rep from * 9 more times. (Section = 10 sts; 111 sts)
Row 13 (second eyelet closes): Ch 4, tr in each of next 3 tr, 5 tr in ch-4 sp, tr in each of next 3 tr, tr in spoke; rep from * 9 more times. (Section = 11 sts; 121 sts)
Row 14 (third eyelet opens): Ch 4, tr in each of next 5 tr, ch 3, sk next tr, tr in each of next 5 tr, tr in spoke; rep from * 9 more times. (Section = 13 sts; 141 sts)
Row 15: Ch 4, tr in each of next 5 tr, ch 4, sk ch-3 sp, tr in each of next 5 tr, tr in spoke; rep from * 9 more times. (Section = 14 sts; 151 sts)
Row 16 (third eyelet closes): Ch 3, dc in each of next 5 tr, 5 dc in ch-4 sp, dc in each of next 5 tr, dc in spoke; rep from * 9 more times. (Section = 15 sts; 161 sts)
Row 17 (scallop edge): Ch 1, sc in first st (spoke), sk 3 sts, 7 dc in next st, sk 3 sts, sc in next st (section center), sk 3 sts, 7 dc in next st, sk 3 sts, sc in spoke; rep from * 9 more times. Don’t fasten off. (20 shells + 21 sc = 161 sts)
Each 15-stitch section plus its spoke uses exactly 16 sts (3 + 1 + 3 + 1 + 3 + 1 + 3 + 1). That gives two shells per feather.
Mesh Body
Row A (pick-up row, RS): Ch 1. Rotate the fan so you work along the straight edge, into the row ends:
- Work 4 sc in Row 17 and 3 sc in Row 16.
- Down Rows 15–7, alternate 4 sc and 3 sc, starting and ending with 4 (32 sc).
- Across Rows 6–1, work 3 sc in Rows 6, 4 and 2, and 2 sc in Rows 5, 3 and 1 (15 sc).
- Work 1 sc in the center of the ring.
- Repeat the same sequence in reverse up the second side. Turn.
(54 + 1 + 54 = 109 sc)
Mesh Row 1: Ch 5 (counts as dc + ch 2), sk next 2 sc, dc in next sc, ch 2, sk next 2 sc, dc in next sc; rep from * across. Turn. (37 dc + 36 ch-2 sps = 109 sts; 36 squares)
Mesh Row 2: Ch 5, sk ch-2 sp, dc in next dc, ch 2, sk ch-2 sp, dc in next dc; rep from * across, working the last dc in the 3rd ch of the tch. Turn. (109 sts)
Mesh Rows 3–35: Repeat Mesh Row 2. (109 sts each)
Checkpoint: The mesh section measures 20 in (50.8 cm) tall and 24 in (61.0 cm) wide.
Top Band and Tabs
Band Row 1: Ch 1, sc in each dc and 2 sc in each ch-2 sp across, sc in 3rd ch of tch. Turn. (37 + 72 = 109 sc)
Band Row 2: Ch 1, sc in each st across. Fasten off. (109 sc)
Tabs (make 9): With RS facing, join yarn in the first sc. Ch 1, then sc in the same st and the next 4 sts (5 sc). Work 15 more rows of 5 sc, for 16 rows that measure 4 in (10.2 cm). Fasten off, leaving a 10 in (25.4 cm) tail. Sk 8 sc on the band, then work the next tab over the following 5 sts. Repeat until you have 9 tabs. (9 × 5 + 8 × 8 = 109 sts)
Each tab is 1.1 in (2.8 cm) wide, and the gaps are 1.8 in (4.6 cm). Fold each tab to the WS and whipstitch its last row to the back of Band Row 1.
Make All Pieces
- Cream: 2 fans, 2 mesh bodies and 18 tabs (about 295 g per panel)
[ Panel 1 ][ Panel 2 ]
   9 tabs     9 tabs
   mesh       mesh
   fan        fan
Joining and Hanging
The two panels aren’t sewn together. Within each panel, the mesh is worked straight off the fan through Row A. That row places 1 sc every 0.22 in (0.6 cm), the same 4.5 sts per in (1.8 sts per cm) as the mesh, so the change from fan to mesh lies flat.
Keep the pick-up loops the same height as a normal sc. If they’re tight, the fan gathers. If they’re loose, you get a wavy ridge.
Size checkpoint: Lay both bordered panels edge to edge. Together they should measure 49 in (124.5 cm) wide. Thread both onto the rod so the inner edges meet at the center.
Border
Border gauge: 4.5 sc per in (1.8 sc per cm) along the side edges, which matches the body.
Border Row 1 (first side edge): With RS facing, join at the top corner of the band.
- Work 1 sc in each of the 2 band row ends.
- Down the mesh, alternate 3 sc and 2 sc per row end, starting and ending with 3 (18 × 3 + 17 × 2 = 88 sc).
- Work 1 sc in the end of Row A. Don’t turn.
(2 + 88 + 1 = 91 sc)
Border Row 2: Ch 1, rev sc in each sc back toward the top. Fasten off. (91 rev sc)
For the second side, work the same counts starting at the fan corner and working up (91 sc, then 91 rev sc).
Why the math works: Each mesh row is about 0.57 in (1.4 cm) tall, so at 4.5 sc per in it needs about 2.57 sc. Alternating 3 and 2 averages 2.5, which is close enough to lie flat. Each side edge is 20.75 in (52.7 cm) long: 0.25 in (0.6 cm) for Row A, 20 in (50.8 cm) of mesh and 0.5 in (1.3 cm) of band. 91 sc ÷ 20.75 in is about 4.4 sc per in (1.7 sc per cm). The scallops already finish the curved edge, so the border stops at the fan corners.
Final Blocking
- Weave in the ends along solid tr or dc columns, not across eyelets.
- Soak the panel in cool water for 15 minutes. Press out the water in a towel; don’t wring it.
- Lay the panel RS up. Pin the top edge straight at 24½ in (62.2 cm).
- Pin both side edges straight for 20.75 in (52.7 cm).
- Pin each spoke out to a 12 in (30.5 cm) radius, measured from the ring at the center of the fan’s straight edge.
- Pin the tip of each of the 20 shells so the scallops are even.
- Use a blunt needle to open each eyelet into a teardrop shape.
- Leave the panel to dry completely. Block Panel 2 to the same pin positions.
Final Quality-Control Checklist
- 10 feather sections and 11 spokes, with 3 eyelets in each section
- 20 even shells in Row 17
- 109 sc in Row A, and the change from fan to mesh lies flat
- 36 squares across and 35 mesh rows
- 109 sc in the band, with 9 tabs of 5 sts each
- 91 sts in each side border
- Both panels are 24½ in (62.2 cm) wide and 32¾ in (83.2 cm) long at the center
Troubleshooting
- Fan cups: Your tension is tight. Go up a hook size.
- Fan ruffles: Your tension is loose, or there are extra stitches. Recount each section against the counts in the pattern.
- Eyelet is off-center: Count the tr stitches on each side of the skipped stitch in Rows 10 and 14.
- Mesh is narrower than the fan: Row A is too tight. Rework it more loosely.
- Mesh slants: You missed the last dc. Always end in the 3rd ch of the tch.
- Sides flare: Work 2 sc in more row ends, and keep both sides the same.
- Tabs are too snug on the rod: Add 2 rows to each tab.
Care
Hand wash the panels in cool water and dry them flat, reshaping the fan and scallops while they’re damp. Pin-block them every few washes to keep the eyelets crisp.
Final Notes
The measurements build on each other. A 12 in (30.5 cm) fan radius gives a 24 in (61.0 cm) straight edge. Row A turns that edge into 109 sc, which is exactly 36 mesh squares. Thirty-five mesh rows add 20 in (50.8 cm). The band and border bring each panel to 24½ in (62.2 cm) by 32¾ in (83.2 cm). If your gauge matches at every checkpoint, the two panels will match each other.
Happy crocheting!