

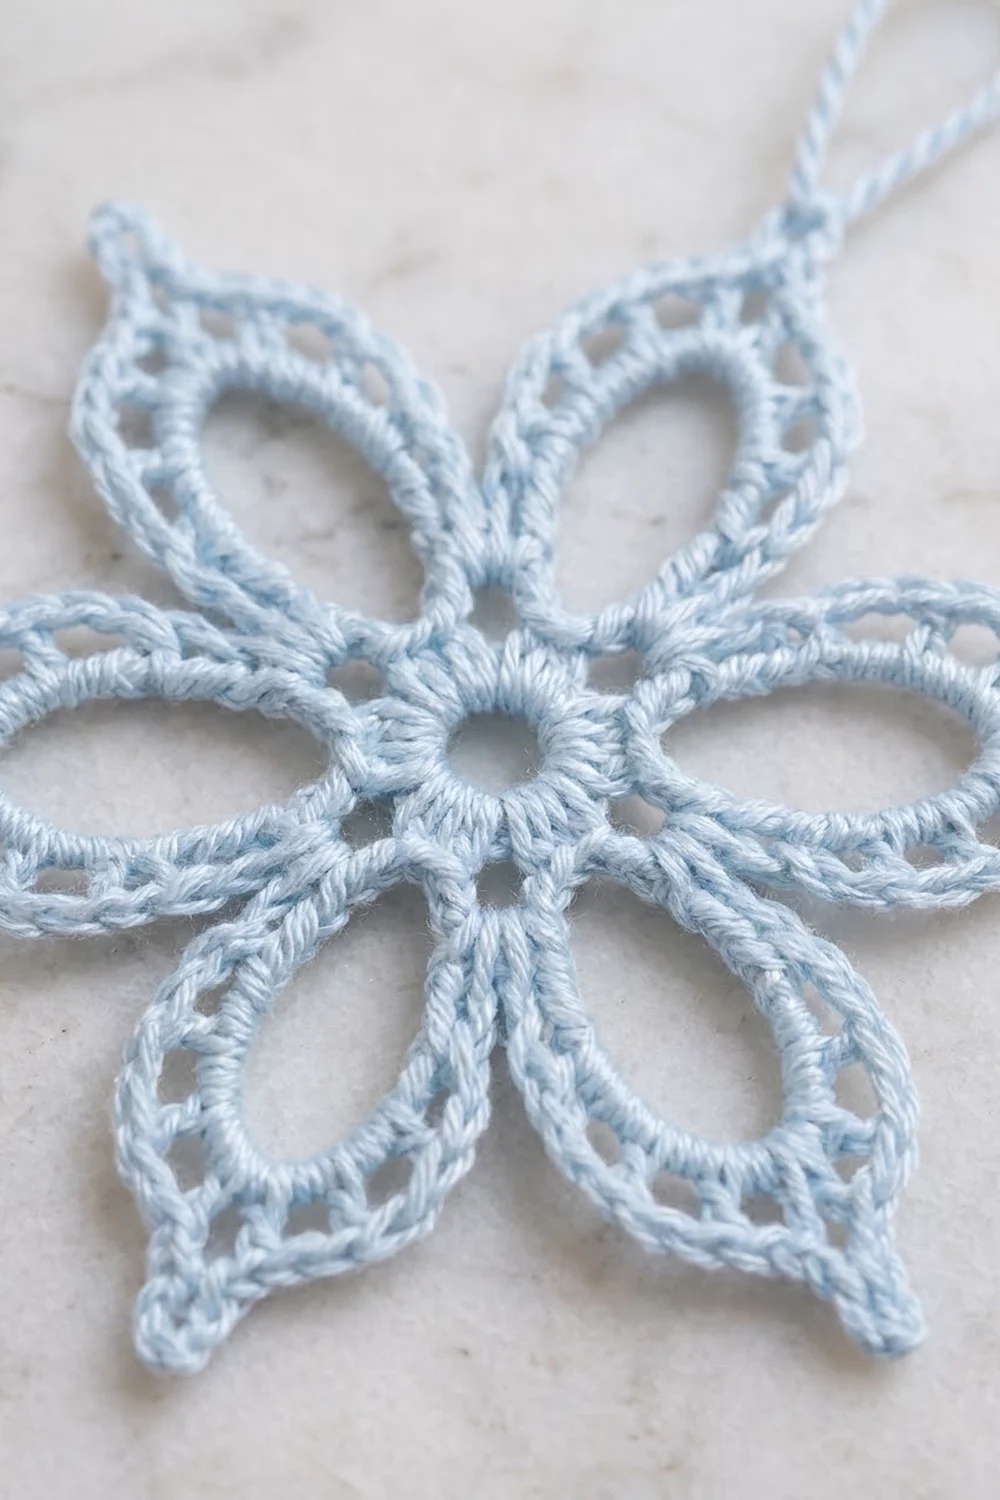
This six-petal snowflake is light and airy, and it works up quickly. Each petal is a pointed oval with an open center and two outlines: a fine inner chain line and a firm outer single crochet line. Short double crochet posts join the two lines and look like a tiny ladder. A small ring of double crochet in the middle holds all six petals together around a neat center hole.
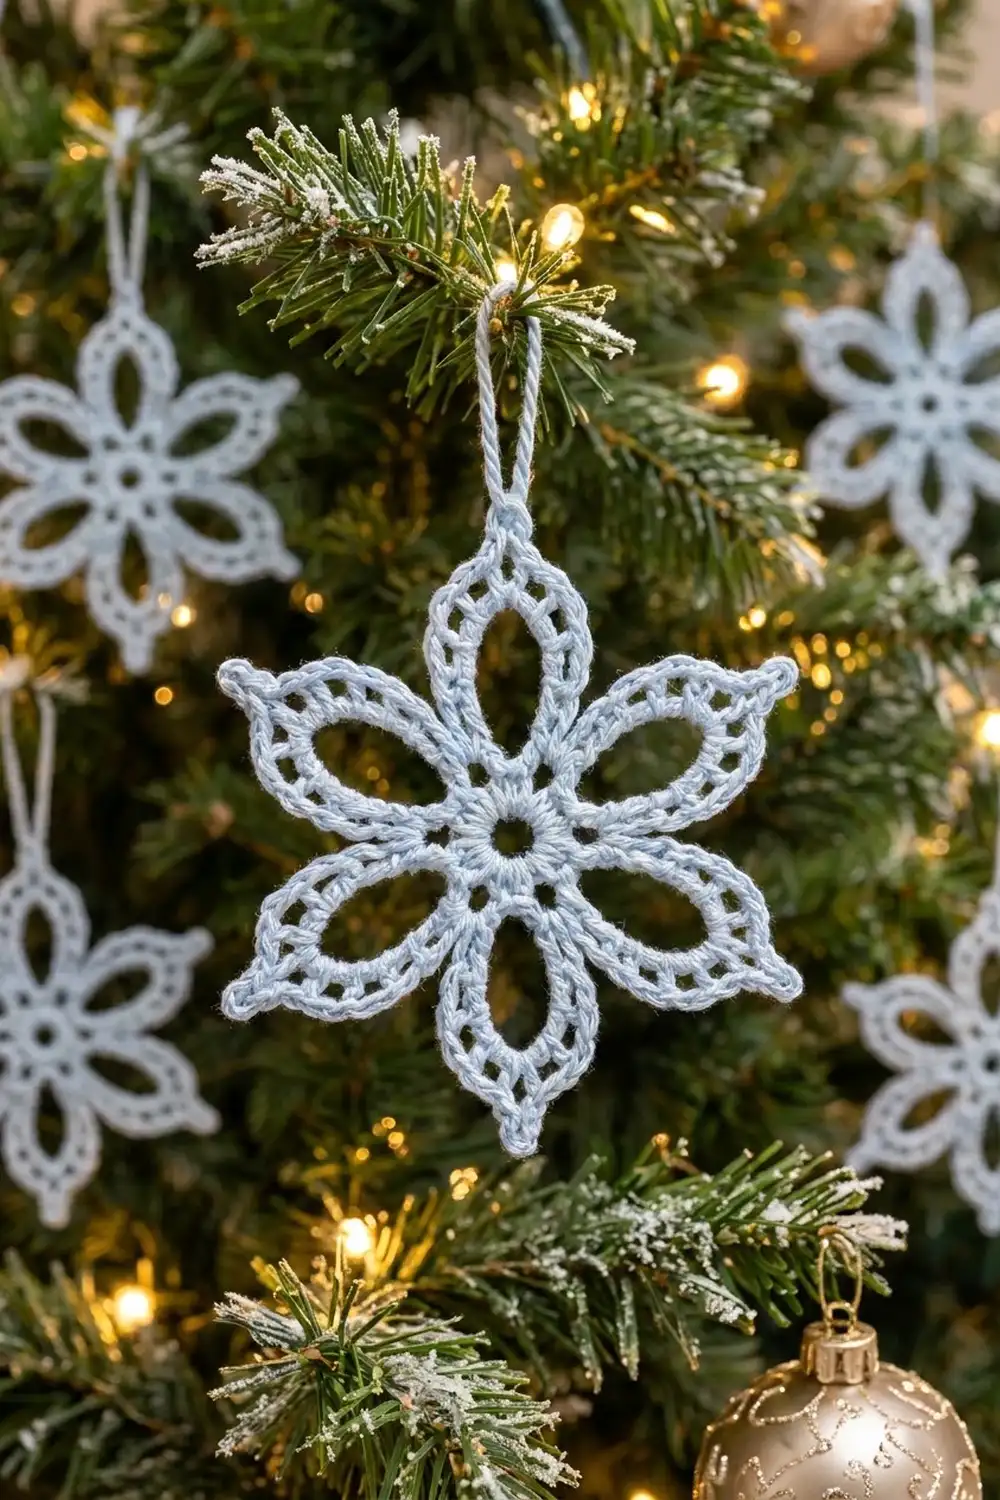
The sample uses one pale ice-blue cotton thread, which gives it a soft, frosty look on a tree or a gift. It works just as well in white, silver-gray, or pale gold for a classic winter palette.
The pattern uses US crochet terms. After blocking, the snowflake measures about 4 in (10.2 cm) from one petal tip to the opposite tip. The hanging loop adds about 1 1/2 in (3.8 cm).
The construction is simple:
– Start with a magic ring of 18 dc.
– Chain six long loops. These become the inner petal outlines.
– In the next round, build the ladder edging into those chains.
– In the last round, add the outer single crochet outline with a pointed chain tip on every petal.
– Add a chain hanging loop at one tip.
Finished Size and Construction
- Finished size: about 4 in (10.2 cm) tip to tip, blocked
- Skill level: Advanced beginner
- Terminology: US crochet terms
- Yarn weight: Size 3 cotton crochet thread (fine)
- Hook: 2.25 mm (US B-1)
- Number of pieces: 1 (single motif, no joining)
- Layout: six petals radiating from a center ring
- Piece size: 4 in (10.2 cm) tip to tip
- Size before border (after Rnd 3): about 3 1/2 in (8.9 cm) tip to tip
- Border depth: about 1/4 in (0.6 cm) added at each petal tip
Materials
Yarn: Use a mercerized cotton thread in size 3. Mercerized cotton holds crisp points after blocking and doesn’t fuzz on the tree. A slightly heavier or lighter thread will also work, but the size will change, so check the gauge section first. Avoid fuzzy acrylics and wool blends, because they blur the ladder windows.
- Ice blue: about 7 g / 25 m (27 yd) per snowflake
This amount includes extra thread for a test chain, the hanging loop, and weaving in ends. One standard ball makes many ornaments.
Tools:
- 2.25 mm (US B-1) crochet hook
- Small tapestry needle
- Scissors
- 1 stitch marker
- Rust-proof pins
- Foam blocking board or folded towel
- Spray starch or fabric stiffener
- Ruler or tape measure
Abbreviations (US Terms)
- MR: magic ring
- ch: chain
- sl st: slip stitch
- sc: single crochet
- hdc: half double crochet
- dc: double crochet
- st(s): stitch(es)
- sp: space
- rnd: round
Special technique, working into a chain loop: In Rnd 3, work into the chains of each ch-21 loop, not around the loop. Insert the hook under the back bump of each chain. The front of the chain stays as a smooth line on the inside of the petal, which forms the inner outline.
Petal tip: (dc, ch 3, dc) in the center chain of the loop. The ch-3 is the base for the pointed outer tip in Rnd 4.
Gauge and Checkpoints
Gauge isn’t critical for an ornament, but it sets the final size. Make one snowflake first and measure it at each checkpoint before you make a set.
- Chain gauge: a ch-21 laid flat without stretching measures about 2 1/4 in (5.7 cm).
- After Rnd 1: the dc ring measures about 3/4 in (1.9 cm) across.
- After Rnd 2: each chain loop, folded flat, is about 1.1 in (2.8 cm) long. The piece is about 3 in (7.6 cm) tip to tip.
- After Rnd 3: about 3 1/2 in (8.9 cm) tip to tip.
- After Rnd 4: about 4 in (10.2 cm) tip to tip, blocked.
If your piece is too big: use a 2.0 mm hook or a size 5 thread. Also check that your chains aren’t loose, because loose chains make long, floppy petals.
If your piece is too small: use a 2.5 mm hook. Don’t add chains to the loops, because the counts in Rnds 3 and 4 depend on exactly 21 chains.
Consistency tip: Ice-blue thread can hide stitches in low light. Work near a bright lamp, and count every ch-21 loop twice before moving on.
Pattern
Rnd 1: Center Ring
Make a MR. Ch 3 (counts as first dc), then work 17 dc into the ring. Pull the ring closed, leaving a small center hole about 1/4 in (0.6 cm) wide. Join with sl st in the top of the beginning ch-3.
Stitch count: 18 dc.
Checkpoint: about 3/4 in (1.9 cm) across.
Rnd 2: Petal Loops
Ch 1. *Sc in next st, ch 21, sc in same st (one loop made), sc in each of next 2 sts; repeat from * 5 more times. Join with sl st in first sc.
Stitch count: 24 sc and 6 ch-21 loops.
Each repeat uses 3 dc from Rnd 1. The first dc holds 2 sc with the loop between them, and the next 2 dc hold 1 sc each. The 6 repeats use all 18 dc.
Let the loops hang free. Each one is the inner outline of a petal and already forms a narrow teardrop pointing outward.
Checkpoint: about 3 in (7.6 cm) tip to tip when the loops are laid out straight.
Rnd 3: Ladder Edging
In this round, you edge each loop and then slip stitch across the base to the next loop. Number the chains of each loop 1 to 21, starting at the sc where the loop begins. Chain 11 is the center chain and becomes the petal tip. Place a stitch marker in chain 11 of the first loop until the rhythm feels natural. Work into the back bump of each chain.
Your yarn is in the first sc of Rnd 2, where loop 1 begins.
Petal edging: Sc in ch 1, hdc in ch 2, dc in ch 3, [ch 1, sk 1 ch, dc in next ch] 3 times (dc in ch 5, 7, and 9), ch 1, sk ch 10, (dc, ch 3, dc) in ch 11, ch 1, sk ch 12, dc in ch 13, [ch 1, sk 1 ch, dc in next ch] 3 times (dc in ch 15, 17, and 19), hdc in ch 20, sc in ch 21.
Travel: Sl st in each of next 4 sc of Rnd 2.
Repeat the petal edging and travel 5 more times. On the last repeat, the 4th sl st lands in the first sc of the round and closes the round.
Stitch count per petal: 2 sc, 2 hdc, 10 dc, 8 ch-1 sps, 1 ch-3 sp.
Stitch count for the round: 12 sc, 12 hdc, 60 dc, 48 ch-1 sps, 6 ch-3 sps, and 24 sl sts.
Check each petal:
– Each of the 21 chains is used once, either worked into or skipped under a ch-1.
– There are 4 dc on each side plus 2 tip dc, for 10 dc.
– The ch-1 sps form the ladder windows, 4 on each side.
The sc and hdc at the base keep each petal narrow at the center. The pair of tip dc with a ch-3 between them pulls the outer end into a point.
Checkpoint: about 3 1/2 in (8.9 cm) tip to tip.
Border
Rnd 4 is the border. It’s the outer sc outline that closes the ladder and gives each petal its sharp tip.
Border gauge: about 9 sc per inch (2.5 cm) along a petal side. Each petal side holds 13 sc, about 1 1/2 in (3.8 cm) of edge.
Rnd 4: Outer Outline
Ch 1. Your yarn is in the first sc of Rnd 2, so the next st is the first Rnd 3 sc of petal 1.
*Sc in sc, sc in hdc, [sc in dc, sc in ch-1 sp] 4 times, sc in tip dc, (2 sc, ch 3, 2 sc) in ch-3 sp, sc in tip dc, [sc in ch-1 sp, sc in dc] 4 times, sc in hdc, sc in sc, sk next sl st, sl st in each of next 2 sl sts, sk next sl st; repeat from * 5 more times. On the last repeat, skip the final sl st (the Rnd 3 join) and join with sl st in first sc of this round. Fasten off.
Per petal: 22 sc worked 1 per existing st or sp + 4 extra sc in the tip ch-3 sp = 26 sc, plus 1 ch-3 tip.
Round total: 156 sc, 6 ch-3 tips, and 12 sl sts (join not counted).
Why the math works:
– In Rnd 3, each petal has 22 positions along its edge besides the tip space: 2 sc, 2 hdc, 10 dc, and 8 ch-1 sps.
– Rnd 4 puts exactly 1 sc in each of those positions, so the outer line lies flat and matches the ladder below it.
– The tip ch-3 sp gets 2 sc on each side of a new ch-3. This turns the point sharply without cupping.
– Each side of every petal ends up with 13 sc (2 + 8 + 1 + 2), so the two sides match.
– Between petals, you work only the 2 middle sl sts, which keeps the valleys tight and narrow.
Checkpoint: about 4 in (10.2 cm) tip to tip before blocking. It may measure slightly less if the petals curl.
Hanging Loop
Join thread with sl st in the ch-3 tip of any petal. Ch 30, then sl st in the same ch-3 sp. For a firmer cord, sl st in the back bump of each of the 30 ch around the loop, then sl st in the ch-3 sp again. Fasten off.
The loop hangs about 1 1/2 in (3.8 cm) above the tip. If you prefer, skip this step and tie a ribbon through the tip instead.
Final Blocking
- Weave in all ends along the back of the Rnd 4 outline, not through the ladder windows, so they stay hidden.
- Soak the snowflake in cool water and press out the extra water in a towel. Don’t wring it.
- Lay it flat on the blocking board, right side up.
- Pin the center first so the hole is round, about 1/4 in (0.6 cm) wide.
- Pin each ch-3 tip outward until the snowflake measures 4 in (10.2 cm) tip to tip. Check all three pairs of opposite tips with a ruler.
- Put a pin inside each petal opening and nudge the inner chain outline into an even oval.
- Pin each valley between petals so all six are the same depth.
- Spray with starch or brush on fabric stiffener. Let it dry completely, which takes at least several hours.
- Remove the pins. For a stiffer ornament, add a second light coat of starch.
Final Quality-Control Checklist
- Rnd 1 has 18 dc and a neat center hole.
- Rnd 2 has 24 sc and 6 loops of exactly 21 chains.
- Each petal in Rnd 3 has 10 dc and 8 ch-1 ladder windows, 4 per side.
- Each petal in Rnd 4 has 26 sc, 13 per side, and a ch-3 point.
- All six petals are the same length and point evenly outward.
- The snowflake measures about 4 in (10.2 cm) tip to tip after blocking.
- The hanging loop is secure and about 1 1/2 in (3.8 cm) long.
- No ends show on the front.
Troubleshooting
Petals are different lengths. Recount the chains in Rnd 2. One loop with 20 or 22 chains throws off the whole petal. Rip back to that loop and fix it.
The tip isn’t centered. Check that you worked the (dc, ch 3, dc) in chain 11. Mark chain 11 with a stitch marker if needed.
Petals twist. The loop was probably twisted before Rnd 3. Lay each loop flat and make sure you work into the back bumps all the way along.
Ladder windows look closed. Your dc are too short or your ch-1s are too tight. Pull up a slightly taller loop on each dc.
Outer edge ruffles. You’ve added extra sc. Each side should have exactly 13 sc.
Outer edge cups. Your Rnd 4 tension is too tight. Loosen up, or switch to a hook 0.25 mm larger for that round only.
Valleys between petals gape. In Rnd 4, work only the 2 middle sl sts and skip the outer two.
Care
Hand wash in cool water and lay flat to dry. If the points soften, starch and pin them again. Store the snowflake flat or hanging, away from heavy items that could crush the petals.
Final Notes
The measurement chain is short and easy to check:
– A ch-21 measures about 2 1/4 in (5.7 cm).
– Rnd 1 measures 3/4 in (1.9 cm).
– Rnd 2 reaches about 3 in (7.6 cm).
– Rnd 3 brings the piece to 3 1/2 in (8.9 cm).
– The Rnd 4 border adds about 1/4 in (0.6 cm) at each tip, for a finished 4 in (10.2 cm) snowflake.
Count 18 dc, then 24 sc, then 26 sc per petal, and the shape will come out right.
Make one, check it against the numbers, then make a whole flurry for the tree, gift tags, or a window.
Happy crocheting!