

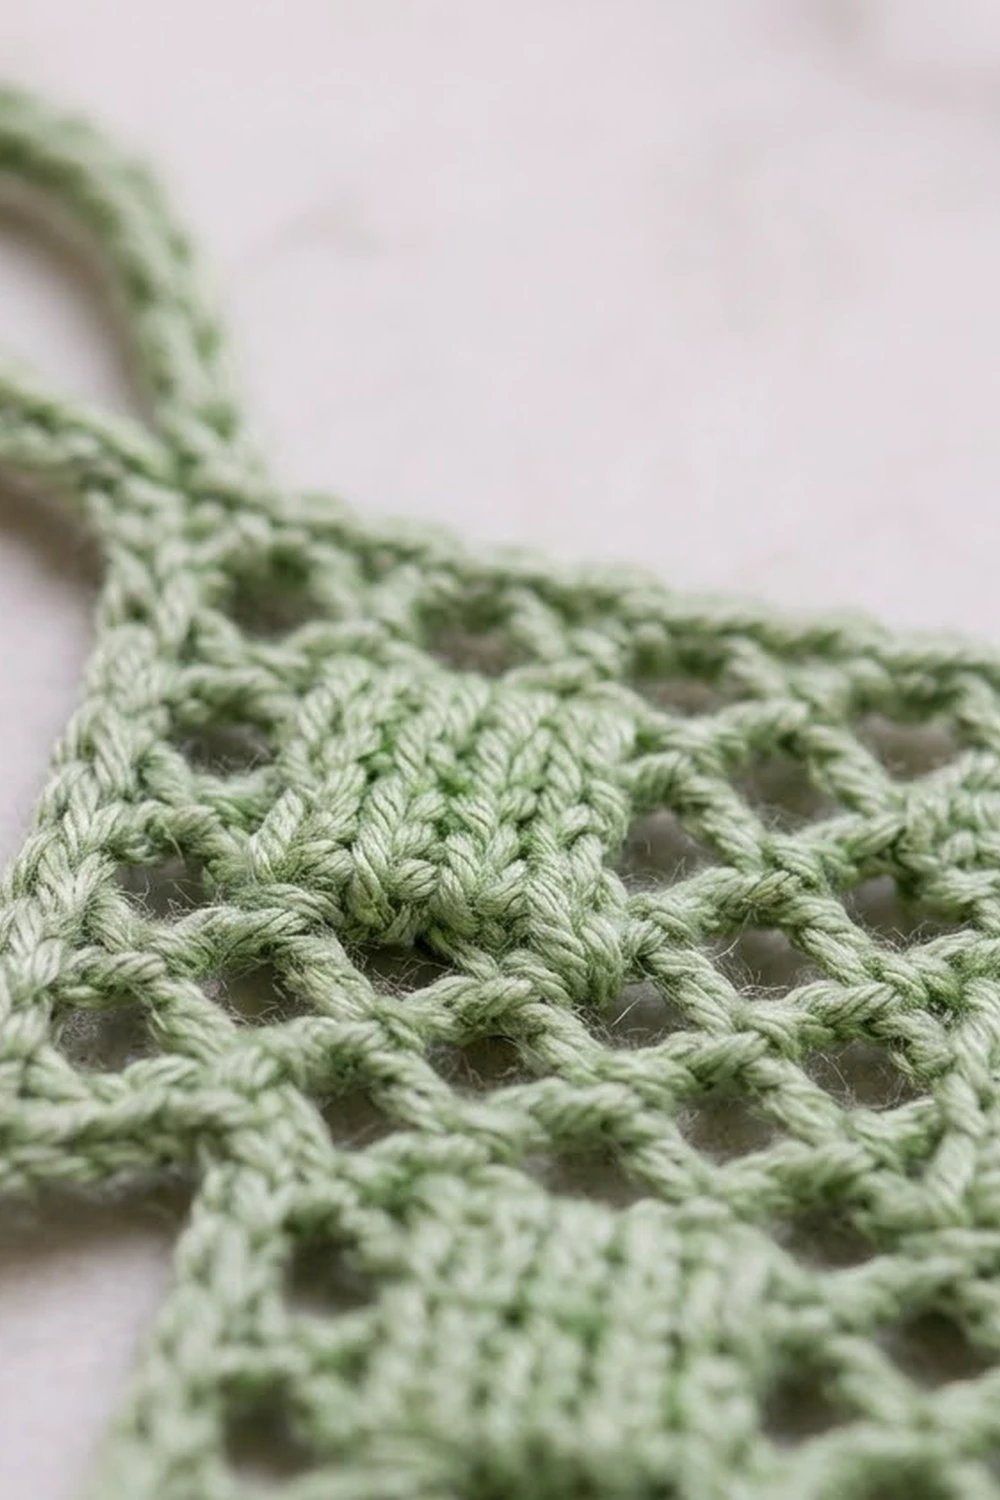
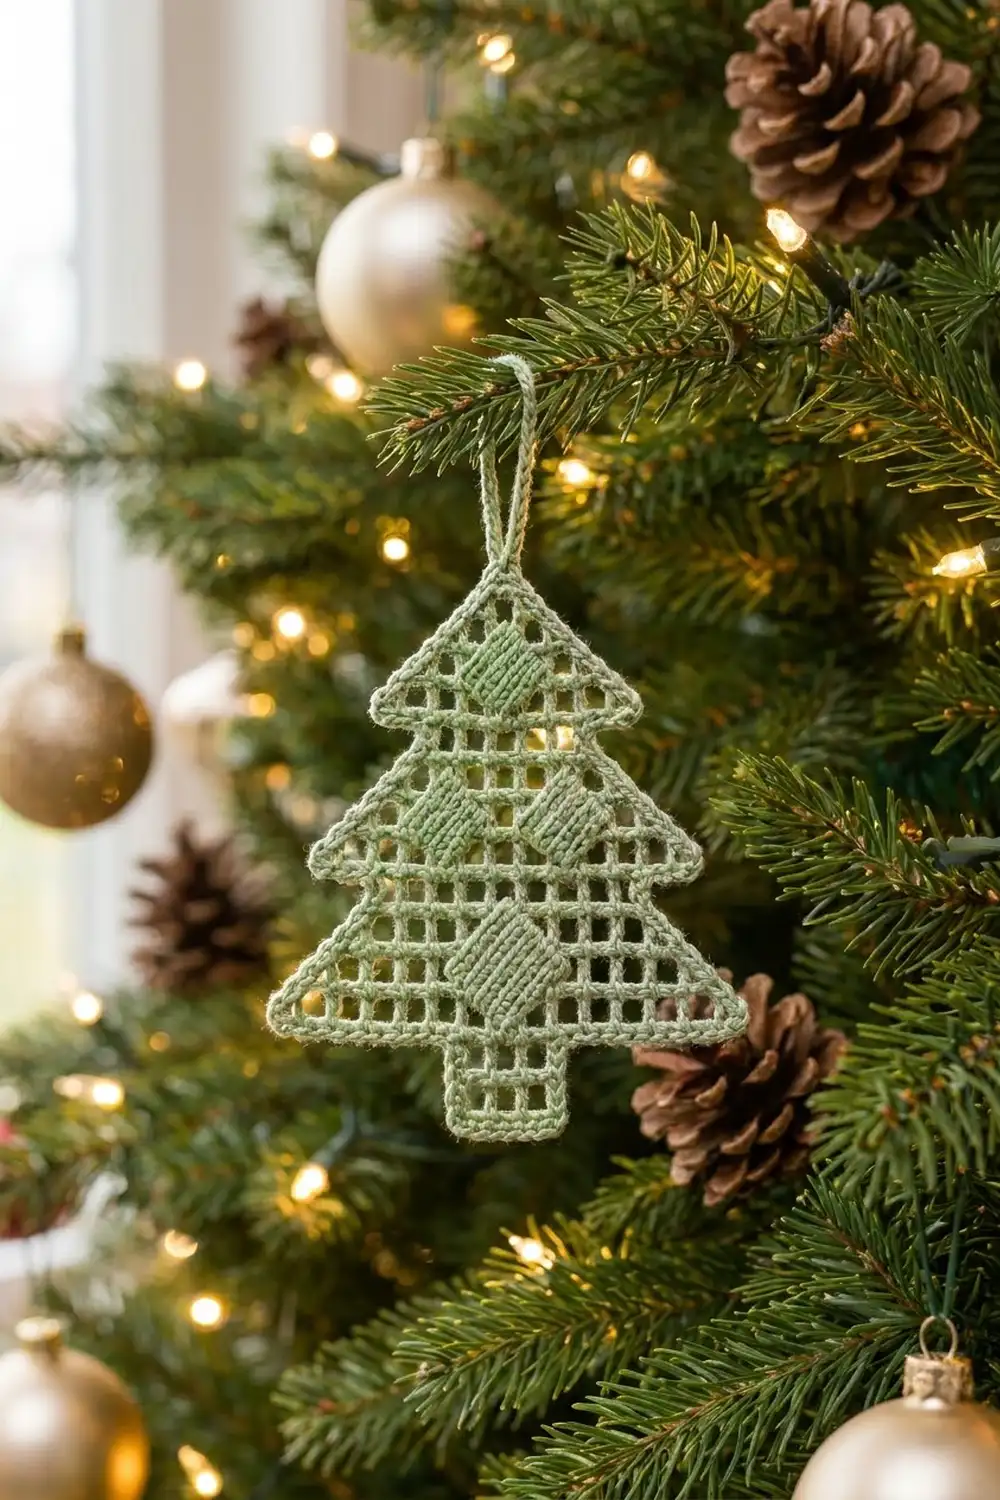
This small tree is a classic filet crochet ornament. An open grid of tiny square meshes forms a three-tier Christmas tree, with solid diamond motifs worked right into the grid. It hangs from a sturdy single crochet loop at the tip. A neat single crochet outline sharpens every tier point.
The sample uses one soft sage green cotton thread. The diamonds are the same color, but they are solid blocks of double crochet, so they catch the light and look slightly brighter than the airy mesh around them. The look is light, lacy and a little vintage.
The pattern uses US crochet terms. The finished ornament measures 5.25 in (13.3 cm) wide and 5.25 in (13.3 cm) tall. With the hanging loop it is about 6.25 in (15.9 cm) tall.
You work one single piece in rows from the bottom of the trunk to the tip of the tree. Each tier starts with a short chain extension on both sides and then narrows by one mesh at each edge per row. A one-round single crochet edging and a hanging loop finish the piece.
Finished Size and Construction
- Finished size: 5.25 in x 5.25 in (13.3 cm x 13.3 cm), plus a 1 in (2.5 cm) loop
- Skill level: Easy-intermediate (basic filet increases and decreases)
- Terminology: US crochet terms
- Yarn weight: Size 3 cotton crochet thread (fingering, #1 super fine)
- Hook: 2.25 mm (US B-1)
- Number of pieces: 1 (single ornament, no joining)
- Layout: Filet grid 15 meshes wide at the widest row, 16 rows tall
- Piece size before border: 5 in x 5 in (12.7 cm x 12.7 cm)
- Border depth: 1/8 in (0.3 cm) on every edge
Materials
Choose a smooth, mercerized size 3 cotton thread. It gives crisp mesh corners and blocks well. Avoid fuzzy or very stretchy fibers, because they blur the grid and the diamonds.
- Sage green (only color): about 8 g, about 30 m
This amount includes a generous margin for test rows, the short extension chains for each tier, and weaving in ends. The ornament itself uses about half of it.
Tools:
- 2.25 mm (US B-1) crochet hook
- Tapestry needle and scissors
- 1 locking stitch marker
- Blocking mat or foam board
- Rustproof pins and a spray bottle
- Optional: diluted fabric stiffener or spray starch
Abbreviations (US Terms)
- ch – chain
- sl st – slip stitch
- sc – single crochet
- dc – double crochet
- sk – skip
- sp – space
- st(s) – stitch(es)
Special stitches (filet cells):
- Mesh (M): ch 2, sk next 2 sts (or the ch-2 sp), dc in next dc.
- Block (B): 2 dc in the ch-2 sp below (or dc in each of next 2 dc), dc in next dc.
- Beginning mesh: ch 5 (counts as dc and ch 2), sk next 2 sts, dc in next dc.
Every cell is 3 sts wide and shares its edge dc with the next cell. A row of n cells has 3n + 1 sts and n + 1 dc posts. The edge cells of every row are meshes, so every row starts with a beginning mesh.
Gauge and Checkpoints
Gauge: 6 meshes = 2 in (5.1 cm) wide, and 16 rows = 5 in (12.7 cm) tall. One mesh is about 0.33 in (0.8 cm) wide, and one row is about 0.31 in (0.8 cm) tall.
The ornament is small, so the first rows are your test piece. Work Rows 1–3 and measure before you go on.
- After Row 2 (trunk): 1 in (2.5 cm) wide, 5/8 in (1.6 cm) tall.
- After Row 3: 5 in (12.7 cm) across the widest row.
- After Row 7 (bottom tier): about 2.2 in (5.6 cm) total height.
- After Row 11 (middle tier): about 3.4 in (8.6 cm) total height.
- After Row 16: 5 in (12.7 cm) tall and 5 in (12.7 cm) wide.
If Row 3 is more than 1/4 in (0.6 cm) too wide, go down one hook size. If it is too narrow, go up one size. If the width is right but the rows are too tall, keep each dc and the turning chains snug.
The Grid at a Glance
Columns are numbered 1–15 across the widest row, and column 8 is the center. The blocks form the diamonds.
| Row | Columns | Cells | Blocks |
|---|---|---|---|
| 1–2 | 7–9 | 3 | none |
| 3 | 1–15 | 15 | col 8 |
| 4 | 2–14 | 13 | cols 7–9 |
| 5 | 3–13 | 11 | cols 6–10 |
| 6 | 4–12 | 9 | cols 7–9 |
| 7 | 5–11 | 7 | col 8 |
| 8 | 3–13 | 11 | cols 6 and 10 |
| 9 | 4–12 | 9 | cols 5–7 and 9–11 |
| 10 | 5–11 | 7 | cols 6 and 10 |
| 11 | 6–10 | 5 | none |
| 12 | 4–12 | 9 | none |
| 13 | 5–11 | 7 | col 8 |
| 14 | 6–10 | 5 | cols 7–9 |
| 15 | 7–9 | 3 | col 8 |
| 16 | 8 | 1 | none |
The large diamond (1-3-5-3-1, 13 blocks) fills the bottom tier. Two small diamonds (1-3-1, 5 blocks each) sit side by side in the middle tier, and one small diamond sits just under the tip. In total there are 118 cells and 28 blocks.
Tree Pattern
Trunk
Row 1: Ch 14, dc in 8th ch from hook, [ch 2, sk 2 ch, dc in next ch] 2 times. (3 meshes; 10 sts)
Row 2: Turn, beginning mesh, M 2, working the last dc into the 3rd of the 7 skipped chains, counted from the free end. (3 meshes; 10 sts)
Bottom Tier
Far-side extension: Put the marker in the working loop and take out the hook. Using a separate 12 in (30.5 cm) strand, ch 18, then sl st into the 3rd ch of the beginning ch-5 of Row 2. Fasten off, leaving a 6 in (15.2 cm) tail. Put the hook back in the working loop.
Row 3 (increase): Turn. Ch 22, dc in 8th ch from hook, [ch 2, sk 2 ch, dc in next ch] 4 times, ch 2, sk 2 ch, dc in last dc of Row 2 (6 meshes added). Across Row 2: M 1, B 1, M 1, ending in the 3rd ch of the beginning ch-5. On the far-side chain: [ch 2, sk 2 ch, dc in next ch] 6 times. (15 cells: 14 meshes, 1 block; 46 sts)
Extension math: to add n meshes at the start of a row, ch 3n + 4. The 7 chains skipped before the first dc form the outer post and the top and bottom of the outer mesh, just like a standard filet foundation. Here n = 6, so you ch 22. The far-side chain needs 3 ch per mesh, which is 18.
Decrease method: Turn, sl st in each of next 2 ch, sl st in next dc, then work the beginning mesh from that dc. At the end of the row, stop after the dc before the last cell and leave the last cell unworked. Each decrease row loses one cell on each side.
Row 4: Decrease start, beginning mesh, M 4, B 3, M 5. (13 cells: 10 meshes, 3 blocks; 40 sts)
Row 5: Decrease start, beginning mesh, M 2, B 5, M 3. (11 cells: 6 meshes, 5 blocks; 34 sts)
Row 6: Decrease start, beginning mesh, M 2, B 3, M 3. (9 cells: 6 meshes, 3 blocks; 28 sts)
Row 7: Decrease start, beginning mesh, M 2, B 1, M 3. (7 cells: 6 meshes, 1 block; 22 sts)
Middle Tier
Far-side extension: As before, use a separate strand to ch 6 and sl st into the 3rd ch of the beginning ch-5 of Row 7. Fasten off.
Row 8 (increase): Turn. Ch 10, dc in 8th ch from hook, ch 2, sk 2 ch, dc in last dc of Row 7 (2 meshes added). Across Row 7: M 1, B 1, M 3, B 1, M 1. On the far-side chain: [ch 2, sk 2 ch, dc in next ch] 2 times. (11 cells: 9 meshes, 2 blocks; 34 sts)
Row 9: Decrease start, beginning mesh, B 3, M 1, B 3, M 1. (9 cells: 3 meshes, 6 blocks; 28 sts)
Row 10: Decrease start, beginning mesh, B 1, M 3, B 1, M 1. (7 cells: 5 meshes, 2 blocks; 22 sts)
Row 11: Decrease start, beginning mesh, M 4. (5 meshes; 16 sts)
Top Tier
Far-side extension: Use a separate strand to ch 6 and sl st into the 3rd ch of the beginning ch-5 of Row 11. Fasten off.
Row 12 (increase): Turn. Ch 10, dc in 8th ch from hook, ch 2, sk 2 ch, dc in last dc of Row 11. Across Row 11: M 5. On the far-side chain: [ch 2, sk 2 ch, dc in next ch] 2 times. (9 meshes; 28 sts)
Row 13: Decrease start, beginning mesh, M 2, B 1, M 3. (7 cells: 6 meshes, 1 block; 22 sts)
Row 14: Decrease start, beginning mesh, B 3, M 1. (5 cells: 2 meshes, 3 blocks; 16 sts)
Row 15: Decrease start, beginning mesh, B 1, M 1. (3 cells: 2 meshes, 1 block; 10 sts)
Row 16: Decrease start, beginning mesh (skip the 2 dc of the block below). (1 mesh; 4 sts) Fasten off.
Checkpoint: the grid should measure 5 in x 5 in (12.7 cm x 12.7 cm). Weave in all ends, including the extension tails, before you start the edging.
Border: Edging and Hanging Loop
Border gauge: 9 sc = 1 in (2.5 cm) along horizontal edges (3 sc per cell), and 3 sc per row along vertical edges.
Edging rules:
- Horizontal edges and ledges: 1 sc in each ch or st.
- Row-ends: 3 sc around the outer post of each row.
- Diagonal step: 2 sc in the exposed ch-2 sp of the lower row’s end cell (work behind any slip stitches), plus 3 sc around the next row’s outer post = 5 sc per step.
- Outer corners: 3 sc in the corner st or ch.
Round 1: Join the thread with a sl st in one bottom corner ch of the trunk, ch 1.
Trunk bottom: 3 sc in the corner ch, sc in each of next 8 ch, 3 sc in the last corner ch. (14 sc)
First side, going up:
- Trunk: 3 sc around each of 2 row-ends. (6 sc)
- Bottom ledge: sc in each of the first 17 extension ch, 3 sc in the 18th ch. (20 sc)
- Row 3 row-end: 3 sc. Tier tip: 3 sc in top of the Row 3 outer post. (6 sc)
- Steps for Rows 4–7: 4 x 5 sc. (20 sc)
- Middle ledge: sc in each of 5 extension ch, 3 sc in the 6th ch. (8 sc)
- Row 8 row-end: 3 sc. Tier tip: 3 sc. (6 sc)
- Steps for Rows 9–11: 3 x 5 sc. (15 sc)
- Top ledge: 5 sc, 3 sc in the 6th ch. (8 sc)
- Row 12 row-end: 3 sc. Tier tip: 3 sc. (6 sc)
- Steps for Rows 13–16: 4 x 5 sc. (20 sc)
Side total: 6 + 20 + 6 + 20 + 8 + 6 + 15 + 8 + 6 + 20 = 115 sc.
Top and loop: Sc in top of the Row 16 outer post, sc in next ch, ch 18, sl st in the sc just made, work 24 sc into the ch-18 loop, sl st in the same sc, sc in next ch, sc in top of the far post. (4 sc across the top, plus 24 sc on the loop)
Second side, going down: Mirror the first side. Each step becomes 3 sc around the row-end, then 2 sc in the exposed ch-2 sp. Each tier tip comes after that tier’s exposed sp and before its row-end. Each ledge starts with 3 sc in the outer corner ch. (115 sc)
Join with a sl st to the first sc. Fasten off and weave in.
Round total: 14 + 115 + 4 + 115 = 248 sc, plus 24 sc on the loop.
Why the math works: On horizontal edges, 1 sc per st keeps exactly 3 sts per cell, so the grid stays the same width. On row-ends, 3 sc cover a 0.31 in (0.8 cm) row without pulling it in. On the diagonals, 2 sc match the 2-ch width and 3 sc match the row height. Skipping the post tops turns the stair-step into a straight line. The only extra sts are 2 per outer corner, and these make the sharp tier points. The edging adds 1/8 in (0.3 cm) per side: 5 in + 1/4 in = 5.25 in (13.3 cm) each way.
Final Blocking
- Weave the remaining ends into the edging, not through the open meshes.
- Soak the ornament in cool water for 10 minutes, then press the water out in a towel.
- Lay it flat on the blocking mat, right side up.
- Pin the trunk bottom straight and the trunk sides parallel.
- Pin the three tier tips so the widest point measures 5.25 in (13.3 cm).
- Pin the apex so the height without the loop is 5.25 in (13.3 cm).
- Line up each diagonal edge with a ruler, then square every mesh with a tapestry needle.
- Optional: mist with diluted stiffener or spray starch.
- Let it dry completely before you take out the pins.
Final Quality-Control Checklist
- Grid before the border: 5 in x 5 in (12.7 cm x 12.7 cm).
- 118 cells and 28 blocks, with meshes as the edge cells of every row.
- Diamonds centered on column 8 or mirrored around it.
- Edging: 248 sc (115 per side, 14 across the trunk, 4 across the top).
- Loop: 24 sc over ch 18, about 1 in (2.5 cm) tall.
- Both sides of each tier are the same length.
- Finished size: 5.25 in x 5.25 in (13.3 cm x 13.3 cm).
Troubleshooting
Meshes look like tall rectangles: Your dc is too tall. Snug the first loop or try a smaller hook.
One side of a tier is longer: Recount the extension chains. You need 3 per added mesh on the far side and 3n + 4 on the near side.
Diamonds look lopsided: Check the block positions against the grid table. A single block one column off breaks the shape.
Diagonal edging ruffles: Work 2 sc in the exposed sp, not 3, and skip the post tops.
Trunk pulls inward: Work the trunk row-ends loosely, with all 3 sc around the post.
Loop twists: Block the loop flat and let it dry fully.
Care
Hand wash in cool water with mild soap, roll in a towel and dry flat. If you stiffened the ornament, block it again after washing.
Final Notes
The measurement chain is short. 3 meshes = 1 in (2.5 cm), so the 15-mesh widest row is 5 in (12.7 cm), and 16 rows are 5 in (12.7 cm) tall. The edging adds 1/8 in (0.3 cm) per side, for a 5.25 in (13.3 cm) square outline. The loop adds 1 in (2.5 cm), for a 6.25 in (15.9 cm) hanging height. Get your Row 3 width right and the rest will fall into place.
Happy crocheting!