

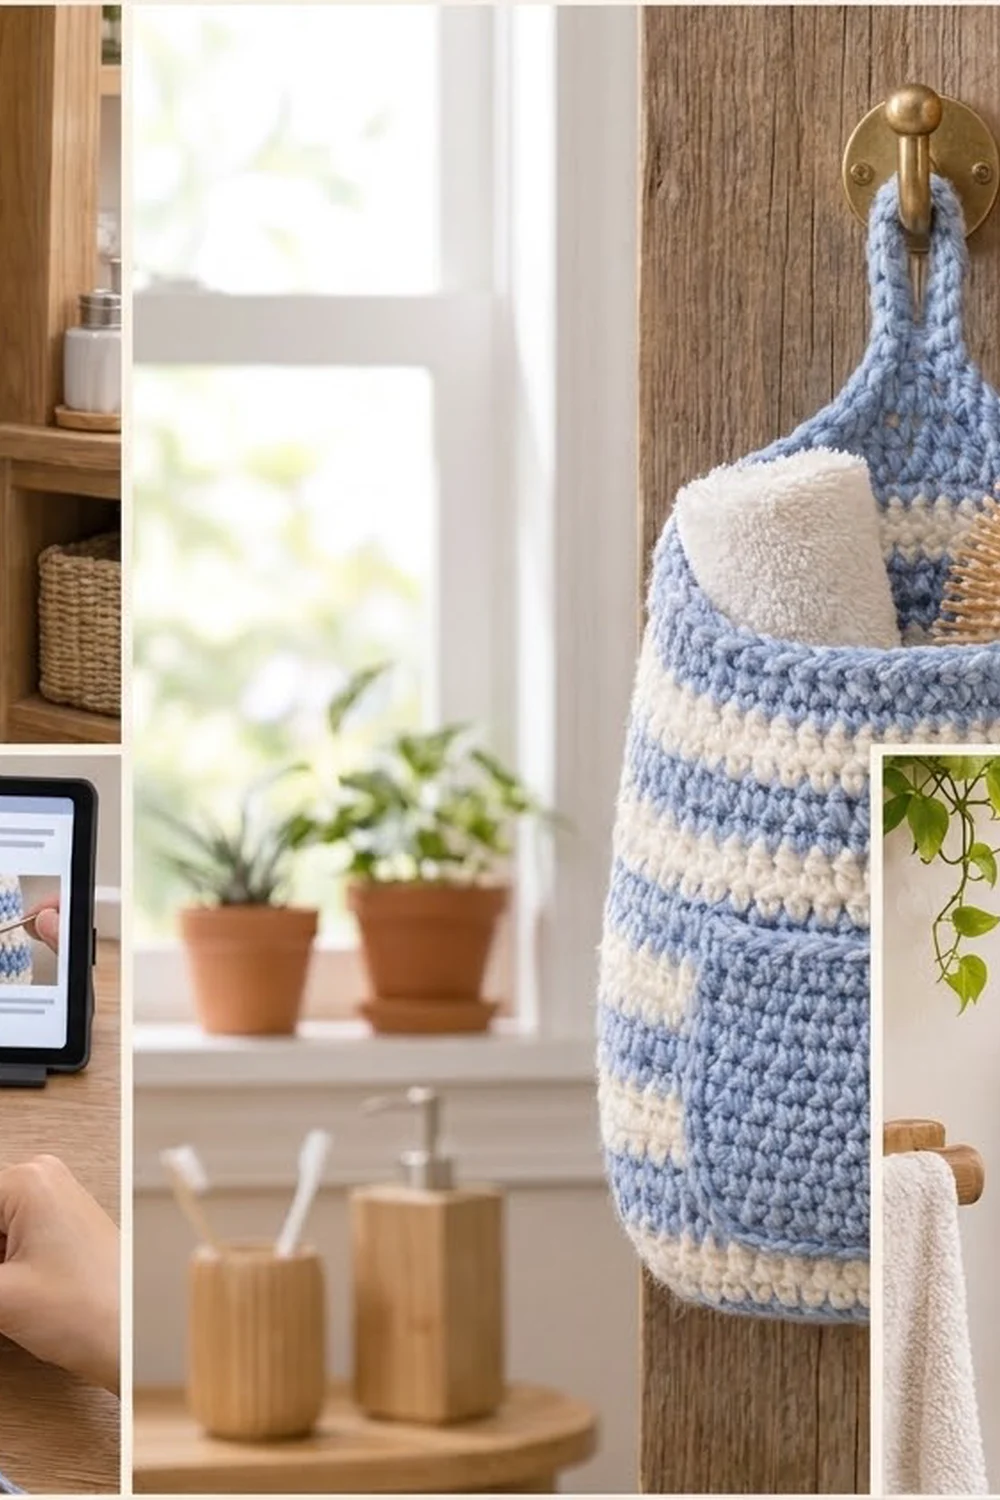
The Seaside Stripe Hanging Basket is a soft, sturdy wall organizer for a bathroom, nursery, or entryway. Cornflower blue and cream stripes run around a deep oval body. A solid blue patch pocket on the front holds small items like tubes, hair ties, or a lip balm.
The style is calm and coastal. The fabric is dense single crochet that keeps its shape when it’s full. Instead of a separate handle, the back of the basket rises into a tapered tab that narrows into a strap. The strap folds over into a loop that fits any standard wall hook.
The finished basket is about 7.5 in (19.1 cm) wide when flattened and about 8.5 in (21.6 cm) tall at the front. The back measures about 11.5 in (29.2 cm) to the top of the tab, and the loop adds about 2 in (5.1 cm) above that. This pattern uses US crochet terms throughout.
Construction is simple. You crochet an oval base, then work the walls in joined rounds with stripes. Next you shape the back tab and strap in rows and work one edging round. Finally you make the pocket flat, edge it, and sew it on.
Finished Size and Construction
- Finished size: 7.5 in (19.1 cm) wide flattened × 8.5 in (21.6 cm) tall at the front; 11.5 in (29.2 cm) at the back, plus a 2 in (5.1 cm) loop
- Base: 5.75 in × 2.75 in (14.6 cm × 7.0 cm) oval
- Skill level: Easy
- Terminology: US
- Yarn weight: Worsted (medium #4), cotton or cotton blend
- Hook: 4.5 mm (US 7)
- Number of pieces: 2 (body with integrated strap, plus 1 pocket)
- Layout: Pocket centered on the front, 1 in (2.5 cm) above the base ridge
- Pocket size: 5 in × 4.9 in (12.7 cm × 12.4 cm) after edging
- Pocket size before edging: 4.5 in × 4.4 in (11.4 cm × 11.2 cm)
- Border depth: one round, about 0.25 in (0.6 cm)
Materials
Choose a smooth worsted cotton or cotton blend. Cotton gives crisp stitch definition and holds its shape when the basket is loaded. Avoid fuzzy or very stretchy acrylic, which can let the basket sag over time.
- Color A, cornflower blue: 100 g, about 170 m (186 yd)
- Color B, cream: 50 g, about 85 m (93 yd)
These quantities include a margin of about 25 percent beyond what the sample used.
Tools:
– 4.5 mm (US 7) crochet hook
– 4 locking stitch markers
– Tapestry needle
– Scissors
– Measuring tape
– Rust-proof pins
– A small towel for shaping
Abbreviations (US Terms)
- ch: chain
- sc: single crochet
- sl st: slip stitch
- st(s): stitch(es)
- inc: 2 sc in the same stitch
- sc2tog: single crochet 2 together: (insert hook in next st, yarn over, pull up a loop) twice, yarn over, pull through all 3 loops
- BLO: back loop only
- Rnd: round
- RS / WS: right side / wrong side
Special technique, color change: Work the joining sl st of the round with the new color, pulling the new color through on the final yarn over. Carry the unused color loosely up the inside of the basket at the round join. Each stripe is only 4 rounds tall, so the carried strand stays short and tidy.
Gauge and Checkpoints
Gauge: 16 sc × 18 rounds = 4 in (10.2 cm) in sc worked in the round.
Make the base (Rnds 1–6) first as your gauge test. It should measure 5.75 in × 2.75 in (14.6 cm × 7.0 cm). If it’s larger, go down to a 4.0 mm hook. If it’s smaller, go up to a 5.0 mm hook. Re-measure before you continue.
Checkpoints:
– After Rnd 6: base 5.75 in × 2.75 in (14.6 cm × 7.0 cm)
– After Rnd 23: wall height 3.8 in (9.7 cm), measured from the BLO ridge
– After Rnd 37: wall height 6.9 in (17.5 cm); flattened width 7.5 in (19.1 cm)
– After tab Row 13: tab height 2.9 in (7.4 cm)
– After Row 33: strap length 4.4 in (11.2 cm)
– Pocket before edging: 4.5 in × 4.4 in (11.4 cm × 11.2 cm)
If the walls flare or the basket comes out wider than 7.5 in (19.1 cm), your tension has loosened since the base. Tighten up, or change down half a hook size for the walls only.

Body
Oval Base (Color A)
All rounds are joined with a sl st to the first sc. The ch 1 at the start of each round does not count as a stitch.
Rnd 1: Ch 15. Work 3 sc in the 2nd ch from hook, then sc in the next 12 ch. Work 3 sc in the last ch, rotate, and work along the underside of the foundation chain: sc in the next 12 ch. Join. (30 sts)
Rnd 2: Ch 1. Inc in each of the next 3 sts, sc 12, inc in each of the next 3 sts, sc 12. Join. (36 sts)
Rnd 3: Ch 1. [Sc 1, inc] 3 times, sc 12, [sc 1, inc] 3 times, sc 12. Join. (42 sts)
Rnd 4: Ch 1. [Sc 2, inc] 3 times, sc 12, [sc 2, inc] 3 times, sc 12. Join. (48 sts)
Rnd 5: Ch 1. [Sc 3, inc] 3 times, sc 12, [sc 3, inc] 3 times, sc 12. Join. (54 sts)
Rnd 6: Ch 1. [Sc 4, inc] 3 times, sc 12, [sc 4, inc] 3 times, sc 12. Join. (60 sts)
Each curved end now has 18 sts and each straight side has 12 sts: 18 + 12 + 18 + 12 = 60. Check the base measurement now.
Walls
Rnd 7 (Color A): Ch 1, sc in BLO of each st around. Join. (60 sts) This round makes a crisp ridge so the walls stand up from the base.
Rnds 8–37: Ch 1, sc in each st around. Join. (60 sts every round) Change color at the joins as follows:
- Rnds 8–11: Color B
- Rnds 12–15: Color A
- Rnds 16–19: Color B
- Rnds 20–23: Color A
- Rnds 24–27: Color B
- Rnds 28–31: Color A
- Rnds 32–35: Color B
- Rnds 36–37: Color A (rim band)
Fasten off Color B after Rnd 35. Fasten off Color A after Rnd 37 and weave in the ends.
These are straight, even rounds with no increases, so the walls rise as a smooth tube. Check that the walls are 6.9 in (17.5 cm) tall from the BLO ridge.
Mark Front and Back
Flatten the basket so the curved ends fold at the sides. Sts 10–39 of Rnd 37 form the front (30 sts). Sts 40–60 plus sts 1–9 form the back (30 sts). Place a marker in st 10 and another in st 40.
Back Tab (Color A, worked in rows)
Row 1: With the RS facing, join Color A in st 40. Ch 1, sc2tog over sts 40–41, sc 26 (sts 42–60 and 1–7), sc2tog over sts 8–9. (28 sts)
Rows 2–13: Ch 1, turn. Sc2tog, sc to the last 2 sts, sc2tog. Each row has 2 fewer sts than the row before. The counts for Rows 2 through 13 are 26, 24, 22, 20, 18, 16, 14, 12, 10, 8, 6, and 4. (Row 13: 4 sts)
Check that the tab is 2.9 in (7.4 cm) tall.
Strap
Rows 14–33: Ch 1, turn, sc 4. (4 sts, 20 rows) Don’t fasten off. Continue straight into the edging.
Border (Edging Round, Color A)
Border gauge: 4 sc per inch (2.5 cm), matching the body.
You are at the end of Row 33. You’ll work one continuous round around the whole top opening, starting with the end of the strap.
Edging Rnd:
1. Strap end: Ch 1, turn, sc in each of the 4 sts of Row 33. (4 sc)
2. Left strap edge: Sl st in each row end of Rows 33–14. (20 sl st)
3. Left tab diagonal: Work 1 sc in each row end of Rows 13–1. Add 1 extra sc in the row ends of Rows 12, 9, 6, and 3. (17 sc)
4. Front: Sc in each of sts 39 back to 10, the front sts of Rnd 37. (30 sc)
5. Right tab diagonal: Work 1 sc in each row end of Rows 1–13, adding 1 extra sc in Rows 3, 6, 9, and 12. (17 sc)
6. Right strap edge: Sl st in each row end of Rows 14–33. (20 sl st)
7. Join with a sl st to the first sc of the strap end.
Total: 4 + 20 + 17 + 30 + 17 + 20 = 108 sts. Fasten off, leaving an 18 in (45.7 cm) tail.
Why the math works:
– Front: The front takes exactly 1 sc per stitch, so it keeps its 7.5 in (19.1 cm) width.
– Diagonals: Each tab row steps 1 st inward and 1 row upward, so each diagonal edge measures about 4.25 in (10.8 cm). At 4 sc per inch, 17 sc fill that length without pulling or rippling.
– Strap edges: These edges are straight row ends. Slip stitches lie flat and add no length, so the strap won’t ruffle.
Form the Loop
Fold the strap toward the WS so that Row 33 lies against the back of Row 13. Using the long tail, whipstitch the strap end firmly in place through both layers. Go across twice for strength. The 4.4 in (11.2 cm) strap makes a loop about 2 in (5.1 cm) tall.
Pocket (Color A)
Row 1: Ch 19. Sc in the 2nd ch from hook and in each ch across. (18 sts)
Rows 2–20: Ch 1, turn, sc 18. (18 sts)
Check that the pocket measures 4.5 in × 4.4 in (11.4 cm × 11.2 cm).
Pocket Edging Rnd:
1. Top: Ch 1, turn. Work 3 sc in the first st, sc 16, then 3 sc in the last st. (22 sc)
2. First side: Work 18 sc across the 20 row ends, skipping the 10th and 20th row ends. (18 sc)
3. Bottom: Working in the unused loops of the foundation chain, work 2 sc in the first ch, sc 16, then 2 sc in the last ch. (20 sc)
4. Second side: Work 18 sc across the row ends, skipping the 10th and 20th row ends. (18 sc)
5. Join to the first sc.
Total: 22 + 18 + 20 + 18 = 78 sts. The 2-sc bottom corners turn more gently than the 3-sc top corners, which gives the softly rounded lower edge. The side count matches the stitch gauge: 18 sc over 20 rows keeps the sides flat.
Fasten off, leaving a 30 in (76.2 cm) tail. The pocket should now measure 5 in × 4.9 in (12.7 cm × 12.4 cm).
Attach the Pocket
Center the pocket on the front so its bottom edge sits 1 in (2.5 cm) above the BLO ridge. That leaves 1.25 in (3.2 cm) of body on each side. Pin it in place, keeping the pocket rows parallel to the stripes.
Whipstitch the two sides and the bottom through the edging stitches and the body fabric. Leave the top open. Keep your stitches snug but not tight, so the body doesn’t pucker behind the pocket.
Final Blocking
- Weave in all remaining ends on the WS, following the stitch lines.
- Lightly mist the basket with water, or hold a steam iron 1 in (2.5 cm) above the fabric. Never press directly.
- Roll a small towel and stuff it inside the basket so the walls stand upright and the base sits flat.
- Smooth the front and the pocket flat with your hands. Pin the pocket corners if they curl.
- Lay the tab flat and gently straighten the strap loop.
- Let it dry completely, then remove the towel.
Final Quality-Control Checklist
- [ ] Base measures 5.75 in × 2.75 in (14.6 cm × 7.0 cm) and lies flat.
- [ ] Every wall round has 60 sts, and the walls don’t flare.
- [ ] There are seven 4-round stripes, followed by a 2-round blue rim band.
- [ ] The tab narrows evenly from 28 sts down to 4 sts.
- [ ] The edging round totals 108 sts, and the diagonal edges lie flat.
- [ ] The loop is sewn securely through both layers.
- [ ] The pocket is centered, 1 in (2.5 cm) above the base ridge, with its top open.
- [ ] All ends are woven in on the WS.
Troubleshooting
- The base cups or ruffles: Cupping means you’re crocheting tightly, so go up a hook size. Ruffling means the opposite, so go down a size. Recount the increases at each curved end.
- The stripe joins jog: Jogs are normal in joined rounds. Keep the round join at the side fold so they stay out of sight.
- The walls lean or twist: Make sure you join to the first sc and not to the ch 1. Count 60 sts every few rounds.
- The tab diagonals pucker: You’ve missed the 4 extra sc on that edge. Rework the edging.
- The strap stretches under load: Fold it with a little more overlap, and sew the end through both layers twice.
- The pocket gapes at the top: Add one extra whipstitch at each top corner.
Care
Hand wash in cool water with mild soap. Press out the water in a towel, then dry flat with a towel stuffed inside to hold the shape.
Final Notes
The measurement chain is short and easy to check at each step:
– The base measures 5.75 in × 2.75 in (14.6 cm × 7.0 cm).
– 60 sts in the walls give a 7.5 in (19.1 cm) flattened width.
– 31 wall rounds reach 6.9 in (17.5 cm).
– The tab adds 2.9 in (7.4 cm).
– The strap folds into a 2 in (5.1 cm) loop.
– The pocket finishes at 5 in × 4.9 in (12.7 cm × 12.4 cm) and sits centered on the 7.5 in (19.1 cm) front.
If each checkpoint matches, your basket will hang straight and hold its shape for years.
Happy crocheting!