

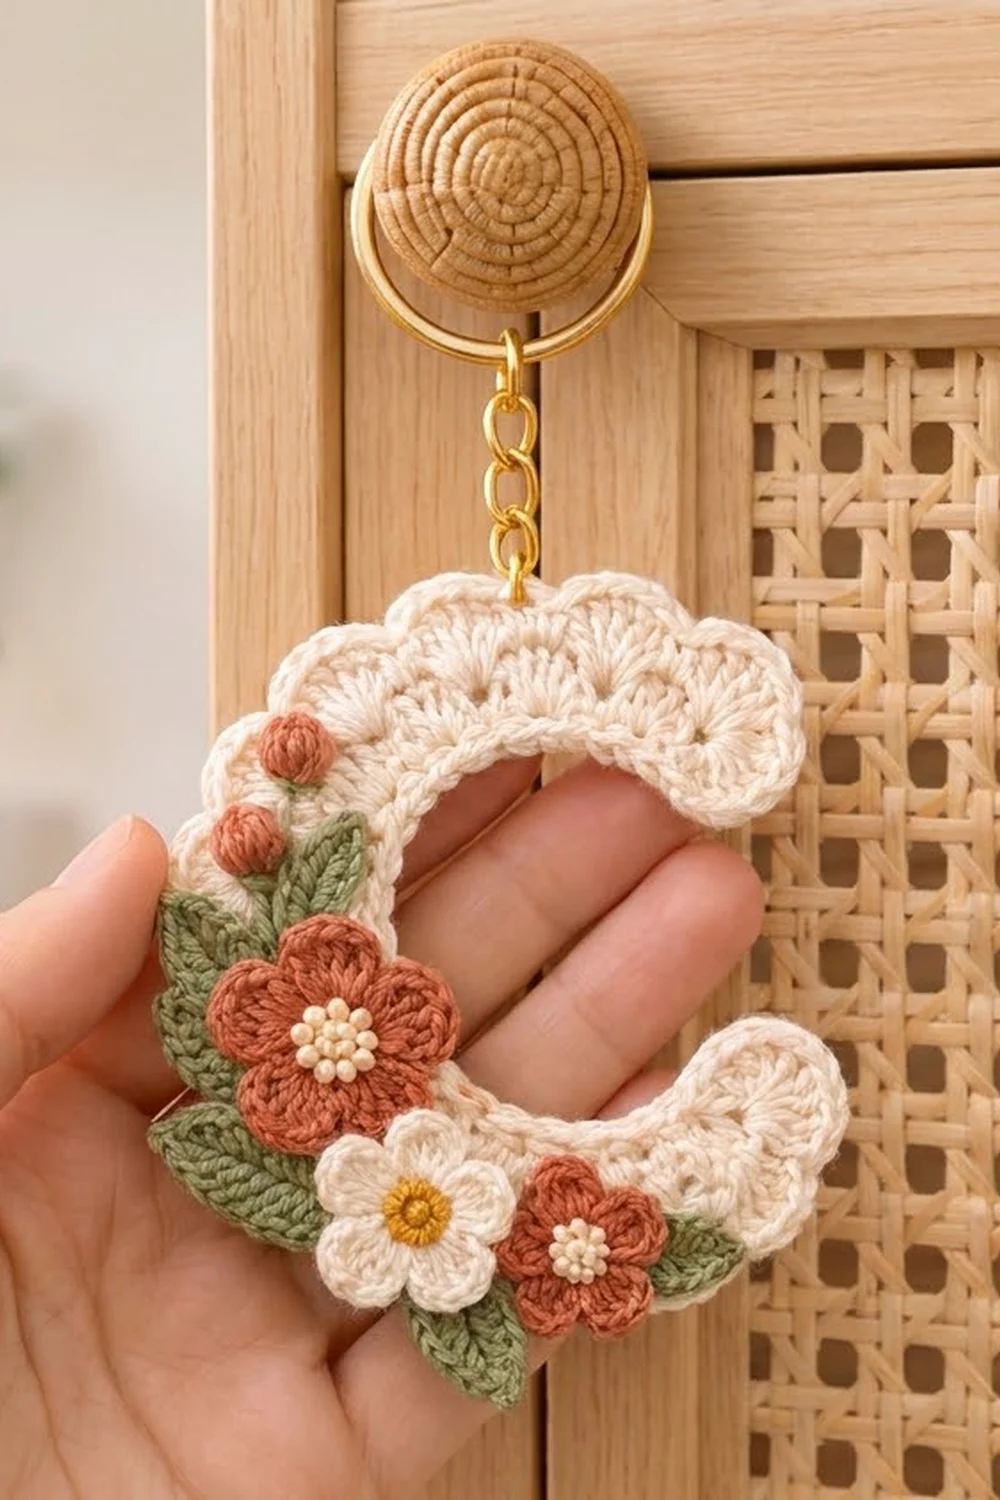
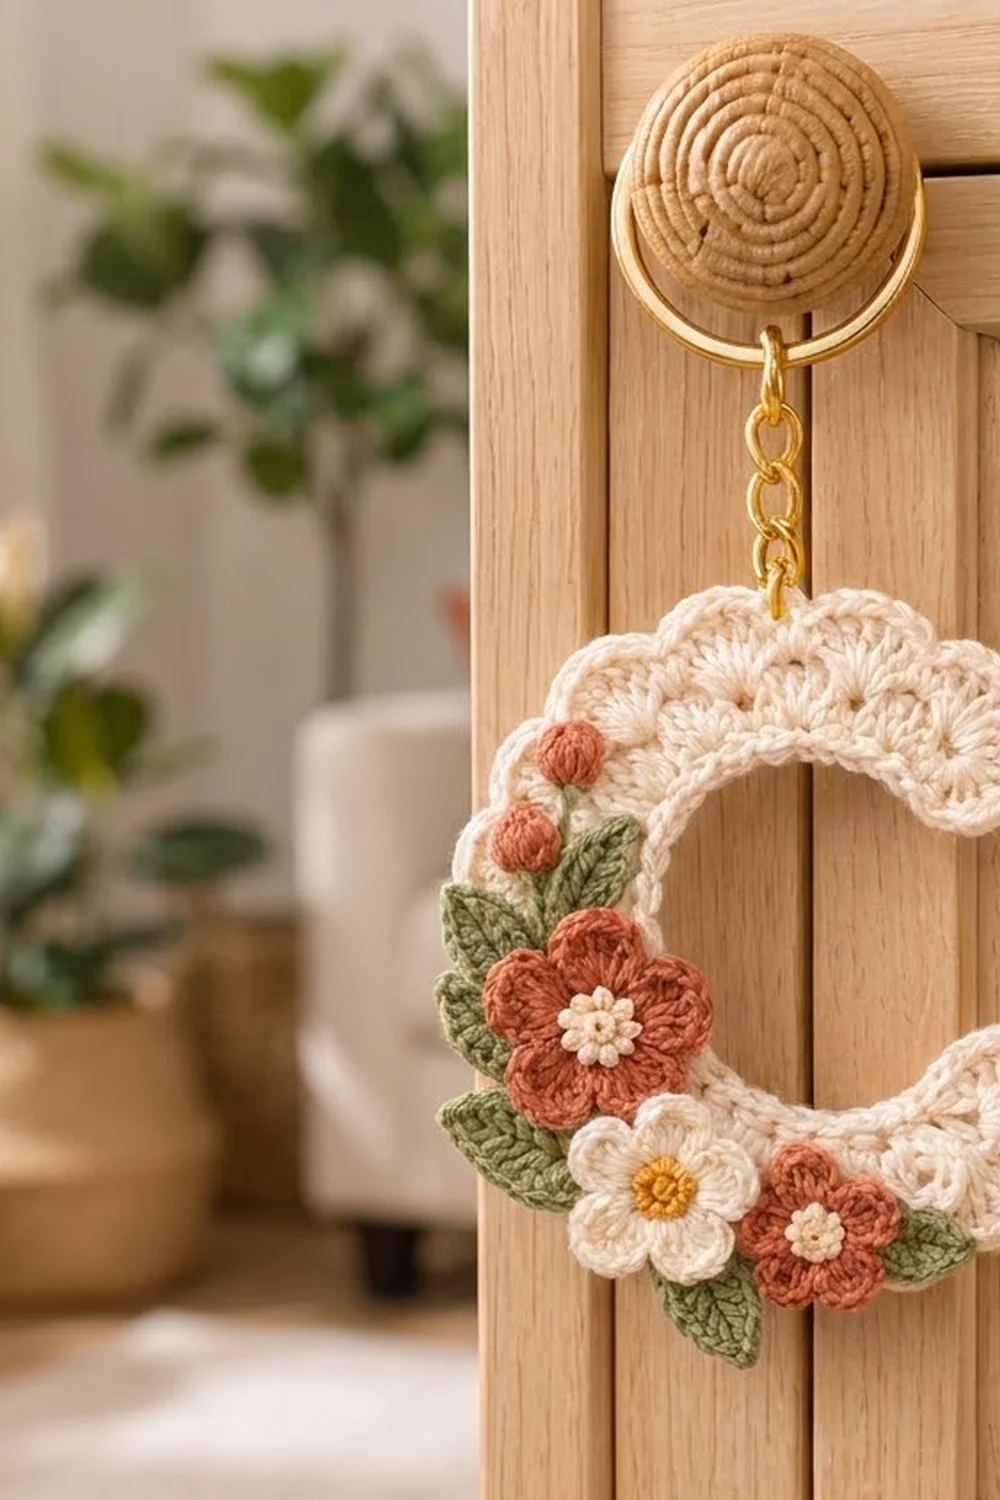
This little letter C keychain has a soft cream crescent base with a scalloped shell edge. A small cluster of flowers and leaves is sewn along its left side. A short gold chain and key ring hang from the top of the curve, so you can put it on keys, a bag zipper, or a cabinet knob.
The palette is warm and gentle. Cream is used for the letter and one flower, terracotta for two flowers and a round bud, sage green for the leaves, and a touch of mustard for one flower center. The overall look is cottage-style and calm, with neat stitch texture.
This pattern uses US crochet terms. The finished charm measures about 4 in (10.2 cm) tall and 3.5 in (8.9 cm) wide, not counting the hardware.
Construction is simple. You work the C base flat in four rows along a foundation chain. Increases in the double crochet rows make it curve, and the last row forms the shell scallops. A two-round border neatens the inner edge and adds rounded scallops at both tips. Then you make the small flowers, bud, and leaves and sew them in place.
Finished Size and Construction
- Finished size (charm): 4 in (10.2 cm) tall x 3.5 in (8.9 cm) wide
- Skill level: Easy-intermediate
- Terminology: US crochet terms
- Yarn weight: Light (#3 / DK) cotton
- Hook: 3.0 mm
- Number of pieces: 1 finished keychain (1 C base plus 9 small appliqués sewn on)
- Layout: One crescent “C” with a 270-degree curve, opening to the right
- Band width before border: about 1.25 in (3.2 cm)
- Size before border: about 3.75 in (9.5 cm) tall
- Border depth: about 1/4 in (0.6 cm) along the band, about 3/8 in (1.0 cm) at the scalloped tips
Materials
Choose a smooth mercerized or combed cotton in DK weight. Cotton keeps the shell edge crisp and holds up to daily handling on a key ring. Avoid fuzzy yarns, because they blur the scallops.
- Cream: 8 g, about 19 m (C base, cream flower petals, large and small flower centers)
- Terracotta: 3 g, about 7 m (2 flowers, 1 bud)
- Sage green: 2 g, about 5 m (5 leaves)
- Mustard: 1 g, about 2 m (cream flower center)
These quantities assume a cotton of about 120 m per 50 g and include a small safety margin.
Tools:
- 3.0 mm crochet hook
- Tapestry needle (a sharp-tip needle helps when sewing appliqués)
- Gold key ring, 1 in (2.5 cm), with about 1 in (2.5 cm) of chain
- 1 jump ring, about 1/4 in (0.6 cm), and two pairs of flat pliers
- Blocking board, rustproof pins, and a spray bottle
- Scissors and a stitch marker
Abbreviations (US Terms)
- ch – chain
- sl st – slip stitch
- sc – single crochet
- hdc – half double crochet
- dc – double crochet
- sc2tog – single crochet 2 together
- sk – skip
- st(s) – stitch(es)
- MR – magic ring
- RS – right side
Shell: 5 dc in the same stitch (Row 4).
End scallop: 7 dc in the same stitch (Border Round 2).
Gauge and Checkpoints
Gauge: 12 sc and 12 rows = 2 in (5.1 cm) in sc. In dc, 3 rows = 1 in (2.5 cm).
Because the charm is small, the C base works as your test piece. Make it first and check it against the points below before you make the appliqués.
- After Row 1: the 21 sc strip measures 3.5 in (8.9 cm) long.
- After Row 4: the piece has curled into a C about 3.75 in (9.5 cm) tall, with a band about 1.25 in (3.2 cm) wide.
- After the border: the C is about 4 in (10.2 cm) tall and 3.5 in (8.9 cm) wide.
If Row 1 is longer than 3.5 in (8.9 cm), switch to a 2.75 mm hook. If it is shorter, try a 3.25 mm hook. If the C opens out flat, your dc rows are too tight: loosen your tension or go up half a hook size for Rows 2–3 only. If it curls past a C into a closed ring, your dc rows are too loose.
C Base
Work with cream. Rows are turned. The turning ch does not count as a stitch.
Foundation: Ch 22.
Row 1 (inner edge): Sc in 2nd ch from hook and in each ch across, turn. (21 sc)
Row 2 (first curve row): Ch 2, dc in first st, *2 dc in next st, dc in next st; repeat from * 9 more times, turn. (31 dc)
This is a growth row: 1 dc plus 10 repeats of 3 dc, for 31 dc total.
Row 3 (second curve row): Ch 2, dc in first st, *dc in next 2 sts, 2 dc in next st; repeat from * 9 more times, turn. (41 dc)
This is also a growth row: 1 dc plus 10 repeats of 4 dc, for 41 dc total. The strip now bends clearly into a C. The outer edge should measure about 6.8 in (17.3 cm).
Row 4 (shell row): Ch 1, sc in first st, *sk 1 st, 5 dc in next st, sk 1 st, sc in next st; repeat from * 9 more times. Do not turn. (10 shells and 11 sc, for 61 sts)
Each repeat uses 4 stitches and the first sc uses 1, so 1 + (10 x 4) = 41. That uses every stitch of Row 3 exactly. The first and last sc sit at the two tips of the C.
Checkpoint: the C is about 3.75 in (9.5 cm) tall. Do not fasten off.
Border
The border keeps the inner curve firm, outlines the shells, and rounds off both tips. Border gauge matches the base: about 6 sc per 1 in (2.5 cm) along the edges.
To keep the counts clear, think of the C as having four edges:
- Outer edge: the 61 sts of Row 4. This count already includes the end sc at each tip, so you don’t add extra corner stitches.
- Tip A: the row ends where you finished Row 4
- Inner edge: the foundation ch
- Tip B: the row ends at the other tip
Round 1 (sc outline): Continuing from Row 4, ch 1 and rotate the piece to work down Tip A: 2 sc in end of Row 3, 2 sc in end of Row 2, 1 sc in end of Row 1. (Tip A: 5 sc)
Work along the opposite side of the foundation ch: sc in each of the 21 ch. (Inner edge: 21 sc)
Work up Tip B: 1 sc in end of Row 1, 2 sc in end of Row 2, 2 sc in end of Row 3. (Tip B: 5 sc)
Work across Row 4: sc in each of the 61 sts, including each dc of the shells. Join with sl st to first sc. (Outer edge: 61 sc)
Round 1 total: 5 + 21 + 5 + 61 = 92 sc.
Round 2 (scalloped tips and firm edges): Ch 1.
Tip A: sc in first st, sk 1, 7 dc in next st, sk 1, sc in next st. (9 sts made from 5 sts)
Inner edge: sl st in each of the 21 sts. (21 sl st)
Tip B: sc in next st, sk 1, 7 dc in next st, sk 1, sc in next st. (9 sts made from 5 sts)
Outer edge: sl st loosely in each of the 61 sts. Join with sl st to first sc. (61 sl st)
Round 2 total: 9 + 21 + 9 + 61 = 100 sts.
Why the math works: Each tip has exactly 5 sts. The end scallop uses 1 sc + 1 skip + 1 center st + 1 skip + 1 sc, which is 5, so the scallop sits centered on the tip. On the inner edge, 1 sl st goes into each stitch, which holds the curve without pulling it in. On the outer edge, the sl sts follow every shell stitch, so the scallops stay rounded.
Fasten off and weave in all ends.
Checkpoint: the C is about 4 in (10.2 cm) tall and 3.5 in (8.9 cm) wide.
Appliqués
Leave an 8 in (20.3 cm) tail on each piece for sewing.
Large terracotta flower (make 1):
- R1: With cream, MR, 10 sc in ring, sl st to first sc. Fasten off cream. (10 sc)
- R2: Join terracotta in any st. *(Sc, hdc, dc) in next st, (dc, hdc, sc) in next st; repeat from * 4 more times. Sl st to first sc. (5 petals, 30 sts)
The flower is about 1.1 in (2.8 cm) across. For the beaded center in the photo, add 3–4 tiny cream French knots.
Small terracotta flower (make 1):
- R1: With cream, MR, 5 sc in ring, sl st to first sc. Fasten off cream. (5 sc)
- R2: Join terracotta. (Sc, hdc, dc, hdc, sc) in each st around. Sl st to first sc. (5 petals, 25 sts)
It is about 0.8 in (2.0 cm) across.
Cream flower (make 1):
- R1: With mustard, MR, 5 sc in ring, sl st to first sc. Fasten off mustard. (5 sc)
- R2: Join cream. Work as for Small Flower R2. (5 petals, 25 sts)
It is about 0.8 in (2.0 cm) across.
Bud (make 1):
- R1: With terracotta, MR, 6 sc in ring. (6 sc)
- R2: Sc in each st around. (6 sc)
- R3: Sc2tog 3 times. (3 sts)
Fasten off and close the hole. The bud is a firm ball about 0.4 in (1.0 cm) wide.
Leaf (make 5):
With sage green, ch 7. Starting in 2nd ch from hook, work sc, hdc, dc, dc, hdc across the next 5 ch, then 3 sc in the last ch. Working along the other side of the ch, work hdc, dc, dc, hdc, sc across the next 5 ch. Sl st to first sc. (13 sts)
Each leaf is about 0.9 in (2.3 cm) long, with a pointed tip.
Assembly
Hold the C with the RS facing you and the opening to the right. Place the large flower on the left side of the band, slightly above center. Set the cream flower just below it, toward the lower curve, and the small terracotta flower to its right on the bottom of the band.
Tuck the leaves under the flower edges: two above the large flower, one to its left, one under the cream flower, and one beside the small flower. Place the bud at the top of the cluster, between the two top leaves.
Pin everything in place first. Sew each leaf down along its center line, then sew each flower around its center ring with small stitches. Catch only the back loops of the C base so the stitches stay hidden. Weave the tails in on the back.
Hardware: Count 3 shells in from Tip A (the top tip). Open the jump ring with two pliers, slip it through the base of that shell, add the end link of the key chain, and close the ring fully.
Final Blocking
- Before you sew on the appliqués, mist the C base lightly until it is damp, not wet.
- Lay it RS up on the board in a smooth C shape.
- Pin the inner edge into an even curve about 1.5 in (3.8 cm) across.
- Pin the tip of each shell and each end scallop so the scallops fan open.
- Check the size: 4 in (10.2 cm) tall and 3.5 in (8.9 cm) wide.
- Let it dry completely, then unpin.
- After assembly, hold a steamer or iron above the flowers without touching them, then press the petals open with your fingers.
Final Quality-Control Checklist
- Row 4 has 10 even shells and 11 sc.
- Border Round 1 has 92 sc, and Round 2 has 100 sts.
- Both tips have a rounded 7-dc scallop.
- The inner edge is smooth, neither ruffled nor tight.
- The charm measures 4 in (10.2 cm) x 3.5 in (8.9 cm).
- Each flower has 5 clear petals, and each leaf has a sharp point.
- No sewing stitches show on the front.
- The jump ring is fully closed and the charm hangs straight.
Troubleshooting
The C won’t curve. Rows 2–3 are too tight or you missed increases. Recount: Row 2 should have 31 dc and Row 3 should have 41 dc.
The C curls into a ring. The dc rows are too loose. Use a smaller hook for Rows 2–3.
Shells crowd or ripple. Check that Row 3 has exactly 41 sts, so each shell has one skipped stitch on each side.
The inner edge puckers. Your sl sts are too tight. Work them more loosely, or use a hook half a size larger for that edge only.
Petals look flat. Gently tug each petal after Round 2 and steam lightly.
The charm tilts when hanging. Move the jump ring one stitch to the left or right until it hangs straight.
Care
Spot clean with mild soap and cool water, then reshape and dry flat. Keep the metal hardware dry so it doesn’t tarnish.
Final Notes
The measurement chain is short and easy to follow. Row 1 sets the inner edge at 21 sc and 3.5 in (8.9 cm). Rows 2–3 grow to 31 and 41 dc to create the curve. Row 4 turns those 41 sts into 10 shells, and the piece is about 3.75 in (9.5 cm) tall. The border adds 92 sc, then 100 sts, bringing the charm to 4 in (10.2 cm) x 3.5 in (8.9 cm). Sew on 3 flowers, 1 bud, and 5 leaves, add the gold ring, and your keychain is ready.
Happy crocheting!