

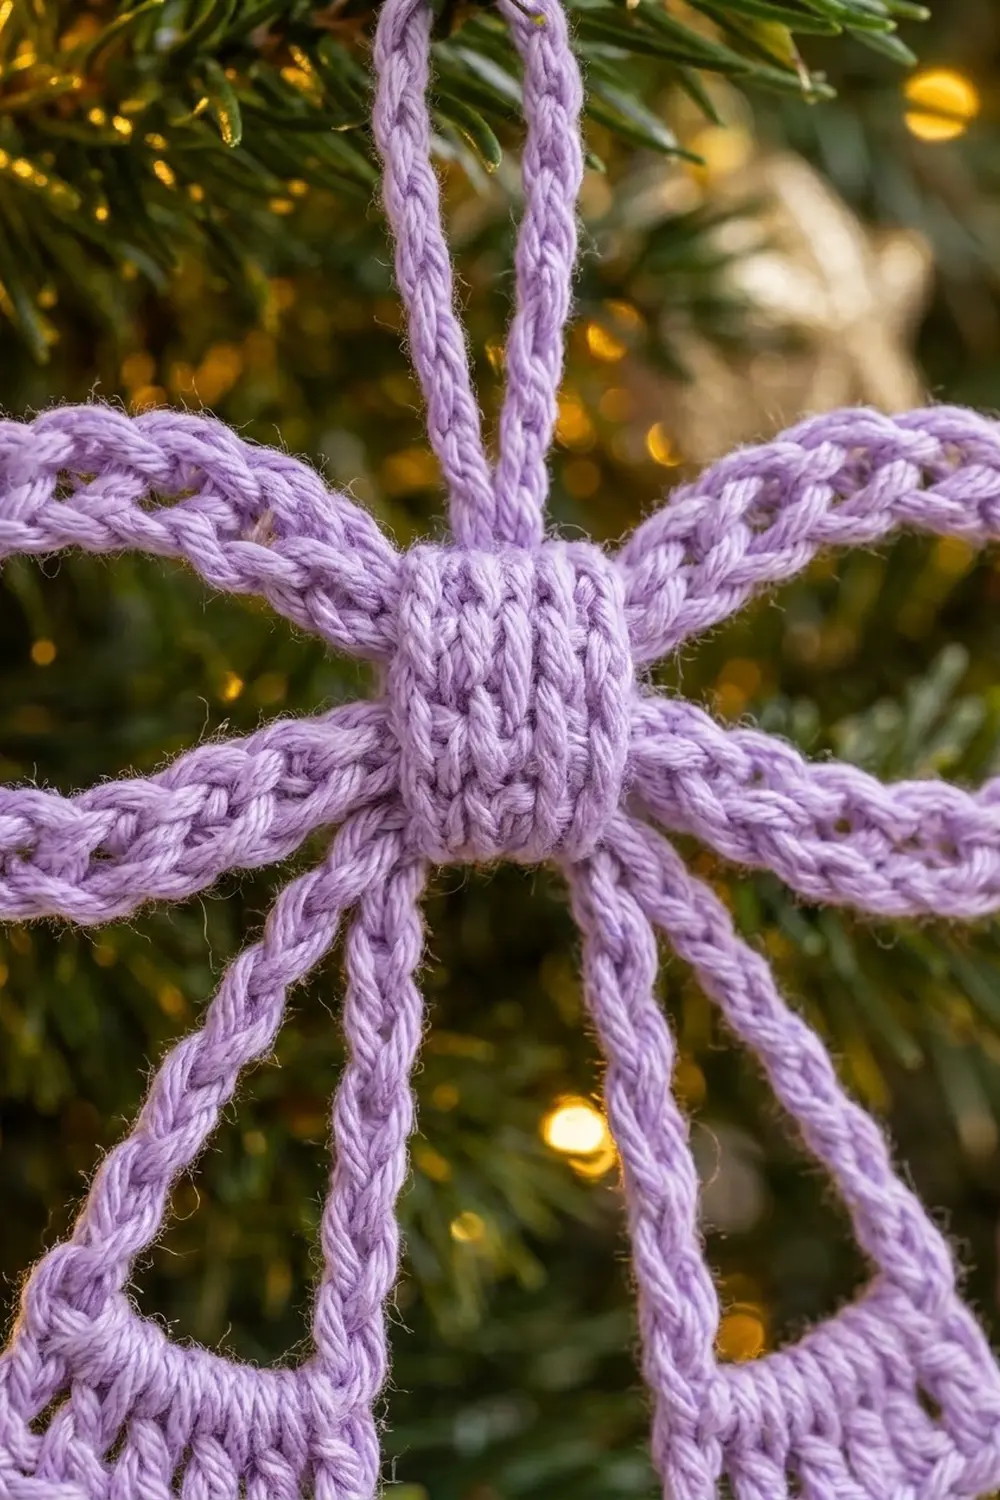
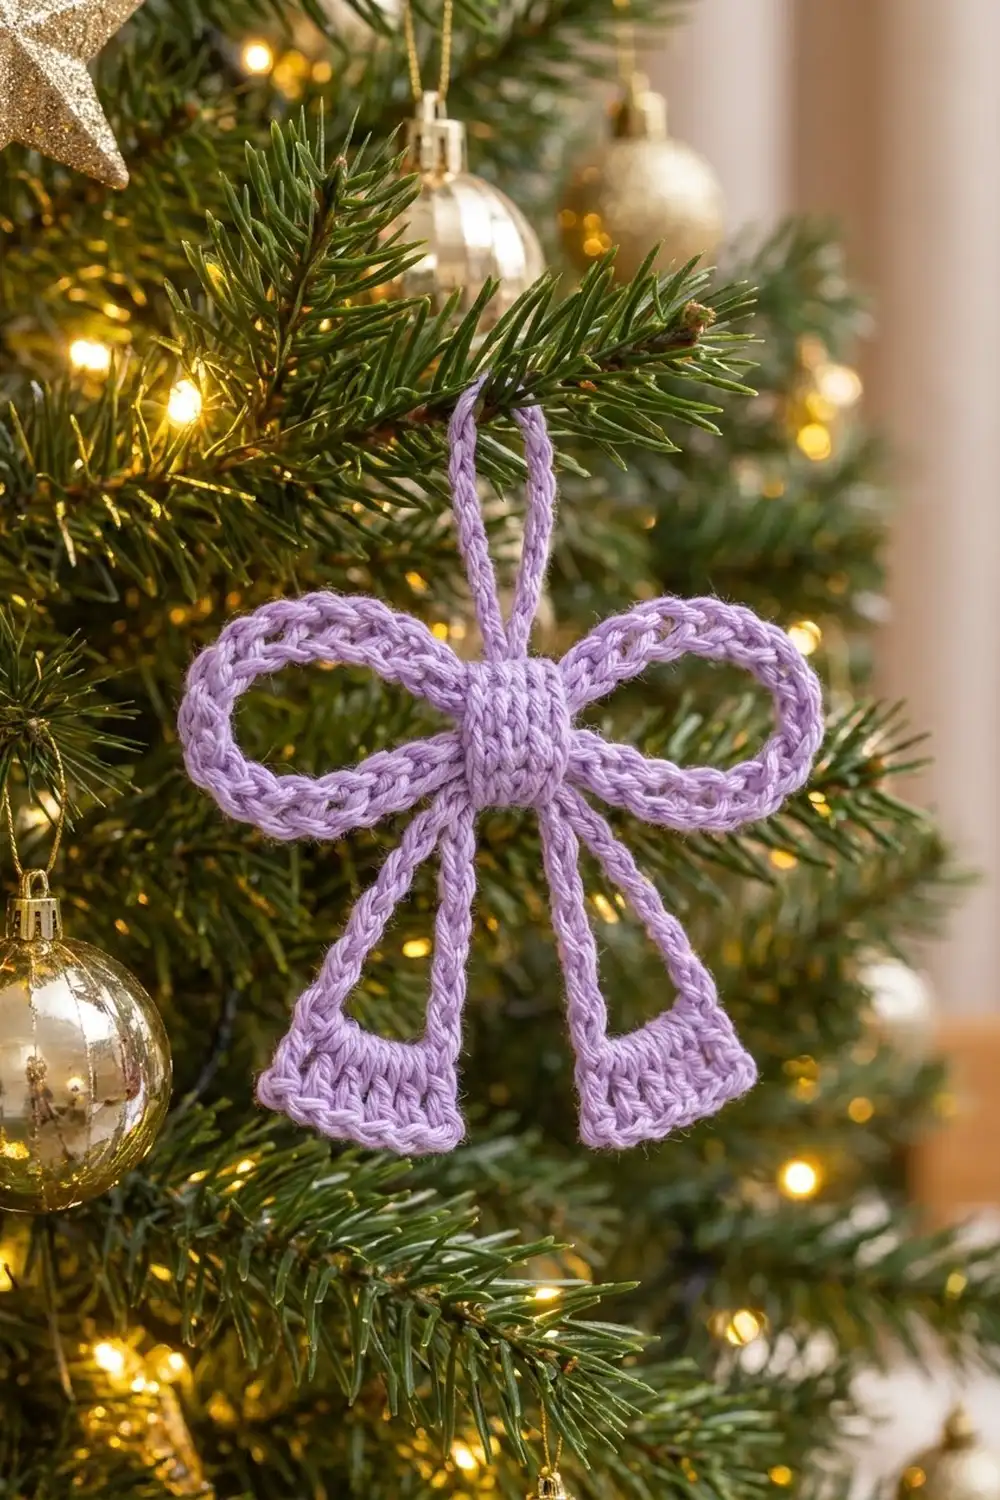
This bow is drawn in yarn instead of built from solid fabric. It has two airy loops, two open tails and a ribbed center knot. Because the bow is mostly outline, it looks light on the branch and the tree lights shine through it. A slim hanging loop sits on top, so the bow is ready to hang as soon as you weave in your ends.
The sample uses one soft lavender cotton. Every line of the bow is a chain with a round of single crochet worked into it, so each outline shows two neat braided edges side by side. The center knot is a tiny strip ribbed in the back loop only. Each tail ends in a small solid cuff that flares slightly at the bottom, like the end of a cut ribbon.
The pattern uses US crochet terms. The finished bow measures about 4.5 in (11.4 cm) wide and 4 in (10.2 cm) tall. The hanging loop rises another 1.6 in (4.1 cm) above the knot. The bow uses very little yarn and works up in one evening, so it is a good choice for gift toppers, tree ornaments and last-minute holiday makes.
The construction is simple:
– Make one chain ring for the bow loops and two chain rings for the tails.
– Add a cuff to the bottom of each tail.
– Wrap everything together with the ribbed knot.
– Finish with the hanging loop.
The result is one finished ornament.
Finished Size and Construction
- Finished size: 4.5 in (11.4 cm) wide x 4 in (10.2 cm) tall, plus a 1.6 in (4.1 cm) hanging loop
- Skill level: Easy
- Terminology: US crochet terms
- Yarn weight: Light worsted / DK cotton (CYC 3)
- Hook: 3.5 mm (US E-4)
- Number of pieces: 1 finished ornament, built from 5 small components (bow ring, 2 tails, knot, hanging loop)
- Layout: Loops to the left and right, tails angled down, knot in the center, hanger on top
- Wing size: each visible wing is about 1.85 in (4.7 cm) long x 1.3 in (3.3 cm) tall
- Size before border (cuffs): 4.5 in (11.4 cm) wide x 3.2 in (8.1 cm) tall
- Border depth: 0.8 in (2.0 cm) cuff on each tail
Materials
Choose a smooth, tightly plied cotton or cotton blend. Mercerized cotton shows the braided edges best and holds the open shapes without sagging. Avoid fuzzy or very soft acrylic: the outlines will look blurry and the loops may droop when the bow hangs.
- Lavender: 10 g, about 25 m (27 yd)
Tools:
- 3.5 mm (US E-4) crochet hook
- Tapestry needle
- Scissors
- 2 stitch markers
- Rust-proof pins and a foam blocking mat
- Spray bottle with water
- Optional: fabric stiffener or diluted white glue
The yarn quantity includes a generous margin for a gauge check and for long sewing tails. One 50 g ball makes four or five bows.
Abbreviations (US Terms)
- ch: chain
- sl st: slip stitch
- sc: single crochet
- dc: double crochet
- BLO: back loop only
- st(s): stitch(es)
- Rnd: round
Special technique (corded outline): Every line of this bow starts as a foundation chain joined into a ring. You then work one sc into each chain. The bottom of the chain shows on one edge and the tops of the sc show on the other. Together they make a double braid about 0.2 in (0.5 cm) wide. Work the sc into the back bump of each chain, or under one loop. Use the same method everywhere so all the outlines match.
Gauge and Checkpoints
Gauge: 10 sc x 10 rows = 2 in (5.1 cm). That is 5 sts and 5 rows per 1 in (2.5 cm). Each sc worked into a chain adds 0.2 in (0.5 cm) of outline length.
Chain at the same tension as your sc. A tight chain makes the outline cup and twist. A loose chain makes the outline wavy.
Make the bow ring first and use it as your test piece. It takes only a few minutes and tells you whether your tension is right before you make anything else. Check these measurements as you go:
- Bow ring: 56 sts, 11.2 in (28.4 cm) around. Laid flat as a doubled band, it measures 5.6 in (14.2 cm) long.
- Tail ring: 30 sts, 6 in (15.2 cm) around. Each side is 2.4 in (6.1 cm) and the base is 1.2 in (3.0 cm).
- Knot strip: 0.8 in (2.0 cm) wide x 2 in (5.1 cm) long.
- Cuff: 1.2 in (3.0 cm) across the top, 1.6 in (4.1 cm) across the bottom and 0.8 in (2.0 cm) deep.
If the bow ring lies longer than 5.6 in (14.2 cm) flat, switch to a 3.25 mm hook. If it lies shorter, switch to a 3.75 mm hook. Change the hook, not the stitch counts: the shapes depend on them.
Bow Ring (Make 1)
Ch 56. Check that the chain is not twisted, then sl st into the first ch to form a ring.
Rnd 1: Ch 1, sc in the same ch as the join and in each ch around, sl st to first sc. (56 sc)
Fasten off and leave a 6 in (15.2 cm) tail.
Shaping: Lay the ring flat as a doubled band 5.6 in (14.2 cm) long. Pinch the exact middle of the band. You now have two loops of 28 sts each, with 14 sts on top and 14 sts underneath in each loop. Each loop has a perimeter of 5.6 in (14.2 cm). Place a marker through both layers at the pinch.
Checkpoint: Each loop measures about 2.25 in (5.7 cm) from the pinch to the tip. About 0.4 in (1.0 cm) of that will be hidden under the knot, leaving a visible wing of 1.85 in (4.7 cm). Open each loop into an oval about 1.3 in (3.3 cm) tall.
Tails (Make 2)
Ch 30. Check that the chain is not twisted, then sl st into the first ch to form a ring.
Rnd 1: Ch 1, sc in the same ch as the join and in each ch around, sl st to first sc. (30 sc)
Fasten off and leave a 6 in (15.2 cm) tail.
Shaping: The join is the top point of the tail. Counting from the join:
– sts 1–12 form one side
– sts 13–18 form the base
– sts 19–30 form the other side
That is 12 + 6 + 12 = 30 sts. Place a marker in st 13 and another in st 18. These are the two bottom corners.
Pinch the top point and spread the base so the tail becomes a narrow open triangle. Each side is 2.4 in (6.1 cm) and the base is 1.2 in (3.0 cm) across. Both tails are identical. Simply flip one over so the joins sit at the back.
Border: Tail Cuffs
The border on this design is the small solid cuff at the bottom of each tail. You work it in rows directly into the 6 base sts of the tail ring. Add the cuffs now, while the tails are still loose and easy to turn.
Border gauge: 5 sts per 1 in (2.5 cm). One sc row is 0.2 in (0.5 cm) tall and one dc row is 0.4 in (1.0 cm) tall.
Hold the tail with the point facing away from you and the base along the top. Join yarn with a sl st in st 13, the first marked corner.
Row 1: Ch 1, sc in st 13 and in each st through st 18, turn. (6 sc) That is one sc per base st.
Row 2: Ch 3 (counts as dc), dc in same st, dc in each of next 4 sts, 2 dc in last st, turn. (8 dc = 6 worked 1-per-st + 2 increases)
Row 3: Ch 1, sc in each st across. (8 sc)
Fasten off and weave in the ends. Repeat on the second tail.
Why the math works: The base is 6 sts. At 5 sts per inch, 6 sts equals 1.2 in (3.0 cm), so Row 1 matches the base exactly and sits flat, with no ruffling or pulling. Row 2 adds exactly one stitch at each corner, bringing the bottom to 8 sts, or 1.6 in (4.1 cm). That gives the cuff its gentle bell flare. The dc posts in Row 2 create the vertical ribbed look, and Row 3 locks the bottom edge into a firm line. The cuff depth is 0.2 + 0.4 + 0.2 = 0.8 in (2.0 cm). Adding that to the 3.2 in (8.1 cm) body gives the finished height of 4 in (10.2 cm).
Assembly of the Bow Body
- Lay the bow ring flat with the pinch in the middle.
- Stack the top points of both tails behind the pinch, with the join sides facing back. Angle the first tail down and to the left and the second down and to the right. The cuffs should end up about 1.6 in (4.1 cm) apart.
- Use the yarn tails to sew 2–3 small stitches through the pinch and both tail tips. This holds the bundle in place while you add the knot.
Checkpoint: The bow now measures 4.5 in (11.4 cm) wide and 4 in (10.2 cm) tall from the top of the wings to the bottom of the cuffs.
Center Knot (Make 1)
Ch 5.
Row 1: Sc in 2nd ch from hook and in each ch across, turn. (4 sc)
Rows 2–10: Ch 1, sc in BLO of each st across, turn. (4 sc per row)
Fasten off and leave a 10 in (25.4 cm) tail. The strip is 4 sts wide (0.8 in / 2.0 cm) and 10 rows long (2 in / 5.1 cm). The BLO ridges run along the rows. When the strip wraps around the bow, the ridges stand vertically on the front, like gathered ribbon.
Attach:
1. Wrap the strip around the pinched center so it covers the tail tips.
2. Bring Row 1 and Row 10 together at the back and whipstitch them closed, matching the 4 sts of each row.
3. Take a few stitches through the bundle so the knot cannot slide.
From the front, the knot looks like a square about 0.8 in (2.0 cm) on each side.
Hanging Loop
Join yarn with a sl st at the center of the knot’s top edge, at the back seam.
Ch 16, sl st in the same st to form a loop.
Rnd 1: Ch 1, sc in each of the 16 ch, sl st to the base. (16 sc)
Fasten off and weave in the ends. The loop is 3.2 in (8.1 cm) around and rises 1.6 in (4.1 cm) above the knot. It has the same braided edges as the rest of the bow, so it reads as part of the design.
Final Blocking
- Mist the whole ornament with water until it is damp but not dripping.
- Lay it face up on the blocking mat.
- Pin the knot in the center first.
- Shape each wing into a smooth oval 1.85 in (4.7 cm) long and 1.3 in (3.3 cm) tall. Pin the tip and the top and bottom of each curve.
- Straighten the tail sides into clean lines. Pin each cuff flat, 1.6 in (4.1 cm) across the bottom.
- Pin the hanging loop into a narrow upright teardrop.
- For a firmer ornament, brush on a light coat of fabric stiffener now.
- Let the bow dry completely before you unpin it, usually overnight.
Final Quality-Control Checklist
- The bow ring has 56 sc and each tail ring has 30 sc.
- No ring is twisted, and the braided edges lie flat all the way around.
- The two wings are the same size to within 0.1 in (0.3 cm).
- The tails angle symmetrically, and both cuffs have 8 sts at the bottom.
- The knot shows vertical ridges and fully covers the tail tips.
- The whipstitch seam is at the back.
- The hanging loop is centered over the knot.
- The bow is 4.5 in (11.4 cm) wide and 4 in (10.2 cm) tall.
- All ends are woven through solid stitches and trimmed close.
Troubleshooting
The outline curls or twists. The chain was twisted when you joined it. Next time, check the chain before you work the first sc. Firm pinning during blocking usually fixes a mild curl.
The wings look lopsided. The pinch is off center. Count 28 sts on each side of the pinch and reposition it before you sew.
The cuff ruffles. Your dc are looser than your sc. Work Row 2 with a 3.25 mm hook.
The cuff pulls the tail inward. One of the corner increases is missing. Row 2 must have 8 dc.
The knot is loose or slides. Your rows are taller than gauge. Remove Row 10 and seam the strip again.
The ornament droops when it hangs. Use mercerized cotton, or stiffen the bow lightly.
The ends show through the open lines. Weave the ends inside the knot or the cuffs, not along the thin outlines.
Care
Hand wash in cool water with mild soap, press out the water in a towel and reshape the bow flat to dry. If you stiffened the bow, spot-clean it only.
Final Notes
The whole ornament runs on one gauge: 5 sts per inch.
- The 56-st bow ring folds to 5.6 in (14.2 cm) and pinches into two 28-st loops.
- The 30-st tails have 2.4 in (6.1 cm) sides and a 1.2 in (3.0 cm) base.
- The 3-row cuffs flare to 1.6 in (4.1 cm) and add 0.8 in (2.0 cm) of height.
- The 4-st x 10-row knot is 0.8 in (2.0 cm) by 2 in (5.1 cm) and wraps the center snugly.
Together they give a bow 4.5 in (11.4 cm) wide and 4 in (10.2 cm) tall with a 1.6 in (4.1 cm) hanger. Make one in lavender, then try a set in your favorite holiday shades.
Happy crocheting!