

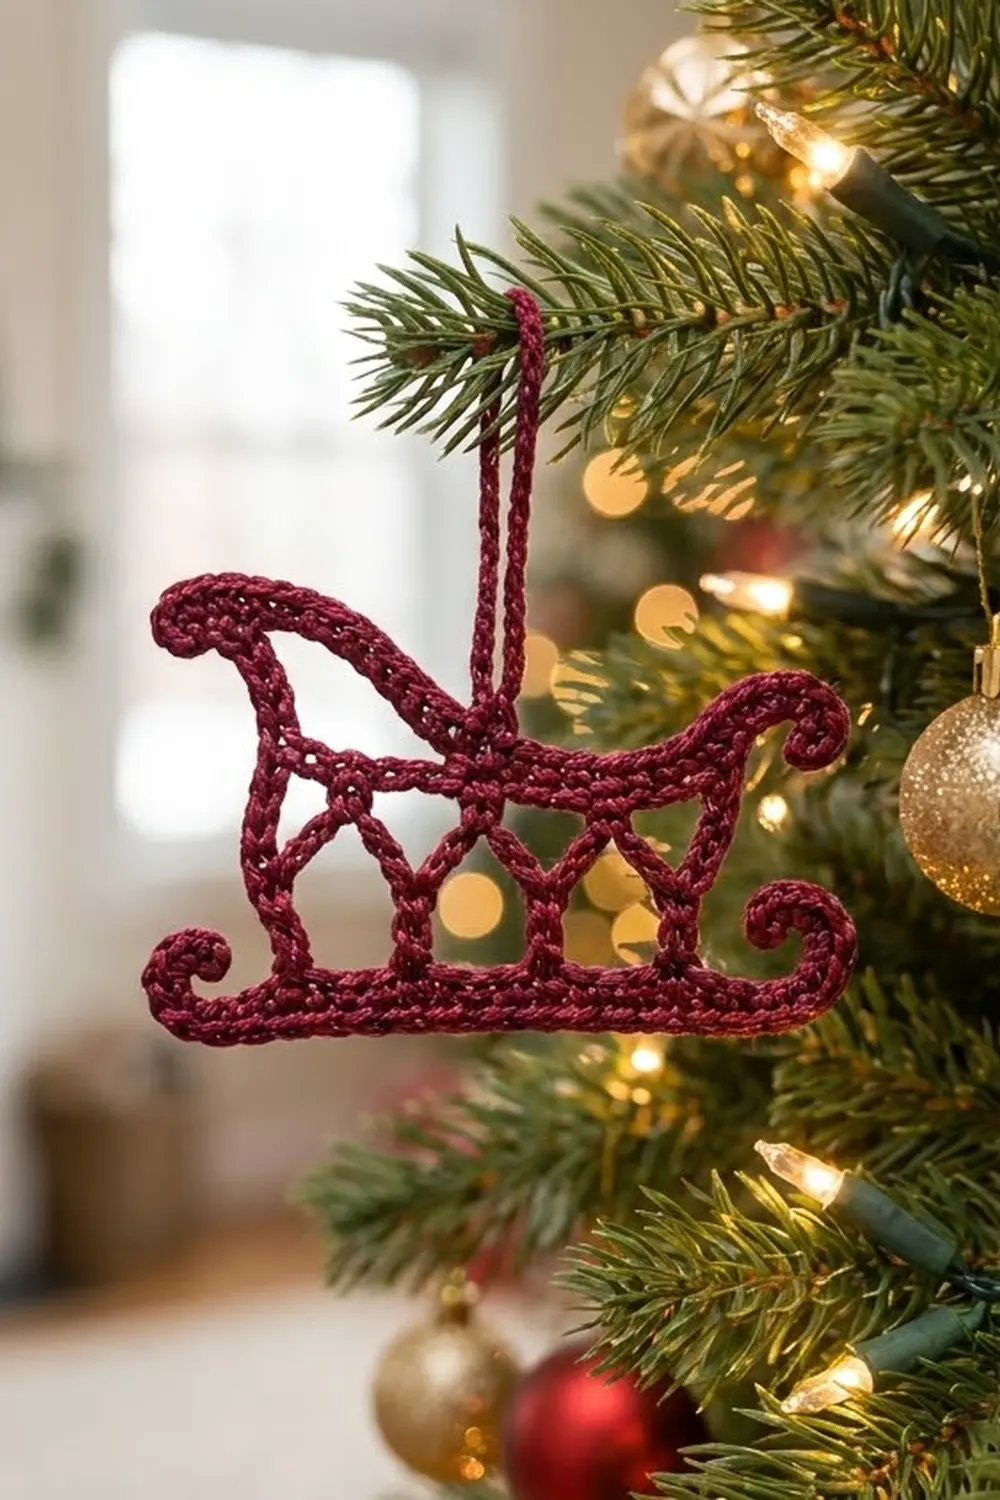
This little sleigh is a single flat ornament worked in one deep wine-red color. It has a tall scrolled backrest, a low curled front, two scrolled runner tips and an open lattice body. Every line reads as a firm, rope-like cord, so the ornament holds its shape on a tree branch, on a gift tag or hung in a window.
The design uses sport-weight mercerized cotton and a small hook. That gives crisp stitch definition and a slight sheen. The pattern uses US crochet terms throughout.
The finished sleigh measures about 4.75 in (12.1 cm) wide and 2.75 in (7.0 cm) tall, not counting the hanging loop. The loop rises about 1.25 in (3.2 cm) above the top of the seat rail.
Construction is simple:
1. Crochet the runner in rows.
2. Add a lattice row of posts and V-shaped struts.
3. Close the body with a two-row seat rail.
4. Chain out the backrest and front curl, then add the runner scrolls.
5. Work an outline border around the silhouette and finish with a hanging loop.
Finished Size and Construction
- Finished size: 4.75 in (12.1 cm) wide x 2.75 in (7.0 cm) tall, not counting the loop
- Skill level: Intermediate
- Terminology: US crochet terms
- Yarn weight: Sport (#2 fine), mercerized cotton
- Hook: 2.75 mm (C-2)
- Number of pieces: 1 (single motif, no joining)
- Layout: One flat sleigh silhouette with a hanging loop at top center
- Piece size before border: 4.75 in (12.1 cm) x 2.65 in (6.7 cm)
- Border depth: about 0.1 in (0.3 cm), added to the bottom edge only. The width does not change because the scrolls are the widest points and are not bordered.
Materials
Choose a smooth, tightly plied mercerized cotton. It shows the lattice clearly and blocks to a firm finish. Avoid fuzzy or very soft yarns, which blur the open shapes and let the curls droop.
- Wine red / burgundy sport-weight cotton: 8 g, about 24 m (26 yd)
Tools:
- 2.75 mm (C-2) crochet hook
- Tapestry needle
- 2 locking stitch markers
- Scissors
- Blocking mat and rust-proof pins
- Spray bottle with water; optional spray starch
The yarn amount includes about 25 percent extra for the gauge check, tails and any reworking.
Abbreviations (US Terms)
- ch – chain
- sl st – slip stitch
- sc – single crochet
- tr – treble crochet
- sk – skip
- st(s) – stitch(es)
- sp – space
- RS – right side
Special technique – Scroll: Chain the stated number, then work back along the chain with 2 sc in several chains in a row. Adding stitches along one edge makes that edge longer than the chain edge, so the strip coils into a spiral on its own. You then shape the coil during blocking.
Gauge and Checkpoints
Gauge: 12 sc and 12 rows = 2 in (5.1 cm) in sc rows.
Treat your first sleigh as the test piece. The runner (Rows 1 and 2) doubles as your gauge swatch, so you don’t need a separate square.
Checkpoints:
- After Row 2: runner is 4.2 in (10.7 cm) long and about 0.3 in (0.8 cm) tall.
- After Row 3: piece is about 0.8 in (2.0 cm) tall, measured from the runner bottom to the post tops.
- After Row 5: piece is about 1.1 in (2.8 cm) tall and still 4.2 in (10.7 cm) wide.
- After shaping and scrolls: 4.75 in (12.1 cm) x 2.65 in (6.7 cm).
- After border: 4.75 in (12.1 cm) x 2.75 in (7.0 cm).
If the runner is longer than 4.4 in (11.2 cm), go down to a 2.5 mm hook. If it is shorter than 4.0 in (10.2 cm), go up to a 3.0 mm hook. Restart from Row 1 and check again. Use the hook size you settle on for the whole ornament.
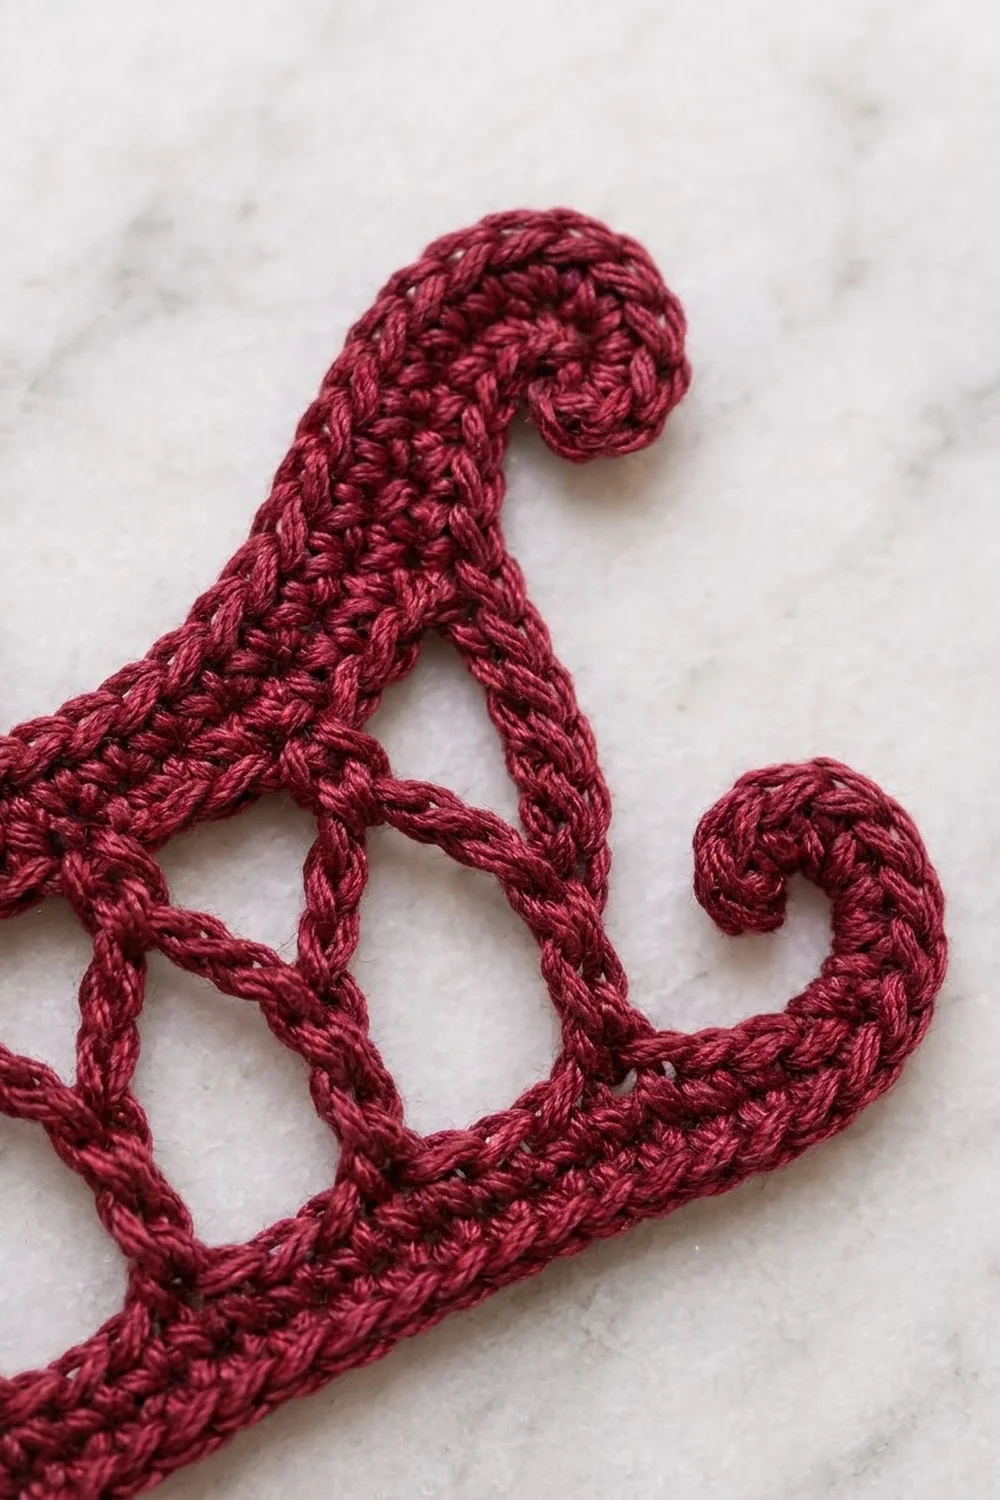
Runner
Leave a 6 in (15.2 cm) tail. You’ll use it later to tack down the front runner scroll.
Row 1: Ch 26, sc in 2nd ch from hook and in each ch across. (25 sc)
Row 2: Ch 1, turn, sc in each st across. (25 sc)
Row 2 ends at the front of the sleigh. Place a marker in this last stitch and label it “front.” The opposite end is the back.
Checkpoint: 4.2 in (10.7 cm) x 0.3 in (0.8 cm).
Lattice Row
This row makes five upright posts. Between each pair of posts, two chain struts dip down to one anchor stitch on the runner and form a V. Each bay shows a downward-pointing triangle with a smaller triangle on each side.
Row 3: Ch 4 (counts as first tr), *ch 4, sk 2 sts, sc in next st, ch 4, sk 2 sts, tr in next st; rep from * 3 more times. (5 tr, 4 sc, 8 ch-4 sps)
Check the placement:
– The posts sit in runner sts 1, 7, 13, 19 and 25.
– The V anchors sit in sts 4, 10, 16 and 22.
– Each 6-stitch bay is identical, and the last post lands exactly on the last stitch.
Pull each ch-4 strut snug but not tight. The V should touch the runner without puckering it.
Seat Rail
Row 4: Ch 1, turn, sc in first tr, *ch 5, sc in next tr; rep from * 3 more times, working the last sc in the top of the turning ch-4. (5 sc, 4 ch-5 sps)
Row 5: Ch 1, turn, sc in first sc, *5 sc in next ch-5 sp, sc in next sc; rep from * 3 more times. (25 sc)
The math: 1 sc + (4 bays x 6 sc) = 25 sc. That matches the runner exactly, so the rail and runner run parallel. The post tops line up with rail sts 1, 7, 13, 19 and 25.
Row 5 ends at the back. Do not fasten off. From here on, the rail stitches are numbered from the back end: B1 is the back-end stitch and B25 is the front-end stitch.
Checkpoint: 4.2 in (10.7 cm) wide x 1.1 in (2.8 cm) tall.
Backrest
The backrest is a closed chain outline. It rises from the back end of the rail, ends in a forward-facing curl, and comes back down to land on the second post.
- Outer edge: From the last sc of Row 5 (B1), ch 14.
- Top curl: Ch 9. Sl st in 2nd ch from hook, 2 sc in each of next 7 ch. (15 sts) You are now at the top of the ch-14.
- Inner edge: Ch 10, sl st in rail st B7, directly above the second post.
Fasten off and weave in the tail. The outer ch-14 is longer than the inner ch-10, so the backrest sweeps up and leans forward. It rises about 1.5 in (3.8 cm) above the rail.
Front Curl
With RS facing, join yarn with sl st in B25 (the front end of the rail).
Ch 13. Sl st in 2nd ch from hook, 2 sc in each of next 5 ch, sc in each of last 6 ch, sl st in B25. (17 sts: 1 sl st + 10 sc + 6 sc)
The 6 plain sc form a short, straight neck. The 10 increase sc coil into the curl. Fasten off.
Runner Scrolls (make 2)
With RS facing, join yarn with sl st in the end stitch of Row 2 at the back.
Ch 9. Sl st in 2nd ch from hook, 2 sc in each of next 5 ch, sc in each of last 2 ch, sl st in same end st. (13 sts: 1 sl st + 10 sc + 2 sc)
Fasten off, leaving a 6 in (15.2 cm) tail. Repeat at the front end of the runner.
Coil each scroll upward and inward, with the increased edge on the outside. Use the tail to tack the tip lightly to the side of the scroll, then weave it in. Use the starting tail at the front to secure the front runner scroll the same way.
Checkpoint: 4.75 in (12.1 cm) x 2.65 in (6.7 cm). The two runner scrolls are now the widest points.
Border
The border turns every chain line into a firm cord and gives the bottom of the runner a clean, rounded edge.
Border gauge: 6 sc = 1 in (2.5 cm) along straight edges, the same as the body.
Round 1: With RS facing, join yarn with sl st in the front-most foundation ch on the underside of the runner.
- Runner underside: 25 sc, 1 in each foundation ch, working toward the back.
- Back side edge: 2 sc in the row ends of Rows 1–2 (working beside the scroll base), 3 sc around the end tr post, 2 sc in the row ends of Rows 4–5. (7 sc)
- Backrest outer edge: 14 sc, 1 in each ch of the ch-14. Sl st at the base of the curl to pass it.
- Backrest inner edge: 10 sc, 1 in each ch of the ch-10.
- Rail top: 1 sc in each of B8–B25, working beside the front curl base in B25. (18 sc)
- Front side edge: 2 sc in the row ends of Rows 4–5, 3 sc around the end tr post, 2 sc in the row ends of Rows 1–2. (7 sc)
Sl st in first sc to join. (81 sc)
Count check: 25 + 7 + 14 + 10 + 18 + 7 = 81.
Round 2: Sl st in each sc around, passing the curls without working into them. (81 sl sts) Join and fasten off.
Why the math works:
– Every foundation chain, every backrest chain and every open rail stitch gets exactly 1 sc.
– Each sc row end gets 1 sc.
– Each tr post is about as tall as 2.5 sc rows, so it gets 3 sc.
– Nothing is added at the corners, so the edges stay flat with no ruffling or cupping.
– The slip-stitch round only firms the edge and adds no stitches.
Hanging Loop
Join yarn with sl st in the border sc above rail st B13, at the center of the seat.
Ch 16, sl st in the same sc. Work 22 sc into the loop, sl st in the same sc. Fasten off and weave in.
The loop rises about 1.25 in (3.2 cm) above the rail top, about level with the backrest curl.
Final Blocking
- Weave in all tails along the cords, never across open spaces.
- Spray the sleigh evenly until damp, not dripping.
- Lay it RS up on the blocking mat.
- Pin the runner straight at 4.2 in (10.7 cm) between the scroll bases.
- Pin each post upright and each V strut into a clean point.
- Shape the backrest: pin the outer edge in a smooth sweep and turn the curl to face forward.
- Coil the front curl and both runner scrolls into tight, round spirals and pin through their centers.
- Pin the loop into a narrow teardrop.
- Check the overall size: 4.75 in (12.1 cm) x 2.75 in (7.0 cm).
- Mist with spray starch if you want extra stiffness, then let it dry completely before unpinning.
Final Quality-Control Checklist
- Runner and rail both have 25 sc.
- Five posts stand upright and evenly spaced.
- All four V struts meet the runner at a clean point.
- The backrest curl faces forward, and the front curl and runner scrolls are tightly coiled.
- Border Round 1 has 81 sc with no extra corner stitches.
- No tails show on the front.
- The loop is centered above B13 and the sleigh hangs level.
- Final size is 4.75 in (12.1 cm) x 2.75 in (7.0 cm).
Troubleshooting
The runner curves up at the ends. Your foundation chain is tighter than your stitches. Make the chain with a hook one size larger, then switch back for Row 1.
The V struts sag below the runner. The ch-4 struts are too loose. Chain more firmly, or work ch 3 if your chains are very long.
The rail ripples. The 5 sc in each ch-5 space are too many for your tension. Work the ch-5 a little looser rather than changing the count.
The backrest flops over. Block it with starch, and make sure the inner ch-10 is not longer than the outer ch-14.
A scroll won’t coil. Check that you worked 2 sc in each increase chain. Then dampen it and pin it tightly around a pin.
The ornament hangs crooked. Move the loop one stitch toward the backrest. The tall backrest makes the back slightly heavier.
Care
Hand wash in cool water with mild soap, press out the water in a towel, and reshape flat to dry. Starch again if needed, and store flat so the curls keep their shape.
Final Notes
The whole ornament rests on one chain of measurements:
– The runner sets the width at 4.2 in (10.7 cm).
– The lattice and rail keep the same 25-stitch count and bring the height to 1.1 in (2.8 cm).
– The backrest, curls and scrolls take the piece to 4.75 in (12.1 cm) x 2.65 in (6.7 cm).
– The border adds 0.1 in (0.3 cm) at the bottom, for a final size of 4.75 in (12.1 cm) x 2.75 in (7.0 cm).
Check gauge at the runner, count every row, and block with care. One sleigh takes about an hour, so it’s easy to make enough to fill a whole tree.
Happy crocheting!