

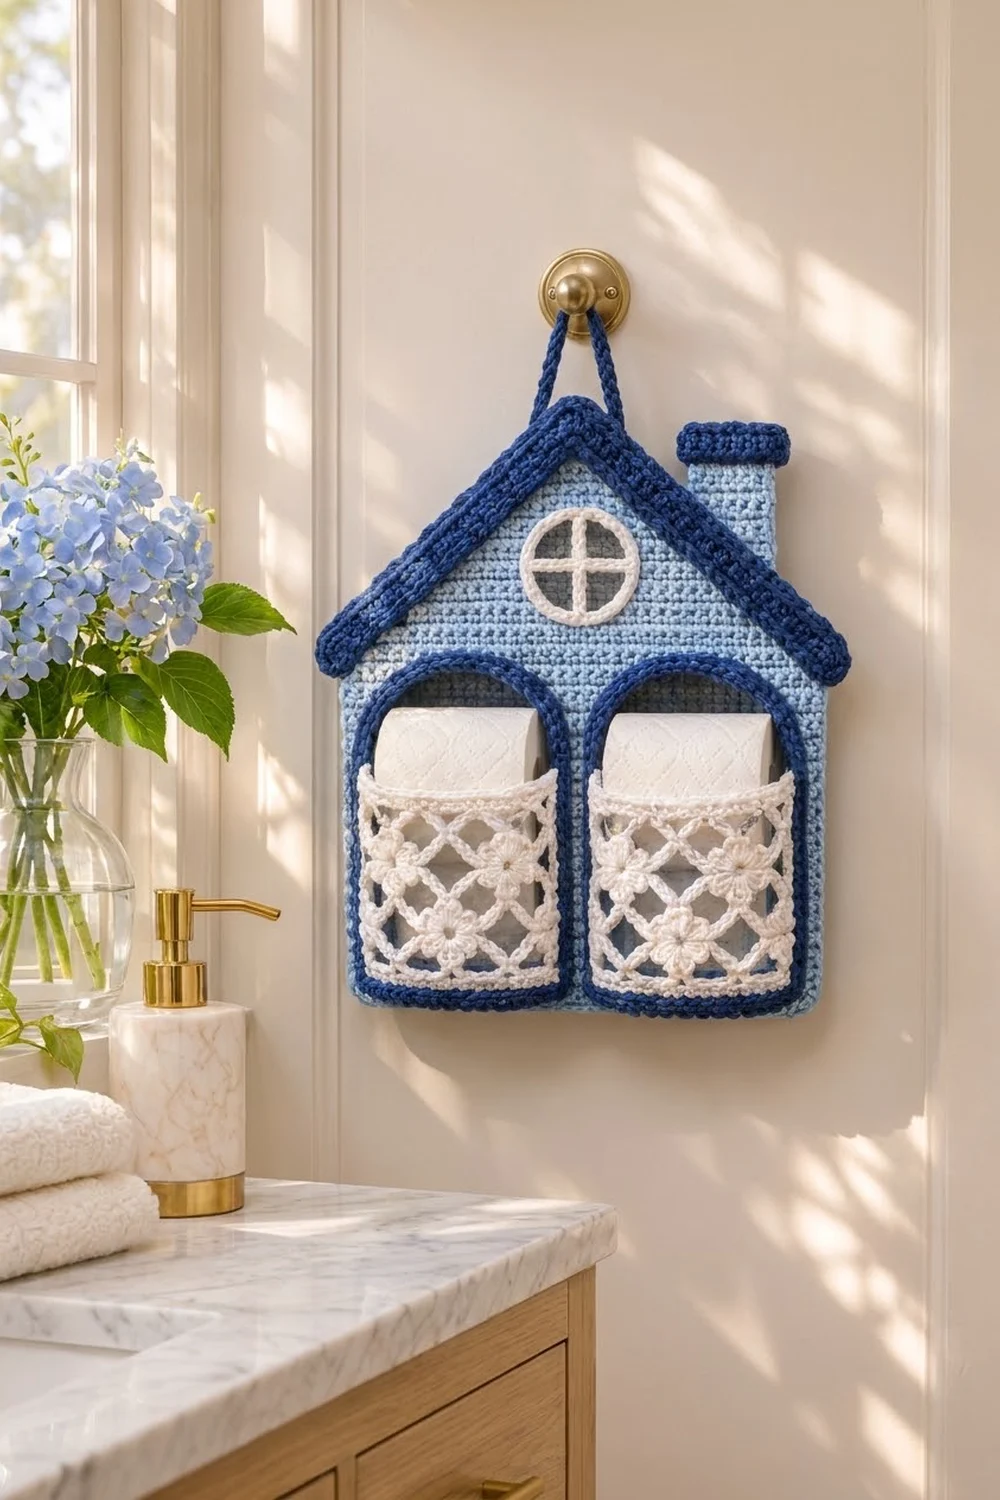
This little cottage hangs on a hook and holds two spare toilet rolls in its lace front pockets. The house is light blue with a ridged navy roofline, a small chimney, and a round cream window with a cross. Below the window, two navy arched doorways frame the cream pockets.
The colors are cornflower blue, deep navy, and cream, which suit a white or pale bathroom. The lace is a diamond mesh with small five-petal flowers sewn at the mesh points.
The pattern uses US crochet terms. The finished holder is 12.5 in (31.8 cm) wide at the walls, about 13.5 in (34.3 cm) wide across the eaves, and 14.8 in (37.6 cm) tall, not counting the hanging loop.
You’ll crochet the back panel in rows and add the edging and roof band directly onto it. Then you’ll make the small pieces and sew them on. Each pocket is a lace front joined to a navy gusset strip, which gives it real depth for a roll.
Finished Size and Construction
- Finished size: 12.5 in (31.8 cm) wide x 14.8 in (37.6 cm) tall, without the loop
- Skill level: Intermediate
- Terminology: US
- Yarn weight: Worsted (#4) cotton
- Hook: 5 mm (H-8)
- Number of pieces: 26: 1 back panel, 1 chimney, 1 window, 2 arch frames, 2 lace pocket fronts, 16 flowers, 2 gussets, 1 hanging cord. The edging and roof band are worked onto the panel.
- Layout: two pockets side by side along the bottom of the walls, the window centered in the gable, and the chimney on the right slope
- Pocket size: 5.75 in (14.6 cm) wide x 5 in (12.7 cm) tall x 3 in (7.6 cm) deep
- Panel size before border: 12 in (30.5 cm) x 13.8 in (35.1 cm)
- Border depth: 0.2 in (0.5 cm) wall edging; 0.8 in (2.0 cm) roof band
Materials
Use a smooth worsted cotton or cotton blend. Cotton holds its shape on a wall and copes well with bathroom humidity. The amounts below assume a yarn with about 80 m per 50 g.
- Light blue: 140 g / 225 m (panel, chimney, wall edging)
- Navy: 130 g / 210 m (roof band, chimney cap, arch frames, gussets, pocket joins, cord)
- Cream: 60 g / 95 m (pocket fronts, flowers, window)
Each amount includes a margin of about 15%.
Tools: 5 mm (H-8) hook, tapestry needle, stitch markers, rust-proof pins, tape measure, blocking mat, spray bottle.
Abbreviations (US Terms)
- ch – chain
- sl st – slip stitch
- sc – single crochet
- dc – double crochet
- sc2tog – single crochet 2 together
- BLO – back loop only
- st(s) – stitch(es)
- sp – space
- RS / WS – right side / wrong side
Special stitch – Petal: work (sl st, ch 2, 2 dc, ch 2, sl st) all in the same stitch.
Gauge and Checkpoints
Sc gauge: 16 sc x 20 rows = 4 in (10.2 cm).
Mesh gauge: 5 ch-5 loops = 5.5 in (14.0 cm) wide; 10 mesh rows = 4.75 in (12.1 cm) tall.
Make one lace pocket front, including its trim row, before anything else. It should measure 5.75 in (14.6 cm) x 5 in (12.7 cm).
Measure at these checkpoints:
- Panel after Row 45: 12 in (30.5 cm) x 9 in (22.9 cm).
- Panel after Row 69: 13.8 in (35.1 cm) tall.
- After the wall edging: 12.5 in (31.8 cm) wide.
- After the roof band: 14.8 in (37.6 cm) tall.
If your piece is too big, go down one hook size. If it’s too small, go up one size. Don’t change the stitch counts, because every join depends on matching counts.
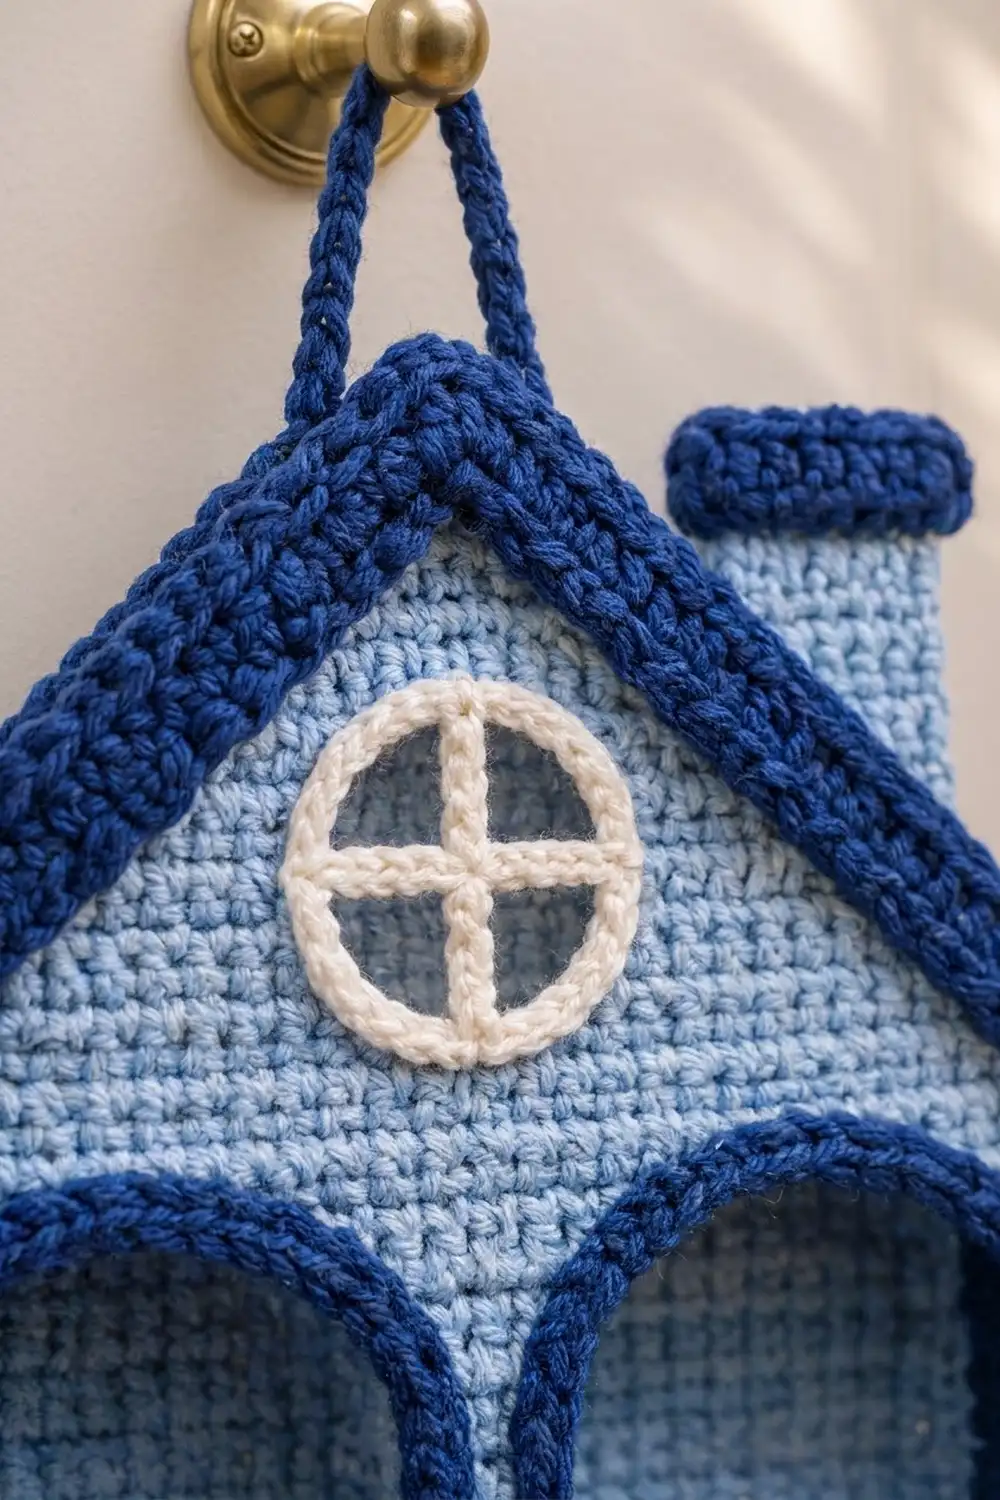
Back Panel (light blue, make 1)
Ch 1 at the start of a row never counts as a stitch.
Row 1 (RS): Ch 49, sc in 2nd ch from hook and in each ch across. (48 sts)
Rows 2–45: Ch 1, turn, sc in each st across. (48 sts)
Checkpoint: 12 in (30.5 cm) x 9 in (22.9 cm).
Rows 46–68 (gable): Ch 1, turn, sc2tog, sc to last 2 sts, sc2tog. Each row has 2 fewer sts than the row before: Row 46 has 46 sts, and Row 68 has 2 sts.
Row 69: Ch 1, turn, sc2tog. (1 st) Fasten off.
The gable is 24 rows, or 4.8 in (12.2 cm), tall. Each slope has 24 row-ends.
Chimney (make 1)
Row 1: With light blue, ch 9, sc in 2nd ch from hook and in each ch across. (8 sts)
Rows 2–10: Ch 1, turn, sc across. (8 sts) Fasten off light blue.
Row 11: Join navy, ch 1, 2 sc in first st, sc in next 6 sts, 2 sc in last st. (10 sts)
Row 12: Ch 1, turn, sc across. (10 sts) Fasten off.
The chimney is 2 in (5.1 cm) wide x 2.4 in (6.1 cm) tall, and the cap is 2.5 in (6.4 cm) wide.
Round Window (cream, make 1)
Foundation: Ch 20, then sl st to the first ch to form a ring. Make sure the chain isn’t twisted.
Rnd 1: Ch 1, work 32 sc into the ring, covering the chain. Sl st to the first sc. (32 sts)
Rnd 2: Ch 1, sc in next 7 sts, 2 sc in next st 4 times. Sl st to the first sc. (36 sts) Fasten off.
Cross bars: Number the Rnd 1 stitches 1 to 32.
- Join cream in st 1, ch 6, and sl st in st 17. Sl st back along all 6 ch to thicken the bar, then fasten off.
- Join cream in st 9, ch 3, sl st around the center of the first bar, ch 3, and sl st in st 25. Sl st back along the 3 ch, around the center, and along the other 3 ch. Fasten off.
The window is about 2.75 in (7.0 cm) across, with four open panes.
Arch Frames (navy, make 2)
Row 1: Ch 71, sc in 2nd ch from hook and in each ch across. (70 sts: 22-st leg + 26-st curve + 22-st leg)
Row 2: Ch 1, turn, sc in next 22 sts, 2 sc in next st, sc in next 3 sts 6 times, sc in next 2 sts, sc in last 22 sts. (76 sts: 22 + 32 + 22)
Row 3: Ch 1, turn, sc across. (76 sts) Fasten off.
Steam the strip into an arch, with Row 1 on the inside edge. Each frame is 5.25 in (13.3 cm) wide and about 8.1 in (20.6 cm) tall, and the strip is 0.6 in (1.5 cm) wide.
Lace Pocket Fronts (cream, make 2)
Row 1 (RS): Ch 22, sc in 2nd ch from hook, ch 5, skip 3 ch, sc in next ch 5 times. (6 sc, 5 loops)
Row 2: Ch 5 (counts as dc + ch 2), turn, sc in first loop, ch 5, sc in next loop 4 times, ch 2, dc in last sc. (5 sc, 4 loops, 2 ch-2 sps)
Row 3: Ch 1, turn, sc in dc, ch 5, sc in next loop 4 times, ch 5, sc in 3rd ch of turning ch. (6 sc, 5 loops)
Rows 4–10: Repeat Rows 2–3 three times, then work Row 2 once more. You’ll end on Row 10.
Row 11 (trim, conversion row): Ch 1, turn, sc in dc, 2 sc in ch-2 sp, sc in next sc, 3 sc in next loop, sc in next sc 4 times, 2 sc in ch-2 sp, sc in 3rd ch of turning ch. Count: 7 sts worked into existing dc, sc, and turning ch + 16 sts worked into spaces = 23 sts.
Edging (3 sides): Don’t turn. Ch 1 and work down the first side:
- First side: 1 sc in the Row 11 row-end, 2 sc in each row-end of Rows 10–2, and 1 sc in the Row 1 row-end. (20 sc)
- Bottom: 2 sc in the first foundation ch, sc in the next 19 ch, 2 sc in the last ch. (23 sc)
- Second side: Work up to match the first side. (20 sc)
Total: 63 sts. Fasten off. The finished front is 5.75 in (14.6 cm) x 5 in (12.7 cm).
Flowers (cream, make 16)
Rnd 1: Magic ring, ch 1, 5 sc in the ring, sl st to the first sc. (5 sts)
Rnd 2: Work a Petal in each st. (5 petals) Fasten off, leaving a tail for sewing.
Each flower is 1 in (2.5 cm) across. Sew 8 flowers onto each pocket front, centered over the sc knots, in a staggered 3-2-3 layout:
- Row 2: knots 1, 3, and 5
- Row 6: knots 2 and 4
- Row 10: knots 1, 3, and 5
Gussets (navy, make 2)
Row 1: Ch 64, sc in 2nd ch from hook and in each ch across. (63 sts)
Rows 2–15: Ch 1, turn, sc across. (63 sts) Fasten off.
Each gusset is 15.75 in (40.0 cm) x 3 in (7.6 cm). Place markers in sts 21 and 43 to mark the bottom corners. This divides the gusset into 20 + 23 + 20 sts.
Hanging Cord (navy, make 1)
Ch 41, then sl st in the back bump of the 2nd ch from the hook and in each ch across. (40 sts; 10 in / 25.4 cm long) Fasten off.
Make All Pieces
- Light blue: 1 back panel, 1 chimney body
- Navy: 2 arch frames, 2 gussets, 1 cord, 1 chimney cap
- Cream: 2 pocket fronts, 16 flowers, 1 window
Layout on the RS of the panel:
            [chimney]
        /  roof band  \
       /   ( window )   \
      |  ____     ____   |
      | /arch\   /arch\  |
      ||pocket| |pocket| |
      |______________________|
 0.25 | 5.75 | 0.5 | 5.75 | 0.25 in
Joining
Work the Border on the panel first, then join the pieces in this order.
- Pocket to gusset: Hold a lace front and the Row 15 edge of its gusset with WS together. Join navy and sc through both layers, one stitch to one stitch: 20 down the side, 23 across the bottom, and 20 up the other side (63 sts). The markers should line up with the lace corners. This seam makes the navy rim around the pocket.
- Arch frames: Pin each frame with its leg ends at Row 1. The outer edge should be 0.5 in (1.3 cm) from the wall edge, with a 1 in (2.5 cm) gap between the two frames. Whipstitch both edges in navy.
- Pockets to panel: Pin each gusset’s foundation edge over its frame in a U shape, 5.75 in (14.6 cm) x 5 in (12.7 cm). Leave 0.25 in (0.6 cm) from the wall edge and 0.5 in (1.3 cm) between the pockets. Whipstitch one gusset stitch to each panel stitch or row.
- Window: Center it over Row 55 and sew around its outer edge.
- Chimney: Sew it to the WS of the panel along the right slope, so it rises 1.5 in (3.8 cm) above the roof band.
- Cord: Fold the cord and sew both ends to the WS at the peak, 0.75 in (1.9 cm) apart. This gives a loop about 4.5 in (11.4 cm) tall.
Keep your sewing tension snug and even. Loose seams let the pockets sag, and tight seams make the panel pucker.
Size checkpoint: The two pockets together span 12 in (30.5 cm), leaving a 0.25 in (0.6 cm) margin on each side.
Border
The border uses the main sc gauge of 4 sc per inch.
Wall edging (light blue): With RS facing, join at the top of the left wall (Row 45) and ch 1.
- Left side: sc in next 4 row-ends, skip 1 row-end 9 times. (36 sc)
- Bottom: 3 sc in the corner foundation ch, sc in the next 46 ch, 3 sc in the last ch.
- Right side: Work up to match the left side. (36 sc)
Total: 124 sts. Fasten off.
Why it works: 45 rows measure 9 in, and 36 sc also measure 9 in, so the sides lie flat. Across the bottom, the 48 stitches plus 1 new stitch at each corner give 50 sts, which is 12.5 in (31.8 cm).
Roof band (navy):
Row 1: With RS facing, join at the left Row 46 row-end. Sc up the slope, working 1 sc in each row-end and 2 sc in every 4th row-end (30 sc). Work 3 sc in the Row 69 stitch. Work down the right slope to match (30 sc). (63 sts)
Row 2: Ch 1, turn. Working in BLO: 2 sc in first st, sc in next 30 sts, 3 sc in center st, sc in next 30 sts, 2 sc in last st. (67 sts)
Row 3: Ch 1, turn. BLO: 2 sc in first st, sc in next 32 sts, 3 sc in center st, sc in next 32 sts, 2 sc in last st. (71 sts)
Row 4: Ch 1, turn. BLO: 2 sc in first st, sc in next 34 sts, 3 sc in center st, sc in next 34 sts, 2 sc in last st. (75 sts) Fasten off.
Why it works: each slope is about 7.6 in (19.3 cm) long, which needs about 30 sc at this gauge. The 3 sc at the peak keep the point sharp. The 2 sc at each end push the eaves out past the walls, and working in BLO forms the ridges.
Final Blocking
- Mist the whole piece lightly with water.
- Pin it RS up to 12.5 in (31.8 cm) x 14.8 in (37.6 cm).
- Pin the slopes straight and the peak sharp.
- Stuff each pocket with a rolled towel to set the 3 in (7.6 cm) depth.
- Open up the lace diamonds and shape the petals with your fingers.
- Let it dry completely before unpinning.
Final Quality-Control Checklist
- Panel is 48 sts wide and ends in 1 st at Row 69
- Wall edging has 124 sts, and the roof band ends with 75 sts
- Each pocket front is 23 sts wide and has a 63-st edging
- Each gusset has 63 sts and is joined one stitch to one stitch
- Each pocket has 8 flowers in a 3-2-3 layout
- Window cross is centered and the panes are even
- Pockets are level and 0.5 in (1.3 cm) apart
- All ends are woven in
Troubleshooting
- Gable slopes curve inward: Your decreases are too tight. Work the sc2tog more loosely.
- Roof band ripples: There are too many stitches. Increase in every 5th row-end instead.
- Roof band pulls: There are too few stitches. Add 1 sc per slope.
- Frame won’t curve: Steam it, then pin it in place before sewing.
- Lace front is too wide: Tighten the loops, or use a smaller hook for the lace only.
- Pockets sag: Re-sew the gussets with closer whipstitches.
Care
Hand wash in cool water with mild soap. Roll it in a towel to press out the water, then dry flat, reshaping the pockets while damp.
Final Notes
The measurements build on each other, so check each stage as you go. At 16 sc = 4 in (10.2 cm), the 48-st panel is 12 in (30.5 cm) wide, and its 69 rows are 13.8 in (35.1 cm) tall. The edging brings the width to 12.5 in (31.8 cm), and the roof band brings the height to 14.8 in (37.6 cm). Two 5.75 in (14.6 cm) pockets with 63-st edges then fit across the wall with even margins.
Happy crocheting!