

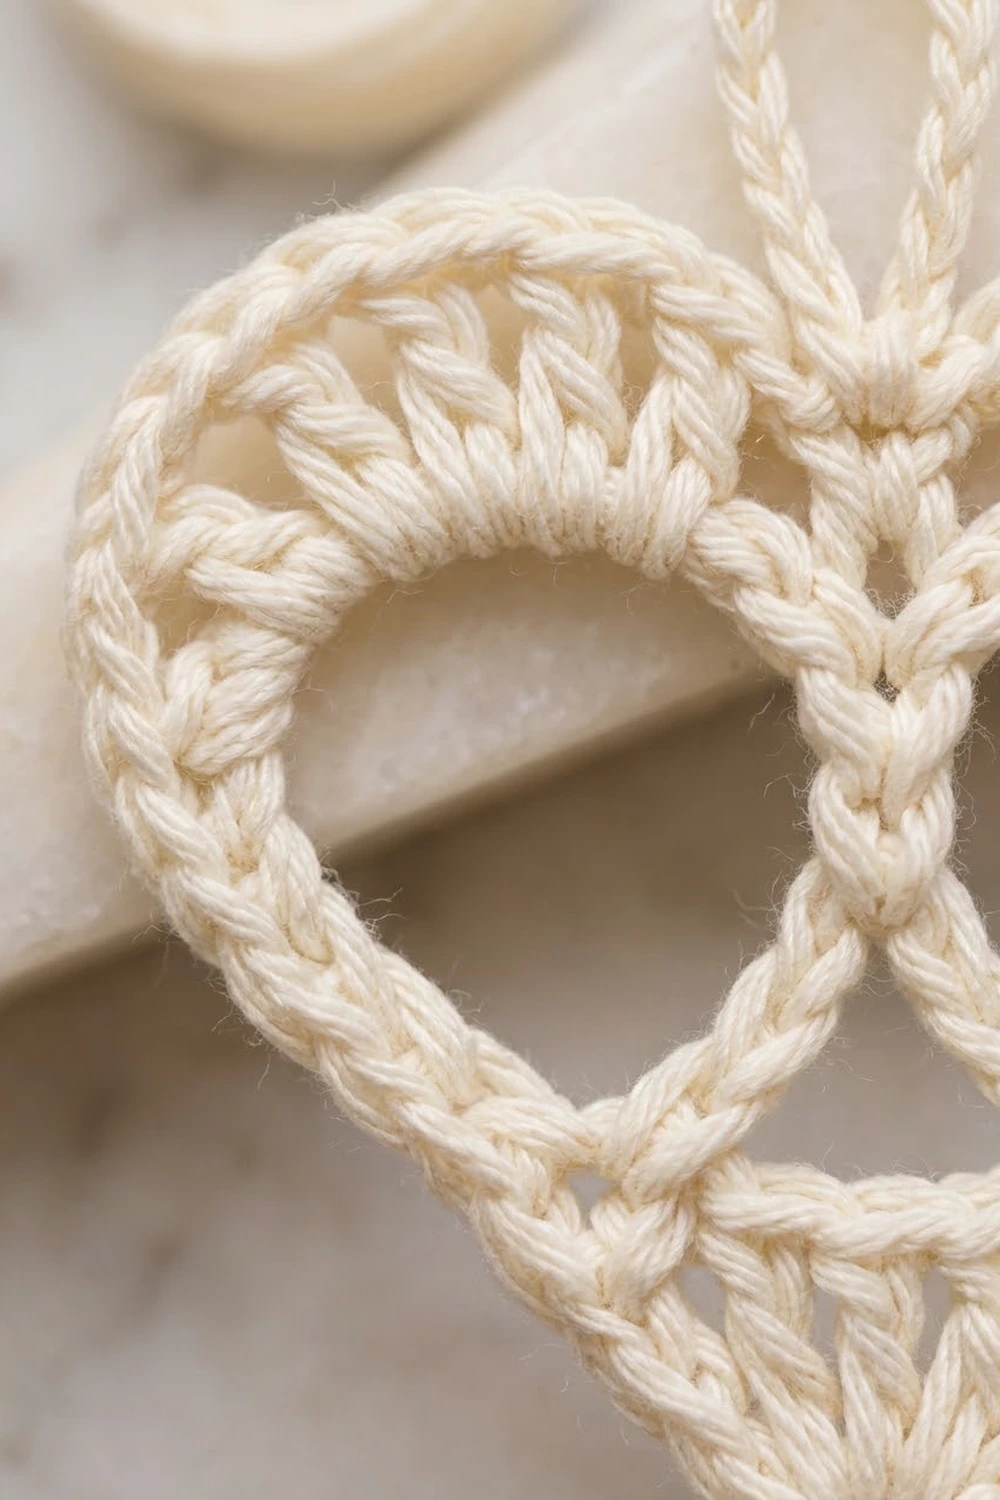
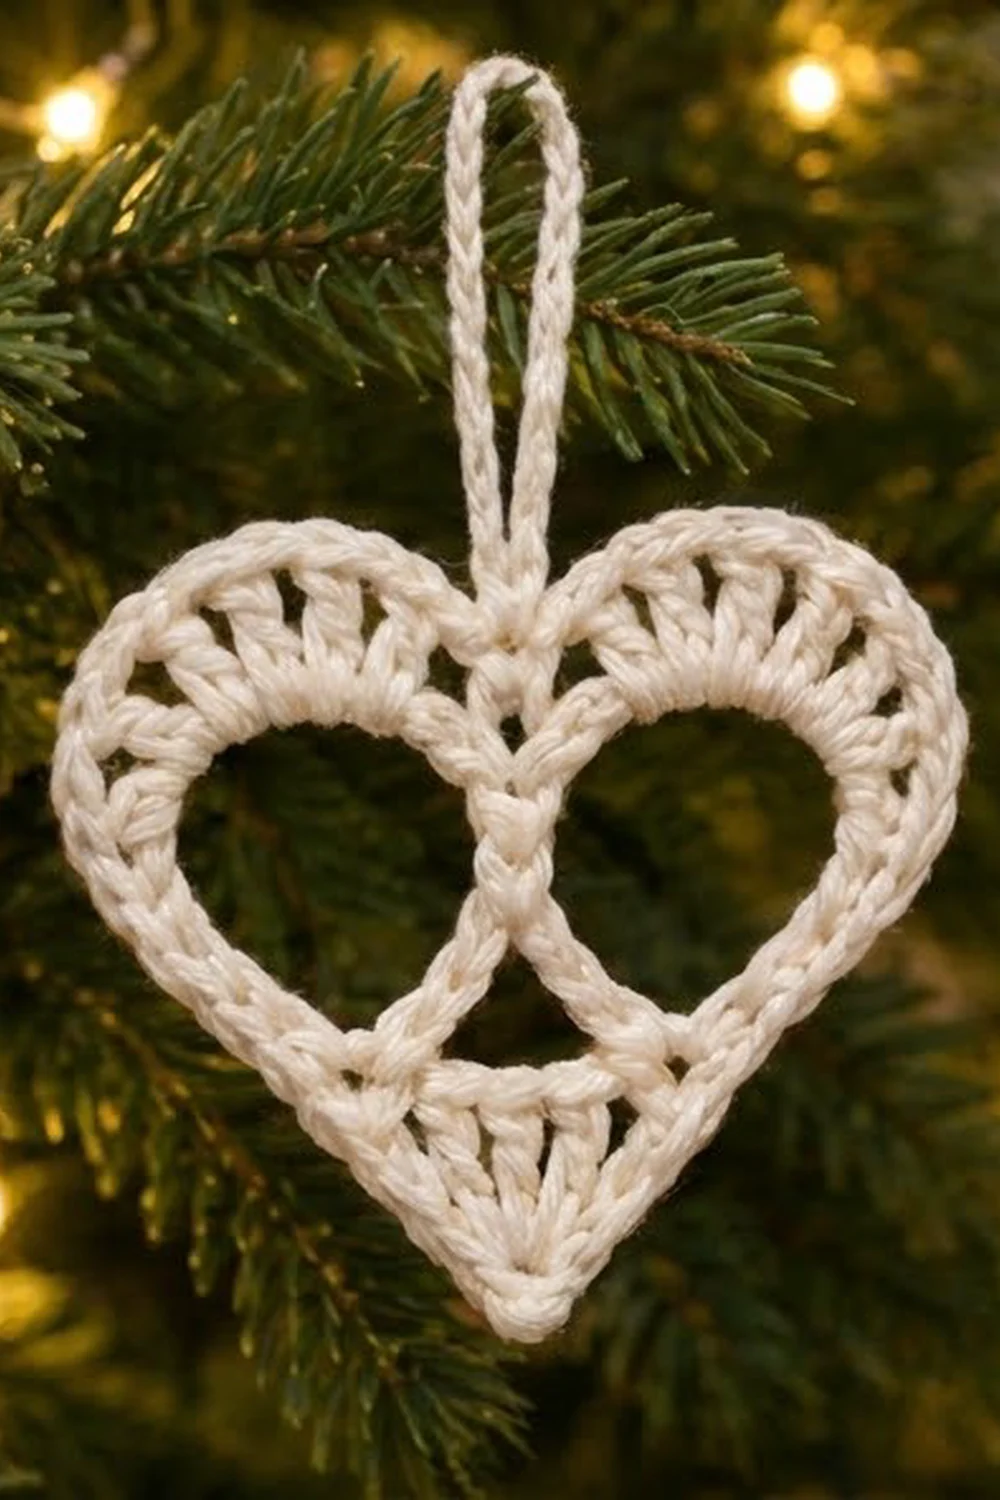
The Twin Window Heart is a small, lacy ornament with two round openings inside a heart outline. The two windows cross at the center like a figure-eight. A fan of double crochet posts crowns each lobe, and another narrowing fan fills the point. The result looks delicate but works up firm enough to hang on a tree branch.
This sample uses one ivory cotton yarn, which gives the heart a soft, vintage look against greenery and warm lights. It would also suit white, red, or metallic cotton. The pattern uses US crochet terms throughout.
The finished heart measures 3.5 in (8.9 cm) wide by 3.5 in (8.9 cm) tall. The hanging loop adds about 1.25 in (3.2 cm), so the total hanging height is about 4.75 in (12.1 cm).
Construction is simple and continuous. You chain two rings to make the figure-eight frame, then single crochet around it. Next, you work the bottom triangle in short rows. A shaping round adds the top crescents and outlines the triangle. A final single crochet border and a chain loop finish the piece.
Finished Size and Construction
- Finished size: 3.5 in × 3.5 in (8.9 cm × 8.9 cm), not including the loop
- Hanging loop: about 1.25 in (3.2 cm)
- Skill level: Easy+ (simple stitches and careful counting)
- Terminology: US crochet terms
- Yarn weight: DK / light (#3) cotton
- Hook: 3.5 mm (E-4)
- Number of pieces: 1
- Layout: single motif, no joining
- Piece size: 3.5 in × 3.5 in (8.9 cm × 8.9 cm)
- Size before border: 3.25 in × 3.25 in (8.3 cm × 8.3 cm)
- Border depth: about 0.125 in (0.3 cm) on each side
Materials
Yarn: Use a smooth, mercerized or matte DK cotton. Cotton holds stitch definition and keeps the windows round after blocking. Avoid fuzzy yarns, because they hide the post texture.
- Ivory / cream: 8 g, about 18 m (19.7 yd)
The quantity includes a margin for your gauge swatch, the hanging loop, and weaving in ends. One heart uses about 5 g.
Tools:
- 3.5 mm (E-4) crochet hook
- 4 locking stitch markers
- Tapestry needle
- Scissors
- Blocking mat and rust-proof pins
- Spray bottle with water
- Optional: fabric stiffener for a crisper ornament
Abbreviations (US Terms)
- ch – chain
- sl st – slip stitch
- sc – single crochet
- hdc – half double crochet
- dc – double crochet
- sk – skip
- st(s) – stitch(es)
- sp – space
- sc2tog – single crochet 2 together: (insert hook in next st, pull up a loop) twice, yo, pull through all 3 loops
- RS – right side
Special stitches:
- dc3tog – double crochet 3 together: (yo, insert hook in next st, pull up a loop, yo, pull through 2 loops) 3 times, yo, pull through all 4 loops on hook.
- dc4tog – double crochet 4 together: (yo, insert hook in next st, pull up a loop, yo, pull through 2 loops) 4 times, yo, pull through all 5 loops on hook.
Ch 2 at the start of a decrease row does not count as a stitch.
Gauge and Checkpoints
Gauge: 20 sc = 4 in (10.2 cm), or 5 sc per 1 in (2.5 cm). One dc row is about 0.4 in (1.0 cm) tall.
Since the heart is small, make one test heart before you start a batch. Measure it at each checkpoint:
- After Round 1: the figure-eight is 3 in (7.6 cm) wide and 1.5 in (3.8 cm) tall. Each window is about 1.5 in (3.8 cm) across on the outside.
- After the triangle (Row 4): the piece is about 2.75 in (7.0 cm) tall from the top of the rings to the tip.
- After Round 2: 3.25 in × 3.25 in (8.3 cm × 8.3 cm).
- After Round 3 (border): 3.5 in × 3.5 in (8.9 cm × 8.9 cm).
If it is too big, go down to a 3.25 mm (D-3) hook or tighten your chains. If it is too small, go up to a 3.75 mm (F-5) hook. The chain rings matter most. If they come out tight, the windows close up and the whole heart shrinks. You can chain with a hook one size larger and then switch back for Round 1.
Pattern
Figure-Eight Frame
First ring (left): Ch 24, sl st in the first ch to form a ring. Do not fasten off.
Second ring (right): Ch 24, sl st into the same first ch as before. You now have two rings of 24 ch that meet at one point, the junction.
Lay the rings side by side with the junction in the center.
Round 1 (RS): Ch 1. Working into each ch around the outside of the rings, sc in each of the 24 ch of the right ring. Cross over the junction and sc in each of the 24 ch of the left ring. Sl st to the first sc. (48 sc: 24 per ring)
Working past the junction from one ring to the other crosses the yarn path. This creates the twisted crossing at the center of the heart. Fasten off.
Place markers. With the junction centered, divide each ring’s 24 sc into four zones. Going around each ring from the top of the junction:
- Inner top: 2 sts (beside the junction, facing up)
- Top arc: 10 sts
- Outer side: 6 sts
- Lower arc: 6 sts (back down to the junction)
Check: 2 + 10 + 6 + 6 = 24. Mark the first and last stitch of each ring’s lower arc.
Checkpoint: 3 in (7.6 cm) wide × 1.5 in (3.8 cm) tall.
Bottom Triangle
You’ll work the triangle in rows across the two lower arcs.
Row 1 (RS): Join the yarn with a sl st in the outermost lower-arc st of the left ring. Ch 1, sc in the same st and in the next 5 lower-arc sts of the left ring. Continue across the 6 lower-arc sts of the right ring. (12 sc) Turn.
This row forms the flat top edge of the triangle beneath the windows.
Row 2: Ch 2 (does not count), dc3tog over the first 3 sts, dc in the next 6 sts, dc3tog over the last 3 sts. (8 sts: 1 + 6 + 1) Turn.
Check: 3 + 6 + 3 = 12 sts used.
Row 3: Ch 2, dc3tog over the first 3 sts, dc in the next 2 sts, dc3tog over the last 3 sts. (4 sts: 1 + 2 + 1) Turn.
Check: 3 + 2 + 3 = 8 sts used.
Row 4: Ch 2, dc4tog over all 4 sts. (1 st, the tip) Fasten off.
The dc posts lean inward as the rows decrease, so they radiate toward the point like a fan.
Checkpoint: about 2.75 in (7.0 cm) from the top of the rings to the tip.
Round 2: Crescents and Outline
This round adds the double crochet crescents above the windows and outlines the whole shape. Remove the markers before you start, or move them to the top arcs to help with counting.
Join the yarn with a sl st in the first inner-top st of the right ring, the one right beside the junction.
Round 2 (RS): Ch 1. Then work:
- Right inner top: sc in each of the 2 sts. (2)
- Right top arc (10 sts): hdc, dc, dc, 2 dc in next st 4 times, dc, dc, hdc. (14)
- Right outer side: sc in each of the 6 sts. (6)
- Right slant of triangle: sk the end of Row 1. Work 2 sc into the side of each of Rows 2, 3, and 4. (6)
- Tip: (sc, ch 2, sc) in the top of the dc4tog. (2 sc + ch-2 sp)
- Left slant: 2 sc into the side of each of Rows 4, 3, and 2. Sk the end of Row 1. (6)
- Left outer side: sc in each of the 6 sts. (6)
- Left top arc (10 sts): hdc, dc, dc, 2 dc in next st 4 times, dc, dc, hdc. (14)
- Left inner top: sc in each of the 2 sts. (2)
Sl st to the first sc.
Total: 58 sts + 1 ch-2 sp.
Check: 2 + 14 + 6 + 6 + 2 + 6 + 6 + 14 + 2 = 58.
The top-arc pattern is what makes the crescents. The hdc stitches at each end barely rise, the dc stitches rise more, and the four 2-dc increases at the crest give the most height and spread. Together they form a band that is deepest at the top and tapers to nothing at the sides.
Checkpoint: 3.25 in × 3.25 in (8.3 cm × 8.3 cm).
Border
Border gauge: 5 sc per 1 in (2.5 cm), the same as the main gauge. The border adds about 0.125 in (0.3 cm) on every side.
Round 3 (RS): Ch 1. Starting in the 2nd st of Round 2, work:
- Right inner top: sc in the 2nd st. (1)
- Right crescent (14 sts): sc in the next 5 sts, 2 sc in the next st, sc in the next 2 sts, 2 sc in the next st, sc in the next 5 sts. (16)
- Right outer side: sc in each of the 6 sts. (6)
- Right slant: sc in each of the 6 sts. (6)
- Tip: sc in the tip sc, 3 sc in the ch-2 sp, sc in the next tip sc. (2 + 3 = 5)
- Left slant: sc in each of the 6 sts. (6)
- Left outer side: sc in each of the 6 sts. (6)
- Left crescent: work as for the right crescent. (16)
- Left inner top: sc in the 1st st. (1)
- Center dip: sc2tog over the last left inner-top st and the first st of Round 2. (1)
Sl st to the first sc. Total: 64 sts.
Check: 1 + 16 + 6 + 6 + 5 + 6 + 6 + 16 + 1 + 1 = 64.
Why the math works:
- Crescents: the crest of each lobe is the widest curve, so 2 increases per crescent (14 → 16) keep it from cupping.
- Straight edges: the outer sides and slants are nearly straight, so they stay 1 sc per st.
- Tip: the 3 sc in the ch-2 space turn a sharp corner without pulling.
- Center dip: the sc2tog pulls the top center inward, which defines the heart’s notch.
Hanging loop: Ch 12, sl st into the top of the sc2tog at the center dip. Sl st in the next st and fasten off.
The 12 chains make a loop about 1.25 in (3.2 cm) long, folded. Check the size: 3.5 in × 3.5 in (8.9 cm × 8.9 cm), plus the loop.
Final Blocking
- Weave in all ends along the back of the sc stitches. Do not trim them closer than 0.25 in (0.6 cm) yet.
- Spray the heart until it is damp, but not dripping.
- Pin it RS up on the mat at 3.5 in × 3.5 in (8.9 cm × 8.9 cm).
- Pin the tip to a sharp point. Pin the center dip down slightly.
- Push a pin through the inside of each window at four points to round it out to about 1.25 in (3.2 cm) inner width.
- Ease the crescent posts so they fan out evenly.
- If you want, brush on a light coat of fabric stiffener.
- Let it dry completely, at least 6 hours. Then unpin and trim the ends.
Final Quality-Control Checklist
- Round 1 has 48 sc, 24 per ring.
- Each triangle row matches: 12 → 8 → 4 → 1.
- Round 2 has 58 sts plus the ch-2 tip.
- Round 3 has 64 sts.
- Both crescents are the same height and width.
- The two windows are about the same size and round.
- The tip is centered under the junction.
- The loop is centered over the dip and not twisted.
- The finished heart is 3.5 in × 3.5 in (8.9 cm × 8.9 cm).
Troubleshooting
Windows look oval or squashed. Your chains are too tight. Rechain with a hook one size larger, then block the windows round with pins.
One crescent is taller than the other. Check that each top arc used exactly 10 sts in Round 2. Recount the zones from the junction.
The triangle leans to one side. Row 1 may have started off-center. Make sure it covers exactly 6 lower-arc sts on each ring.
The border ruffles at the crests. Skip one of the 2-sc increases on each crescent in Round 3. That leaves 62 sts total.
The tip is blunt. Pull the dc4tog snug, and make sure the ch 2 at the tip in Round 2 is not loose.
The heart curls. Block it damp and pin it fully flat. Stiffener helps keep cotton flat.
Care
Hand wash in cool water with mild soap, press out the water in a towel, and dry flat, reshaping the windows. If you used stiffener, spot clean only.
Final Notes
The measurement chain is short and easy to check:
- Two 24-ch rings make a figure-eight 3 in × 1.5 in (7.6 cm × 3.8 cm).
- The triangle brings the height to about 2.75 in (7.0 cm).
- Round 2 grows the heart to 3.25 in (8.3 cm) square.
- The 64-st border finishes it at 3.5 in × 3.5 in (8.9 cm × 8.9 cm).
- The loop adds 1.25 in (3.2 cm).
If each checkpoint matches, your heart will too. Make one, check it, and then make a whole set for the tree.
Happy crocheting!