

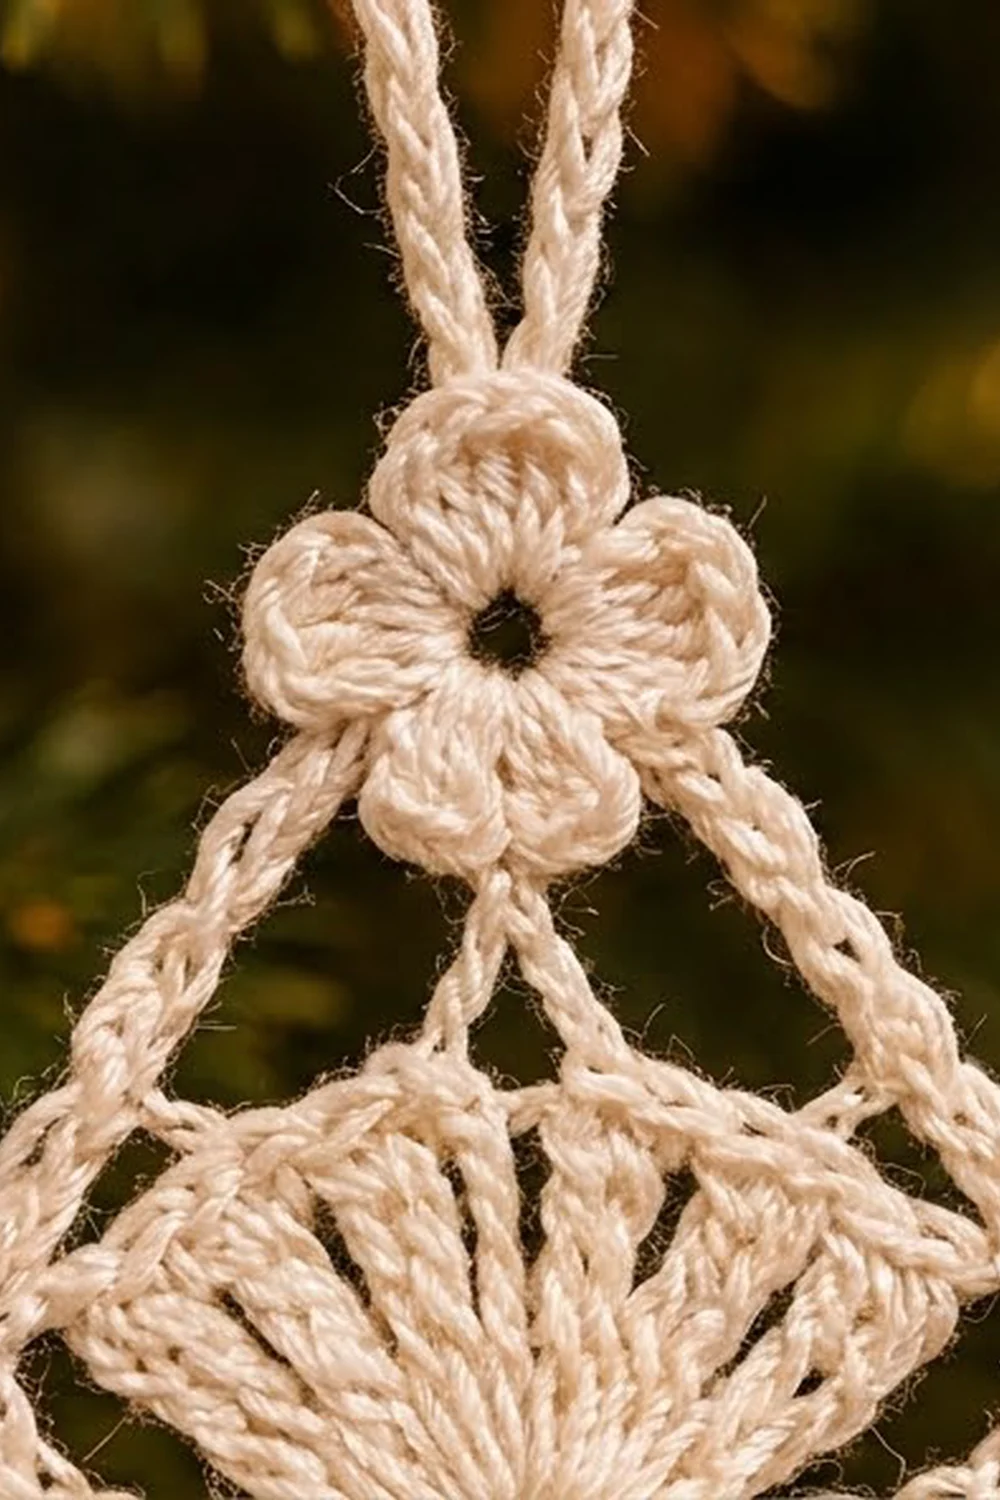
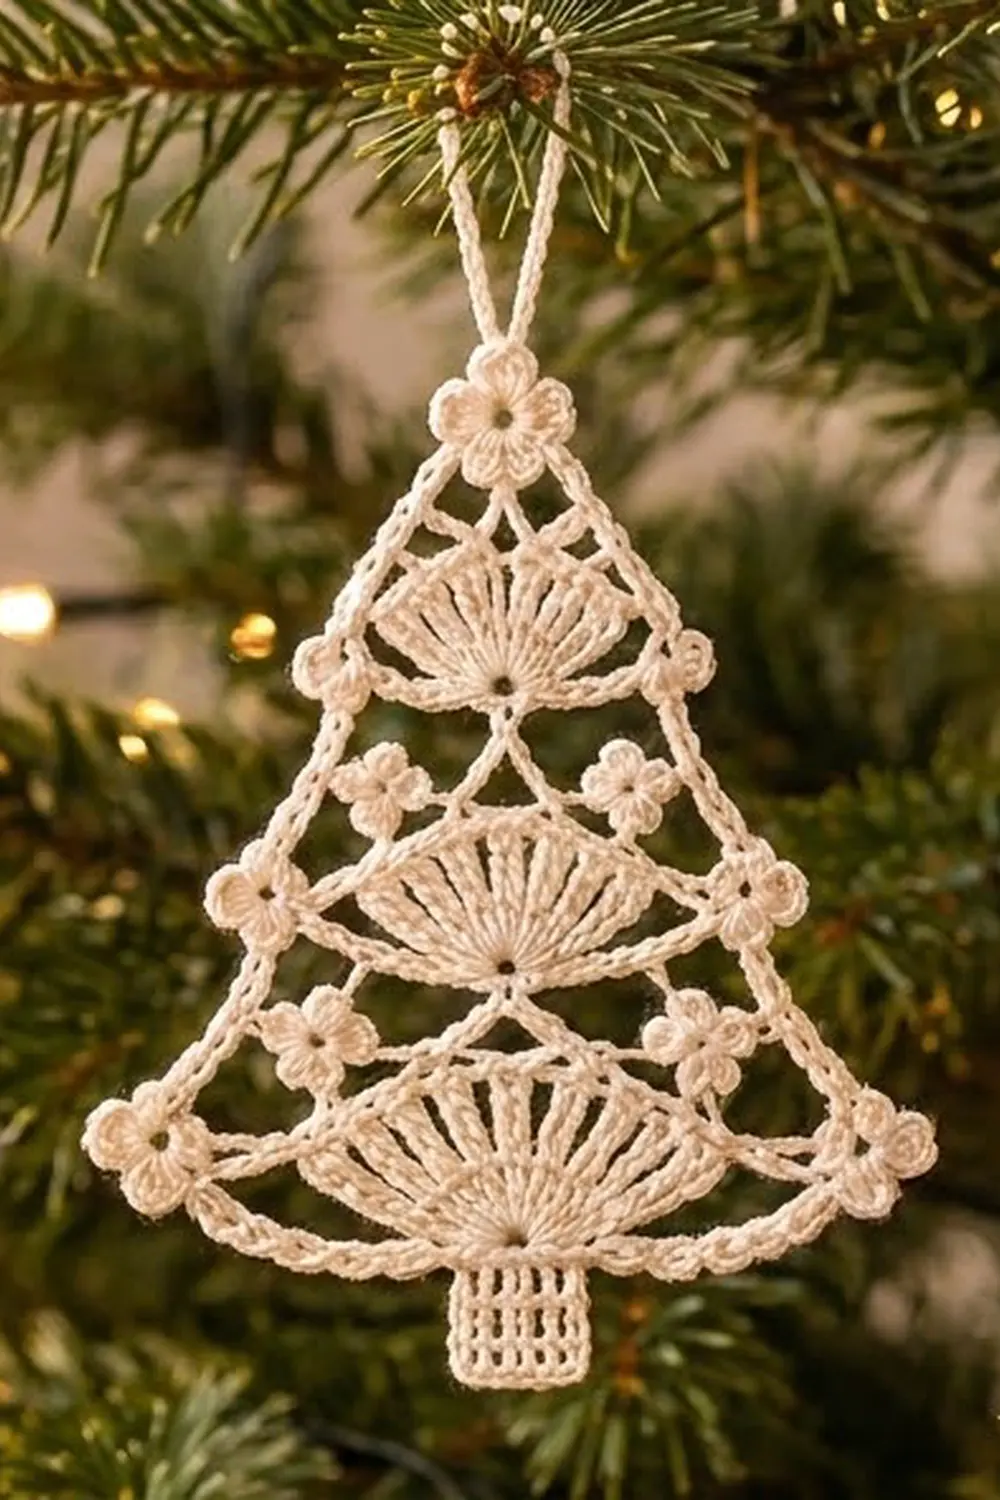
This lace Christmas tree ornament is built from three stacked shell fans that get smaller toward the top. A small five-petal flower and a hanging loop sit at the tip, and a filet-mesh trunk sits at the base. A light chain frame with picots and little four-loop flowers draws the triangular tree outline around the fans.
The sample is worked in one color, cream size 10 cotton thread, which gives it a soft, old-fashioned snowflake look. It’s a single flat piece, so it works as a tree ornament, a gift tag, or a card topper. White, ivory, or metallic gold thread also suit the design.
The pattern uses US crochet terms. The finished ornament measures 4.5 in (11.4 cm) wide at the base and 4 in (10.2 cm) tall from the trunk to the top flower. The hanging loop adds 1.25 in (3.2 cm), for a total hanging length of 5.25 in (13.3 cm).
Construction runs from the bottom up. You make the trunk first, then work Fan 1 out from the trunk’s center. Fan 2, Fan 3, and the top flower each grow from a short chain stem at the center of the fan below. Two frame rounds then add the outline, the corner flowers, and the picot edge, and they also lock the fans in place.
Finished Size and Construction
- Finished size: 4.5 in (11.4 cm) wide × 4 in (10.2 cm) tall, plus a 1.25 in (3.2 cm) loop
- Skill level: Intermediate
- Terminology: US crochet terms
- Yarn weight: Size 10 crochet thread (Lace, weight 0)
- Hook: 1.75 mm steel hook
- Number of pieces: 1
- Layout: One single motif with three stacked fan tiers
- Piece size: 4.5 in × 4 in (11.4 cm × 10.2 cm)
- Size before border (center stack only): 2 in (5.1 cm) wide × 4 in (10.2 cm) tall
- Border depth: The frame adds 1.25 in (3.2 cm) on each side at the base. The picot edge adds about 0.1 in (0.3 cm).
Materials
Thread: Use mercerized cotton size 10 crochet thread. It holds a crisp shape and blocks well. Avoid soft or fuzzy thread, because the fan spokes and picots lose definition.
- Cream (main and only color): 5 g, about 26 m
The quantity includes a comfortable margin for a gauge swatch and weaving in ends. One ornament uses roughly half of that amount.
Tools:
- 1.75 mm steel crochet hook
- Fine tapestry needle or size 22 chenille needle
- Small sharp scissors
- Blocking board or foam mat and rustproof pins
- Spray bottle with water
- Optional: liquid starch or a 1:1 mix of white glue and water for a stiff finish
Abbreviations (US Terms)
- ch – chain
- sl st – slip stitch
- sc – single crochet
- dc – double crochet
- tr – treble crochet (yarn over twice)
- dtr – double treble crochet (yarn over 3 times)
- sk – skip
- sp(s) – space(s)
- st(s) – stitch(es)
- RS – right side
Special stitches
- Picot: Ch 3, sl st in 3rd ch from hook.
- PF (picot flower): Working into the last chain made, [ch 4, sl st in that same ch] 4 times. This gives four small loops around one point. The chain then carries on from that same point.
Gauge and Checkpoints
Gauge: 10 sc = 1 in (2.5 cm). Also 10 ch = about 1 in (2.5 cm) with relaxed tension.
Make one full test ornament before planning a batch. Lace changes size easily, and the frame chains depend on the fan sizes. Check these measurements after each stage, laid flat and lightly smoothed:
- Trunk: 0.75 in (1.9 cm) wide × 0.5 in (1.3 cm) tall
- Fan 1: 2 in (5.1 cm) across the flat edge × 1 in (2.5 cm) tall
- Fan 2: 1.5 in (3.8 cm) × 0.75 in (1.9 cm)
- Fan 3: 1.25 in (3.2 cm) × 0.6 in (1.5 cm)
- Top flower: 0.6 in (1.5 cm) across
- After the frame: 4.5 in (11.4 cm) × 4 in (10.2 cm)
If your fans are too big: Go down to a 1.5 mm hook, or keep your yarn-overs snug on the tall stitches.
If they are too small, or the arcs cup: Go up to a 2 mm hook.
If only the frame is off: Change the hook for the two frame rounds only. Don’t change any chain counts, because the edging math depends on them.
Trunk
Ch 10.
Row 1 (RS): Dc in 6th ch from hook (the skipped 5 ch count as dc + ch 1), [ch 1, sk 1 ch, dc in next ch] 2 times. (4 dc, 3 ch-1 sps)
Row 2: Ch 4 (counts as dc + ch 1), turn, dc in next dc, ch 1, dc in next dc, ch 1, dc in 4th ch of beg ch-5. (4 dc, 3 ch-1 sps)
Row 3: Ch 1, turn, sc in first dc, [sc in ch-1 sp, sc in next dc] 3 times, working the last sc in 3rd ch of beg ch-4. (7 sc)
The trunk is now a small mesh rectangle with four vertical bars, three openings, and a solid top bar. Don’t fasten off.
Fan 1 (Large)
Row F1: Sl st in next 3 sc to reach the center (4th) sc. Ch 4 (counts as tr), 8 tr in the same sc. (9 tr)
The fan opens upward from one point at the center of the trunk.
Row F2: Ch 7 (counts as dtr + ch 2), turn, [dtr in next tr, ch 2] 7 times, dtr in top of beg ch-4. (9 dtr, 8 ch-2 sps)
Row F3: Ch 1, turn, sc in first dtr, [3 sc in next ch-2 sp, sc in next dtr] 8 times, working the last sc in 5th ch of beg ch-7. (33 sc: 1 + 8 × 4)
The 33 sc form the arc. The center sc is #17. Fasten off.
Checkpoint: 2 in (5.1 cm) across the flat lower edge × 1 in (2.5 cm) tall. The arc should lie flat. If it ruffles, your dtr are too short. If it cups, they are too tall.
Fan 2 (Medium)
With RS facing, join the thread with a sl st in sc #17 of Fan 1.
Row F1: Ch 6, 6 tr in 5th ch from hook. (7 tr) The first 2 ch form a short stem, and the 4 skipped ch count as the first tr.
Row F2: Ch 5 (counts as dc + ch 2), turn, [dc in next tr, ch 2] 5 times, dc in top of beg ch. (7 dc, 6 ch-2 sps)
Row F3: Ch 1, turn, sc in first dc, [3 sc in next ch-2 sp, sc in next dc] 6 times, working the last sc in 3rd ch of beg ch-5. (25 sc: 1 + 6 × 4)
The center sc is #13. Fasten off.
Checkpoint: 1.5 in (3.8 cm) × 0.75 in (1.9 cm).
Fan 3 (Small)
Join with a sl st in sc #13 of Fan 2.
Row F1: Ch 5, 4 dc in 4th ch from hook. (5 dc) The first 2 ch form the stem, and the 3 skipped ch count as the first dc.
Row F2: Ch 5 (counts as dc + ch 2), turn, [dc in next dc, ch 2] 3 times, dc in top of beg ch. (5 dc, 4 ch-2 sps)
Row F3: Ch 1, turn, sc in first dc, [3 sc in next ch-2 sp, sc in next dc] 4 times. (17 sc: 1 + 4 × 4)
The center sc is #9. Fasten off.
Checkpoint: 1.25 in (3.2 cm) × 0.6 in (1.5 cm).
Top Flower and Hanging Loop
Join with a sl st in sc #9 of Fan 3. Ch 6, then sl st in 4th ch from hook to form a 4-ch ring. The first 2 ch are the stem.
Petals 1 and 2: [Ch 3, 2 dc in ring, ch 3, sl st in ring] 2 times.
Petal 3 (with hanging loop): Ch 3, dc in ring, ch 25, sl st in top of the dc just made. Work 30 sc over the ch-25 loop, then sl st in top of the same dc. Dc in ring, ch 3, sl st in ring.
Petals 4 and 5: [Ch 3, 2 dc in ring, ch 3, sl st in ring] 2 times. (5 petals)
Fasten off.
Petals 1 and 5 sit on either side of the stem, Petal 3 points straight up, and Petals 2 and 4 face outward. The center stack now measures 2 in (5.1 cm) × 4 in (10.2 cm), not counting the loop.
Border (Frame and Picot Edge)
Border gauge: 1 sc per chain, so 10 sc over a ch-10 = 1 in (2.5 cm).
Both frame rounds start at the end of Fan 1’s arc. With RS facing, call the end on your right the right arc end.
Round 1 (frame): Join with a sc in the right arc-end sc of Fan 1.
Right side:
- Ch 10, PF (bottom corner).
- Ch 12, PF (middle corner).
- Spur: Ch 4, PF (inner flower), ch 4, sl st in Fan 2’s right arc-end sc. Sc in each of the 4 ch, sl st in the inner PF base, sc in each of the next 3 ch, sl st in the middle-corner PF base. (7 sc)
- Ch 10, PF (top corner).
- Spur: Ch 4, sl st in Fan 3’s right arc-end sc, sc in each of the 4 ch, sl st in the PF base. (4 sc)
- Ch 10, sc in the center of Petal 2 (between its 2 dc).
Top: Ch 4 and carry it behind Petal 3, then sc between the 2 dc of Petal 4.
Left side: Repeat the right side in reverse:
- Ch 10, PF (top corner).
- Ch 4, sl st in Fan 3’s left arc end, 4 sc back, sl st in the PF base.
- Ch 10, PF (middle corner).
- Ch 4, PF, ch 4, sl st in Fan 2’s left arc end, 4 sc, sl st in the inner PF base, 3 sc, sl st in the corner PF base.
- Ch 12, PF (bottom corner).
- Ch 10, sc in Fan 1’s left arc-end sc.
Bottom: Work 4 sc around the post of the end dtr and 3 sc around the post of the end tr, down to the trunk. Then work 3 sc around the opposite tr post and 4 sc around the opposite dtr post. (14 sc) Sl st in the first sc.
Round 1 counts per side: 42 outer ch (10 + 12 + 10 + 10), 4 PFs, and spurs of 7 sc and 4 sc. Each side mirrors the other exactly.
Round 2 (picot edge): Ch 1, sc in the same sc.
Right side:
- Over the ch-10: [3 sc, picot] 2 times, 4 sc. Sl st in the bottom-corner PF base.
- Over the ch-12: [3 sc, picot] 3 times, 3 sc. Sl st in the middle-corner PF base.
- Over the ch-10: [3 sc, picot] 2 times, 4 sc. Sl st in the top-corner PF base.
- Over the ch-10: [3 sc, picot] 2 times, 4 sc. Sl st in the Petal 2 sc.
Top: 4 sc over the ch-4, sl st in the Petal 4 sc.
Left side: Work the same four segments in reverse order: 10 sc + 2 picots, 10 sc + 2 picots, 12 sc + 3 picots, then 10 sc + 2 picots. Sl st in each PF base as you pass it.
Bottom: Sc in the left arc-end sc, sc in each of the 14 bottom sc, sl st in the first sc. Fasten off.
Round 2 counts: 42 sc and 9 picots per side, 4 sc across the top, and 16 sc along the bottom (2 arc ends + 14). That’s 104 sc and 18 picots in total.
Why the math works: Every outer chain gets exactly one sc, so each segment keeps its Round 1 length. The edge can’t ruffle or pull in. Picots stand out from the edge but add no length. At the base, Fan 1 is 2 in (5.1 cm) wide, and each 10 ch base line adds 1 in (2.5 cm). Each corner PF adds about 0.25 in (0.6 cm). That gives 2 + 1 + 1 + 0.25 + 0.25 = 4.5 in (11.4 cm).
Final Blocking
- Weave in all ends along the sc arcs and the trunk before blocking. Leave about 0.25 in (0.6 cm) and trim after the piece dries.
- Soak the ornament in cool water for a few minutes, then roll it in a towel to remove excess water.
- Pin the two bottom corner PFs 4.5 in (11.4 cm) apart, with the trunk centered below.
- Pin the top flower 4 in (10.2 cm) above the trunk’s lower edge.
- Pin the middle and top corner PFs so the sides form straight lines.
- Pin each fan arc into a smooth half-circle and open every spoke space.
- Pin out every picot and each loop of the PFs.
- Optional: Spray with starch or brush on diluted glue for a firm ornament.
- Let it dry completely, at least 12 hours, before you unpin it.
Final Quality-Control Checklist
- Trunk has 4 bars and 3 open spaces.
- Fans have 9, 7, and 5 spokes, from bottom to top.
- Arc counts are 33, 25, and 17 sc.
- Each fan is anchored at both arc ends.
- There are 8 PFs in total, 4 on each side.
- Round 2 has 18 picots, 9 on each side.
- Hanging loop is centered on Petal 3 and fully covered with 30 sc.
- Finished size is 4.5 in × 4 in (11.4 cm × 10.2 cm), and both halves match.
Troubleshooting
- Fan ruffles: The tall stitches are too short or the arc sc are too loose. Redo the fan with a smaller hook.
- Fan cups: Use a larger hook for Rows F2 and F3.
- Frame pulls the fans out of shape: Your chains are too tight. Work the frame with a hook one size larger.
- Tree leans: Count the chains on both sides. They should be 10, 12, 10, and 10 on each side.
- PF loops twist: Work all four loops into the same chain, keeping the same face up.
- Loop is limp: Add more sc over the chain loop, or starch it.
Care
Hand wash in cool water with mild soap, then reshape and dry flat. Re-starch if needed. Store flat or hang it away from damp.
Final Notes
The measurements build on each other. A 0.75 in (1.9 cm) trunk carries a 2 in (5.1 cm) Fan 1, which supports the 1.5 in (3.8 cm) and 1.25 in (3.2 cm) fans above it. The finished center stack is 4 in (10.2 cm) tall. Two frame rounds at 10 sts per inch then widen the base to 4.5 in (11.4 cm). If each checkpoint matches, the finished tree will too.
Happy crocheting!