

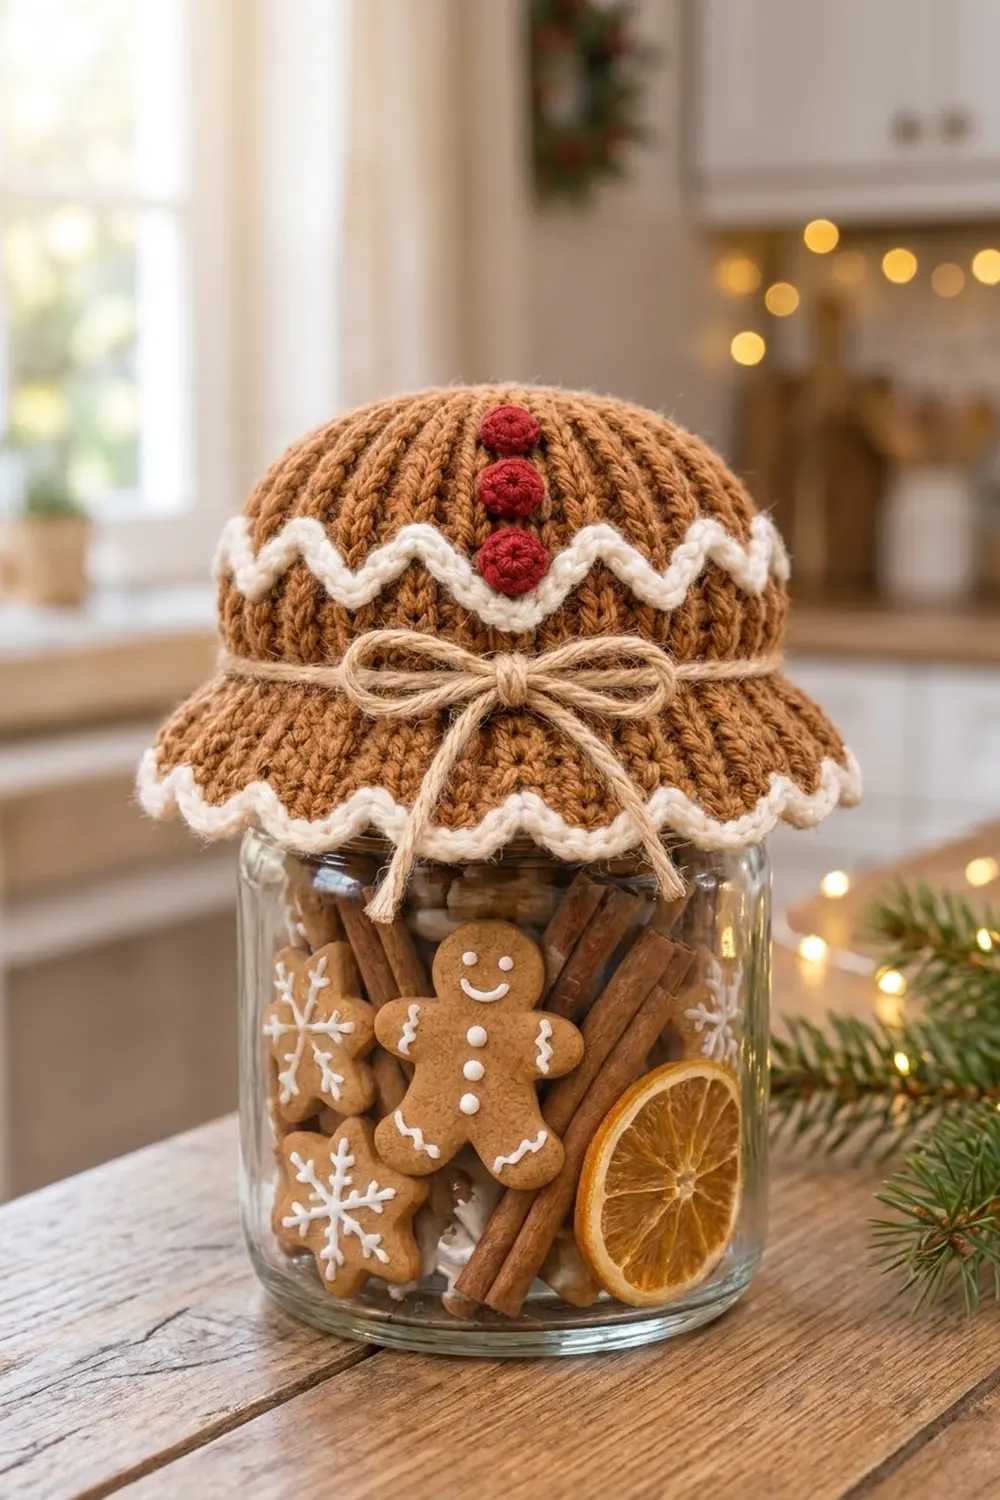
This cover makes a plain glass jar look like gingerbread. The crown is a soft dome of cinnamon-brown ribbing with a wavy line of cream “icing” around it. Three round red buttons run down the front like gumdrops, and a ruffled brim ends in cream scallops. A twine bow is tied around the jar neck.
The colors are cinnamon brown for the body, cream for the icing details and cherry red for the buttons, plus natural jute twine. The style is cozy farmhouse Christmas. It suits jars of cookie mix, cocoa or spiced nuts given as gifts. The pattern uses US crochet terms throughout.
The finished cover measures 10 in (25.4 cm) around the base of the crown, unstretched. It stretches to fit jar lids from 10.5 to 12 in (26.7 to 30.5 cm) around. Measured flat from the gathered top to the tip of a scallop, it is about 5.5 in (14.0 cm) long.
You crochet a small rectangle of back-loop single crochet sideways, so the rows become vertical ribs. Next, seam it into a tube, gather the top into a dome and work the ruffled brim in rounds along the bottom edge. To finish, add a cream scalloped border, a cream zigzag cord, three crocheted red buttons and a twine bow.
Finished Size and Construction
- Finished size: 10 in (25.4 cm) around the crown base, unstretched; about 5.5 in (14.0 cm) from top center to scallop tip
- Skill level: Easy
- Terminology: US crochet terms
- Yarn weight: Worsted (#4)
- Hook: 5.0 mm (H-8)
- Number of pieces: 1 main cover, plus 1 cream zigzag cord and 3 small red buttons sewn on
- Layout: Single piece, worked flat, then seamed into a tube; brim and border worked in the round
- Crown panel size: 10 in (25.4 cm) wide x 3.5 in (8.9 cm) tall before seaming
- Size before border: 4.75 in (12.1 cm) from top center to brim edge
- Border depth: 0.75 in (1.9 cm)
Materials
Use a smooth, soft worsted-weight yarn in acrylic or a cotton blend. Acrylic gives the ribbing more stretch, which helps the cover grip the jar. Avoid fuzzy yarns, because they hide the rib texture.
- Cinnamon brown (Color A): about 25 g / 50 m (55 yd)
- Cream (Color B): about 8 g / 16 m (17 yd)
- Cherry red (Color C): about 4 g / 8 m (9 yd)
- Natural jute twine: 30 in (76.2 cm)
Yarn amounts include a small safety margin, so you will probably have some left over.
Tools:
- 5.0 mm (H-8) crochet hook
- Yarn needle
- 2 stitch markers
- Scissors
- A small pinch of fiberfill (for the buttons)
- Measuring tape
- Pins (optional, for placing the zigzag)
Abbreviations (US Terms)
- ch – chain
- sl st – slip stitch
- sc – single crochet
- dc – double crochet
- sc2tog – single crochet 2 together
- BLO – back loop only
- st(s) – stitch(es)
- rnd – round
- MR – magic ring
Special stitch – sc BLO: Insert the hook under the back loop only of the stitch, yarn over and pull up a loop, then yarn over and pull through both loops. When you work it in rows, the unused front loops form raised ridges, one ridge for every 2 rows.
Gauge and Checkpoints
Gauge: 16 sts and 20 rows = 4 in (10.2 cm) in sc BLO, worked in rows with a 5.0 mm hook.
Because this is a single piece, the crown panel is your gauge swatch. Check it early, before you start the brim.
- Checkpoint 1 (after Row 20): The panel should measure 4 in (10.2 cm) wide across the rows and 3.5 in (8.9 cm) tall along the 14 sts.
- Checkpoint 2 (after Row 50): The panel should measure 10 in (25.4 cm) wide and 3.5 in (8.9 cm) tall, laid flat without stretching.
- Checkpoint 3 (after brim Rnd 1): The crown base should measure 10 in (25.4 cm) around.
- Checkpoint 4 (after border): The cover should measure about 5.5 in (14.0 cm) from top center to scallop tip.
If your panel is too big: Change to a 4.5 mm hook. Or keep your hook and work fewer rows, ending on an even row so the ribs stay balanced.
If your panel is too small: Change to a 5.5 mm hook. A slightly small cover is fine because the ribbing stretches, but it should be no more than 0.5 in (1.3 cm) short of 10 in (25.4 cm).
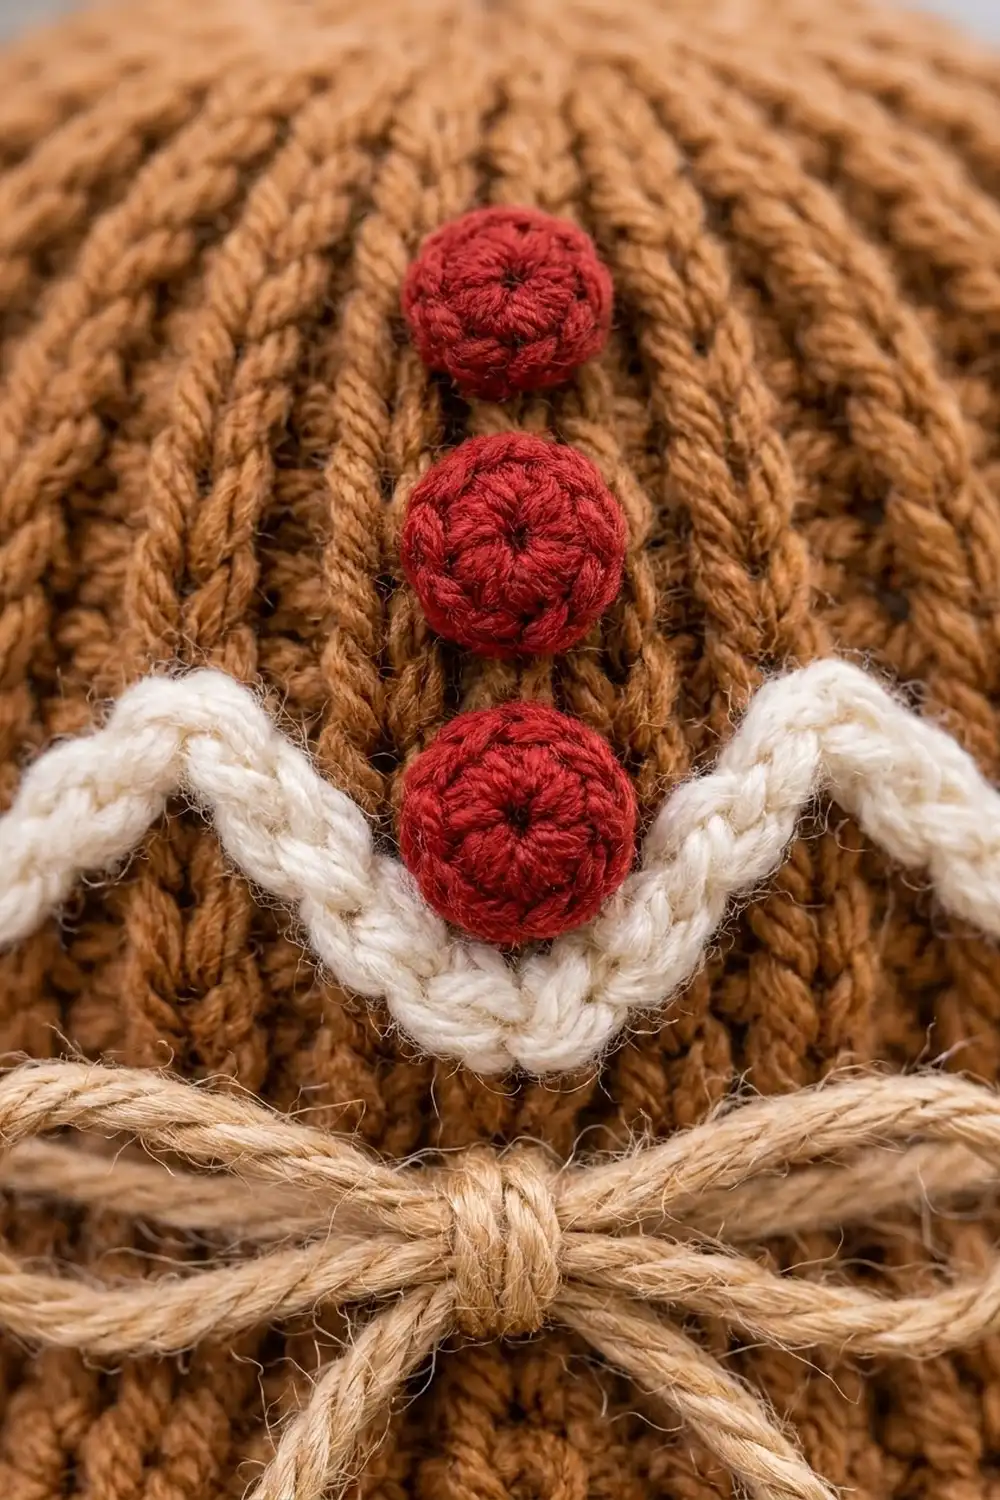
Crown Panel
The panel is worked sideways. The 14 stitches of each row become the height of the crown, and the 50 rows become its circumference.
With Color A, ch 15.
Row 1: Sc in 2nd ch from hook and in each ch across. Turn. (14 sc)
Rows 2–50: Ch 1 (does not count as a st), sc BLO in each st across. Turn. (14 sc in each row)
At the end of Row 50 you will have 25 ridges on each side. Pick the side you like best as the right side. Do not fasten off.
Seam: Fold the panel so Row 1 lies behind Row 50 with the edges matching. Ch 1, then sl st through the back loop of each st of Row 50 and the matching free loop of the foundation chain. (14 sl st) You now have a tube 10 in (25.4 cm) around and 3.5 in (8.9 cm) tall. Fasten off, leaving a 12 in (30.5 cm) tail.
Gather the top: The long edge where the tail sits is the top. Thread the tail onto the yarn needle and pass it once through the end of each row along that edge. (50 row ends) Pull firmly to close the opening into a dome. Take two small stitches across the center to lock it, then weave in the tail on the wrong side.
Turn the crown right side out. The ribs should run straight up and down from the gathered top to the open bottom edge.
Ruffled Brim
The brim is worked in rounds into the row ends along the open bottom edge of the crown. Join each round, and do not turn.
Rnd 1: With the right side facing, join Color A with a sl st at the seam. Ch 1, sc in the end of each row around. Join with a sl st to the first sc. (50 sc)
You will thread the twine through this round later. Check that it measures 10 in (25.4 cm) around.
Rnd 2 (growth round): Ch 2 (does not count as a st), dc in next st, 2 dc in next st; repeat from * 25 times. Join with a sl st to the first dc. (75 dc)
Rnd 3 (growth round): Ch 2, dc in each of the next 2 sts, 2 dc in next st; repeat from * 25 times. Join with a sl st to the first dc. (100 dc)
Fasten off Color A. The brim now flares into a soft ruffle about 1.25 in (3.2 cm) deep from the crown base: 0.25 in (0.6 cm) for the sc round plus 0.5 in (1.3 cm) for each dc round.
Cream Zigzag Icing
The zigzag is a crocheted cord sewn onto the crown, so it stands up slightly like piped icing.
With Color B, ch 61.
Row 1: Sl st in the back bump of the 2nd ch from hook and in each back bump across. (60 sl st) Fasten off, leaving a 20 in (50.8 cm) tail.
The cord should be about 15 in (38.1 cm) long.
Placement: Mark a guideline 1.25 in (3.2 cm) above brim Rnd 1. The high points of the zigzag sit 0.25 in (0.6 cm) above this line and the low points 0.25 in (0.6 cm) below it. The whole zigzag is 0.5 in (1.3 cm) tall.
Pin a high point on the seam, then one every 5 rows around, for 10 high points. Pin a low point halfway between each pair of high points, 2.5 rows from each. Each slanted segment uses about 0.75 in (1.9 cm) of cord, so the 20 segments use the whole cord.
Sew the cord down with small stitches through its center. Catch only the surface of the ribbing so the cover can still stretch. Butt the two cord ends together at the seam and sew them flat.
Red Buttons (Make 3)
With Color C, work in continuous rounds.
Rnd 1: 6 sc in MR. (6 sc)
Rnd 2: 2 sc in each st around. (12 sc)
Rnd 3: Sc in each st around. (12 sc)
Rnd 4: Sc2tog 6 times. (6 sc)
Tuck in a tiny pinch of fiberfill. Fasten off, leaving a 10 in (25.4 cm) tail. Weave the tail through the front loops of the last 6 sts and pull to close.
Each button should measure about 0.5 in (1.3 cm) across.
Placement: Sew the buttons at the center front, directly opposite the seam (Row 25), where there is also a zigzag high point. Sew the first button 0.5 in (1.3 cm) below the gathered center. Sew the second and third buttons below it, 0.6 in (1.5 cm) apart from center to center. This puts the lowest button just above the zigzag point. Sew through the center and around the base of each button so it does not wobble.
Border
The cream border follows the ruffled edge of brim Rnd 3.
Border gauge: One sc per dc of Rnd 3. Each scallop uses 4 sts of the round below and is about 0.5 in (1.3 cm) tall.
Rnd 1 (conversion round): Join Color B with a sl st in any dc of Rnd 3. Ch 1, sc in each st around. Join with a sl st to the first sc. (100 sc worked 1 per existing st + 0 added = 100 sc)
Rnd 2 (scallop round): Skip next st, 5 dc in next st, skip next st, sl st in next st; repeat from * 25 times, working the final sl st into the first sc of Rnd 1. (25 scallops: 125 dc + 25 sl st = 150 sts) Fasten off and weave in the end.
Why the math works: Each scallop uses exactly 4 sts: skip 1, shell in 1, skip 1, sl st in 1. Rnd 1 has 100 sc, and 100 ÷ 4 = 25 scallops with no stitches left over. Rnd 3 was also built from 25 repeats of 4 sts, so there is one scallop above each brim repeat and the waves stay even all the way around.
The border adds 0.75 in (1.9 cm): 0.25 in (0.6 cm) for the sc round and 0.5 in (1.3 cm) for the scallops.
Twine Bow
Cut 30 in (76.2 cm) of jute twine. Start at the center front, below the buttons. Weave the twine through brim Rnd 1 all the way around, going under 2 sts and over 2 sts. Bring both ends out at the center front.
Put the cover on the jar, pull the twine snug around the jar neck and tie a bow. Trim each tail to about 2 in (5.1 cm) and knot the ends so they don’t fray.
Final Blocking
- Remove the twine.
- Mist the whole cover with cool water until it is damp but not soaked.
- Slip the cover over an upside-down jar of the size you will use it on, or over a ball with the same circumference.
- Smooth the ribs so they run straight down from the gathered top.
- Ease the brim outward and shape each cream scallop into an even curve.
- Check that the zigzag points are still evenly spaced and the buttons are centered.
- Let the cover dry completely, then rethread the twine and tie the bow.
Final Quality-Control Checklist
- Crown measures 10 in (25.4 cm) around the base, unstretched.
- Crown is 3.5 in (8.9 cm) tall from brim join to top, measured along a rib.
- Gathered top is closed with no visible hole.
- Ribs run straight up and down, and the seam lines up with a rib.
- Brim Rnd 3 has 100 dc; border Rnd 1 has 100 sc.
- There are 25 evenly spaced scallops.
- Zigzag has 10 high points and lies flat with no puckering.
- Three red buttons are centered on the front, 0.6 in (1.5 cm) apart.
- Twine bow sits at the center front, below the buttons.
- All yarn ends are woven in securely.
Troubleshooting
The ribs look slanted or flat. You may have worked into both loops on some rows. Every row after Row 1 must be worked BLO.
The top won’t close. Pull the gathering tail harder and make a second pass through the row ends.
The cover slides off the jar. Tie the twine tighter, or redo brim Rnd 1 with a 4.5 mm hook to tighten the crown base.
The brim curls inward instead of ruffling. Your dc may be too tight. Work Rnds 2 and 3 with a 5.5 mm hook.
The scallops are uneven. Count your stitches; Rnd 1 of the border must have exactly 100 sc.
The zigzag puckers. Your sewing stitches are too tight. Loosen them and catch only the surface of the ribbing.
The buttons look flat. Add a little more fiberfill before closing them.
Care
Hand wash in cool water with mild soap, press the water out in a towel and dry flat. Remove the twine before washing, and keep the cover away from direct heat.
Final Notes
Here is how the measurements build up:
- Crown: 14 stitches make it 3.5 in (8.9 cm) tall, and 50 rows make it 10 in (25.4 cm) around.
- Brim: Rnd 1 picks up 50 sc, one per row end. Two growth rounds bring it to 75 and then 100 dc, adding 1.25 in (3.2 cm) of depth.
- Border: It keeps 100 sc, and 100 ÷ 4 gives 25 even scallops. These add the last 0.75 in (1.9 cm), for a total length of 5.5 in (14.0 cm).
- Decoration: A 15 in (38.1 cm) cream cord with 10 high points, three red buttons and a twine bow complete the gingerbread look.
Happy crocheting!