

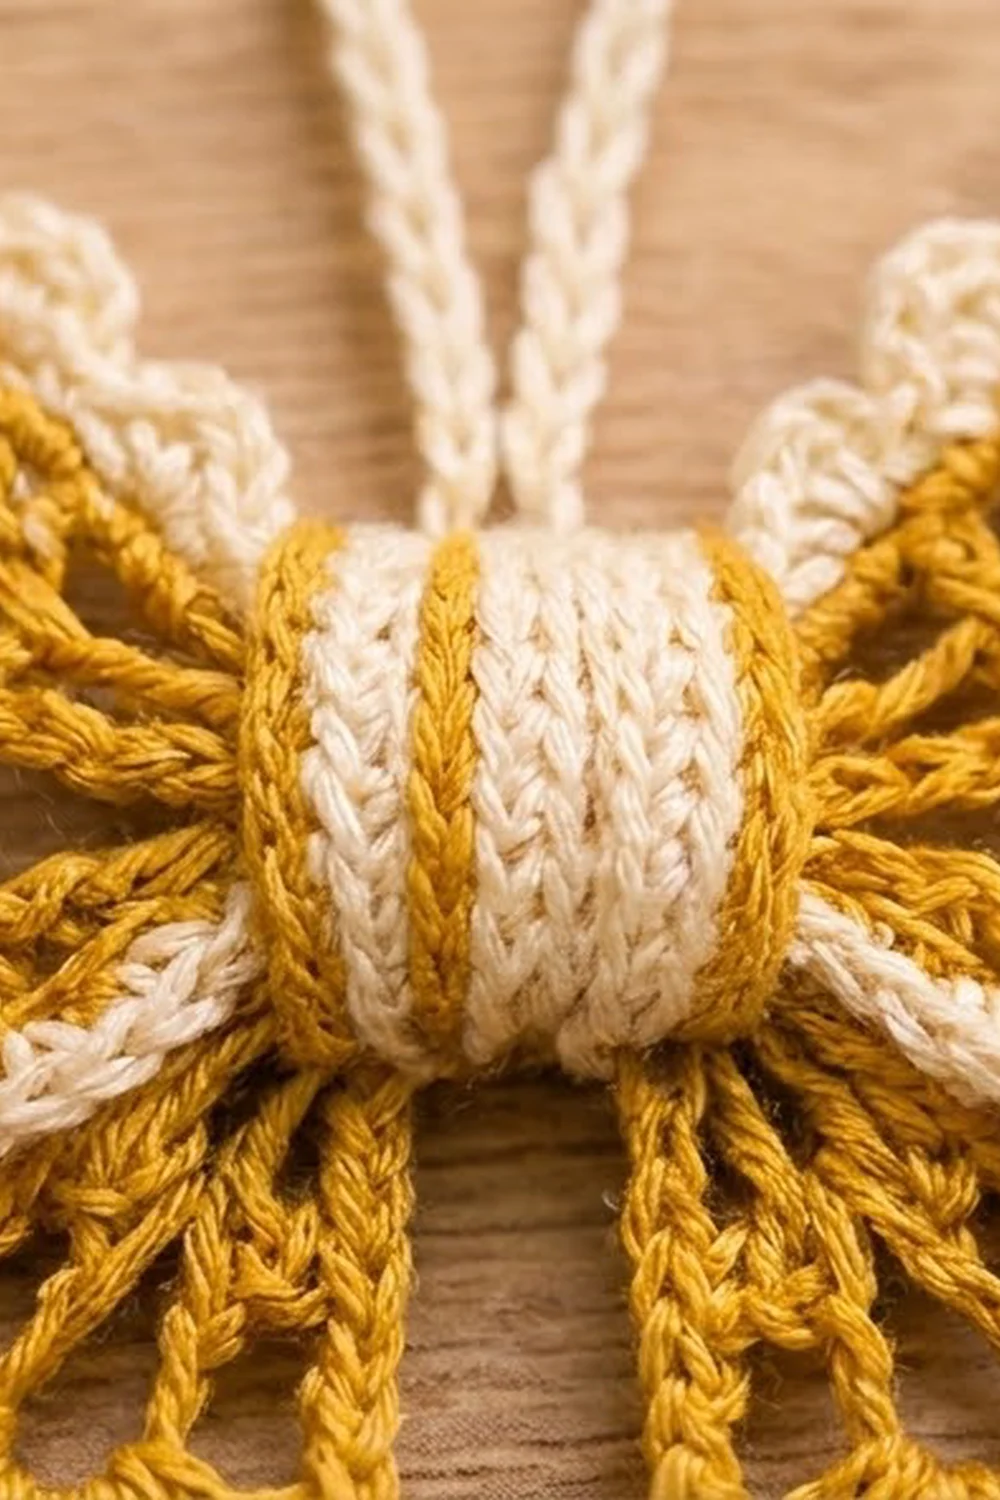
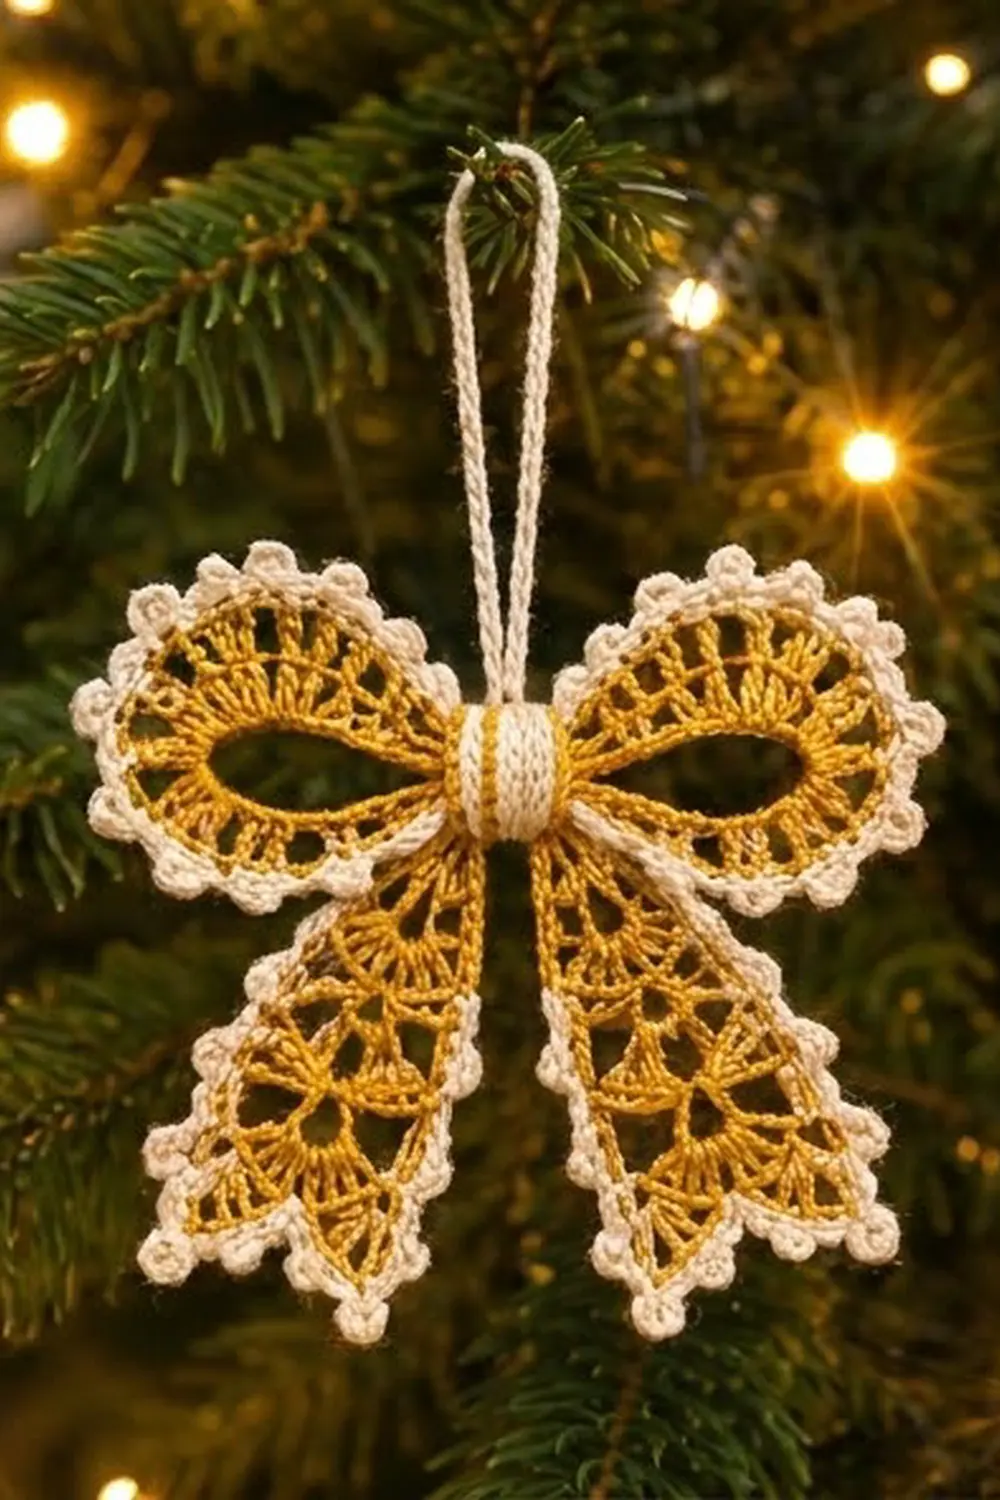
The Golden Lace Bow is a thread crochet ornament with old-fashioned charm. Two round, lacy wings frame open oval centers, and two flared tails end in scalloped shell points. Every edge is outlined in cream picots, and a ribbed cream band wraps the center like the knot of a real ribbon.
The palette is mustard-gold for the lace and soft cream for the trim, center wrap, and hanging cord. Against green branches and warm lights it looks like antique lace and gold leaf.
The pattern uses US crochet terms. The finished bow measures about 4.5 in (11.4 cm) wide and 4 in (10.2 cm) tall, not counting the hanging loop, which adds about 2 in (5.1 cm).
You’ll make two wings in the round and two tails in rows, then add cream picot edging to each. Finally, you stack the parts at the center, tack them together, wrap them with a ribbed cream band, and attach the cord. The result is one finished ornament.
Finished Size and Construction
- Finished size: 4.5 in (11.4 cm) wide × 4 in (10.2 cm) tall, excluding the loop
- Hanging loop: about 2 in (5.1 cm) tall
- Skill level: Intermediate (thread work, picots, shaping)
- Terminology: US
- Yarn weight: Size 10 cotton crochet thread (Lace, 0)
- Hook: 1.75 mm (US steel 4)
- Number of pieces: One finished ornament, built from 6 small components (2 wings, 2 tails, 1 center wrap, 1 hanging cord)
- Layout: Classic bow: wings left and right, tails angled down in a V
- Wing size: 2 in (5.1 cm) across before the border; 2.25 in (5.7 cm) after the border; flattens to an oval about 2.25 × 1.75 in (5.7 × 4.4 cm)
- Tail size: 1.9 in (4.8 cm) wide at the bottom before the border, 2.15 in (5.5 cm) after it; about 2.6 in (6.6 cm) long when finished
- Border depth: about 0.125 in (0.3 cm) on each edge
Materials
Thread: Use mercerized cotton in size 10. Mercerized cotton keeps the spokes crisp and holds its shape well after blocking. Avoid fuzzy or very soft threads, because they blur the picots.
- Gold (mustard): 8 g, about 45 m
- Cream: 5 g, about 28 m
These quantities include a margin for a gauge swatch and tails for weaving in.
Tools:
- 1.75 mm (US steel 4) crochet hook
- Fine tapestry needle or sharp embroidery needle
- Small scissors
- Rust-proof pins and a foam blocking board
- Spray bottle, or liquid starch (optional, for firm ornaments)
Abbreviations (US Terms)
- ch: chain
- sl st: slip stitch
- sc: single crochet
- dc: double crochet
- tr: treble crochet
- BLO: back loop only
- sk: skip
- st(s): stitch(es)
- sp: space
- tch: turning chain
- RS / WS: right side / wrong side
Special stitch – Picot: Ch 3, then sl st into the 3rd ch from the hook (the first ch you made). This makes one small round bump.
Stitch counts: Ch-1 spaces count as stitches in the tail counts. A ch-3 at the start of a row or round counts as 1 dc unless the pattern says otherwise.
Gauge and Checkpoints
Gauge: 10 dc and 4 dc rows = 1 in (2.5 cm), worked in gold thread with the 1.75 mm hook.
Make one tail first. It works as your gauge swatch and shows you how the bow will turn out.
Checkpoints:
- Tail Row 1: 5 dc measure about 0.5 in (1.3 cm).
- Tail Row 8: 19 sts measure about 1.9 in (4.8 cm). The tail is about 2 in (5.1 cm) long.
- Wing Round 1: The open center is about 1 in (2.5 cm) across when laid in a circle.
- Wing Round 3: The wing is about 2 in (5.1 cm) across.
- Wing after the border: The wing is about 2.25 in (5.7 cm) across.
If your pieces are too big, go down to a 1.5 mm hook, or crochet a little more tightly on the tall stitches. If your pieces are too small, go up to a 2 mm hook. A difference of 0.1 in (0.3 cm) per tail is fine. Larger differences change how the bow balances.
Tails (Make 2, Gold)
You’ll work the tails in rows from the narrow top down to the wide bottom. Each row adds 2 stitches, one at each edge. Odd rows are solid, and even rows are mesh.
Row 1 (RS): Ch 7. Dc in the 4th ch from the hook and in each of the next 3 ch. Turn. (5 dc; the skipped ch counts as 1 dc)
Row 2 (mesh): Ch 3, dc in the first st. [Ch 1, sk next st, dc in next st] once. Ch 1, sk next st, 2 dc in the top of the tch. Turn. (7 sts)
Row 3 (solid): Ch 3, dc in the first st. Dc in each dc and each ch-1 sp across. 2 dc in the top of the tch. Turn. (9 sts)
Row 4 (mesh): Ch 3, dc in the first st. [Ch 1, sk next st, dc in next st] 3 times. Ch 1, sk next st, 2 dc in the top of the tch. Turn. (11 sts)
Row 5 (solid): Repeat Row 3. (13 sts)
Row 6 (mesh): Ch 3, dc in the first st. [Ch 1, sk next st, dc in next st] 5 times. Ch 1, sk next st, 2 dc in the top of the tch. Turn. (15 sts)
Row 7 (solid): Repeat Row 3. (17 sts)
Row 8 (mesh): Ch 3, dc in the first st. [Ch 1, sk next st, dc in next st] 7 times. Ch 1, sk next st, 2 dc in the top of the tch. Turn. (19 sts)
Mesh check: A mesh row that starts with N stitches uses (N − 3) ÷ 2 bracket repeats. For Row 8, that’s (17 − 3) ÷ 2 = 7. Each mesh row also adds 2 stitches.
Row 9 (points): This row makes the two shell points with the notch between them. Ch 1, sc in st 1. Sk sts 2–4. Work (3 dc, ch 3, 3 dc) in st 5, then sk sts 6–8 and sc in st 9 to finish Point A. Ch 1, sk st 10 for the notch. Sc in st 11. Sk sts 12–14. Work (3 dc, ch 3, 3 dc) in st 15, then sk sts 16–18 and sc in st 19 to finish Point B. Fasten off.
Result: Two shell points. Each point has 2 sc, 6 dc, and 1 ch-3 tip. The ch-1 notch sits between them.
Checkpoint: The tail is about 1.9 in (4.8 cm) wide and about 2.4 in (6.1 cm) long, including the points.
Wings (Make 2, Gold)
Foundation: Ch 30. Sl st to the first ch to form a ring, taking care not to twist it.
Round 1: Ch 3 (counts as dc). Dc in each remaining ch around, working into the chains (not into the ring center) so the opening stays clear. Sl st to the top of the ch-3. (30 dc)
Round 2 (growth, spokes): Ch 5 (counts as tr + ch 1). (Tr, ch 1) in each dc around. Sl st to the 4th ch of the ch-5. (30 tr + 30 ch-1 sps = 60 sts)
Round 3 (conversion): Ch 1. Sc in each tr and 2 sc in each ch-1 sp around. Sl st to the first sc. Fasten off.
Count: 60 sts worked 1 per existing st + 30 extra sc = 90 sc.
Checkpoint: The wing is about 2 in (5.1 cm) across. The spokes should lie flat. If the wing cups, block it before adding the border.
Borders (Cream)
Border gauge: One cream sc round plus the picot round adds about 0.125 in (0.3 cm) to every edge.
Wing Border (each wing)
Round 1: Join cream in any sc. Ch 1, sc in each sc around. Sl st to the first sc. (90 sc)
Round 2 (picot): Ch 1. Sc in each of the next 3 sc, picot. Repeat from * around. Sl st to the first sc and fasten off. (90 sc, 30 picots)
Why the math works: 90 ÷ 3 = 30. That’s exactly one picot for each spoke from Round 2, so the picots line up with the spokes.
Tail Border (each tail)
The tail border is worked in rows down one long side, around both points, and up the other side. The narrow top edge (Row 1) is left plain, because the center wrap covers it.
Row 1: With the RS facing, join cream at the top corner of the right side edge. Ch 1.
- Side 1: 2 sc in each row-end of Rows 1–8. (16 sc)
- Point A: Sc in the sc, sc in each of the 3 dc, then (2 sc, ch 1, 2 sc) in the ch-3 tip. Sc in each of the 3 dc, then sc in the sc. (12 sc + 1 ch-1 tip)
- Notch: Sc in the ch-1 notch. (1 sc)
- Point B: Work as for Point A. (12 sc + 1 ch-1 tip)
- Side 2: 2 sc in each row-end of Rows 8 back to 1. (16 sc)
Fasten off. Row total: 16 + 12 + 1 + 12 + 16 = 57 sc, plus 2 tip sps.
Row 2 (picot): With the RS still facing, rejoin cream in the first sc of Row 1 so that the picots face the front. Ch 1.
- Side 1: Sc in each of the next 4 sc, picot. Repeat 4 times. (16 sc, 4 picots)
- Point A: Sc in each of the next 3 sc, picot, sc in each of the next 3 sc. Work (sc, picot, sc) in the tip sp. Sc in each of the next 3 sc, picot, sc in each of the next 3 sc. (12 sc worked 1 per st + 2 sc in the tip = 14 sc; 3 picots)
- Notch: Sc in the notch sc. (1 sc)
- Point B: Work as for Point A. (14 sc, 3 picots)
- Side 2: Sc in each of the next 4 sc, picot. Repeat 4 times. (16 sc, 4 picots)
Fasten off. Row total: 61 sc, 14 picots.
Why the math works: Each side has 8 dc rows, and 2 sc per row-end gives 8 × 2 = 16 sc. That splits evenly into 4 groups of 4. Each point has 12 sc, which splits into 4 groups of 3 around the tip. The single notch sc keeps the V sharp.
Checkpoint: The tail is about 2.15 in (5.5 cm) wide and about 2.6 in (6.6 cm) long.
Center Wrap (Make 1, Cream)
Row 1: Ch 7. Sc in the 2nd ch from the hook and in each ch across. Turn. (6 sc)
Rows 2–12: Ch 1, sc in the BLO of each st across. Turn. (6 sc per row)
Fasten off, leaving a 6 in (15.2 cm) tail for sewing. The strip should be about 0.6 in (1.5 cm) wide and 1.25 in (3.2 cm) long, with ribs running across it.
Hanging Cord (Make 1, Cream)
Ch 41. Sl st in the 2nd ch from the hook and in each ch back to the start. (40 sl st)
Fasten off, leaving 6 in (15.2 cm) tails at both ends. The cord measures about 4 in (10.2 cm) and folds into a 2 in (5.1 cm) loop.
Assembly
- Block first: Lightly block all four lace parts before you assemble the bow (see Final Blocking below).
- Shape the wings: Lay the wings left and right with their open centers running horizontally. Pinch the inner end of each wing into a narrow point about 0.25 in (0.6 cm) wide.
- Stack the center: Overlap the two pinched ends by about 0.25 in (0.6 cm) at the center. Then place the tails behind the wings, with their top (Row 1) edges meeting at the center and the tails angled outward in a V.
- Tack the stack: With gold thread, make 4–5 stitches straight through the whole stack to hold it in place.
- Wrap the center: Wrap the cream strip around the stack with the ribs running vertically. Sew the short ends together at the back. The wrap should be snug but not crushing, so the wings stay full.
- Attach the cord: Fold the cord into a loop and sew both ends to the top back of the wrap. Weave in all ends.
Final Blocking
- Lightly mist the ornament, or dip it in diluted starch and blot it with a towel.
- Lay it RS up on the blocking board.
- Pin each wing to a 2.25 × 1.75 in (5.7 × 4.4 cm) oval. Pin the open center flat.
- Straighten the spokes so they radiate evenly.
- Pin each tail point at its ch-1 tip, and open the notch into a clear V.
- Pin out every picot with the tip of a pin.
- Check the full size: 4.5 in (11.4 cm) wide and 4 in (10.2 cm) tall.
- Let it dry completely, at least 6 hours, before you unpin it.
Final Quality-Control Checklist
- Each wing has 30 spokes, 90 sc in the outer gold band, and 30 picots.
- Each tail has 8 body rows, two shell points, and a clear V-notch.
- Each tail border has 61 sc and 14 picots.
- The tails match in length within 0.1 in (0.3 cm).
- The wings match in size and sit at the same height.
- The center wrap fully hides the tacking stitches.
- The hanging cord is centered and the bow hangs level.
- All ends are woven in invisibly.
Troubleshooting
- The wing ruffles: Your tr stitches are too tall or too loose. Rework Round 2 with a tighter yarn-over, or block it firmly.
- The wing cups: Round 1 is too tight. Rework it with a slightly looser tension.
- The tail edges wave: Your turning chains are loose. Use ch 2 as the turning chain instead of ch 3, but still count it as 1 dc.
- The notch is shallow: Make sure you skipped st 10 in Row 9 and worked only 1 sc into the notch in the border.
- The picots are uneven: Insert your hook into the same loop of the first ch every time you make a picot.
- The bow tilts: Re-sew the cord ends so they sit exactly at the center top of the wrap.
Care
Hand wash in cool water with a mild soap, roll it in a towel, and re-block it flat to dry. Store it flat in tissue paper so the picots stay crisp.
Final Notes
The measurements build on each other. Tail Row 1 measures 0.5 in (1.3 cm), and Row 8 grows to 1.9 in (4.8 cm). The wing reaches 2 in (5.1 cm) after Round 3. The cream border then adds 0.125 in (0.3 cm) to each edge, bringing the wings to 2.25 in (5.7 cm) and the tails to 2.15 in (5.5 cm). Once assembled, the bow measures 4.5 × 4 in (11.4 × 10.2 cm). If you check each stage, the finished bow will balance and hang straight.
Happy crocheting!