

This crown ornament pairs deep royal purple lace with a bright, twisted gold edge. The body is made of staggered fan shells over a row of open “window” bars. The top rises into five peaks, and each tip carries a small gold trefoil.
The style is classic thread lace with a festive feel. It is light enough to hang on a tree branch and sturdy enough, once starched, to keep its points. You can also use it as a gift topper or a royal-themed party favor.
The pattern uses US crochet terms. The finished ornament measures 4.8 in (12.2 cm) wide by 3.5 in (8.9 cm) tall, not counting the hanging loop. The loop adds about 1.25 in (3.2 cm).
You work the body flat in six purple rows: a single crochet base, a row of bars, three shell rows and one shaping row that builds the five peaks. Then you add a two-round gold border: single crochet with trefoils at the tips, followed by crab stitch. A purple hanging loop finishes the piece.
Finished Size and Construction
- Finished size: 4.8 in (12.2 cm) wide × 3.5 in (8.9 cm) tall, excluding the loop
- Hanging loop: about 1.25 in (3.2 cm) tall
- Skill level: Intermediate
- Terminology: US crochet terms
- Yarn weight: Size 3 crochet thread (lace weight, category 0)
- Hook: 2.25 mm (US B-1)
- Number of pieces: 1
- Layout: Single flat piece, worked in rows
- Size before border: 4.4 in (11.2 cm) wide × 2.75 in (7.0 cm) tall at the center tip
- Border depth: about 0.2 in (0.5 cm) on each side, plus about 0.3 in (0.8 cm) for each trefoil
Materials
Use mercerized cotton thread for the purple. It gives crisp stitch definition and takes starch well. For the gold, choose a metallic size 3 thread or a cotton-metallic blend of the same thickness, so the border lies flat and does not pucker.
- Purple (Color A): 8 g / about 24 m of size 3 mercerized cotton
- Metallic gold (Color B): 4 g / about 12 m of size 3 metallic thread
These quantities include a margin of about 25% for your gauge swatch and weaving in ends.
Tools:
– 2.25 mm (US B-1) crochet hook
– Small sharp scissors
– Tapestry or embroidery needle with an eye large enough for size 3 thread
– Rust-proof pins
– Foam blocking board or a folded towel
– Spray starch or a fabric stiffener
– Measuring tape or ruler
Abbreviations (US Terms)
- ch – chain
- sl st – slip stitch
- sc – single crochet
- hdc – half double crochet
- dc – double crochet
- tr – treble crochet (yarn over twice)
- dtr – double treble crochet (yarn over 3 times)
- trtr – triple treble crochet (yarn over 4 times)
- sc3tog – single crochet 3 together
- rev sc – reverse single crochet (crab stitch)
- sp – space
- st(s) – stitch(es)
- RS / WS – right side / wrong side
Special stitches:
- Shell: 7 dc in the same stitch.
- Trefoil: (ch 4, sl st in 4th ch from hook) 3 times, working every sl st into the same first chain. This makes three small rings that sit close together.
- Crab stitch (rev sc): Working left to right, insert the hook into the next stitch to the right, yarn over, pull up a loop, then yarn over and pull through both loops.
Gauge and Checkpoints
Gauge: 7 sc = 1 in (2.5 cm) in size 3 thread with a 2.25 mm hook.
Make one test crown before you make a batch. Thread gauge varies a lot with tension, and small differences add up across 31 base stitches.
Checkpoints:
- After Row 1: The base row of 31 sc measures 4.4 in (11.2 cm).
- After Row 2: The piece is about 0.45 in (1.1 cm) tall.
- After Row 5: The piece is about 1.75 in (4.4 cm) tall and still 4.4 in (11.2 cm) wide.
- After Row 6: The center tip reaches 2.75 in (7.0 cm), and the outer tips reach about 2.4 in (6.1 cm).
- After the border: The crown is 4.8 in (12.2 cm) wide and 3.5 in (8.9 cm) tall.
If your Row 1 is too wide, switch to a 2.0 mm hook. If it is too narrow, switch to a 2.5 mm hook. Do not change the stitch counts. The fan repeats depend on exactly 31 base stitches.
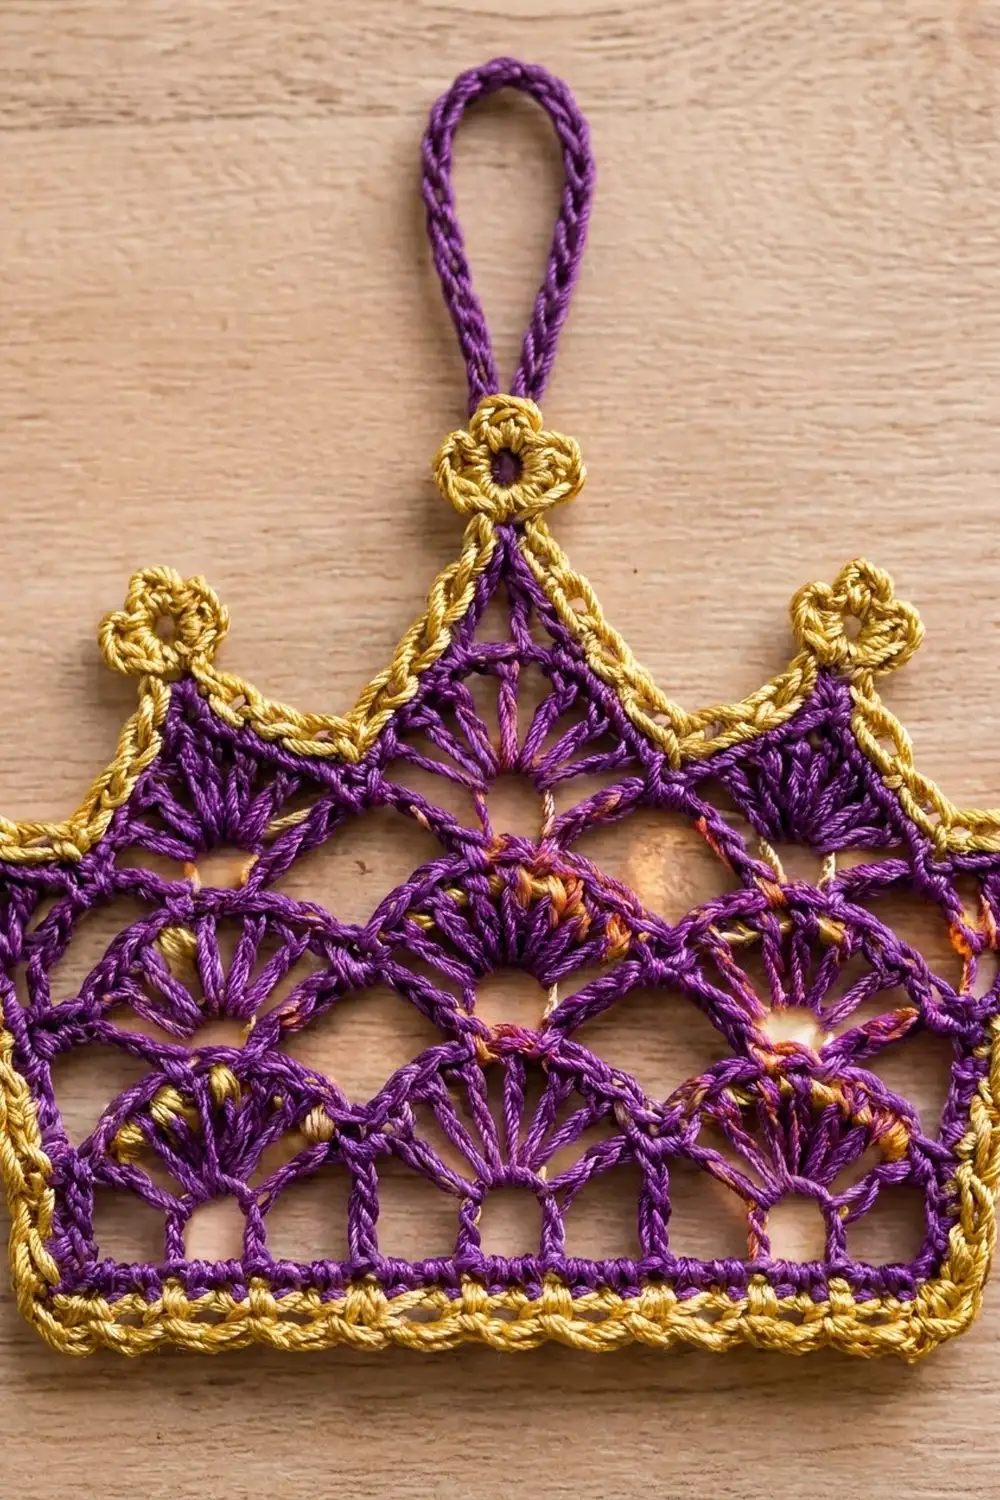
Crown Body (Color A, Purple)
Ch 32.
Row 1 (WS): Sc in 2nd ch from hook and in each ch across. Turn. (31 sc)
Row 2 (RS, window bars): Ch 5 (counts as dc + ch 2). Skip next 2 sc and dc in next sc. Ch 2, skip next 2 sc, dc in next sc. Repeat from * across. Turn. (11 dc, 10 ch-2 sps)
The bars are worked into sc positions 1, 4, 7 and so on, up to 31. This makes ten evenly spaced open windows along the base.
Row 3 (WS, first fan row): Ch 1. Sc in first dc. Skip ch-2 sp, shell in next dc, skip ch-2 sp, sc in next dc. Repeat from * 4 more times. Work the last sc in the 3rd ch of the turning ch-5. Turn. (5 shells, 6 sc = 35 dc + 6 sc = 41 sts)
The shells sit on dc 2, 4, 6, 8 and 10, and the sc sit on dc 1, 3, 5, 7, 9 and 11.
Row 4 (RS, offset fans): Ch 3 (counts as dc). Work 3 dc in the same sc for a half shell. Ch 2, sc in center (4th) dc of next shell, ch 2, shell in next sc. Repeat from * 3 more times. Ch 2, sc in center dc of last shell, ch 2, then 4 dc in last sc for a half shell. Turn. (4 full shells + 2 half shells = 36 dc, 5 sc, 10 ch-2 sps)
Row 5 (WS, third fan row): Ch 1. Sc in first dc. Ch 2, shell in next sc, ch 2, sc in center dc of next shell. Repeat from * 4 more times. On the last repeat, work the final sc into the top of the turning ch-3 instead of a shell center. Turn. (5 shells, 6 sc = 35 dc + 6 sc = 41 sts, 10 ch-2 sps)
The shells now line up above the Row 3 shells. This gives the lace its staggered fish-scale look.
Row 6 (RS, peak shaping): Ch 1. Sc in first sc.
Side and middle peaks (shells 1, 2, 4 and 5): Work 2 sc in ch-2 sp. On the shell, work hdc in the 1st dc, dc in the 2nd dc and tr in the 3rd dc. Work (dtr, ch 3, dtr) in the 4th dc. Then work tr in the 5th dc, dc in the 6th dc and hdc in the 7th dc. Work 2 sc in next ch-2 sp, then sc in next sc.
Center peak (shell 3): Work 2 sc in ch-2 sp. On the shell, work dc in the 1st dc, tr in the 2nd dc and dtr in the 3rd dc. Work (trtr, ch 3, trtr) in the 4th dc. Then work dtr in the 5th dc, tr in the 6th dc and dc in the 7th dc. Work 2 sc in next ch-2 sp, then sc in next sc.
Work the peaks in order: peak, peak, center peak, peak, peak. Fasten off. (66 sts + 5 ch-3 tip spaces)
Row 6 count check: 1 starting sc + 5 peaks × 13 sts each (2 + 3 + 2 + 3 + 2 + 1) = 66.
The single sc that sits between two peaks becomes the bottom of a V. The taller stitches at the center of each shell lift the tips. The outer peaks lean outward naturally because the outer slope of each one is the edge of the piece.
Weave in the ends on the WS. The body should now measure 4.4 in (11.2 cm) wide and 2.75 in (7.0 cm) tall at the center tip.
Border
Border gauge: The border keeps the body gauge of 7 sc = 1 in (2.5 cm). Work every border stitch into a real stitch or row end, without stretching. Two border rounds add about 0.2 in (0.5 cm) on each side.
Round 1 (Color B, Gold)
With RS facing, join gold with a sc in the first sc of Row 6 (the far right sc).
Top edge:
- Peak 1: Sc in each of the next 6 sts, up to and including the dtr. In the ch-3 tip, work (sc, trefoil, sc). Sc in each of the next 5 sts.
- First valley: Sc3tog over the last sc of this peak, the valley sc and the first sc of the next peak.
- Peaks 2, 3 and 4: Sc in each of the next 5 sts. In the tip, work (sc, trefoil, sc). Sc in each of the next 5 sts. Work sc3tog across the next valley. Repeat for each of these three peaks. You will have worked 4 valleys in total, between peaks 1–2, 2–3, 3–4 and 4–5.
- Peak 5: Sc in each of the next 5 sts. In the tip, work (sc, trefoil, sc). Sc in each of the next 6 sts, ending with the last sc of Row 6.
Top edge count: 68 sc + 5 trefoils.
Left side: Work 12 sc down the row ends: 3 in Row 5, 3 in Row 4, 3 in Row 3, 2 in Row 2 and 1 in Row 1. (12 sc)
Bottom edge: Work 3 sc in the first foundation ch, sc in each of the next 29 ch, then 3 sc in the last ch. (35 sc, including both corner groups)
Right side: Work 12 sc up the row ends, mirroring the left side. Join with a sl st to the first sc. (12 sc)
Round 1 total: 68 + 12 + 35 + 12 = 127 sc + 5 trefoils.
Round 2 (Color B, Crab Stitch)
Ch 1 and do not turn. Work rev sc in each sc around, moving left to right.
- At each trefoil: Work rev sc in the sc before it and in the sc after it. Leave the trefoil free so it stands up above the edge.
- At each valley: Work 1 rev sc into the sc3tog. This keeps the V sharp.
- At each bottom corner: Work 1 rev sc into the center sc of the 3-sc group.
Join with a sl st to the first st. (127 rev sc) Fasten off.
Why the Math Works
Bottom edge: Row 1 has 31 stitches, so the foundation chain has 31 usable loops. The two end loops each take 3 sc and the 29 loops between them take 1 sc each: 29 + 3 + 3 = 35. The corner stitches are counted only once, inside the bottom count.
Sides: The 12 sc per side follow the height of each row: about 1 sc for a sc row, 2 for a dc row and 3 for a shell row. That keeps the side edges flat.
Top edge: Row 6 has 66 stitches. Each of the 4 sc3tog valleys turns 3 stitches into 1, which removes 8 stitches and leaves 58. The 5 tips add 2 sc each, which adds 10: 58 + 10 = 68.
Round 2 works 1 stitch into each of the 127 Round 1 stitches, so the count stays the same.
Hanging Loop (Color A, Purple)
Join purple with a sl st to the middle ring of the center trefoil. Ch 26, then sl st into the same ring. Turn and sl st into each ch back around the loop. Join to the trefoil and fasten off.
The sl st pass gives the loop a firm, twisted look. The loop stands about 1.25 in (3.2 cm) tall.
Final Blocking
- Wet: Soak the crown in cool water for a few minutes, then press out the water in a towel. Do not wring it.
- Pin the base: Place the crown RS up on the board. Pin the bottom edge straight at 4.8 in (12.2 cm) wide.
- Pin the tips: Pin each peak tip just below its trefoil. Set the center tip at 3.2 in (8.1 cm) above the base and the outer tips at about 2.8 in (7.1 cm).
- Open the V’s: Pin into each valley to sharpen it.
- Shape the trefoils: Open each trefoil ring with a pin through its center.
- Starch: Spray with starch until the piece is evenly damp. For a very stiff finish, brush on fabric stiffener instead.
- Dry: Leave the crown to dry completely, at least 12 hours. Unpin it only when it is fully dry.
- Final measure: The finished crown should be 4.8 in (12.2 cm) wide and 3.5 in (8.9 cm) tall.
Final Quality-Control Checklist
- [ ] Row 2 shows 10 even windows along the base.
- [ ] Each fan row has the correct number of shells: 5, then 4 plus 2 halves, then 5.
- [ ] The center peak is clearly taller than the other four.
- [ ] All 4 valleys form sharp V’s.
- [ ] There are 5 trefoils, each with 3 open rings.
- [ ] The crab-stitch edge is continuous and has no gaps at the corners.
- [ ] The hanging loop is centered and secure.
- [ ] All ends are woven in on the WS and trimmed close.
- [ ] The finished size is 4.8 in × 3.5 in (12.2 cm × 8.9 cm).
Troubleshooting
The base edge ruffles. Your foundation chain is tighter than your sc. Chain with a hook one size larger, then switch back to the 2.25 mm hook for Row 1.
The fans cup or curl. The shells are too tight. Relax your tension on the dc stitches, or check that you skipped the ch-2 spaces in Row 3.
The peaks look rounded. Check that you placed the dtr (or trtr at the center) in the 4th dc of each shell. Make sure you worked sc3tog in every valley, then block with firm pins.
The gold border puckers. Metallic thread has no stretch, so work it a little looser. Do not add extra sc on the sides; keep to 12 per side.
The crab stitch twists unevenly. Keep the hook angle the same for every stitch, and pull each loop up to the same height.
The ornament flops on the tree. Re-wet it and apply stiffener, or add a second coat of starch.
Care
Hand wash the crown gently in cool water and lay it flat to dry. Re-starch and pin it to shape whenever it starts to soften.
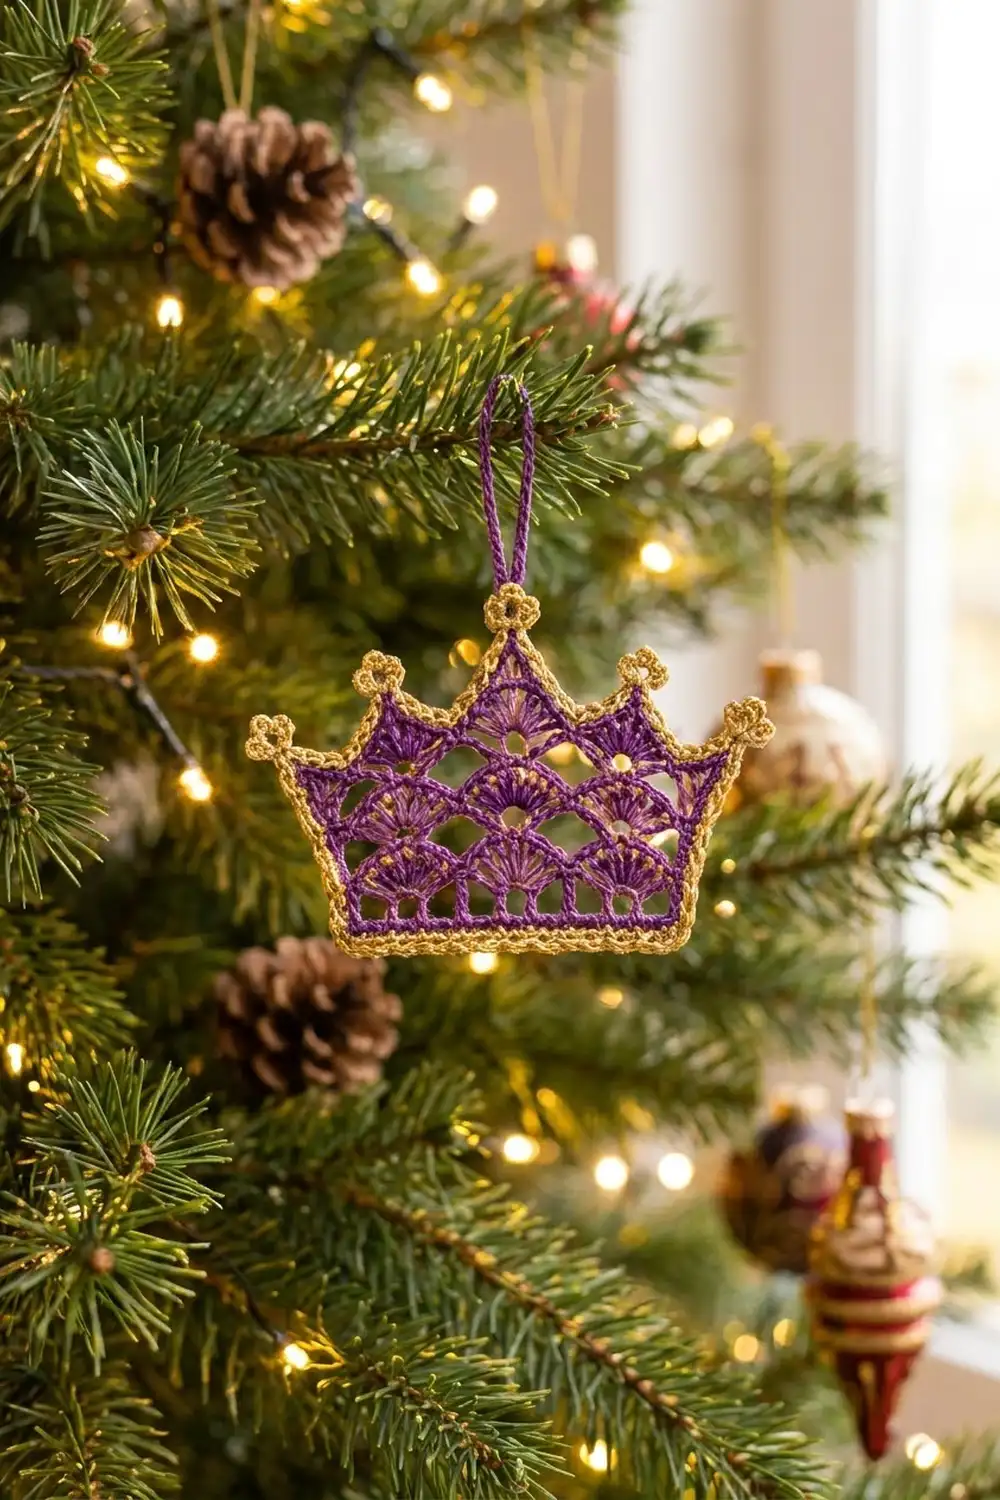
Final Notes
The measurement chain is simple. Thirty-one base stitches at 7 sc per inch give a 4.4 in (11.2 cm) body. Three shell rows bring the height to 1.75 in (4.4 cm), and the peak row lifts the center tip to 2.75 in (7.0 cm). The gold border adds 0.2 in (0.5 cm) on each side and the trefoils add their small crowns on top, for a finished size of 4.8 in × 3.5 in (12.2 cm × 8.9 cm).
If your test crown matches each checkpoint, the rest of your batch will match too. Make a few and hang them together.
Happy crocheting!