

The Rosy Trellis Toilet Paper Cozy is a small, sturdy basket that holds one standard roll on your bathroom counter or tank. The walls are covered in a deep puff-fan texture that nests into a diamond trellis, and the rim is finished with soft cream scallops.
The palette is gentle and vintage: dusty rose for the body and the large center rose, blush pink for the two side roses, the rosebuds and the feet, cream for the scalloped rim and foot soles, and sage green for the leaves and stems. Four little round feet lift the basket and give it a playful, cottage-style look.
This pattern uses US crochet terms. The finished cozy measures about 5 1/4 in (13.3 cm) across and 3 3/4 in (9.5 cm) tall without the feet, or about 4 1/2 in (11.4 cm) tall standing on its feet.
Construction is simple to follow. You work a flat circular base in single crochet, turn the edge with a back-loop round, build the walls in the round with offset puff fans, level the top, and add a two-round cream scallop border. The roses, leaves, rosebud drops and feet are made separately and sewn on.
Finished Size and Construction
- Finished size: 5 1/4 in (13.3 cm) diameter x 3 3/4 in (9.5 cm) tall; 4 1/2 in (11.4 cm) tall with feet
- Skill level: Intermediate
- Terminology: US crochet terms
- Yarn weight: Worsted (#4)
- Hook: 4.5 mm (US 7)
- Number of pieces: 1 main body worked in one piece, plus sewn-on details (3 roses, 6 leaves, 2 rosebud drops, 4 feet)
- Layout: Single cylinder; embellishments centered on the front
- Body size before border: 5 1/4 in (13.3 cm) diameter x 3 in (7.6 cm) tall
- Border depth: 3/4 in (1.9 cm)
- Circumference: 16 1/2 in (41.9 cm), 66 stitches
Materials
Choose a smooth worsted-weight cotton or cotton blend. Cotton holds the basket shape well and shows the puff texture clearly. Acrylic works too, but the walls will be softer. The amounts below assume about 170 m per 100 g (186 yd per 3 1/2 oz).
- Dusty rose (body, large rose): 110 g, about 187 m (205 yd)
- Blush pink (small roses, buds, feet): 30 g, about 51 m (56 yd)
- Cream (border, foot soles): 20 g, about 34 m (37 yd)
- Sage green (leaves, stems, bud caps): 10 g, about 17 m (19 yd)
All quantities include a margin of roughly 15 percent for gauge swatches and tails.
Tools:
- 4.5 mm (US 7) crochet hook
- Tapestry needle
- Stitch marker
- Scissors
- A small amount of polyester fiberfill
- Rustproof pins
Abbreviations (US Terms)
- ch – chain
- sl st – slip stitch
- sc – single crochet
- hdc – half double crochet
- dc – double crochet
- inc – 2 sc in the same stitch
- dec – sc 2 together
- BLO / FLO – back loop only / front loop only
- MR – magic ring
- sk – skip
- sp – space
- st(s) – stitch(es)
Puff: (Yarn over, insert hook in indicated st, yarn over and pull up a loop) 3 times, yarn over and pull through all 7 loops on hook.
Fan: (Puff, ch 1, puff, ch 1, puff) all in the same st. Each fan counts as 5 sts: 3 puffs plus 2 ch-1 sps.
Gauge and Checkpoints
Gauge in sc: 16 sts and 18 rounds = 4 in (10.2 cm).
Gauge in pattern: one 6-st repeat (sc plus fan) = 1 1/2 in (3.8 cm) wide; 2 pattern rounds = 1 in (2.5 cm) tall.
The base is your gauge swatch. Work it first and measure it before you start the walls.
Checkpoints:
- After Rnd 6 (36 sts): base about 2 3/4 in (7.0 cm) across
- After Rnd 11 (66 sts): base 5 1/4 in (13.3 cm) across, lying flat
- After Rnd 18: walls 3 in (7.6 cm) tall from the base edge
- After the border: total height 3 3/4 in (9.5 cm)
If the base is more than 1/4 in (0.6 cm) too big, go down one hook size. If it is too small, go up one hook size. Most rolls are about 4 1/2 in (11.4 cm) across, so a base under 5 in (12.7 cm) may be too snug.
Base
With dusty rose, work in continuous rounds. Mark the first st of each round.
Rnd 1: 6 sc in MR. (6 sts)
Rnd 2: Inc in each st around. (12 sts)
Rnd 3: *Sc in next st, inc; rep from * 5 more times. (18 sts)
Rnd 4: *Sc in next 2 sts, inc; rep from * 5 more times. (24 sts)
Rnd 5: *Sc in next 3 sts, inc; rep from * 5 more times. (30 sts)
Rnd 6: *Sc in next 4 sts, inc; rep from * 5 more times. (36 sts)
Rnd 7: *Sc in next 5 sts, inc; rep from * 5 more times. (42 sts)
Rnd 8: *Sc in next 6 sts, inc; rep from * 5 more times. (48 sts)
Rnd 9: *Sc in next 7 sts, inc; rep from * 5 more times. (54 sts)
Rnd 10: *Sc in next 8 sts, inc; rep from * 5 more times. (60 sts)
Rnd 11: *Sc in next 9 sts, inc; rep from * 5 more times. (66 sts)
To keep the circle round instead of hexagonal, you can move the inc to the middle of each repeat on alternate rounds. The counts stay the same. Sl st to the next st to finish spiraling, and work joined rounds from here.
Walls
Rnd 12 (turning round): Ch 1, sc in BLO of each st around, join with sl st to first sc. (66 sts)
The unused front loops make a crisp edge where the base meets the wall.
Rnd 13 (set-up fan round): Ch 1, sc in first st, *sk 2 sts, fan in next st, sk 2 sts, sc in next st; rep from * 9 more times, sk 2 sts, fan in next st, sk 2 sts, join with sl st to first sc. (11 sc + 11 fans = 11 x 6 = 66 sts)
Rnd 14 (offset fan round): Sl st in next puff, sl st in next ch-1 sp, sl st in center puff. Ch 1, sc in same center puff, *sk next ch-1 sp and puff, fan in next sc, sk next puff and ch-1 sp, sc in center puff of next fan; rep from * 9 more times, sk next ch-1 sp and puff, fan in next sc, sk last puff and ch-1 sp, join with sl st to first sc. (66 sts)
Each new fan sits on the sc between two fans below, and each new sc sits on a fan center. This offset builds the diamond trellis: the outer puffs of neighboring fans line up diagonally and form raised ridges.
Rnds 15–17: Rep Rnd 14. (66 sts each round)
Checkpoint: five fan rounds measure about 2 1/2 in (6.4 cm). The wall should rise straight up. If it flares, your fans are too loose. If it pulls inward, your sc are too tight.
Rnd 18 (leveling round): Ch 3 (counts as dc) in the first sc, *sc in each of next 5 sts (puff, ch-1 sp, puff, ch-1 sp, puff), dc in next sc; rep from * 9 more times, sc in each of last 5 sts, join with sl st to top of ch-3. (11 dc + 55 sc = 66 sts)
The dc fills the dip above each sc so the rim sits level. Fasten off dusty rose.
Checkpoint: wall height 3 in (7.6 cm), circumference 16 1/2 in (41.9 cm).
Border
Border gauge: 16 sc = 4 in (10.2 cm), the same as the base. One scallop covers 6 sts, or 1 1/2 in (3.8 cm).
Rnd 19: Join cream in any dc. Ch 1, sc in each st around, join. (66 sts)
Rnd 20 (scallop round): Ch 1, sc in first st, *sk 2 sts, 7 dc in next st, sk 2 sts, sc in next st; rep from * 9 more times, sk 2 sts, 7 dc in next st, sk 2 sts, join with sl st to first sc. (11 sc + 11 shells of 7 dc = 11 + 77 = 88 sts)
Fasten off and weave in the end.
Why the math works: each scallop uses exactly 6 sts of Rnd 19 (1 sc, 2 skipped, 1 shell base, 2 skipped). The rim has 66 sts, and 66 ÷ 6 = 11 scallops with nothing left over. Because the walls also use a 6-st repeat, each scallop sits above one fan column. The 7-dc shell is full enough to curl slightly outward without ruffling.
Feet (make 4)
With cream, work in continuous rounds.
Rnd 1: 6 sc in MR. (6 sts)
Rnd 2: Inc in each st around. (12 sts)
Rnd 3: *Sc in next st, inc; rep from * 5 more times. (18 sts)
Rnd 4: Sc in BLO of each st around. (18 sts) Change to blush pink on the last st.
Rnds 5–6: Sc in each st around. (18 sts)
Sl st to the next st and fasten off, leaving a 12 in (30.5 cm) tail. Each foot is about 1 1/2 in (3.8 cm) across and 3/4 in (1.9 cm) tall. Stuff lightly so the sole stays flat.
Roses
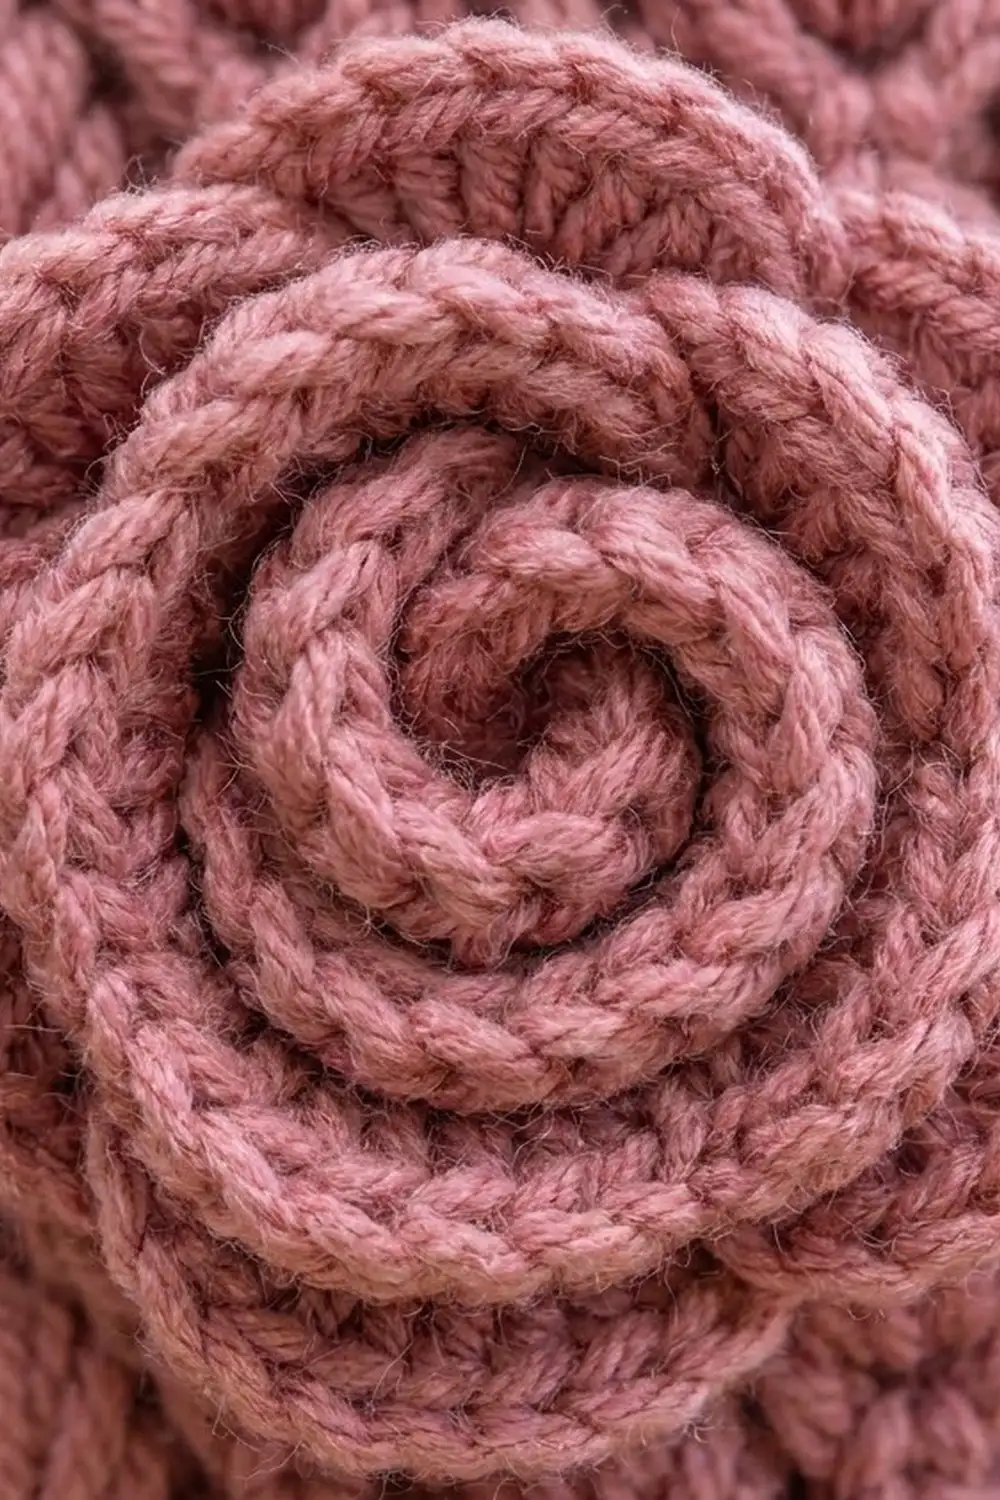
Large rose (make 1, dusty rose): Ch 44.
Row 1: (Dc, ch 1, dc) in 5th ch from hook, *sk 2 ch, (dc, ch 1, dc) in next ch; rep from * to end. (14 V-sts)
Row 2: Turn. Ch 1, 5 dc in ch-1 sp of next V-st, sl st between V-sts; rep from * 4 more times (5 small petals), 7 dc in next ch-1 sp, sl st between V-sts; rep from ** 4 more times (5 medium petals), **9 dc in next ch-1 sp, sl st between V-sts; rep from *** 3 more times (4 large petals). (14 petals)
Fasten off with a 12 in (30.5 cm) tail. Starting with the small-petal end, roll the strip into a spiral, keeping the base flat. Stitch through all layers at the base. The finished rose is about 2 1/4 in (5.7 cm) across.
Small rose (make 2, blush pink): Ch 29.
Row 1: Work as large rose Row 1. (9 V-sts)
Row 2: Work 4 petals of 5 dc, then 5 petals of 7 dc, with a sl st between V-sts. (9 petals)
Roll and stitch as for the large rose. Each small rose is about 1 1/2 in (3.8 cm) across.
Leaves (make 6, sage green)
Ch 7.
Rnd 1: Sc in 2nd ch from hook, hdc in next ch, dc in next 2 ch, hdc in next ch, (sc, ch 2, sc) in last ch for the tip. Working along the other side of the chain, hdc in next ch, dc in next 2 ch, hdc in next ch, sc in last ch, sl st to first sc.
Fasten off with a tail. Each leaf is about 1 1/4 in (3.2 cm) long with a pointed tip.
Rosebud Drops (make 2)
Stem: With sage green, ch 11. Sl st in 2nd ch from hook and each ch across. (10 sl sts, about 2 in / 5.1 cm) Fasten off, leaving tails at both ends.
Bud: With sage green, work in continuous rounds.
Rnd 1: 6 sc in MR. (6 sts)
Rnd 2: *Sc in next st, inc; rep from * 2 more times. (9 sts) Change to blush pink.
Rnd 3: *Sc in next 2 sts, inc; rep from * 2 more times. (12 sts)
Rnd 4 (petal frill, FLO): *Sc in next st, (hdc, dc, hdc) in next st, sc in next st; rep from * 3 more times. (4 petals; 4 x 5 = 20 sts)
Rnd 5: Working in the unused back loops of Rnd 3, *sc in next st, dec; rep from * 3 more times. (8 sts) Stuff lightly.
Rnd 6: Dec 4 times. (4 sts)
Fasten off and close the hole. The green cap sits on top, the pink petal frill wraps the middle, and the bud measures about 3/4 in (1.9 cm). Sew the green cap to one end of a stem.
Assembly
- Feet: Turn the basket upside down. Pin the four feet on Rnd 8 of the base, 12 sts apart. Sew around the full edge of each foot.
- Large rose: Center it on the front, with its top edge just below the cream border.
- Small roses: Place one on each side of the large rose, slightly overlapping it.
- Leaves: Tuck one leaf on the outer side of each small rose and two leaves under each gap between the roses.
- Rosebud drops: Sew the top of each stem under a gap between the large rose and a small rose, so the stems hang about 2 in (5.1 cm). Tack the stems flat along their length and add one small stitch behind each bud.
Use matching yarn and small stitches that pass through the backs of the pieces only.
Final Blocking
- Lightly dampen the basket, or hold a steam iron 1 in (2.5 cm) above it. Never press.
- Slide a toilet paper roll, or a jar wrapped in a towel, inside to hold the cylinder shape.
- Make sure the base is flat and the walls stand straight.
- Pin each scallop so it curls slightly outward, with 11 even scallops around.
- Fluff the rose petals with your fingers so the outer layers open.
- Let everything dry completely before removing the form.
Final Quality-Control Checklist
- Base measures 5 1/4 in (13.3 cm) and sits flat
- Walls are 3 in (7.6 cm) tall with 11 fan columns
- Every fan round has 66 sts
- Border has 11 even scallops; total height is 3 3/4 in (9.5 cm)
- All four feet are the same height, and the basket does not rock
- Roses are centered and firmly attached
- All ends are woven in and hidden
- A standard roll slides in easily
Troubleshooting
Base cups upward: Too few stitches or tight tension. Go up a hook size or check your increase counts.
Base ruffles: Too loose. Go down a hook size.
Fans do not line up: Count each round. You should have exactly 11 fans and 11 sc.
Walls flare outward: Work your puffs with shorter loops, or go down a hook size for Rnds 13–17 only.
Roll does not fit: Add one more base round of 72 sts. Change the walls to 12 repeats, and work 12 scallops in the border.
Scallops flop: Use 5 dc per shell instead of 7, keeping the same 6-st repeat.
Basket rocks: Re-pin the feet on Rnd 8, 12 sts apart, and stuff them evenly.
Care
Hand wash in cool water with mild soap, press out the water in a towel, and dry flat with a roll inside to keep the shape. Do not tumble dry.

Final Notes
The measurement chain is short and easy to check. A 66-st base measures 5 1/4 in (13.3 cm) across. The walls keep those 66 sts for 3 in (7.6 cm), and the 6-st repeat fits 11 times around. The border then adds 3/4 in (1.9 cm) with 11 scallops, for a finished height of 3 3/4 in (9.5 cm). If your base matches the checkpoint, every later stage will line up.
Happy crocheting!