

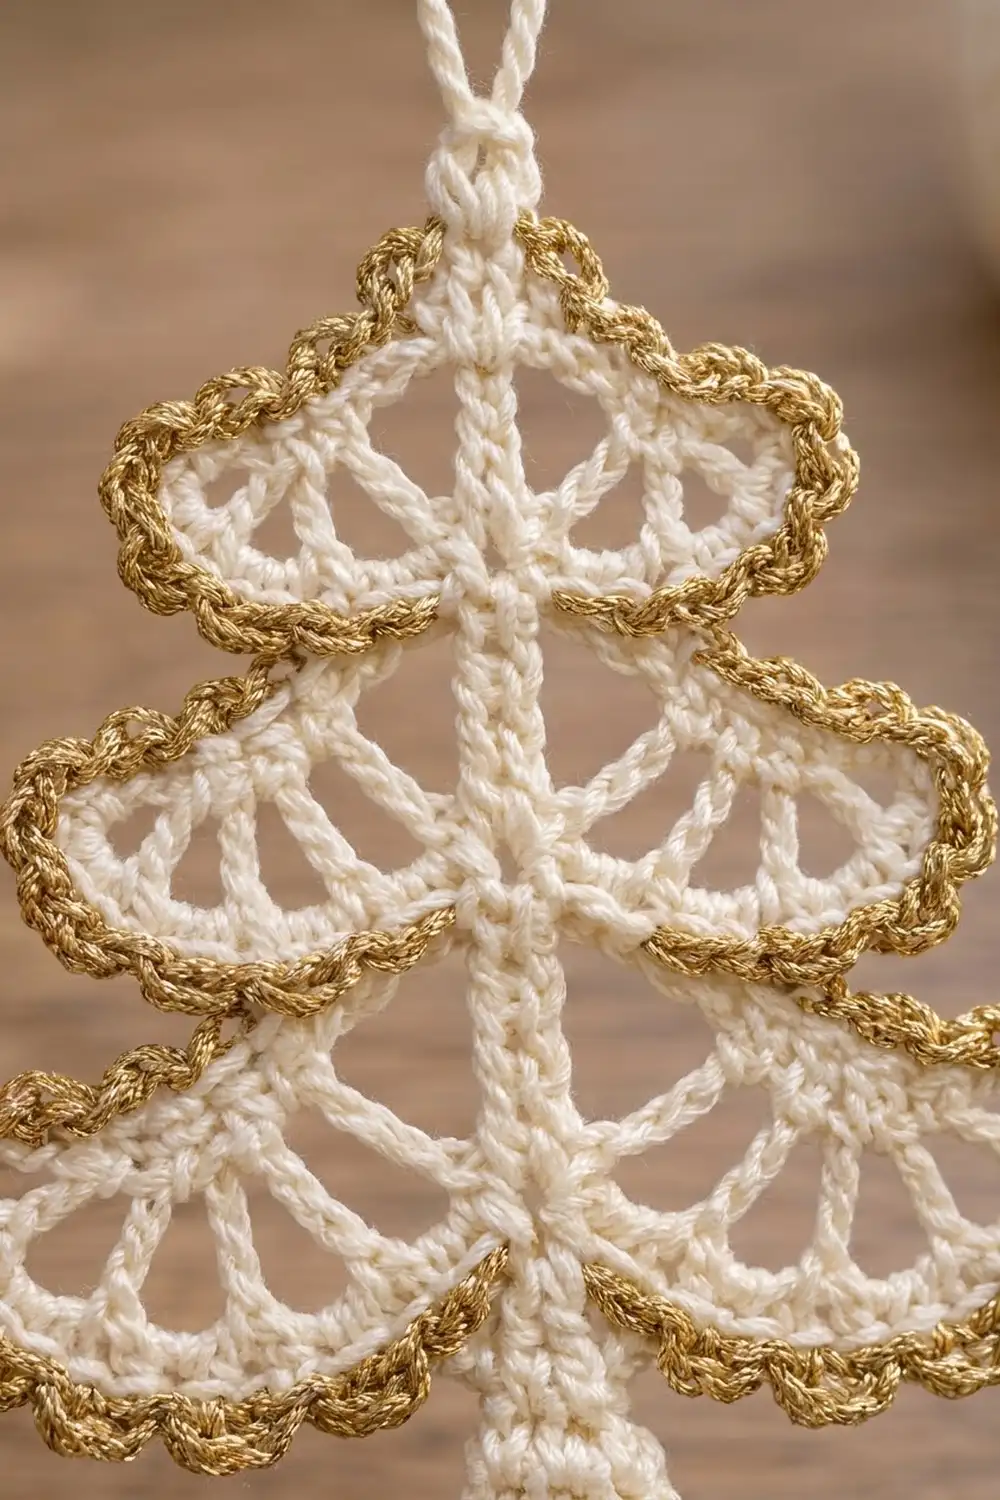
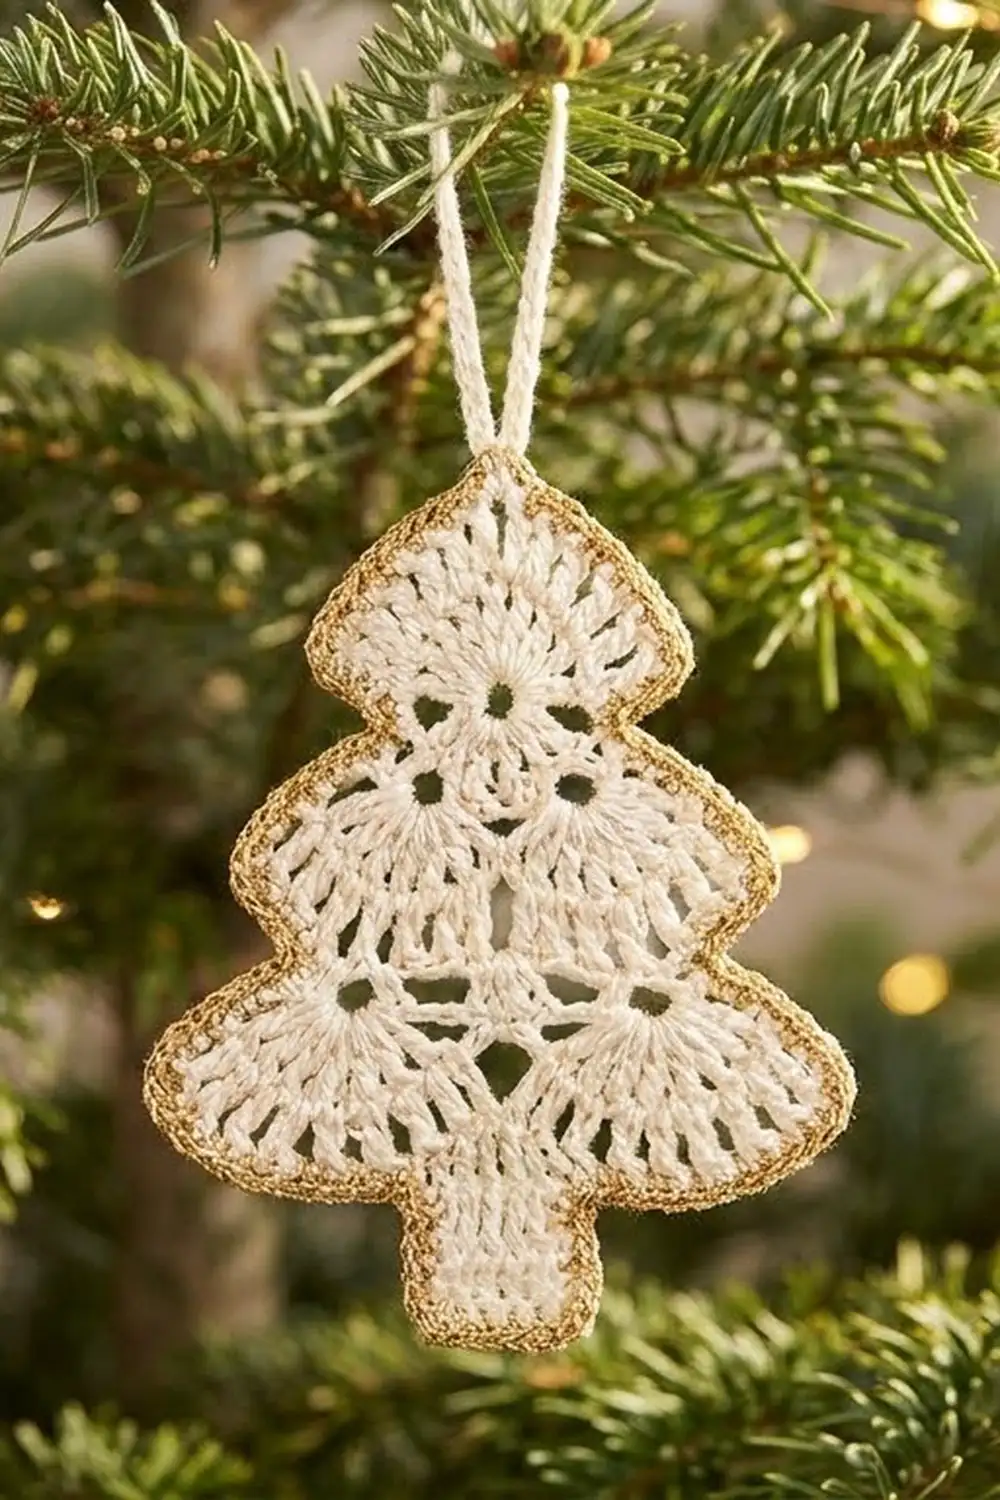
The Golden Lace Fir is a small, airy Christmas tree ornament. It has three stacked fan-shaped tiers, a raised center spine, a tiny rounded trunk and a twisted gold outline. It looks delicate and vintage, but it uses only simple stitches.
The body is worked in ivory cotton thread. The outline is one round of reverse single crochet in metallic gold. Cream and gold together look like heirloom lace on a tree, a mantel garland or a gift tag.
This pattern uses US crochet terms. The finished ornament is about 2.5 in (6.4 cm) wide at the bottom tier and 3.75 in (9.5 cm) tall. With the 1 in (2.5 cm) hanging loop, it is 4.75 in (12.1 cm) overall.
The ornament is made in one continuous piece. You chain the hanging loop and the spine, then crochet the trunk in tiny rounds on the end of the spine. Next you go back to the tip and work each tier as two mirrored half-fans attached to the spine. One gold round finishes the outline.
Finished Size and Construction
- Finished size: 2.5 in (6.4 cm) wide x 3.75 in (9.5 cm) tall, plus a 1 in (2.5 cm) loop
- Skill level: Intermediate
- Terminology: US crochet terms
- Yarn weight: Size 3 cotton crochet thread (Super Fine #1)
- Hook: 2.25 mm (B-1)
- Number of pieces: 1
- Layout: single motif, no joining
- Piece size: same as finished size
- Size before border: 2.25 in (5.7 cm) wide x 3.6 in (9.1 cm) tall
- Border depth: 0.125 in (0.3 cm), one round of gold reverse sc
Materials
Choose a smooth, mercerized size 3 cotton thread. It shows stitches clearly and blocks crisply. For the gold, use a metallic crochet thread of the same weight or slightly finer. If your metallic thread is very fine, hold it double.
- Ivory (Color A): 8 g, about 16 m
- Metallic gold (Color B): 3 g, about 10 m
- 2.25 mm (B-1) crochet hook
- Tapestry needle
- Scissors
- Stitch markers (3)
- Rustproof pins and a foam blocking board
- Spray bottle; optional fabric stiffener or spray starch
These amounts include about 25 percent extra for gauge testing and weaving in ends.
Abbreviations (US Terms)
- ch – chain
- sl st – slip stitch
- sc – single crochet
- hdc – half double crochet
- dc – double crochet
- dtr – double treble (yarn over 3 times, then work off loops in pairs)
- trtr – triple treble (yarn over 4 times, then work off loops in pairs)
- sc2tog – single crochet 2 together
- sp – space
- rev sc – reverse single crochet
- st(s) – stitch(es)
Special stitch – reverse sc (crab stitch): With the right side facing, work from left to right (if you are right-handed). Insert the hook into the next stitch to the right, yarn over, pull up a loop, yarn over and draw through both loops. This makes the twisted, rope-like gold edge.
Gauge and Checkpoints
Gauge: 8 sc and 8 sc rows = 1 in (2.5 cm) in Color A. Along the spine, 8 ch = 1 in (2.5 cm).
The ornament is small, so make one complete tree as your test piece. Measure at each stage:
- Spine: 24 ch = 3 in (7.6 cm), measured without stretching.
- Trunk: about 0.5 in (1.3 cm) wide x 0.75 in (1.9 cm) tall, lightly flattened.
- Top tier, before border: 1.5 in (3.8 cm) wide.
- Middle tier, before border: 2 in (5.1 cm) wide.
- Bottom tier, before border: 2.25 in (5.7 cm) wide.
- After border and blocking: 2.5 in (6.4 cm) wide x 3.75 in (9.5 cm) tall.
If your tree is too big, change to a 2.0 mm hook. If it is too small, change to a 2.5 mm hook. Spoke length depends on how tall your stitches are, so check the spine first. If the spokes are much longer than the part of the spine they span, the fans will cup instead of lying flat.
Spine Positions
Number the 24 spine chains from the tip down. St 1 is just below the loop, and st 24 is just above the trunk. Each half-fan has an apex (A), where all its spokes are worked, and a base (B), where Row 1 is anchored. Row 3 is anchored 2 sts below B.
| Tier | Spoke | Apex (A) | Base (B) | Row 3 anchor |
|---|---|---|---|---|
| Top | dc | st 1 | st 4 | st 6 |
| Middle | dtr | st 7 | st 12 | st 14 |
| Bottom | trtr | st 15 | st 21 | st 23 |
The distance from A to B matches the height of each spoke stitch (dc = 3 sts, dtr = 5 sts, trtr = 6 sts). This lets every fan open into a flat quarter circle.
Loop, Spine, and Trunk
With Color A:
Loop: Ch 16, sl st in first ch to form a ring. The loop is about 1 in (2.5 cm) tall.
Spine: Ch 26. Ch 1–24 are spine sts 1–24. Ch 25 becomes the center of the trunk, and ch 26 is skipped.
Trunk (work in continuous rounds and mark the first st of each round):
- Rnd 1: 6 sc in 2nd ch from hook (ch 25). (6 sc)
- Rnd 2: [Sc in next st, 2 sc in next st] 3 times. (9 sc)
- Rnds 3–4: Sc in each st around. (9 sc)
- Rnd 5: [Sc in next st, sc2tog] 3 times. (6 sc)
Stuff the trunk firmly with thread clippings or a tuft of the tail.
- Rnd 6: Sc2tog 3 times. (3 sc)
Fasten off and leave a 4 in (10.2 cm) tail. Thread the tail through the 3 remaining sts, pull it closed and hide the tail inside the trunk.
Checkpoint: The trunk is a small rounded bulb about 0.5 in (1.3 cm) wide, hanging straight below the spine.
Tiers
Work every anchor stitch (A, B and the Row 3 anchors) under the top 2 loops of the spine chain. Work the travel sl sts along the spine into the back bump. This keeps the spine slim and makes the raised center line.
Rejoin Color A with a sl st in spine st 1.
Top Tier (dc spokes)
Right half, Row 1 (spokes): Ch 3 (counts as first dc), [ch 2, dc in st 1] 2 times, ch 2, sl st in st 4. (3 dc spokes, 3 ch-2 sps)
Row 2 (band): Turn. Ch 1 (does not count), 2 hdc in first ch-2 sp, [hdc in next dc, 2 hdc in next ch-2 sp] 2 times, 3 hdc in top of beginning ch-3. (11 hdc)
Row 3: Turn. Ch 1, sc in each hdc across, sl st in spine st 6. (11 sc)
Travel: Sl st up the spine in sts 5, 4, 3, 2 and 1. (5 sl sts)
Left half: Work Rows 1–3 the same way, but lay the spokes on the other side of the spine. Row 1 is anchored in st 4 and Row 3 in st 6. (3 spokes; 11 hdc; 11 sc)
Travel: Sl st in st 7.
Checkpoint: The top tier is 1.5 in (3.8 cm) wide, with 3 openings on each side.
Middle Tier (dtr spokes)
Right half, Row 1: Ch 5 (counts as first dtr), [ch 2, dtr in st 7] 3 times, ch 2, sl st in st 12. (4 dtr spokes, 4 ch-2 sps)
Row 2: Turn. Ch 1, 2 hdc in first ch-2 sp, [hdc in next dtr, 2 hdc in next ch-2 sp] 3 times, 3 hdc in top of beginning ch-5. (14 hdc)
Row 3: Turn. Ch 1, sc in each hdc across, sl st in spine st 14. (14 sc)
Travel: Sl st up the spine in sts 13 through 7. (7 sl sts)
Left half: Work Rows 1–3 the same way on the other side, anchored in sts 12 and 14. (4 spokes; 14 hdc; 14 sc)
Travel: Sl st in st 15.
Checkpoint: The middle tier is 2 in (5.1 cm) wide. Its apex tucks just under the band of the top tier.
Bottom Tier (trtr spokes)
Right half, Row 1: Ch 6 (counts as first trtr), [ch 2, trtr in st 15] 4 times, ch 2, sl st in st 21. (5 trtr spokes, 5 ch-2 sps)
Row 2: Turn. Ch 1, 2 hdc in first ch-2 sp, [hdc in next trtr, 2 hdc in next ch-2 sp] 4 times, 3 hdc in top of beginning ch-6. (17 hdc)
Row 3: Turn. Ch 1, sc in each hdc across, sl st in spine st 23. (17 sc)
Travel: Sl st up the spine in sts 22 through 15. (8 sl sts)
Left half: Work Rows 1–3 the same way on the other side, anchored in sts 21 and 23. (5 spokes; 17 hdc; 17 sc)
Finish: Sl st in st 24, then sl st into the top of the trunk. Fasten off and weave in the end.
Checkpoint: The bottom tier is 2.25 in (5.7 cm) wide. Before the border, the whole tree is 2.25 in (5.7 cm) x 3.6 in (9.1 cm).
Band math: Each Row 2 has 2 hdc in each ch-2 sp, 1 hdc in each spoke except the first, and 3 hdc at the tip. As a formula: (2 x spokes) + (spokes – 1) + 3. That gives 11, 14 and 17. The band sits farther out than the spokes, so the extra stitches spread out and form the gentle scallop.
Border (Gold Reverse SC)
Border gauge: 8 rev sc = 1 in (2.5 cm).
With the right side facing, join Color B with a sl st in spine st 24, just above the trunk. Work one round of rev sc clockwise around the outline. Work 1 rev sc into each st or row end, in the amounts listed below.
Left side (working up):
- Bottom tier: 17 rev sc along Row 3. Then work up the top edge of the band: 1 in the Row 3 end, 2 in the Row 2 end and 6 along the beginning ch-6. (26 rev sc)
- Middle tier: 14 along Row 3, then 1 + 2 in the row ends and 5 along the beginning ch-5. (22 rev sc)
- Top tier: 11 along Row 3, then 1 + 2 in the row ends and 3 along the beginning ch-3. (17 rev sc)
Tip: 1 rev sc in spine st 1, at the base of the loop. (1 rev sc)
Right side (working down): Repeat the tier counts in reverse order: top tier 17, middle tier 22, bottom tier 26.
Bottom center: 1 rev sc in spine st 24. Join with a sl st to the first rev sc. Fasten off and weave in the end.
Total: 65 + 1 + 65 + 1 = 132 rev sc.
Why the math works: Each band already has 1 sc for each hdc, so working 1 rev sc into each sc keeps the curve flat without ruffling. Along the straight top edges, the count matches how tall each stitch is in sc rows: 1 for an sc row, 2 for an hdc row, and 3, 5 or 6 for a dc, dtr or trtr spoke. The border adds 0.125 in (0.3 cm) on each side, so the bottom tier grows from 2.25 in (5.7 cm) to 2.5 in (6.4 cm).
Final Blocking
- Soak the ornament in cool water for a few minutes. Roll it in a towel to remove the extra water.
- Lay it right side up on the blocking board.
- Pin the tip and the bottom of the spine so the spine is straight and measures 3 in (7.6 cm).
- Open each fan so the spokes are evenly spaced, and pin the outer tip of each band.
- Shape the scallops with your fingertips. Check the widths of the top, middle and bottom tiers: 1.75 in (4.4 cm), 2.25 in (5.7 cm) and 2.5 in (6.4 cm).
- For a stiffer ornament, mist with starch or brush on diluted stiffener.
- Don’t pin the loop or the trunk. Let the ornament dry completely before you remove the pins.
Final Quality-Control Checklist
- The loop is about 1 in (2.5 cm) tall and centered on the tip.
- The spine is straight and shows a raised sl st line.
- Each tier has the same number of openings on both sides: 3, 4 and 5.
- Each half band has 11, 14 or 17 sts.
- The gold border has 132 rev sc and no gaps at the spine.
- The trunk is firm, rounded and closed.
- The finished size is 2.5 in (6.4 cm) x 3.75 in (9.5 cm).
- All ends are woven in and trimmed.
Troubleshooting
- Fans cup or curl: Your spokes are too tall for their part of the spine. Wrap your yarn-overs more snugly or use a smaller hook.
- Bands ruffle: Check that Row 2 has exactly 2 hdc in each space, not 3.
- Spine bends: Check that the travel sl sts went into the back bumps and that each tier is anchored in the listed sts.
- Gold edge flares: Work the rev sc more firmly, or skip 1 row-end stitch on each straight edge.
- Gold edge pulls tight: Use a hook 0.25 mm larger for the border round only.
- Trunk is floppy: Add more stuffing before Rnd 6.
Care
Hand wash in cool water with mild soap, reshape and dry flat. Store flat in tissue paper so the gold thread doesn’t snag.
Final Notes
The measurements build on each other. At 8 per inch, the 24 spine sts make 3 in (7.6 cm). Because the spokes are sized to the spine, the tiers come out at 1.5 in (3.8 cm), 2 in (5.1 cm) and 2.25 in (5.7 cm). The 0.125 in (0.3 cm) gold border widens the bottom tier to 2.5 in (6.4 cm), and the trunk brings the height to 3.75 in (9.5 cm). If the spine measures right, the tiers will too.
Happy crocheting!