

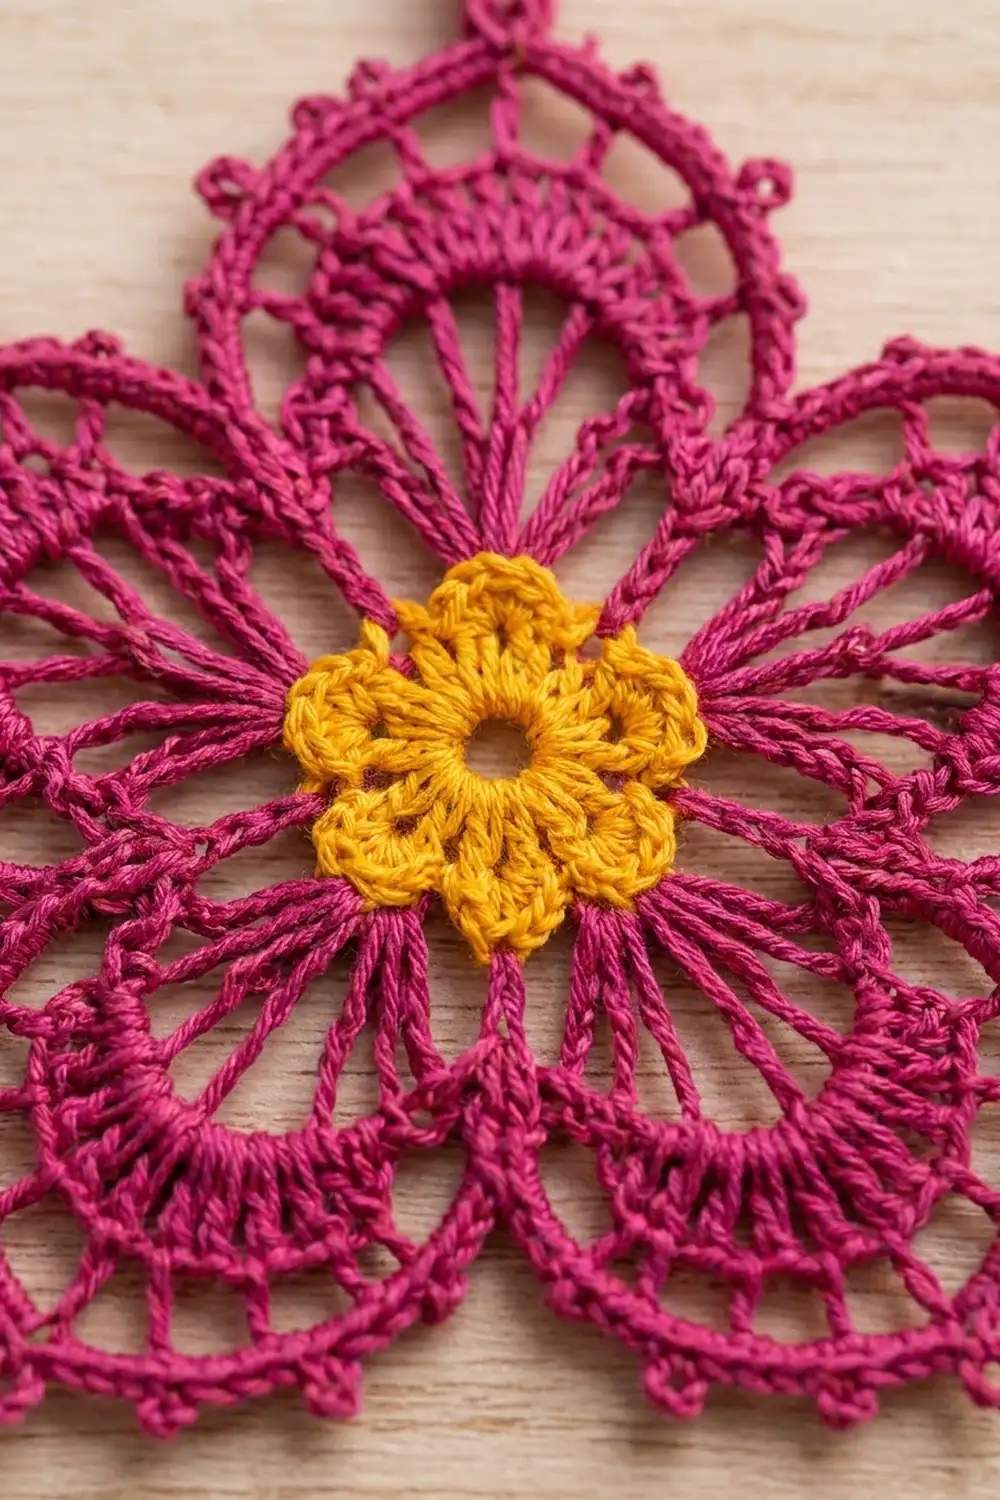
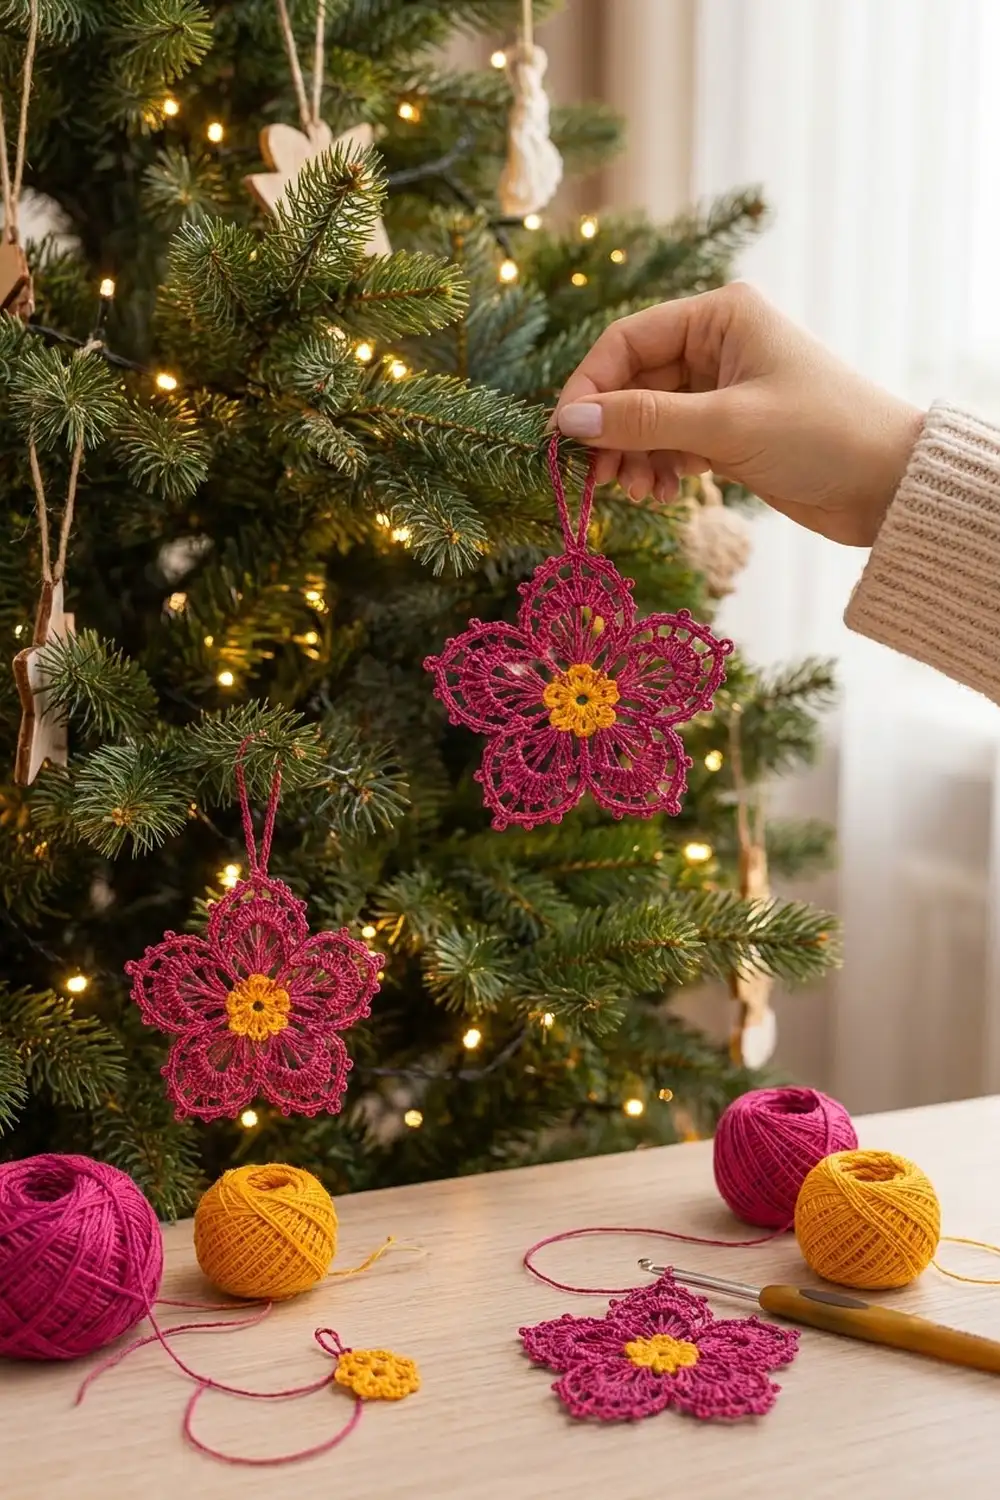
The Berry Blossom Ornament is a lacy five-petal flower worked in fine cotton thread. It has a bright marigold center and raspberry petals. Each petal has a fan of tall treble spokes, a frame of chain arches, and a scalloped edge dotted with tiny picots. It hangs from a sturdy crocheted loop, ready for the tree.
The look is classic thread lace with a modern, saturated color pair. Pink and gold read as festive without being red and green, so the ornament also works as a gift tag, a window charm, or spring décor.
This pattern uses US crochet terms. The finished ornament measures 4.5 in (11.4 cm) across from petal tip to petal tip. The hanging loop adds 1.25 in (3.2 cm), so the full hanging height is about 5.75 in (14.6 cm).
Construction is simple. Work a yellow rosette center (Rounds 1–3), then join pink behind the scallops and build the petals outward (Rounds 4–8). The last two rounds form the petal border, and the hanging loop is made during the final round. It’s one piece, with no sewing other than weaving in the ends.
Finished Size and Construction
- Finished size: 4.5 in (11.4 cm) tip to tip; 5.75 in (14.6 cm) tall including the loop
- Skill level: Intermediate (treble fans, working behind a round)
- Terminology: US crochet terms
- Yarn weight: Size 3 cotton crochet thread
- Hook: 2.25 mm (US B-1)
- Number of pieces: 1
- Layout: Single motif, 5 petals
- Piece size: 4.5 in (11.4 cm)
- Size before border (after Round 6): 3.5 in (8.9 cm)
- Border depth (Rounds 7–8): 0.5 in (1.3 cm) added on each side
Materials
Use a smooth, mercerized size 3 cotton thread. Mercerized cotton holds crisp stitch definition, blocks well, and keeps the picots sharp. Don’t use fuzzy or acrylic yarn here, because the open lace will lose its shape.
- Color A – Marigold (yellow): 3 g, about 5 m
- Color B – Raspberry (pink): 10 g, about 16 m
These quantities include a margin for a gauge swatch and weaving in ends. One ornament uses much less than a full ball, so one ball of each color will make many ornaments.
Tools:
– 2.25 mm (US B-1) crochet hook
– Tapestry needle with a small eye
– Scissors
– Stitch marker
– Blocking mat and rustproof pins
– Spray bottle with water; optional fabric stiffener or starch
Abbreviations (US Terms)
- ch – chain
- sl st – slip stitch
- sc – single crochet
- hdc – half double crochet
- dc – double crochet
- tr – treble crochet (yarn over twice)
- sp(s) – space(s)
- st(s) – stitch(es)
- Rnd – round
Special stitch – Picot: Ch 3, sl st in the 3rd ch from the hook. This makes a small closed bump that sits on top of the edge.
Gauge and Checkpoints
Lace gauge is checked by measuring the motif as you go. Make one test center (Rounds 1–3) before committing to the whole ornament.
- After Rnd 1: 0.75 in (1.9 cm) across
- After Rnd 3 (yellow center): 1.25 in (3.2 cm) across
- After Rnd 5 (treble fans): 3 in (7.6 cm) tip to tip
- After Rnd 6 (arch frame): 3.5 in (8.9 cm) tip to tip
- After Rnd 7 (dc band): 4.25 in (10.8 cm) tip to tip
- After Rnd 8 (picot edge): 4.5 in (11.4 cm) tip to tip
If your center is too big (more than about 1.5 in / 3.8 cm), go down to a 2.0 mm hook. If it’s too small (under 1 in / 2.5 cm), go up to a 2.5 mm hook. A difference of 0.25 in (0.6 cm) at the center becomes almost 1 in (2.5 cm) at the edge, so fix it early.
Pattern
Center (Color A – Marigold)
Rnd 1: Make a magic ring. Ch 3 (counts as dc), work 19 dc into the ring. Pull the ring closed, leaving a small open hole. Sl st to the top of the beginning ch-3. (20 dc)
Rnd 2: Ch 1, sc in the same st. Ch 3, skip next dc, sc in next dc; repeat from * 8 more times. Ch 3, skip the last dc, sl st to the first sc. (10 sc, 10 ch-3 sps)
Rnd 3: Sl st into the first ch-3 sp. Work (sc, hdc, dc, hdc, sc) in that sp and in each of the remaining 9 ch-3 sps. Sl st to the first sc. (50 sts: 10 scallops of 5 sts each)
Fasten off Color A and weave in the end. The center should lie flat as a ring of 10 rounded scallops, 1.25 in (3.2 cm) across.
Petals (Color B – Raspberry)
Rnd 4 (base round, worked behind the scallops): Fold the Rnd 3 scallops toward you so you can see the Rnd 2 sc behind them. Join Color B with a sl st in any Rnd 2 sc. Ch 1, sc in the same sc. Ch 3, sc in the next Rnd 2 sc; repeat from * 8 more times. Ch 3, sl st to the first sc. (10 sc, 10 ch-3 sps)
These ch-3 spaces lie behind the yellow scallops, so the center sits on top of the pink like a raised rosette.
Rnd 5 (treble fans): Sl st into the first ch-3 sp. Ch 5 (counts as tr + ch 1). In the same sp work (tr, ch 1) 5 times, then 1 more tr. (7 tr, 6 ch-1 sps: first fan made) Sc in the next ch-3 sp.
In the next ch-3 sp work (tr, ch 1) 6 times, then 1 tr; sc in the next ch-3 sp; repeat from * 3 more times. Sl st to the 4th ch of the beginning ch-5.
Round total: 35 tr, 30 ch-1 sps, 5 sc (5 fans of 7 tr each, with a sc between fans).
The fans will ruffle slightly. They flatten when the next round frames them.
Rnd 6 (arch frame): Ch 1, sc in the same st (first tr of Fan 1). (Ch 3, sc in the next tr) 6 times, which brings you to the last tr of the fan. Skip the sc between fans, then sc in the first tr of the next fan; repeat from * around. On the last fan, after the 6th arch, skip the sc and sl st to the first sc.
Round total: 35 sc, 30 ch-3 arches (each petal has 7 sc and 6 arches).
The two sc that sit side by side between petals form the deep notch. Checkpoint: 3.5 in (8.9 cm) tip to tip.
Petal Border
Rnd 7 (dc band): Sl st into the first ch-3 arch of Petal 1. Ch 1 (does not count as a stitch). For each petal work:
- 2 hdc in the 1st arch
- 3 dc in each of the next 4 arches (12 dc)
- 2 hdc in the 6th arch
- sl st in the gap between the 2 side-by-side sc that separate this petal from the next one
Repeat for all 5 petals. The last sl st falls in the gap before Petal 1.
Per petal: 2 hdc + 12 dc + 2 hdc = 16 sts. Round total: 80 sts + 5 sl sts.
Rnd 8 (picot edge and hanging loop): Ch 1. For Petal 1 (the loop petal) work:
- sc in each of the 2 hdc
- sc in the next 2 dc, picot
- sc in the next 2 dc, picot
- sc in the next 2 dc. Hanging loop: ch 24, sl st in the sc just made. Work 32 sc into the ch-24 loop, then sl st in the same base sc.
- sc in the next 2 dc, picot
- sc in the next 2 dc, picot
- sc in the next 2 dc
- sc in each of the 2 hdc
- sl st in the Rnd 7 sl st
For Petals 2–5, work: sc in each of the 2 hdc, (sc in the next 2 dc, picot) 5 times, sc in the last 2 dc, sc in each of the 2 hdc, sl st in the Rnd 7 sl st. Join with a sl st to the first sc of the round.
Per petal: 16 sc + 5 picots (Petal 1 has 4 picots + 1 loop). Round total: 80 sc, 24 picots, 1 hanging loop, 5 sl sts.
The picots fall after dc 2, 4, 6, 8, and 10 of each petal’s 12 dc. The 3rd picot (after dc 6) sits exactly at the petal tip, so the hanging loop is centered on Petal 1.
Fasten off and weave in all ends through the backs of the stitches.
Border Math: Why It Works
The border is Rounds 7–8. It adds 0.5 in (1.3 cm) on each side, taking the motif from 3.5 in (8.9 cm) to 4.5 in (11.4 cm).
- Border gauge: about 6.5 sts per 1 in (2.5 cm) along the curved petal edge.
- Rnd 7: Each petal starts with 6 arches. The 4 middle arches get 3 dc each (12) and the 2 end arches get 2 hdc each (4). That makes 16 sts per petal and 80 in total. Shorter hdc at the ends slope the edge down into the notch, and taller dc in the middle round out the petal top.
- Rnd 8: Every Rnd 7 stitch gets 1 sc (16 per petal, 80 total). The picots are extra and don’t replace any stitches. Spacing them every 2 dc gives 5 symmetrical picots: two on each side and one on top.
- Notch: The sl st between petals in Rnds 7 and 8 never adds height, so the notches stay deep and crisp.
Final Blocking
- Soak the ornament in cool water for 5 minutes, then roll it in a towel to remove excess water.
- Lay it right side up on the blocking mat.
- Pin the center hole round, then pin each petal tip so the tips sit 4.5 in (11.4 cm) apart, measured across the widest point.
- Pin each notch so all five notches sit an equal distance from the center.
- Open each picot with a pin tip and pin it outward.
- Straighten the hanging loop and pin it flat, 1.25 in (3.2 cm) tall.
- For a crisp ornament, spray it with starch or brush on diluted fabric stiffener.
- Let it dry completely, at least 12 hours, before unpinning.
Final Quality-Control Checklist
- Yellow center has 10 even scallops and a small open middle
- Each petal has 7 tr spokes and 6 arches
- Each petal has 16 border sts and 5 picots (Petal 1: 4 picots + loop)
- All notches are equally deep
- Loop is centered over a petal tip, not over a notch
- Ornament measures 4.5 in (11.4 cm) tip to tip and lies flat
- All ends are woven in and invisible from the front
Troubleshooting
- Fans cup or ruffle after Rnd 6: Your chains are too tight or too loose. Redo Rnd 6, pulling each ch-3 to the same height as a dc.
- Center puckers: The magic ring is closed too tightly. Leave a small hole, about 0.25 in (0.6 cm).
- Petals look lopsided: Count the 16 sts in Rnd 7. A missing hdc at one end is the usual cause.
- Loop twists: Make sure the 32 sc in the loop are all worked in the same direction, then block the loop flat.
- Picots flatten: Pin them open while blocking, and use starch for crisper picots.
- Pink shows gaps behind the center: Work Rnd 4 firmly into the Rnd 2 sc, not into the scallops.
Care
Hand wash in cool water with mild soap, press out the water in a towel, and re-block flat. Store flat or hanging, away from heavy ornaments that could crush the picots.
Final Notes
Here’s the full measurement chain to check against:
- 0.75 in (1.9 cm) after Rnd 1
- 1.25 in (3.2 cm) after the yellow center
- 3 in (7.6 cm) after the treble fans
- 3.5 in (8.9 cm) after the arch frame
- 4.25 in (10.8 cm) after the dc band
- 4.5 in (11.4 cm) after the picot edge, plus a 1.25 in (3.2 cm) loop
Hit each checkpoint and the Berry Blossom will come out even, flat, and ready to hang. Make one for every branch, or tuck one into a holiday card.
Happy crocheting!