

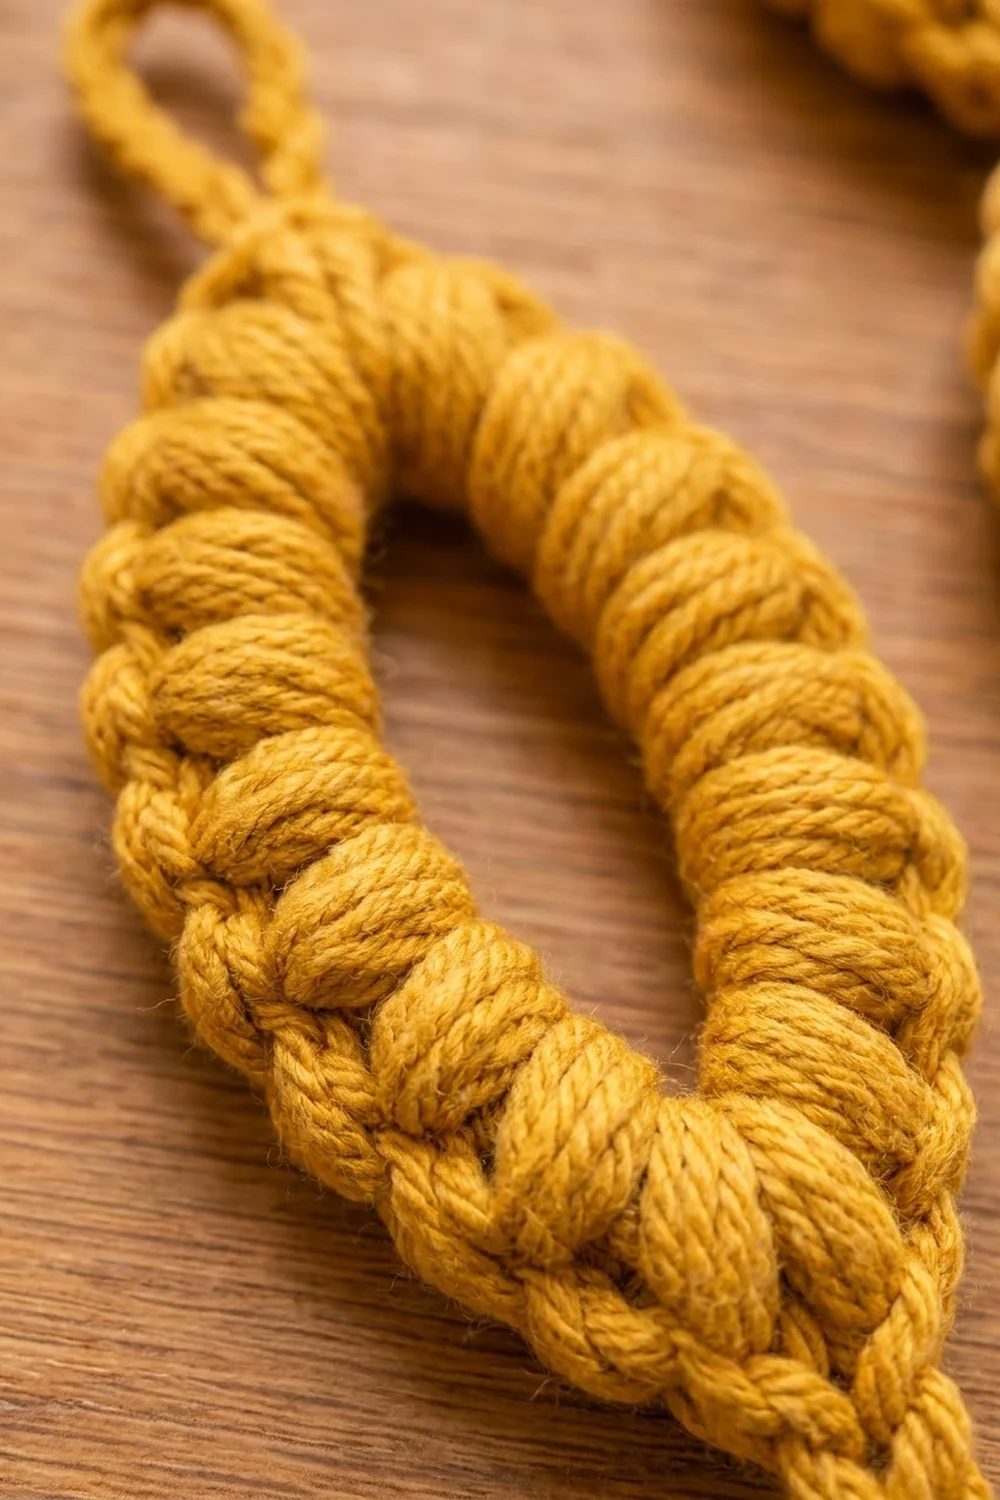
This window curtain is made of eight vertical strands of linked oval puff-stitch rings, hung from a wooden rod. Each pointed oval link is ringed with plump puff stitches. Short chain stems connect the links, and a full tassel weights the bottom of every strand.
The strands alternate warm mustard and soft cream, starting with mustard on the left. The result is a cozy boho piece for a window, a doorway, or a wall behind a mantel. All instructions use US crochet terms.
The finished curtain is 23.5″ (59.7 cm) wide and 48″ (121.9 cm) long, measured from the top of the hanging loops to the tassel tips. One link measures 2.5″ (6.4 cm) wide by 4″ (10.2 cm) tall.
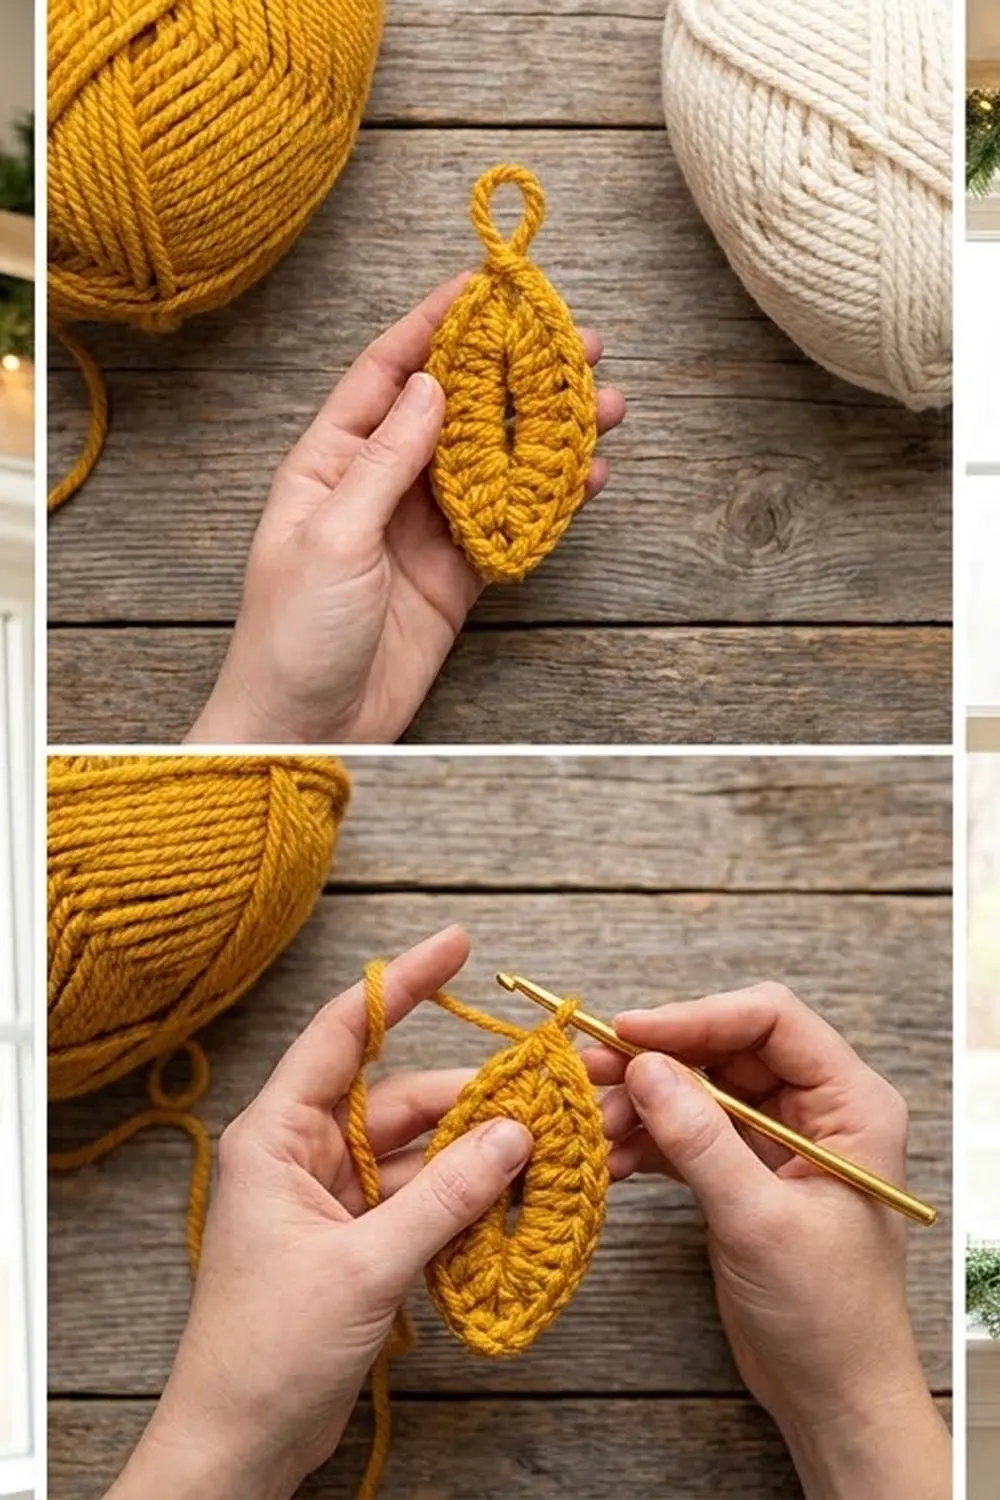
The construction is simple and repeats for every link. You work each link in two rounds: a single crochet ring, then a puff round with a sharp point at the top and bottom. Each new link starts with a slip stitch into the bottom point of the link above it, so the strand grows as you go. You add the tassels last, then slide the hanging loops onto a rod.
Finished Size and Construction
- Finished size: 23.5″ (59.7 cm) wide x 48″ (121.9 cm) long
- Skill level: Easy / advanced beginner (good puff stitch practice)
- Terminology: US crochet terms
- Yarn weight: Bulky (#5), cotton or cotton blend
- Hook: 6 mm (US J-10)
- Number of pieces: 64 links (joined into 8 strands of 8 links), plus 8 tassels
- Layout: 8 strands across and 8 links down, alternating mustard and cream strands
- Piece size: each link is 2.5″ (6.4 cm) wide x 4″ (10.2 cm) tall, and each stem adds 1″ (2.5 cm)
- Size before border: each strand is 42″ (106.7 cm) long without its tassel
- Border depth: there is no edging border; the tassel finish adds 6″ (15.2 cm) to each strand
Materials
Choose a smooth, bulky cotton or cotton blend with good stitch definition. Puff stitches look crisp in a plied cotton and keep their shape when they hang. Avoid very fuzzy yarns, because the puffs blur together. The amounts below assume a yarn of about 120 m per 100 g.
- Mustard: 250 g / about 300 m (4 strands and 4 tassels)
- Cream: 250 g / about 300 m (4 strands and 4 tassels)
These quantities include a margin of roughly 40% to cover your swatch and differences in tension. One strand uses about 52 m, including its tassel.
Tools:
- 6 mm (US J-10) crochet hook
- Tapestry needle
- Scissors
- 2 stitch markers
- Stiff card cut to 7″ (17.8 cm), for the tassels
- Wooden curtain rod or dowel, at least 30″ (76.2 cm) long
- Measuring tape
- Spray bottle and pins, for blocking
Abbreviations (US Terms)
- ch = chain
- sl st = slip stitch
- sc = single crochet
- sk = skip
- sp = space
- st(s) = stitch(es)
- rnd = round
- yo = yarn over
Special stitch: puff stitch (puff): (Yo, insert hook in the indicated st, yo and pull up a loop to about 0.5″ / 1.3 cm) 3 times, yo and draw through all 7 loops on the hook.
Standing join: With a slip knot on your hook, insert the hook in the indicated space, yo, pull up a loop and draw it through the loop on the hook.
Gauge and Checkpoints
Gauge: 10 sc and 11 rows = 4″ (10.2 cm) square, worked in rows. When chained loosely, you should get about 3 ch per 1″ (2.5 cm).
Gauge matters most for length. A small error in one link is repeated 8 times down every strand.
Test one piece first. Make the hanging loop and Link 1 of one strand, then check these measurements:
- After Rnd 1: the sc ring measures about 1.75″ (4.4 cm) wide x 3″ (7.6 cm) tall when gently flattened into an oval.
- After Rnd 2: the link measures 2.5″ (6.4 cm) wide x 4″ (10.2 cm) tall, point to point.
- Stem: the ch-4 stem and its joins measure 1″ (2.5 cm).
- Link pitch: one stem plus one link measures 5″ (12.7 cm).
If your link is too big, go down to a 5.5 mm hook or pull the puff loops up a little shorter. If it is too small, go up to a 6.5 mm hook or pull the puff loops up a little longer. Keep the stitch counts the same. Change the hook instead, so all the math below stays true.
The Link
Strand Top (Link 1 Only)
The first link of each strand includes the hanging loop.
Hanging loop: Ch 12, sl st in the first ch to form a loop. The loop is about 4″ (10.2 cm) around and hangs 2″ (5.1 cm) long.
Stem: Ch 4.
Ring: Ch 18, then sl st in the 4th ch of the stem (the last stem ch you made) to form a ring. This sl st is the top point of the link.
Continue with Rnd 1 below.
Links 2–8
Join and stem: Make a standing join in the ch-2 sp at the bottom point of the previous link. Ch 4 for the stem.
Ring: Ch 18, then sl st in the 4th ch of the stem to form a ring. This sl st is the top point of the new link.
Rnd 1 (All Links)
Ch 1. Work 24 sc into the ring, working over the chain instead of into the individual chains. Push the sts together so they cover the chain evenly. Join with a sl st in the first sc. (24 sc)
Place a marker in the 1st sc (top point) and another in the 13th sc (bottom point). There are 11 sc on each side between the markers.
Working over the chain lets you pack 24 sc onto an 18-ch ring. This gives a dense, rope-like base, so no chain shows through the puffs.
Rnd 2: Puff Round (All Links)
Ch 1, sc in the first sc (top point).
Side A: Ch 1, puff in the next sc, ch 1, sk the next sc, puff in the next sc; repeat from * 4 more times, ch 1. (6 puffs)*
You have now worked over sc 2 through sc 12, with puffs in sc 2, 4, 6, 8, 10 and 12.
Bottom point: (Sc, ch 2, sc) in the marked 13th sc.
Side B: Ch 1, puff in the next sc, ch 1, sk the next sc, puff in the next sc; repeat from * 4 more times, ch 1. (6 puffs)*
The puffs on this side sit in sc 14, 16, 18, 20, 22 and 24. Join with a sl st in the first sc. Fasten off, leaving a 6″ (15.2 cm) tail.
Rnd 2 count: 12 puffs, 3 sc, 14 ch-1 sps and 1 ch-2 sp. Each side has 7 ch-1 sps: 1 before the first puff, 5 between puffs, and 1 after the last puff.
The single sc at the top and the (sc, ch 2, sc) at the bottom pinch the ring into a pointed oval. The puffs on each side lean toward the points and form the rope-like texture. The ch-2 sp at the bottom point is where the next link joins on.
Weave in both tails on the back of the sc ring, where the puffs hide them.
Tip for even puffs: Before you close each puff, pull all 6 loops up to the same height. Rest your index finger on the loops so they don’t shrink while you draw through.
Make All Pieces
Each strand is 8 links joined as you go, all in one color.
- Mustard: 4 strands = 32 links, plus 4 tassels
- Cream: 4 strands = 32 links, plus 4 tassels
- Total: 64 links and 8 tassels
Layout (M = mustard link, C = cream link, reading left to right across the rod):
Strand:   1  2  3  4  5  6  7  8
Link 1:   M  C  M  C  M  C  M  C
Link 2:   M  C  M  C  M  C  M  C
Link 3:   M  C  M  C  M  C  M  C
Link 4:   M  C  M  C  M  C  M  C
Link 5:   M  C  M  C  M  C  M  C
Link 6:   M  C  M  C  M  C  M  C
Link 7:   M  C  M  C  M  C  M  C
Link 8:   M  C  M  C  M  C  M  C
Tassel:   M  C  M  C  M  C  M  C
Joining
Method: Join-as-you-go, using the standing join described above. Each new link starts in the ch-2 sp at the bottom point of the link above it.
Stitch logic: Each join is 1 standing join, then 4 stem chains, then the ring. The stem ends at the top-point sl st, so it runs straight from the bottom point of one link to the top point of the next. This keeps every link centered under the one above it. No stitches are added to any link by joining, so every link keeps its 24 sc and 12 puffs.
Tension advice: Chain the stems at the same tension as your ring chains. Tight stems make the strand look cramped, and loose stems let the links twist. Gently pull each stem straight before you start Rnd 1 of the new link.
Size checkpoint: After Link 4, measure from the top of the hanging loop to the bottom point. It should be 2″ + 4 x 5″ = 22″ (55.9 cm). A full strand of 8 links measures 2″ + 8 x 5″ = 42″ (106.7 cm).
Hanging the strands: Slide all 8 hanging loops onto the rod in layout order. Space them 3″ (7.6 cm) apart, center to center. The distance from the first strand’s center to the last is 7 x 3″ = 21″ (53.3 cm). Add half a link width on each side (1.25″ / 3.2 cm) for a total width of 23.5″ (59.7 cm).
Border: Tassel Finish
This curtain has no edging rounds. The open links are the design, and a border would close them in. Instead, the tassels finish the bottom edge, and their size is planned the same way a border would be.
Tassel gauge: 40 wraps around a 7″ (17.8 cm) card make a tassel about 1.25″ (3.2 cm) thick at the head.
Tassel steps (make 8: 4 in each color):
- Cut an 8″ (20.3 cm) tie strand and set it aside.
- Wrap the yarn around the 7″ (17.8 cm) card 40 times.
- Slide the tie strand under the wraps at the top of the card and knot it tightly.
- Cut the wraps along the bottom edge. You now have 40 strands, each 14″ (35.6 cm) long, folded in half to give 80 ends.
- Wrap a second strand, 20″ (50.8 cm) long, tightly around the bundle 6 times, 1″ (2.5 cm) below the fold. Knot it and hide the ends inside the tassel.
- Trim the ends evenly so the tassel measures 6″ (15.2 cm) from the top of the head.
Attach: Thread both ends of the tie strand through the ch-2 sp at the bottom point of Link 8. Knot securely and bury the ends inside the tassel head.
Why the math works: Each strand is 2″ + 8 x 5″ = 42″ (106.7 cm). Adding the 6″ (15.2 cm) tassel brings the full length to 48″ (121.9 cm). Every strand has the same number of links and the same tassel, so the bottom edge hangs level.
Final Blocking
- Lay each finished strand flat on a towel or blocking mat.
- Mist it with water until damp but not soaked.
- Shape each link into a pointed oval 2.5″ (6.4 cm) x 4″ (10.2 cm), pinning at the top and bottom points.
- Straighten each stem to 1″ (2.5 cm).
- Comb the tassel strands out with your fingers and smooth them flat.
- Let everything dry completely.
- Hang the strands on the rod and trim any uneven tassel ends.
Final Quality-Control Checklist
- [ ] Each link has 12 puffs, 6 per side.
- [ ] Each link has 1 sc at the top point and (sc, ch 2, sc) at the bottom point.
- [ ] Each link measures 2.5″ (6.4 cm) x 4″ (10.2 cm).
- [ ] Each stem is 4 ch and measures 1″ (2.5 cm).
- [ ] Each strand has exactly 8 links.
- [ ] Each strand measures 42″ (106.7 cm) before the tassel.
- [ ] All 8 tassels are 6″ (15.2 cm) long.
- [ ] The strands alternate mustard and cream, starting with mustard on the left.
- [ ] All tails are woven in and hidden.
- [ ] The strands are spaced 3″ (7.6 cm) apart on the rod.
Troubleshooting
Links look round instead of pointed. Check that you worked only 1 sc at the top and (sc, ch 2, sc) at the bottom. Block with pins at both points.
Puffs look flat or messy. Pull every loop up to the same height before closing each puff, and keep the final yo snug.
Chain shows through the sc ring. Push the sc tightly together as you work. If there are still gaps, your ring chains may be too loose, so chain a little tighter.
Strands are different lengths. Measure after every 4 links. Stem tension is the usual cause, so redo any loose stems.
Links twist on the strand. Center each standing join in the ch-2 sp, and block the strand flat before hanging it.
Tassels look thin. Add 10 more wraps per tassel, and use the same number of wraps for all 8.
Care
Dust gently or shake the curtain out when needed. If it needs washing, hand wash in cool water, press out the water in a towel, and dry flat before rehanging.
Final Notes
The measurement chain is short and easy to check. Gauge sets the ring at 1.75″ (4.4 cm) x 3″ (7.6 cm), and the puff round brings each link to 2.5″ (6.4 cm) x 4″ (10.2 cm). One stem plus one link is 5″ (12.7 cm). Eight links plus the 2″ (5.1 cm) hanging loop make a 42″ (106.7 cm) strand, and a 6″ (15.2 cm) tassel brings it to 48″ (121.9 cm). Eight strands spaced 3″ (7.6 cm) apart give a total width of 23.5″ (59.7 cm).
Check your first link, measure every few links, and the whole curtain will hang straight and even. Happy crocheting!