

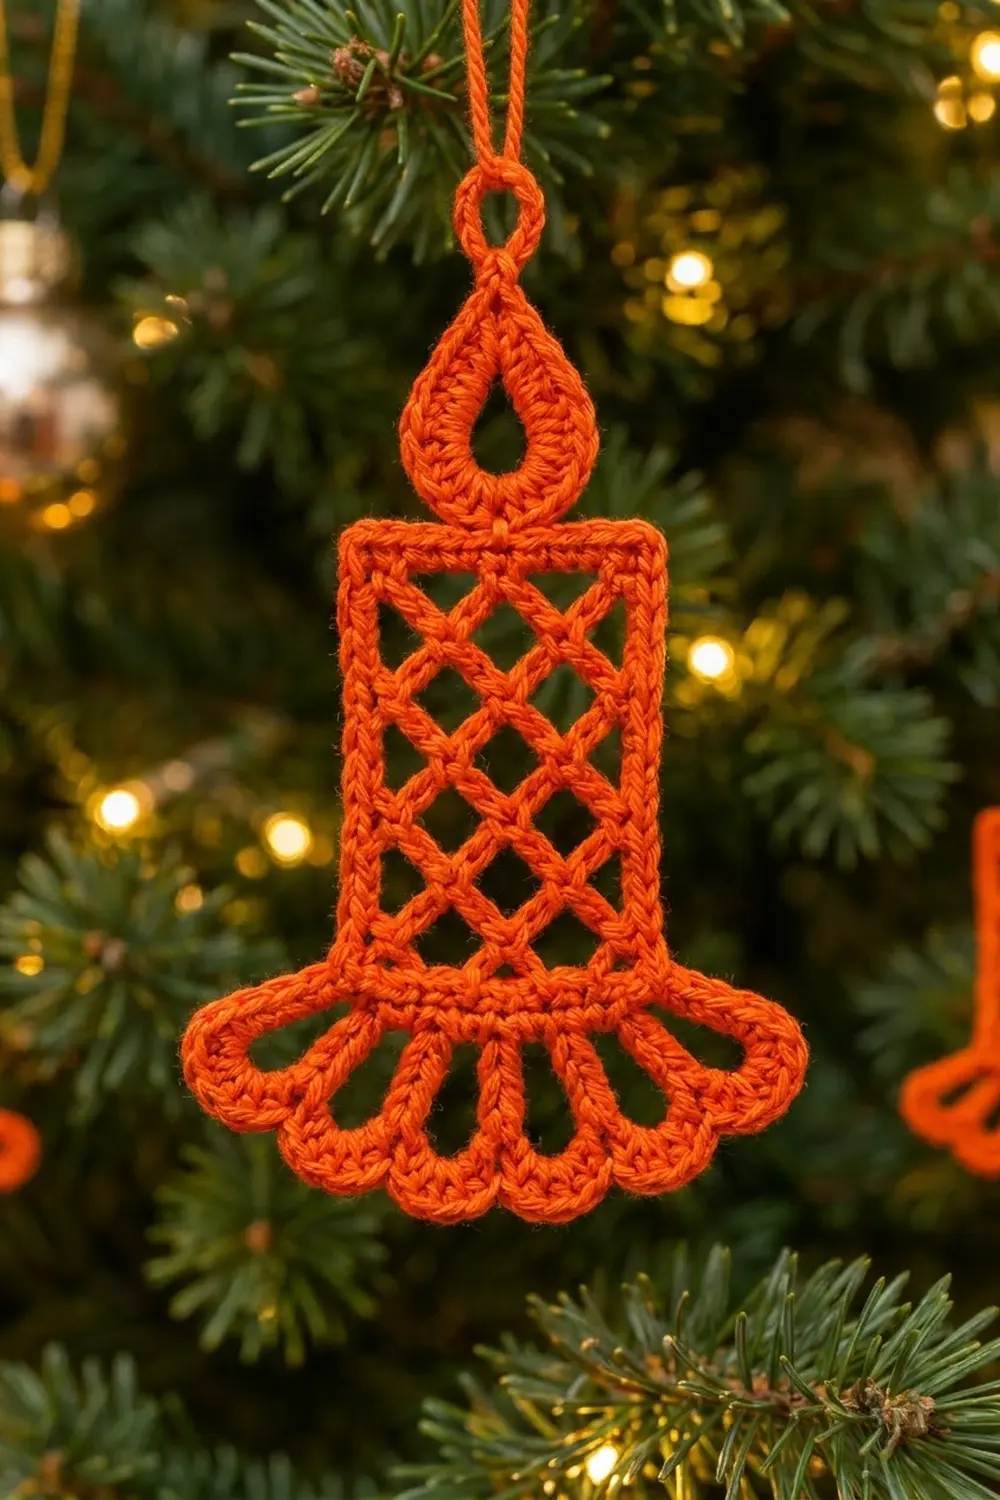
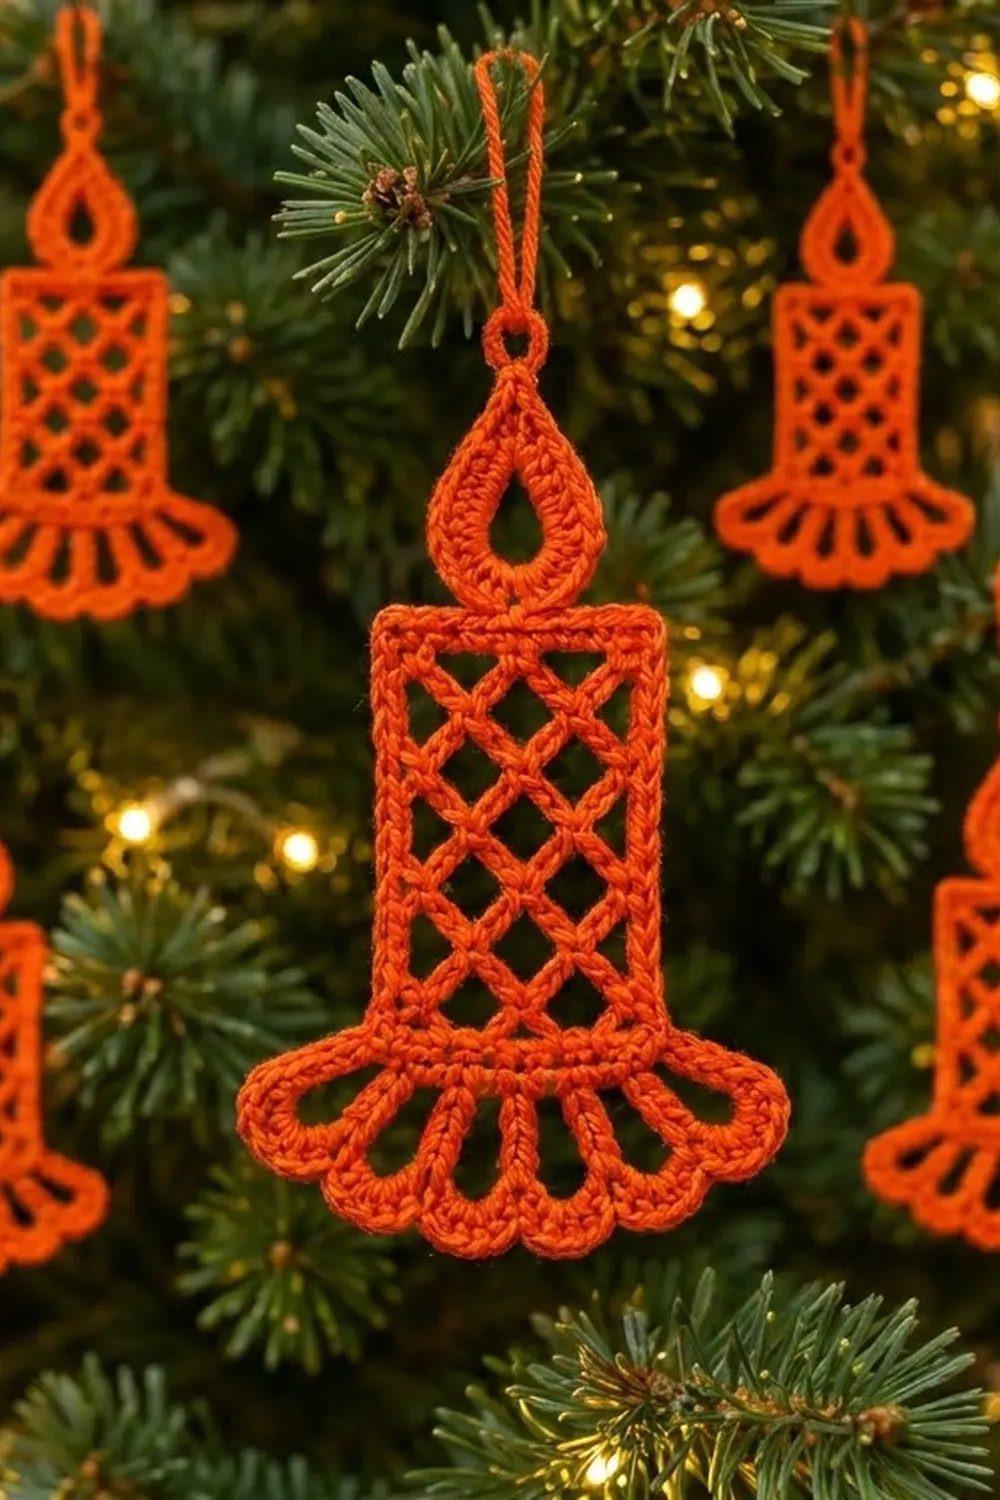
This little candle ornament is all about light and air. An open diamond lattice fills the candle body, a teardrop flame sits on top, and a scalloped skirt of five open petals finishes the base. On a tree, the tree lights shine straight through the holes.
The sample uses one bright orange cotton thread, which looks warm and cheerful against green branches. Red, gold, cream, or white work just as well. The style is lacy but crisp. After blocking, the piece is flat and stiff, so it hangs without curling.
The pattern uses US crochet terms. The finished ornament measures about 3 in (7.6 cm) wide at the skirt and 4.75 in (12.1 cm) tall from skirt to flame tip. With the hanging loop it is 5.25 in (13.3 cm) tall.
Construction is simple and stays in one piece. You work a small rectangle of chain mesh and frame it with one round of single crochet. Then you add the flame and hanging loop to the top edge and the scalloped skirt to the bottom edge. There is no sewing and no joining of separate pieces.
Finished Size and Construction
- Finished size: 3 in (7.6 cm) wide x 4.75 in (12.1 cm) tall; 5.25 in (13.3 cm) tall with hanging loop
- Skill level: Easy-intermediate
- Terminology: US crochet terms
- Yarn weight: Size 3 cotton crochet thread (similar to light fingering)
- Hook: 2.25 mm (US B-1)
- Number of pieces: 1
- Layout: Single ornament; flame on top, lattice body in the middle, skirt at the base
- Body size (with frame): 1.75 in (4.4 cm) wide x 2.5 in (6.4 cm) tall
- Size before border (body plus flame): 1.75 in (4.4 cm) wide x 3.75 in (9.5 cm) tall
- Border (skirt) depth: 1 in (2.5 cm)
Materials
Choose a size 3 mercerized cotton thread. Mercerized cotton has a slight sheen, shows the lattice clearly, and holds starch well. Acrylic will work, but it will not block as crisply.
- Bright orange: 6 g, about 18 m (20 yd) per ornament
These amounts include a margin of roughly 30% for your gauge swatch, joins, and weaving in ends. If you plan a set, multiply by the number of ornaments and round up to the next full ball.
Tools:
- 2.25 mm (US B-1) crochet hook
- Tapestry needle
- Scissors
- Stitch marker
- Rustproof pins and a blocking board or foam mat
- Spray starch or fabric stiffener
- Ruler or tape measure
Abbreviations (US Terms)
- ch – chain
- sl st – slip stitch
- sc – single crochet
- dc – double crochet
- st(s) – stitch(es)
- sp – space
- tch – turning chain
- RS – right side
- [ ] – repeat the steps inside the brackets the number of times stated
Special stitch – mesh loop: ch 5, then sc in the next ch-5 loop (or in the stitch named). Each row of mesh loops sits half a loop over from the row below, which creates the diagonal diamond lattice.
Gauge and Checkpoints
Gauge: 8 sc and 8 rows = 1 in (2.5 cm) in sc with a 2.25 mm hook.
Make a swatch of 16 sc for 16 rows. It should measure 2 in (5.1 cm) square. Thread gauge matters here because every part of the ornament is attached to the frame stitches.
Make one complete ornament as a test before you make a set. Check these points as you go:
- After the mesh (Rows 1–9): about 1.5 in (3.8 cm) wide x 2.25 in (5.7 cm) tall, lightly stretched.
- After the frame round: 1.75 in (4.4 cm) wide x 2.5 in (6.4 cm) tall.
- After the flame: total height 3.75 in (9.5 cm).
- After the skirt: 3 in (7.6 cm) wide x 4.75 in (12.1 cm) tall.
If your piece is too big: go down to a 2.0 mm hook, or tighten your chains. Most of the extra size comes from loose mesh loops.
If your piece is too small: go up to a 2.5 mm hook. Do not add mesh rows or loops, because every count below depends on 3 loops across and 9 rows.
Part 1: Lattice Body
The body is a chain mesh with straight edges. Odd rows have 3 full loops. Even rows have 2 full loops plus a half loop at each edge.
Ch 14.
Row 1 (RS): Sc in 2nd ch from hook, [ch 5, skip 3 ch, sc in next ch] 3 times. (4 sc, 3 ch-5 loops)
Row 2: Ch 5 (counts as dc + ch 2), turn, sc in first ch-5 loop, [ch 5, sc in next ch-5 loop] 2 times, ch 2, dc in last sc. (2 full ch-5 loops + 2 half loops)
Row 3: Ch 1, turn, sc in first dc, [ch 5, sc in next ch-5 loop] 2 times, ch 5, sc in 3rd ch of tch. (4 sc, 3 ch-5 loops)
Rows 4–9: Repeat Rows 2 and 3 three more times.
You now have 9 rows, ending with a RS row of 3 full loops. Do not fasten off.
Tip: Work each sc around the whole ch-5 loop, not into a single chain. This lets the loops slide into even diamonds when you block.
Checkpoint: about 1.5 in (3.8 cm) wide x 2.25 in (5.7 cm) tall when gently stretched. Each mesh row is about 0.25 in (0.6 cm) tall.
Part 2: Frame Round
This round squares off the body. It also gives the flame and skirt an exact number of stitches to work into.
Frame Rnd: Ch 1, do not turn.
- Corner: 3 sc in last sc of Row 9.
- Side 1: Working along the row ends, work 18 sc evenly (2 sc in each of the 9 row ends).
- Corner: 3 sc in the first ch of the foundation.
- Bottom: Working in the foundation chain, sc in each of the 11 ch between the end chs, with 2 sc in the center ch. (12 sc)
- Corner: 3 sc in the last ch of the foundation.
- Side 2: Work 18 sc evenly along the row ends (2 per row end).
- Corner: 3 sc in the first sc of Row 9.
- Top: Working across Row 9, 4 sc in each ch-5 loop, skipping the sc between loops. (12 sc)
Sl st in first sc. Fasten off.
Stitch count: 12 + 18 + 12 + 18 + (4 corners x 3) = 72 sc.
Counted between the corner center stitches, the top and bottom edges each have 14 sc (12 + 1 corner-side st at each end). Each side has 20 sc (18 + 2). Check: 14 + 14 + 20 + 20 + 4 corner centers = 72.
Checkpoint: 1.75 in (4.4 cm) wide x 2.5 in (6.4 cm) tall. Corners should be square, not rounded.
Part 3: Flame and Hanging Loop
With RS facing, number the top edge stitches 1 to 14 from left to right, not counting the corner centers.
Setup: Join thread with sl st in st 5. Ch 14, skip sts 6–9, sl st in st 10. This ch-14 loop forms the open center of the flame.
Row 1: Working into the ch-14 loop, 8 sc, ch 2 (tip), 8 sc. Sl st in st 4 of the top edge. (16 sc + 1 ch-2 tip sp)
Row 2: Ch 1, turn, sc in each of next 8 sc, (sc, ch 10, sc) in the ch-2 tip sp, sc in each of next 8 sc. Sl st in st 11 of the top edge. (18 sc + 1 ch-10 hanging loop)
Fasten off.
The flame base now covers sts 4–11, leaving 3 sts free on each side, so it sits exactly in the center. Working 16 sc into a 14-ch loop lets the base round out. The ch-2 tip and the paired sc at the top pull it into a point.
Checkpoint: flame about 1 in (2.5 cm) wide x 1.25 in (3.2 cm) tall; hanging loop about 0.5 in (1.3 cm) tall. Total height so far: 3.75 in (9.5 cm).
Border: Scalloped Skirt
The skirt is the ornament’s border. You work it along the bottom edge only.
Border gauge: same as the main gauge, 8 sc = 1 in (2.5 cm). Each ch-7 loop hangs about 0.5 in (1.3 cm) deep before you cover it.
Starting count: the bottom edge has 14 sc between the corner centers. With both corner centers added, you have 16 sts to work into. Each corner is counted only once.
Row 1 (RS): With RS facing, join thread with sl st in the bottom-right corner center. Ch 1, sc in same st and in next st, 2 sc in next st, [sc in next 2 sts, 2 sc in next st] 4 times, sc in last st (the bottom-left corner center). (21 sc)
This is a conversion row: 16 sts worked 1-per-stitch + 5 increases = 21 sc. The increases make the skirt flare wider than the body.
Row 2: Ch 1, turn, sc in first sc, [ch 7, skip 3 sc, sc in next sc] 5 times. (6 sc, 5 ch-7 loops)
Row 3: Ch 1, turn, sc in first sc, [11 sc in next ch-7 loop, sc in next sc] 5 times. (61 sc)
Fasten off.
Why the math works: each “skip 3, sc in next” repeat uses 4 stitches. Five repeats plus the first sc need 5 x 4 + 1 = 21 stitches, which is exactly what Row 1 gives you. Row 3 is a trim row: 6 sc worked 1-per-stitch + 55 sc worked into the loops (5 x 11) = 61 sc. Eleven sc in a 7-ch loop is enough to open each loop into a round, U-shaped petal without ruffling. The two outer petals sit on the corner stitches, so they curve outward and give the skirt its bell shape.
Checkpoint: the skirt is 3 in (7.6 cm) wide at the petal tips and 1 in (2.5 cm) deep. Full ornament: 3 in (7.6 cm) x 4.75 in (12.1 cm).
Final Blocking
- Weave in all ends along the frame or skirt sc, never through the open lattice.
- Dampen the ornament with cool water and press out the extra water in a towel.
- Lay it RS up on the blocking board.
- Pin the 4 frame corners first so the body measures 1.75 in (4.4 cm) x 2.5 in (6.4 cm).
- If needed, pin the points of the mesh diamonds so the lattice lines run straight on the diagonal.
- Pin the flame tip straight up and open the flame center into a clean teardrop.
- Pin the center of each of the 5 petals, spreading the skirt to 3 in (7.6 cm).
- Spray generously with starch or brush on fabric stiffener.
- Let it dry completely, at least 6 hours, before unpinning.
Final Quality-Control Checklist
- Body has 3 diamonds across and straight side edges.
- Frame round has 72 sc and 4 square corners.
- Flame is centered, with 3 free sts on each side of its base.
- Flame Row 2 has 18 sc plus the hanging loop.
- Skirt Row 1 has 21 sc, Row 2 has 5 loops, Row 3 has 61 sc.
- All 5 skirt petals are the same size.
- Ornament measures 3 in (7.6 cm) x 4.75 in (12.1 cm).
- All ends are hidden and trimmed.
Troubleshooting
Body edges zigzag. You missed the half loops on the even rows. Each even row must start with ch 5 and end with ch 2, dc.
Lattice looks crooked. Your mesh loops are uneven. Count each ch 5, and pin the diamond points when blocking.
Frame corners curl. Work all 3 sc into the same corner stitch, and check that each side has exactly 18 sc.
Flame leans to one side. Recount the top edge: there should be 14 sts between corners, with the setup chain running from st 5 to st 10.
Petals ruffle. Your ch-7 loops are too tight. Loosen the chains instead of cutting back the 11 sc.
Petals look flat or stretched. Your chains are loose. Go down a hook size for Row 2 only.
Ornament hangs crooked. Make sure the hanging loop is worked exactly into the flame tip space.
Care
Hand wash in cool water, reshape, and re-starch while damp. Store the ornament flat or hanging, away from heavy decorations that could crush the lattice.
Final Notes
The whole ornament grows from one small mesh. Nine rows with 3 loops across make a lattice about 1.5 in (3.8 cm) x 2.25 in (5.7 cm). The frame round adds 72 sc and brings the body to 1.75 in (4.4 cm) x 2.5 in (6.4 cm). The flame uses 8 of the 14 top stitches and brings the height to 3.75 in (9.5 cm). The skirt grows the 16 bottom stitches to 21, then to 5 petals and 61 sc, for a final size of 3 in (7.6 cm) x 4.75 in (12.1 cm).
If every checkpoint matches, all the ornaments in your set will look the same. Make one, check it, then make a whole row of glowing candles for the tree.
Happy crocheting!