

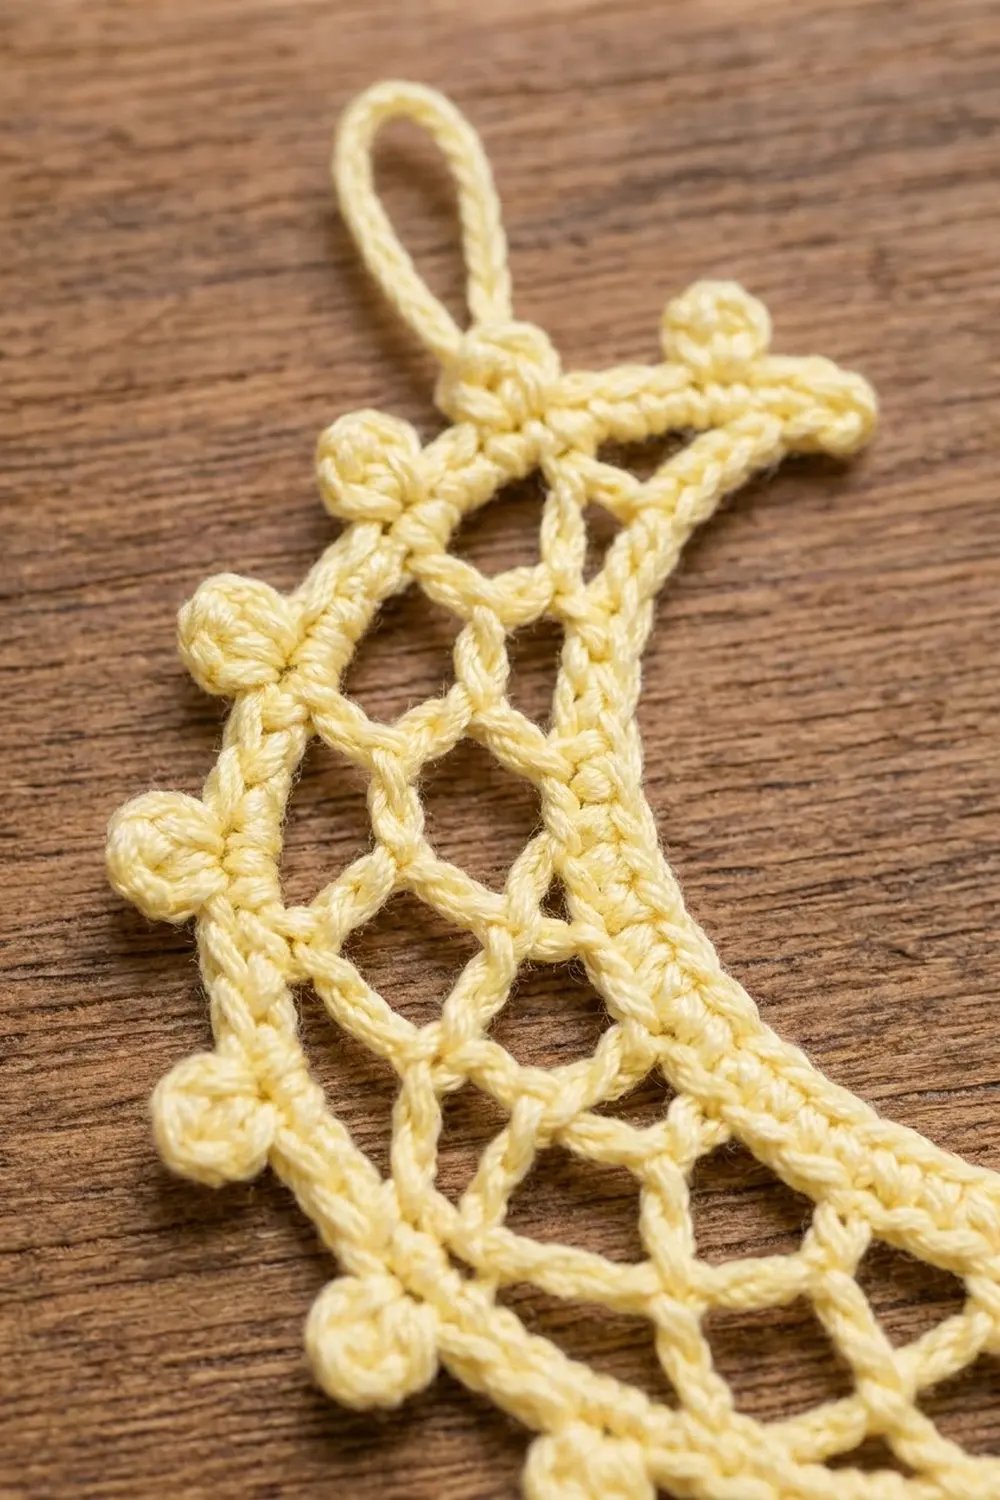
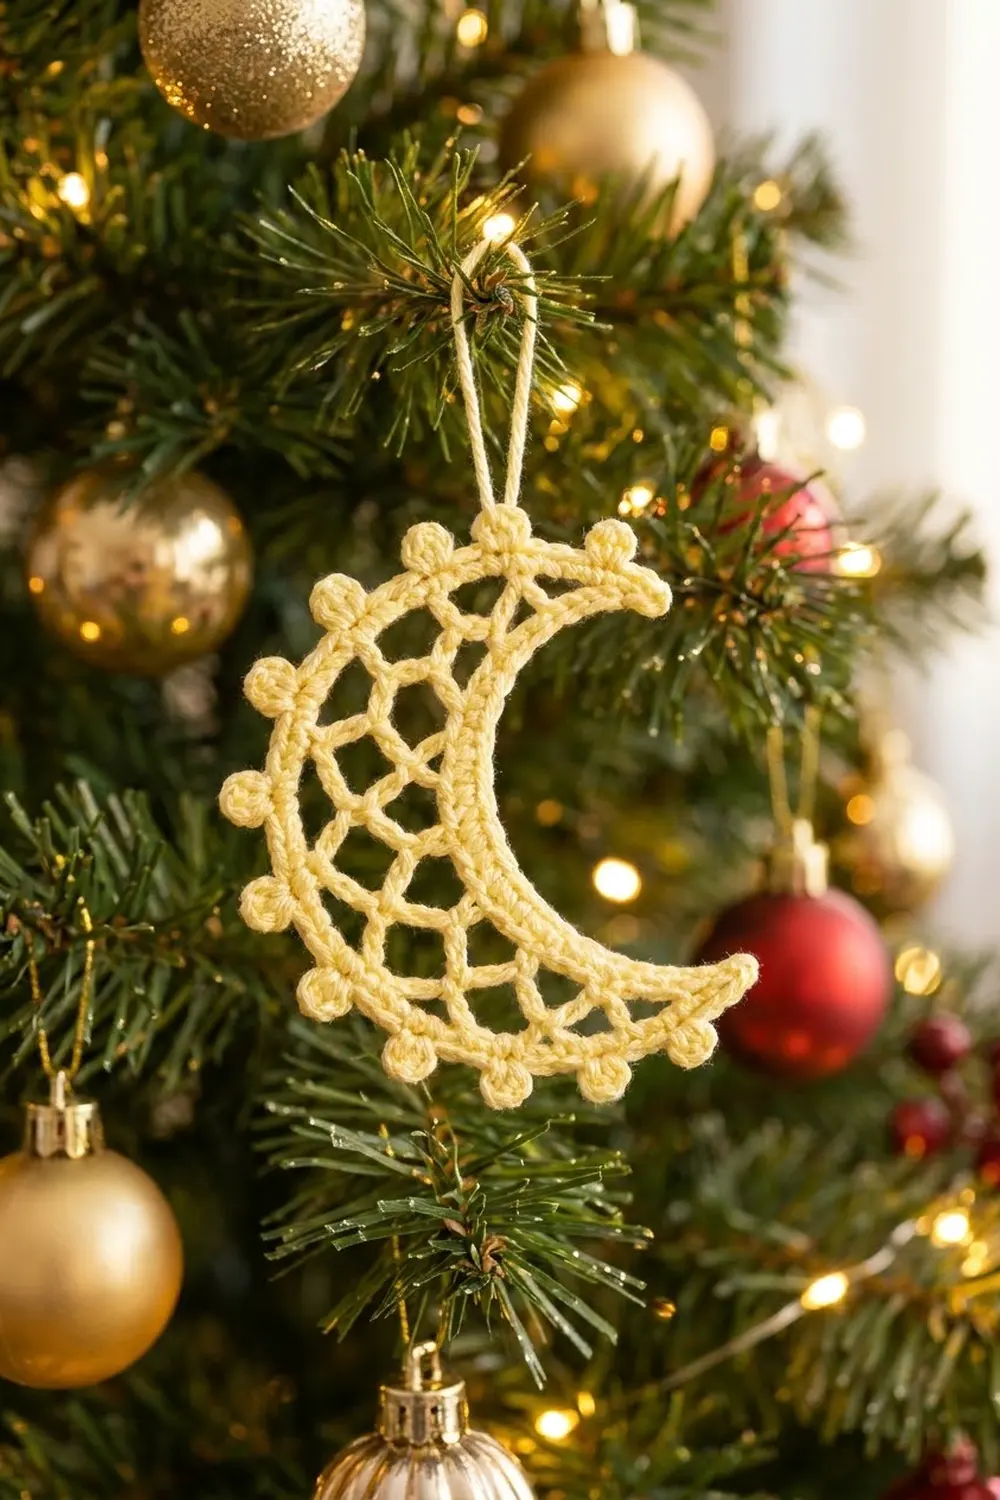
The Moonlit Lace Crescent is a small, airy holiday ornament shaped like a crescent moon. A smooth, solid inner arc frames a lattice of chain loops, and a row of tiny picots runs along the outer curve like little beads of light. A short chain loop at the top tip lets it hang from a tree branch.
The ornament is worked in one color, a soft butter yellow cotton thread. The pale shade looks like moonlight against dark evergreen, and the cotton gives crisp stitches that show off the lace. The style is classic thread crochet: simple stitches with a vintage, lacy look.
This pattern uses US crochet terms. The finished moon measures about 3.75 in (9.5 cm) from tip to tip and 2.25 in (5.7 cm) across at its widest point. The band is about 1 in (2.5 cm) deep at the center, and the hanging loop adds 1 in (2.5 cm).
The ornament is a single piece worked flat in rows from the inner curve outward. You make a tapered single crochet strip for the inner arc, then two rows of graduated chain loops for the lattice, then a solid single crochet edge, and finally a picot row. Each outer row is longer than the one before, and that extra length bends the strip into a crescent. You finish with a hanging loop and a light starch block.
Finished Size and Construction
- Finished size: 3.75 in (9.5 cm) tip to tip x 2.25 in (5.7 cm) wide, plus a 1 in (2.5 cm) hanging loop
- Skill level: Easy to intermediate (basic stitches, thread work)
- Terminology: US crochet terms
- Yarn weight: Size 3 crochet cotton thread
- Hook: 2.25 mm (US B-1)
- Number of pieces: 1 (single ornament, nothing to join)
- Layout: One crescent, worked in 6 rows from inner arc to outer edge
- Piece size: Band about 1 in (2.5 cm) deep at the center, tapering to a point at each tip
- Size before border: About 3.25 in (8.3 cm) tip to tip, with the band 0.75 in (1.9 cm) deep at the center after Row 4
- Border depth: About 0.25 in (0.6 cm), including picots (Rows 5 and 6)
Materials
Yarn advice: Choose a mercerized size 3 cotton thread. Mercerized cotton has a slight sheen, holds starch well, and keeps the lattice open and crisp. Acrylic or wool blends will work, but the loops will relax and the crescent will be harder to shape. A light, warm yellow or cream gives the moonlight effect shown.
- Butter yellow, size 3 cotton: 6 g, about 18 m (20 yd)
The ornament itself uses about 4 g, roughly 12 m (13 yd). The quantity above includes extra thread for a practice row and weaving in ends.
Tools:
- 2.25 mm (US B-1) crochet hook
- Tapestry needle with an eye small enough for thread
- Small sharp scissors
- Fabric stiffener, liquid starch, or a sugar-water solution
- Foam blocking board or a piece of cardboard covered with plastic wrap
- Rustproof pins
- Ruler or tape measure
Abbreviations (US Terms)
- ch = chain
- sl st = slip stitch
- sc = single crochet
- hdc = half double crochet
- sk = skip
- st(s) = stitch(es)
- ch-3 loop / ch-4 loop / ch-5 loop = the space made by 3, 4, or 5 chains
- RS = right side
Special stitch – Picot: Ch 3, sl st into the 3rd ch from the hook (the first of the 3 chains you just made). This makes one small round bead. Picots are not counted in stitch totals.
Gauge and Checkpoints
Gauge: 8 sc and 8 sc rows = 1 in (2.5 cm) with size 3 cotton and a 2.25 mm hook.
Because this is a single small piece, the ornament itself is your test piece. Work Rows 1 and 2, then measure before going on. It takes only a few minutes and saves you from a moon that comes out the wrong size.
Checkpoints:
- After Row 2: The strip laid straight measures about 3.875 in (9.8 cm) long and 0.25 in (0.6 cm) tall.
- After Row 4: The band is about 0.75 in (1.9 cm) deep at the center. The piece measures about 3.25 in (8.3 cm) tip to tip when eased into a curve.
- After Row 5: The outer edge measures about 7.25 in (18.4 cm) along the curve (58 sc at 8 sc per inch).
- After Row 6: The ornament measures 3.75 in (9.5 cm) tip to tip and 2.25 in (5.7 cm) wide.
If your piece is too big: Go down to a 2.0 mm hook, or check that you are not pulling up tall loops on your sc. Tall loops add length to every row.
If your piece is too small: Go up to a 2.5 mm hook. Tight thread work can also make the lattice pucker, so a slightly larger hook helps the loops sit open.
Small size differences are fine for an ornament. The shape matters more than the exact size, so focus on matching the stitch counts.
Pattern
Inner Arc
The inner arc is a solid, tapered strip. Short stitches at each end make the pointed tips, and taller hdc stitches in the middle give the arc its thickness.
Foundation: Ch 32.
Row 1 (RS): Sl st in 2nd ch from hook, sc in next 2 ch, hdc in next 25 ch, sc in next 2 ch, sl st in last ch. (31 sts: 2 sl st, 4 sc, 25 hdc)
Row 2: Ch 1, turn. Sc in each st across, including both sl sts. (31 sc)
Check the first gauge checkpoint now. The strip will be straight or only slightly curved at this point. That is normal.
Lattice
The lattice is made of graduated chain loops. Short loops at the tips and long loops in the middle make the band deepest at the center and narrow at the points. That gives you the crescent shape.
Row 3: Ch 1, turn. Sc in first sc, [ch 3, sk 2 sc, sc in next sc], [ch 4, sk 2 sc, sc in next sc], *[ch 5, sk 2 sc, sc in next sc]; repeat from * 5 more times (6 ch-5 loops total), [ch 4, sk 2 sc, sc in next sc], [ch 3, sk 2 sc, sc in last sc].
Row 3 count: 11 sc and 10 loops. Loop sizes in order: 3, 4, 5, 5, 5, 5, 5, 5, 4, 3.
Check the math: 1 sc to start, then 10 repeats that each use 3 sts (2 skipped + 1 worked). 1 + (10 x 3) = 31, which matches Row 2.
Row 4: Ch 1, turn. Sl st in first 2 ch of the first ch-3 loop, ch 1, sc in same loop. [Ch 3, sc in next loop], [ch 4, sc in next loop], *[ch 5, sc in next loop]; repeat from * 4 more times (5 ch-5 loops total), [ch 4, sc in next loop], [ch 3, sc in last loop]. Sl st in the first sc of Row 3 to close the tip.
Row 4 count: 10 sc and 9 loops. Loop sizes in order: 3, 4, 5, 5, 5, 5, 5, 4, 3.
The sl sts at the start of Row 4 and the sl st at its end attach the row to the tips of Row 3. This keeps both points closed and sharp. Ease the piece into a curve and check the second checkpoint.
Outer Edge and Picots
Rows 5 and 6 form the border. Their instructions and stitch math are in the Border section below. Work those two rows now, then return here for the hanging loop.
Hanging Loop
At the end of Row 6 you are at one tip. This tip becomes the top of the moon.
Ch 15, sl st in the last sc of Row 6 to form a loop. Fasten off, leaving a 6 in (15.2 cm) tail. Weave the tail through the base of the loop twice to secure it, then weave it into the sc edge.
Weave in the starting tail at the bottom tip along the foundation chain. Trim close.
Border
Border gauge: 8 sc = 1 in (2.5 cm), the same as the body. The border is only 2 rows, about 0.25 in (0.6 cm) deep with picots.
Row 5 (solid edge): Ch 1, turn. Sc in first sc. Work the next loop as follows: 4 sc in a ch-3 loop, 5 sc in a ch-4 loop, or 6 sc in a ch-5 loop. Then sc in next sc. Repeat from * across all 9 loops, ending with sc in the last sc of Row 4.
Row 5 count, step by step:
- 10 sc worked one into each sc of Row 4
- 4 + 5 + (6 x 5) + 5 + 4 = 48 sc worked into the 9 loops
- Total: 10 + 48 = 58 sc
Row 6 (picot edge): Ch 1, turn. Sc in first 4 sc, *picot, sc in next 5 sc; repeat from * 9 more times (10 picots), picot, sc in last 4 sc.
Row 6 count: 4 + (10 x 5) + 4 = 58 sc, plus 11 picots.
Why the math works:
Each loop gets one more sc than it has chains (a ch-3 loop gets 4 sc, a ch-5 loop gets 6 sc). That small extra fullness lets the outer edge stretch around the long outside of the curve without cupping. At 8 sc per inch, 58 sc gives an outer edge of about 7.25 in (18.4 cm), while the inner arc is only 31 sts. That difference pulls the band into a crescent.
The picot row is symmetric. There are 4 sc before the first picot and 4 sc after the last, with 5 sc between each pair. This puts the middle (6th) picot at the center of the outer curve, with 5 picots evenly spaced on each side.
Final Blocking
Blocking turns a wavy strip into a crisp crescent. Thread lace needs it, so do not skip this step.
- Draw a template. On paper, draw a crescent 3.75 in (9.5 cm) from tip to tip and 2.25 in (5.7 cm) wide. Make the band 1 in (2.5 cm) deep at the center, tapering to a point at each end. Place the paper under plastic wrap on your board.
- Wet the ornament. Soak it in fabric stiffener or liquid starch for 1 to 2 minutes. Press out the excess between two layers of a towel. It should be damp, not dripping.
- Pin the inner arc. Lay the ornament on the template RS up. Pin the two tips first, then pin along the inner arc every 0.5 in (1.3 cm) so it follows the drawn curve.
- Open the lattice. Pin each ch-5 loop of Row 4 outward so the openings look like even diamonds. Pin the ch-3 and ch-4 loops lightly near the tips.
- Shape the picots. Pin the center picot first, then work out toward each tip. Each picot should point straight outward.
- Straighten the hanging loop. Pin the loop flat, pointing up from the top tip.
- Dry completely. Leave it for at least 12 hours, or until fully stiff. Remove the pins and check the measurements.
Final Quality-Control Checklist
- [ ] Row 2 has 31 sc and the strip measures about 3.875 in (9.8 cm)
- [ ] Row 3 has 10 loops in the order 3, 4, 5, 5, 5, 5, 5, 5, 4, 3
- [ ] Row 4 has 9 loops in the order 3, 4, 5, 5, 5, 5, 5, 4, 3
- [ ] Row 5 has 58 sc
- [ ] Row 6 has 58 sc and 11 picots, with the 6th picot at the center
- [ ] Both tips are closed and pointed
- [ ] Finished size is about 3.75 in (9.5 cm) x 2.25 in (5.7 cm)
- [ ] Hanging loop is about 1 in (2.5 cm) long and firmly secured
- [ ] All ends are woven in and trimmed
- [ ] The ornament is fully dry and holds its shape when hung
Troubleshooting
The moon is too straight, more like a banana than a crescent. The outer rows are too tight. Check that each loop got the full sc count in Row 5. You can also re-block, pinning the tips closer together.
The outer edge ruffles. You likely added extra sc in Row 5. Count again: it should be 58. Ruffling can also come from a hook that is too large for the edge rows.
The lattice openings are uneven. Your chain tension is varying. Try to keep each chain the same size, and re-block with a pin in the center of each opening.
A tip is open or blunt. You may have missed the sl sts at the start of Row 4 or the closing sl st at its end. Use the tail to stitch the tip closed with a few small whipstitches.
The picots look flat. Make sure you sl st into the 3rd ch from the hook, not the 2nd. Pin each picot during blocking.
The ornament is floppy after drying. Apply a second coat of stiffener and let it dry again.
My count is off by one in Row 3. Recount Row 2. If you have 30 or 32 sc, the repeats will not end in the last stitch. Fix Row 2 before going on.
Care
Store the ornament flat in tissue paper, away from humidity. If it gets dusty, dab it gently with a damp cloth. A full wash will remove the starch, so re-block it afterward if needed.
Final Notes
The size of this moon comes from a simple chain of measurements. A 31-stitch inner strip measures about 3.875 in (9.8 cm) at 8 sc per inch. Two rows of graduated chain loops deepen the band to 0.75 in (1.9 cm) at the center and about 3.25 in (8.3 cm) tip to tip. A 58-stitch edge row and a picot row add 0.25 in (0.6 cm), giving a finished crescent of 3.75 in (9.5 cm) x 2.25 in (5.7 cm). The 1 in (2.5 cm) hanging loop completes it.
If your counts match at each checkpoint, the shape will follow. Make one, check it against the template, and hang it where the lights can shine through the lace.
Happy crocheting!