

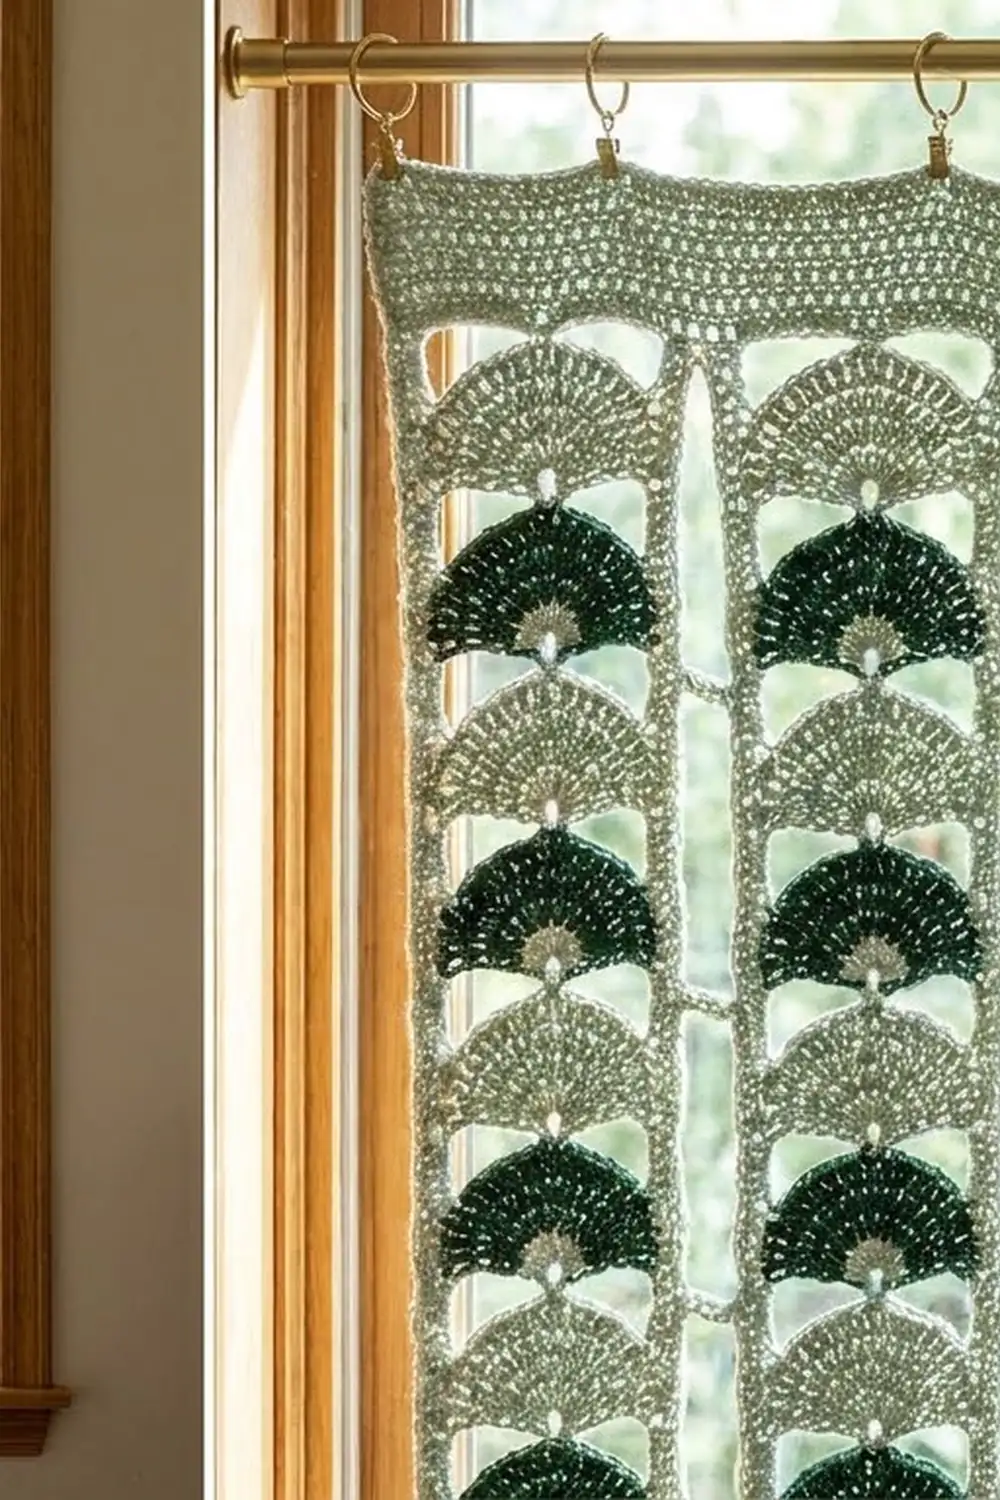
This curtain is made of tall, airy strips filled with stacked fan shells. Dark forest green and soft sage fans alternate down each strip, framed by two pale sage rails. Light comes through the open gaps between the strips and through the small spaces between the fans, so the curtain divides a room without making it dark.
The style is calm and botanical. The fans look a little like overlapping leaves when the curtain hangs, and the two greens give it a natural, layered look. Only two colors are used. Light sage is the main color, used for the rails, joins, and top band. Dark green is used only for alternating fans.
This pattern uses US crochet terms. The finished curtain is 32.5 in (82.6 cm) wide and 63 in (160.0 cm) long, including the top band.
Here is the construction in short. You make each strip’s fans as one continuous chain of fans, changing color with every fan. Next you work a two-row rail up one side and then the other, catching the tip of each fan. Then you join seven strips with chain bars, add a top band, and hang the curtain with clip rings.
Finished Size and Construction
- Finished size: 32.5 in x 63 in (82.6 cm x 160.0 cm)
- Skill level: Easy-intermediate
- Terminology: US
- Yarn weight: DK (#3), cotton or cotton blend
- Hook: 4.0 mm (G-6)
- Number of pieces: 7 strips
- Layout: 7 strips side by side, 1 row of strips
- Strip size: 4 in x 62 in (10.2 cm x 157.5 cm)
- Fan size: 3 in wide x 1.5 in tall (7.6 cm x 3.8 cm)
- Size before border: 32.5 in x 62 in (82.6 cm x 157.5 cm)
- Border (top band) depth: 1 in (2.5 cm)
Materials
Use a smooth, mercerized or matte cotton DK. Cotton hangs straight, keeps the fan shells crisp, and doesn’t stretch much under its own weight. Avoid fuzzy yarns, because they blur the stitch definition and catch on each other between the strips.
- Color A, dark forest green: about 175 g / 385 m (fans only)
- Color B, light sage: about 300 g / 660 m (fans, rails, joins, top band)
These quantities are based on a typical DK cotton of about 110 m per 50 g. They include a margin of roughly 10% for gauge differences and long weaving tails.
Tools:
- 4.0 mm (G-6) crochet hook
- Tapestry needle
- Locking stitch markers (at least 10)
- Measuring tape
- Spray bottle and blocking pins
- 8 to 10 curtain clip rings and a rod at least 36 in (91.4 cm) long
Abbreviations (US Terms)
- ch – chain
- sl st – slip stitch
- sc – single crochet
- dc – double crochet
- st(s) – stitch(es)
- sp – space
Special term: fan tip. On each fan, the first and last stitches of Row 3 sit at the two lower corners of the semicircle. These are the fan tips. The rails are worked into them.
Gauge and Checkpoints
Main gauge: 16 sc = 4 in (10.2 cm), worked into a chain. Rail rows measure about 0.25 in (0.6 cm) tall each.
Test first: Make 3 linked fans and a short rail before you start the full project. Check each stage:
- One fan: 3 in (7.6 cm) wide across the base and 1.5 in (3.8 cm) tall.
- Fan repeat: From the base of one fan to the base of the next fan up, measure 2 in (5.1 cm). This is fan height plus the 2-chain link.
- Rail: 8 rail stitches = 2 in (5.1 cm), so each rail repeat matches each fan repeat exactly.
If your piece is too big: Go down to a 3.75 mm hook. If only the fans are too big, chain more tightly on the link.
If your piece is too small: Go up to a 4.5 mm hook.
The rails and the fans must agree. If the rail repeat is longer than the fan repeat, the fans will sag between tips. If it is shorter, the strip will pucker.
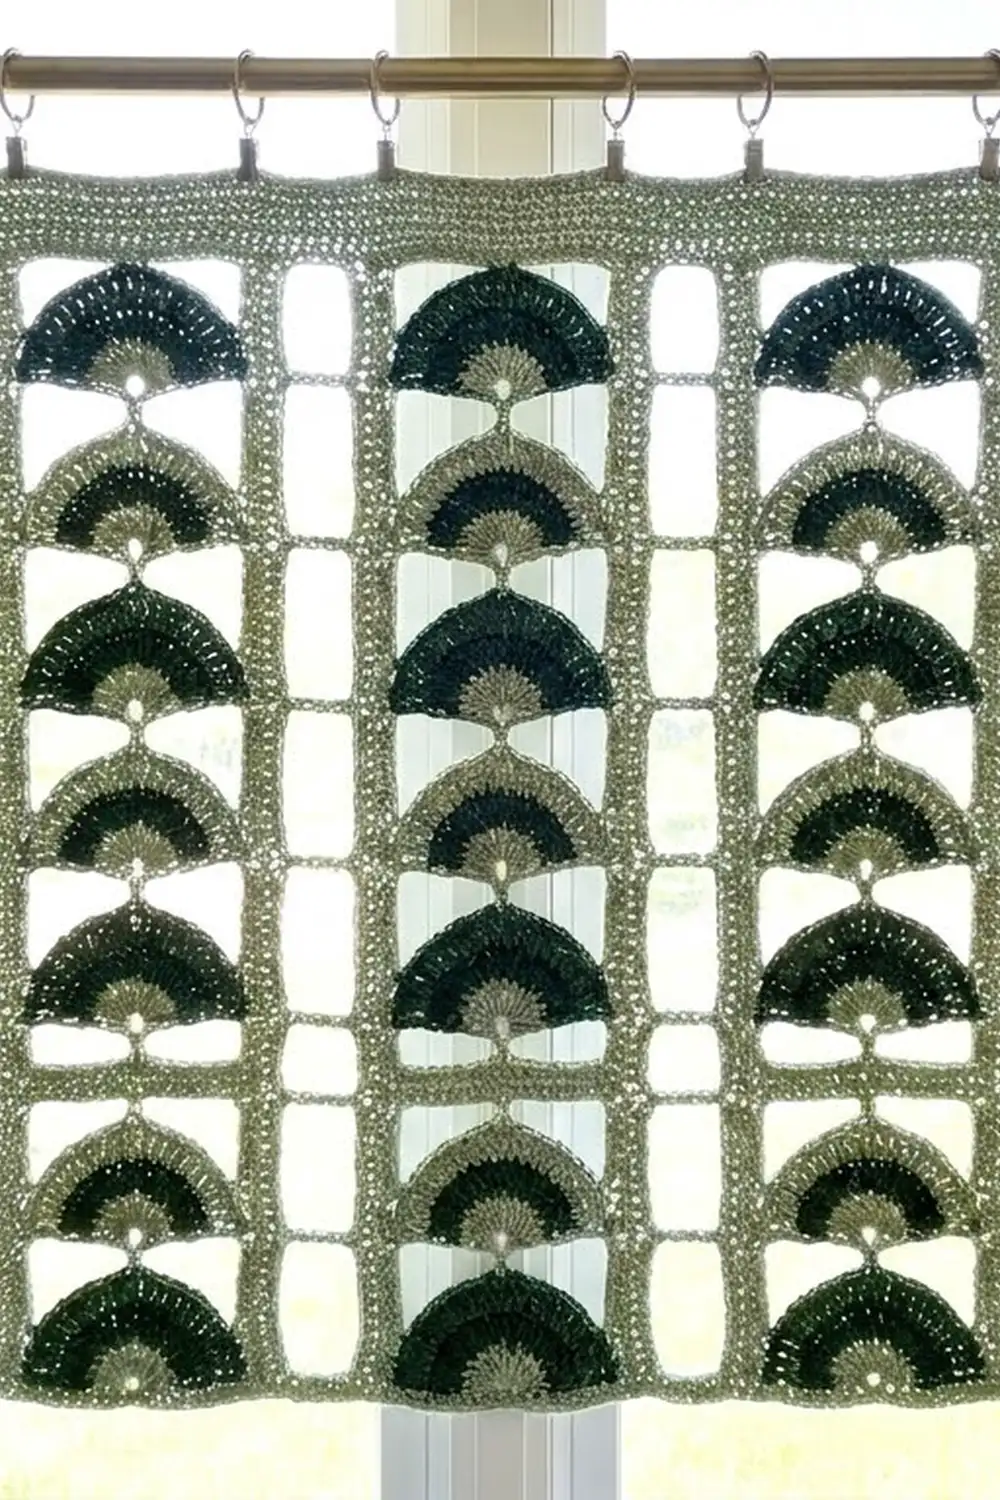
Fan Column (make 1 per strip)
Each strip has 30 fans. Fan 1 at the bottom is Color A, and the colors then alternate. All odd-numbered fans are A and all even-numbered fans are B.
Fan 1 (Color A)
Row 1: Ch 4, 6 dc in 4th ch from hook. (7 dc; the skipped ch-3 counts as 1 dc.) Turn.
Row 2: Ch 3 (counts as dc), dc in first st, 2 dc in each remaining st across. (14 dc) Turn.
Row 3: Ch 3 (counts as dc), dc in first st, dc in next st, 2 dc in next st, dc in next st 6 times. (21 dc) Fasten off.
The 21 dc of Row 3 form the crown. Its 11th st is the center of the crown. The first and last sts of Row 3 are the fan tips.
Checkpoint: 3 in (7.6 cm) wide, 1.5 in (3.8 cm) tall, lying flat with no ruffling.
Fans 2 to 30
Work each new fan in the opposite color from the fan below.
Join: With the new color, join with sl st in the 11th st (center) of Row 3 on the previous fan.
Row 1: Ch 6, 6 dc in 4th ch from hook. (7 dc; the first 2 ch stay as the link below the fan.) Turn.
Rows 2–3: Work as Fan 1. (14 dc, then 21 dc) Fasten off.
The new fan grows straight up from the crown of the fan below. The 2-ch link is what creates the small notch at the base of each fan.
Checkpoint after Fan 30: The column is about 60 in (152.4 cm) from the base of Fan 1 to the crown of Fan 30. Weave in all fan tails now. Weaving later, through the rails, is much harder.
Rails (2 per strip)
Lay the fan column flat, crowns up and right side facing you. Both rails are worked in Color B from the bottom up, then back down.
Left Rail
Row 1: Make a slip knot. Ch 7, sc in left tip of Fan 1, ch 7, sc in left tip of next fan 29 times, ch 8. Don’t turn yet.
Count: 7 ch + 1 sc + 29 x (7 ch + 1 sc) + 8 ch = 7 + 1 + 232 + 8 = 248 sts.
Row 2: Ch 1 (does not count), turn, sc in each st down to the bottom. (248 sc) Fasten off.
Right Rail
Work as the left rail, catching the right tip of each fan. (248 sts in Row 1, 248 sc in Row 2)
Stitch logic: Numbered from the bottom, the fan tips sit at rail sts 8, 16, 24 … 240. That is 30 tips, one every 8 sts. Sts 241–248 extend the rail above Fan 30’s crown.
Checkpoint: Each rail is 248 sts / 4 sts per in = 62 in (157.5 cm). The strip is 4 in (10.2 cm) wide: 3 in (7.6 cm) of fan plus 0.5 in (1.3 cm) of rail on each side.
End Bars
Top bar: With B, join with sl st to the top end of the left rail. Ch 12, sl st to the top end of the right rail. Ch 1, turn, 12 sc in the ch-12 sp, sl st to the left rail. Fasten off. (12 sc)
Bottom bar: Work the same way across the bottom ends of both rails. (12 sc)
The bars span the 3 in (7.6 cm) between rails at 4 sts per in. They sit level with the rail ends, so they hold the strip square without adding length.
Make All Pieces
Make 7 complete strips.
- Color A fans: 15 per strip x 7 = 105 fans
- Color B fans: 15 per strip x 7 = 105 fans
- Rails: 14 (Color B)
- End bars: 14 (Color B)
Layout (front view, strips 1–7, top band across):
[ ======== TOP BAND, 130 sts ======== ]
| S1 | | S2 | | S3 | | S4 | | S5 | | S6 | | S7 |
| B  |=| B  |=| B  |=| B  |=| B  |=| B  |=| B  |   <- Fan 30
| A  |=| A  |=| A  |=| A  |=| A  |=| A  |=| A  |   <- Fan 29
| .. |=| .. |=| .. |=| .. |=| .. |=| .. |=| .. |
| B  |=| B  |=| B  |=| B  |=| B  |=| B  |=| B  |   <- Fan 2
| A  |=| A  |=| A  |=| A  |=| A  |=| A  |=| A  |   <- Fan 1
Each “=” is a ch-3 join bar at fan-tip level. Fans in the same row match in color across the curtain, which creates horizontal bands of dark and light.
Joining
Method: Ladder join with ch-3 bars, Color B, worked from the bottom up.
Place Strip 1 and Strip 2 side by side with right sides up and bottom ends aligned. Mark rail sts 8, 16, … 240 on Strip 1’s right rail and on Strip 2’s left rail. Always work into the outer row (Row 2) of each rail.
Join row:
- Join B with sl st in st 8 of Strip 1’s right rail.
- Ch 3, sl st in st 8 of Strip 2’s left rail.
- Sl st in each of the next 8 sts up the same rail, ch 3, sl st in the matching st on the opposite rail. Repeat 28 more times.
- Fasten off.
This gives 30 bars, one at each fan-tip level from st 8 to st 240. Your sl sts climb the rails in alternating 8-st segments, so the ladder zigzags gently up the gap and the bars stay level.
Repeat to join Strip 3 to Strip 2, and so on, for 6 join rows in total.
Tension: Keep the ch-3 bars relaxed, not tight. They should lie straight and measure 0.75 in (1.9 cm) without stretching. Work the sl sts loosely so the rails don’t shorten. Tight sl sts are the most common reason a joined curtain comes out shorter than a single strip.
Checkpoint: 7 strips x 4 in + 6 gaps x 0.75 in = 28 in + 4.5 in = 32.5 in (82.6 cm) wide. The length is still 62 in (157.5 cm).
Border: Top Band
Border gauge: 16 sc = 4 in (10.2 cm). Each sc row is 0.25 in (0.6 cm) tall.
The band is worked only across the top edge. The sides are already finished by the rails, and the bottom stays open so the strips can move freely.
Per-strip top count: 2 sc in the row ends of the left rail + 12 sc into the top bar + 2 sc in the row ends of the right rail = 16 sts. This already includes both rail edges, so there is nothing extra to add at the corners.
Per-gap count: There is no join bar at the very top of the gap, because the last bar is at st 240. Chain across each gap with ch 3, matching the join bars below.
Row 1 (right side): Join B at the top right corner of Strip 7. Across each strip, work the 16 sts described above, and work ch 3 across each gap. Turn.
Count: 7 strips x 16 sts + 6 gaps x 3 ch = 112 + 18 = 130 sts.
Row 2: Ch 1 (does not count), sc in each sc and each ch across. (130 sc) Turn.
Rows 3–4: Ch 1, sc in each st across. (130 sc) Fasten off after Row 4.
Why the math works: 130 sts / 4 sts per in = 32.5 in (82.6 cm). That matches the joined width exactly, so the band neither gathers nor flares the strips. Four rows at 0.25 in (0.6 cm) give a band depth of 1 in (2.5 cm). The total length is 62 in + 1 in = 63 in (160.0 cm).
Final Blocking
- Lay the curtain flat on a clean surface or blocking mats, right side up.
- Mist evenly with water until the cotton is damp, not soaked.
- Smooth each strip straight, keeping the rails parallel and 4 in (10.2 cm) apart.
- Shape each fan into an even semicircle, 3 in (7.6 cm) wide, with the crown centered over the link below.
- Straighten the join bars so each gap measures 0.75 in (1.9 cm).
- Pin the top band straight at 32.5 in (82.6 cm) wide.
- Check the length: 63 in (160.0 cm) from the top of the band to the bottom bars.
- Let it dry completely before you unpin it.
Final Quality-Control Checklist
- 7 strips, each with 30 fans alternating A and B, starting with A at the bottom
- Each fan has 21 dc in Row 3, with its crown centered
- Each rail Row 1 and Row 2 has 248 sts
- Fan tips are caught at rail sts 8 through 240, every 8 sts
- Each end bar has 12 sc
- 6 join rows, each with 30 ch-3 bars
- Top band has 130 sts in every row
- Finished size is 32.5 in x 63 in (82.6 cm x 160.0 cm)
- All tails are woven in securely, with none showing through the gaps
- The bottom bars hang level across all 7 strips
Troubleshooting
Fans ruffle at the crown: Your dc are too short for the increases. Go up half a hook size for the fans only.
Fans cup and won’t lie flat: Your dc are too tight. Relax your tension or go up half a hook size.
Fans sag between the rail tips: The rail repeat is longer than the fan repeat. Use ch 6 instead of ch 7 between tips, and recount so the rail is 218 sts. Then adjust the join marks to every 7 sts.
Strips are different lengths: Your chain tension changed between rails. Measure every rail against the first one before you join.
Join bars pull the strips together: Rework them with a looser ch-3, or go up a hook size for the joins only.
Top band ripples: Recount Row 1. It must be exactly 130 sts.
Crowns tilt sideways: The link was joined off-center. Rejoin it in the 11th st.
Care
Hand wash in cool water with mild soap, roll it in a towel to remove the water, and dry it flat in its blocked shape. Don’t wring or hang it while wet, because the weight of the wet cotton will stretch the strips.
Final Notes
Everything in this curtain depends on one simple chain of measurements. Each fan is 3 in (7.6 cm) wide and repeats every 2 in (5.1 cm). That repeat equals 8 rail sts at 4 sts per in. Thirty repeats make a 248-st rail that measures 62 in (157.5 cm). Two rails make a 4 in (10.2 cm) strip. Seven strips and six 0.75 in (1.9 cm) gaps make 32.5 in (82.6 cm). That width matches the 130-st top band, which adds 1 in (2.5 cm) for a finished length of 63 in (160.0 cm).
If you check your gauge at the fan, the rail, and the join, the whole curtain will hang straight.
Happy crocheting!