
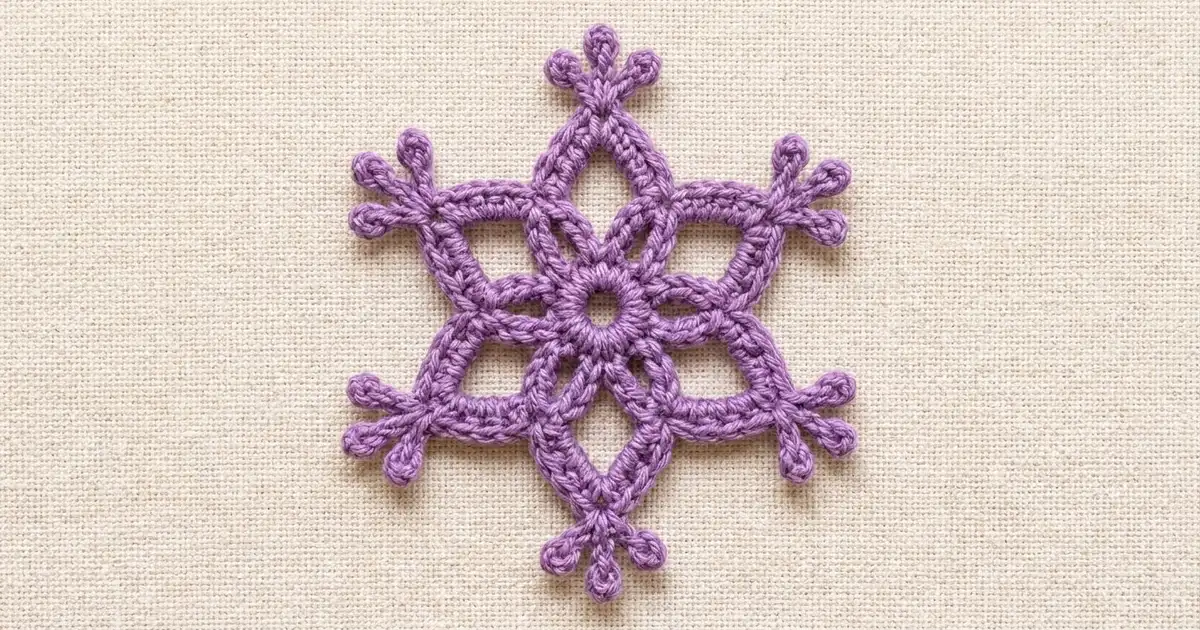
The Lilac Frost Snowflake is a small, lacy, six-pointed ornament worked in a single shade of soft lilac purple. It has a round open center, six pointed petal loops, a hexagonal outer frame, and six trident tips. Each tip is a short stem ending in three little picots. The result looks crisp and wintry, but the purple gives it a warmer, cozier feel than a classic white snowflake.
This pattern uses US crochet terms throughout. The finished snowflake measures about 4.5 in (11.4 cm) from one trident tip to the opposite trident tip, plus a hanging loop about 1.5 in (3.8 cm) long.
The snowflake is worked in one piece, in the round, from the center out. You start with a small chain ring covered in single crochet. Next come six chain loops, which you cover with stitches to form the pointed petals. A chain frame then links the petal tips, gets covered in single crochet, and a final round adds the trident points. The last step is a chain hanging loop at the top point.
One snowflake takes about an hour once you know the pattern. It’s a good project for using up leftover cotton, and a small batch looks lovely on a tree, a gift package, or a window.
Finished Size and Construction
- Finished size: about 4.5 in (11.4 cm) tip to tip, not counting the hanging loop
- Skill level: Easy / Advanced Beginner
- Terminology: US crochet terms
- Yarn weight: Light / DK (size 3) cotton
- Hook: 3.0 mm (US C/2–D/3)
- Number of pieces: 1
- Layout: single motif worked in the round, no joining
- Piece size before the trident round: about 2.75 in (7.0 cm) frame point to opposite frame point
- Trident (“border”) depth: each trident adds about 0.9 in (2.3 cm) beyond the frame point
Materials
Yarn: Use a smooth, mercerized cotton or cotton blend in light / DK weight (size 3). Mercerized cotton gives the clear stitch definition you see in the photo, and it holds its shape after blocking. Avoid fuzzy or very stretchy yarns, because the picots and petal points will lose their crispness.
- Lilac purple: 10 g, about 25 m (27 yd) per snowflake
These quantities include a margin for your gauge swatch and the hanging loop. One snowflake on its own uses about 7 g (about 18 m / 20 yd).
Tools:
- 3.0 mm crochet hook
- Tapestry needle
- Scissors
- Blocking mat or folded towel
- Rust-proof pins
- Spray bottle with water
- Optional: fabric stiffener or starch for a firmer ornament
Abbreviations (US Terms)
- ch – chain
- sl st – slip stitch
- sc – single crochet
- hdc – half double crochet
- dc – double crochet
- sk – skip
- sp – space
- st(s) – stitch(es)
- rnd – round
- [ ] – work instructions in brackets into the stitch or space indicated
- * * – repeat instructions between asterisks as directed
Special stitch – Picot: Ch 3, sl st in the 3rd ch from the hook.
Special stitch – Trident: Ch 7 (stem). Picot, then ch 4 and sl st in the 4th ch from the hook (center picot), then make one more picot. Sl st in each of the 7 stem chains, working back down toward the frame. You now have a stem with three picots fanned at the tip: one on each side and a slightly longer one in the middle.
Gauge and Checkpoints
Gauge isn’t critical for an ornament, but it does control the final size and how well the frame sits. Work Rnds 1–3 as your test piece first and measure before you go on.
Base gauge: 22 sc = 4 in (10.2 cm) in a flat row worked with the 3.0 mm hook.
Checkpoints:
- After Rnd 1: the center ring measures about 0.75 in (1.9 cm) across.
- After Rnd 3: petal tip to opposite petal tip measures about 2.25 in (5.7 cm).
- After Rnd 5: frame point to opposite frame point measures about 2.75 in (7.0 cm).
- After Rnd 6: trident tip to opposite trident tip measures about 4.5 in (11.4 cm) once blocked.
If your piece is too big: go down to a 2.75 mm hook, or check that you aren’t pulling up loose loops on the hdc and dc in Rnd 3.
If your piece is too small or cupping: go up to a 3.25 mm hook. Cupping at Rnd 5 usually means your chains in Rnd 4 are too tight, so loosen them first before you change the hook.
Pattern
Rnd 1 – Center Ring
Ch 6, sl st in the first ch to form a ring.
Ch 1, work 18 sc into the ring. Sl st in the first sc to join. (18 sc)
The ring should lie flat with a clear round hole in the middle, about 0.25 in (0.6 cm) across.
Rnd 2 – Petal Loops
Ch 1, sc in the same st as the join. *Ch 9, sk 2 sc, sc in the next sc*; repeat from * to * 4 more times. Ch 9, sk the last 2 sc, sl st in the first sc to join. (6 sc, 6 ch-9 sps)
Each ch-9 loop starts and ends on the center ring, three stitches apart. Neighboring loops share one sc. These loops become the six petals.
Rnd 3 – Petals
Sl st in the first ch-9 sp.
Ch 1. In the same ch-9 sp work [3 sc, 2 hdc, 1 dc, ch 3, 1 dc, 2 hdc, 3 sc]. *Sk the next sc, and in the next ch-9 sp work [3 sc, 2 hdc, 1 dc, ch 3, 1 dc, 2 hdc, 3 sc]*; repeat from * to * 4 more times. Sl st in the first sc to join. (72 sts: 12 per petal, plus 6 ch-3 tip sps)
The stitches get taller toward the ch-3 tip and then shorter again, so each petal comes to a point. The opening between the covered loop and the center ring stays open, which gives each petal its outlined look. The bases of neighboring petals sit right next to each other on the ring.
Checkpoint: Lay the piece flat. Six pointed petals should radiate evenly from the ring, about 2.25 in (5.7 cm) tip to opposite tip.
Rnd 4 – Frame Chains
Sl st in each of the next 3 sc, 2 hdc and 1 dc, then sl st into the ch-3 tip sp. This moves you to the first petal tip without adding height.
Ch 1, sc in the same ch-3 sp. *Ch 7, sc in the next ch-3 tip sp*; repeat from * to * 4 more times. Ch 7, sl st in the first sc to join. (6 sc, 6 ch-7 sps)
The chains run straight from petal tip to petal tip, forming a hexagon around the petals. Each sc that sits on a petal tip becomes a frame point.
Rnd 5 – Frame Cover
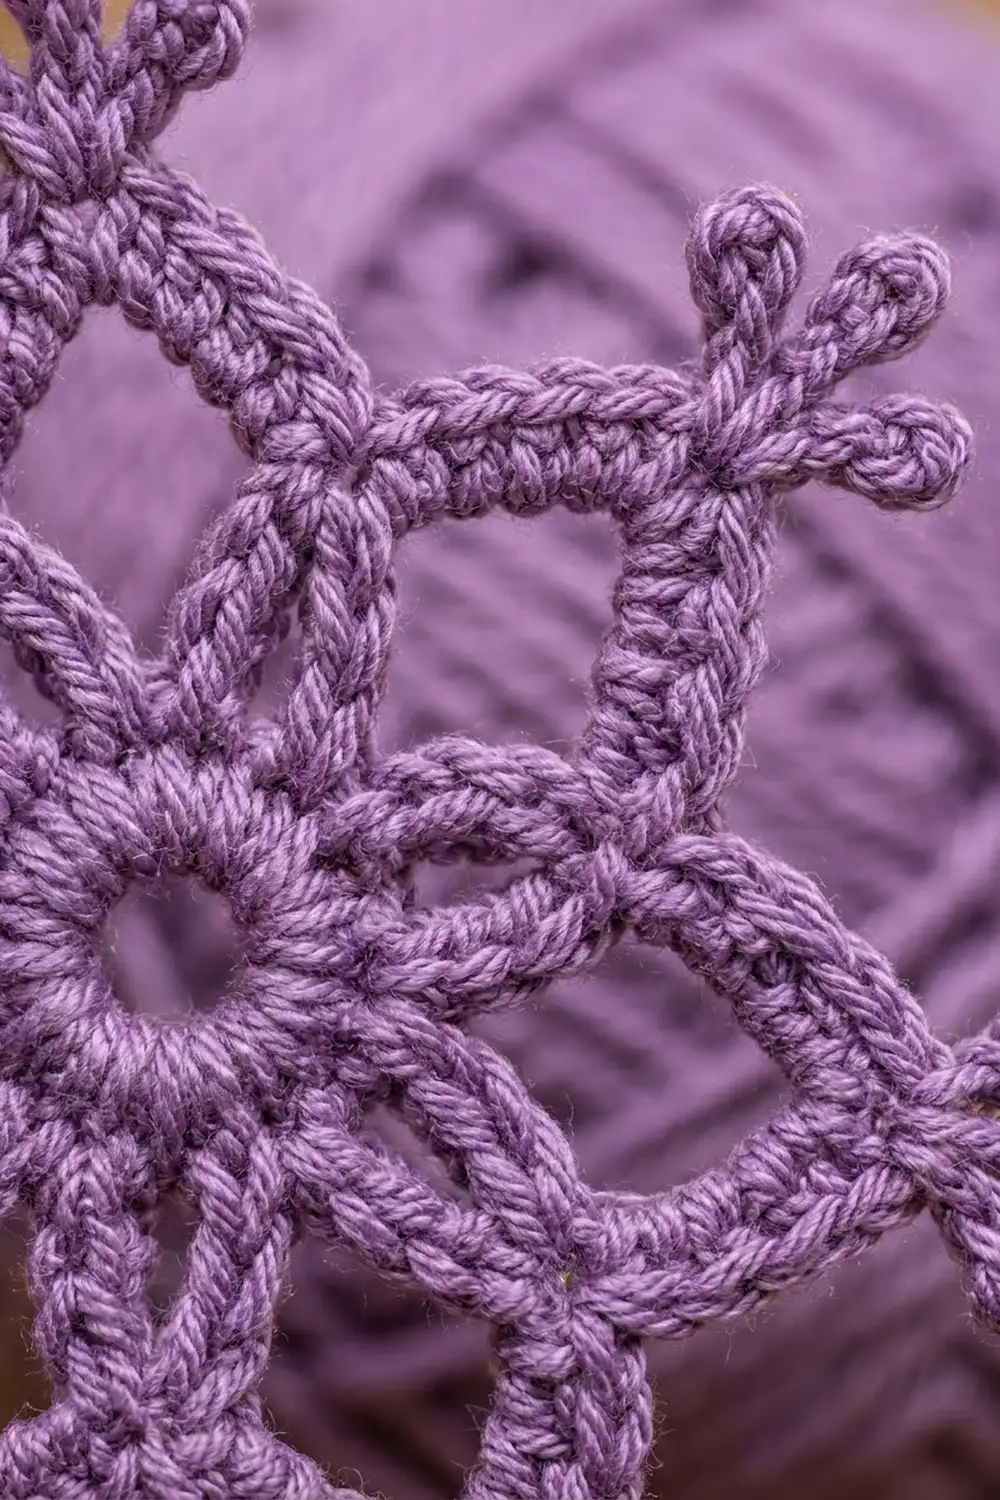
Ch 1. *Sc in the next sc (frame point), 9 sc in the next ch-7 sp*; repeat from * to * 5 more times. Sl st in the first sc to join. (60 sc: 1 point sc plus 9 side sc on each of the 6 sides)
Working 9 sc over 7 chains lets the frame lie flat and gives the solid, rope-like outline you see in the photo. In this pattern, “side” means the 9 sc between two frame points. The point sc is counted on its own and isn’t included in the 9.
Checkpoint: frame point to opposite frame point measures about 2.75 in (7.0 cm). The hexagon should lie flat with no ruffling.
Rnd 6 – Trident Points (Border)
This round works as the snowflake’s border. It adds the six trident points and keeps the frame edges straight.
Ch 1. *In the frame point sc work [sc, Trident, sc]. Sc in each of the next 9 sc*; repeat from * to * 5 more times. Sl st in the first sc to join. Fasten off. (66 sc and 6 Tridents)
Hanging Loop
Choose one trident as the top. Join the yarn with a sl st in its center picot, ch 20, and sl st in the same picot. Fasten off. The loop hangs about 1.5 in (3.8 cm) above the trident tip.
Weave in all ends along the back of the frame stitches. Don’t weave through the picots, because extra bulk there blunts their shape.
Border Notes and Why the Math Works
Border gauge: the frame sides in Rnd 6 follow the base gauge, about 5.5 sc per 1 in (2.5 cm). Each 9-sc side measures about 1.6 in (4.1 cm) along the outer edge.
Count per side in Rnd 6:
- 1 sc before the Trident and 1 sc after it, both in the point sc
- 9 sc along the side, one in each Rnd 5 side sc
Rnd 6 is a conversion round. All 60 stitches from Rnd 5 are worked one-for-one, and 6 extra sc are added (one extra at each point). That gives 60 + 6 = 66 sc.
Why it works: The sides get exactly one sc per existing stitch, so they don’t gain or lose length and stay straight and flat. The only extra stitch on each side sits at the point, where the outer edge needs a little more room to turn the corner. Placing the Trident between the two point sc centers it exactly on the frame point. That lines it up with the petal tip underneath, so all six arms of the snowflake run straight out from the center.
The Trident itself doesn’t count as a stitch in the round total. Its stem is worked in chains and then slip stitched back down, so you finish at the base, ready for the second point sc.
Final Blocking
- Fill a bowl with cool water and soak the snowflake for a few minutes, until it’s fully wet.
- Lift it out and roll it in a dry towel to press out the extra water. Don’t wring it.
- Lay it face up on a blocking mat or folded towel.
- Pin the center ring first so the hole is round, about 0.25 in (0.6 cm) across.
- Pin each petal tip so the tips sit evenly around the center, about 2.25 in (5.7 cm) tip to opposite tip.
- Pin each frame point, then gently straighten the frame sides between them.
- Pin each Trident stem straight out from its frame point. Open the three picots into a small fan, using one pin per side picot if needed.
- Measure tip to opposite tip across all three pairs. Each should be about 4.5 in (11.4 cm).
- If you want a stiffer ornament, spray lightly with starch or brush on diluted fabric stiffener now.
- Let it dry completely, at least 12 hours, before you unpin it.
Final Quality-Control Checklist
- Center ring has 18 sc and a clean round hole.
- Six petals, each with 12 sts and a ch-3 point.
- Frame has six sides of 9 sc each, plus six point sc.
- Rnd 6 has 66 sc and six Tridents.
- Every Trident has three picots, with the center picot slightly longer.
- All six arms line up straight with the petal tips.
- Finished size is about 4.5 in (11.4 cm) tip to tip.
- Hanging loop is secure and sits on a trident tip.
- Ends are woven in invisibly and trimmed.
Troubleshooting
The petals look rounded instead of pointed. Check that you are working the dc on each side of the ch-3 tip and haven’t swapped it for an hdc.
The frame ruffles. Your Rnd 4 chains are too loose. Redo that round with tighter chains, or work 8 sc instead of 9 in each ch-7 sp in Rnd 5. If you make that change, use 8 side sc per side in Rnd 6 as well, for a total of 60 sc.
The frame cups or pulls the petals. Your chains are too tight. Loosen them, or go up half a hook size for Rnd 4 only.
The Tridents lean sideways. Make sure both point sc go into the same frame point stitch. Pin the stems straight while blocking.
The picots look uneven. Pull each picot sl st snug, and keep the chain tension even. Blocking will correct small differences.
The piece is twisted after joining a round. Count the stitches before each join. A missing or extra stitch on one side will pull the shape off center.
Care
Hand wash in cool water with mild soap, and reshape and pin flat to dry. If you used stiffener, re-block after washing to restore its firmness.
Final Notes
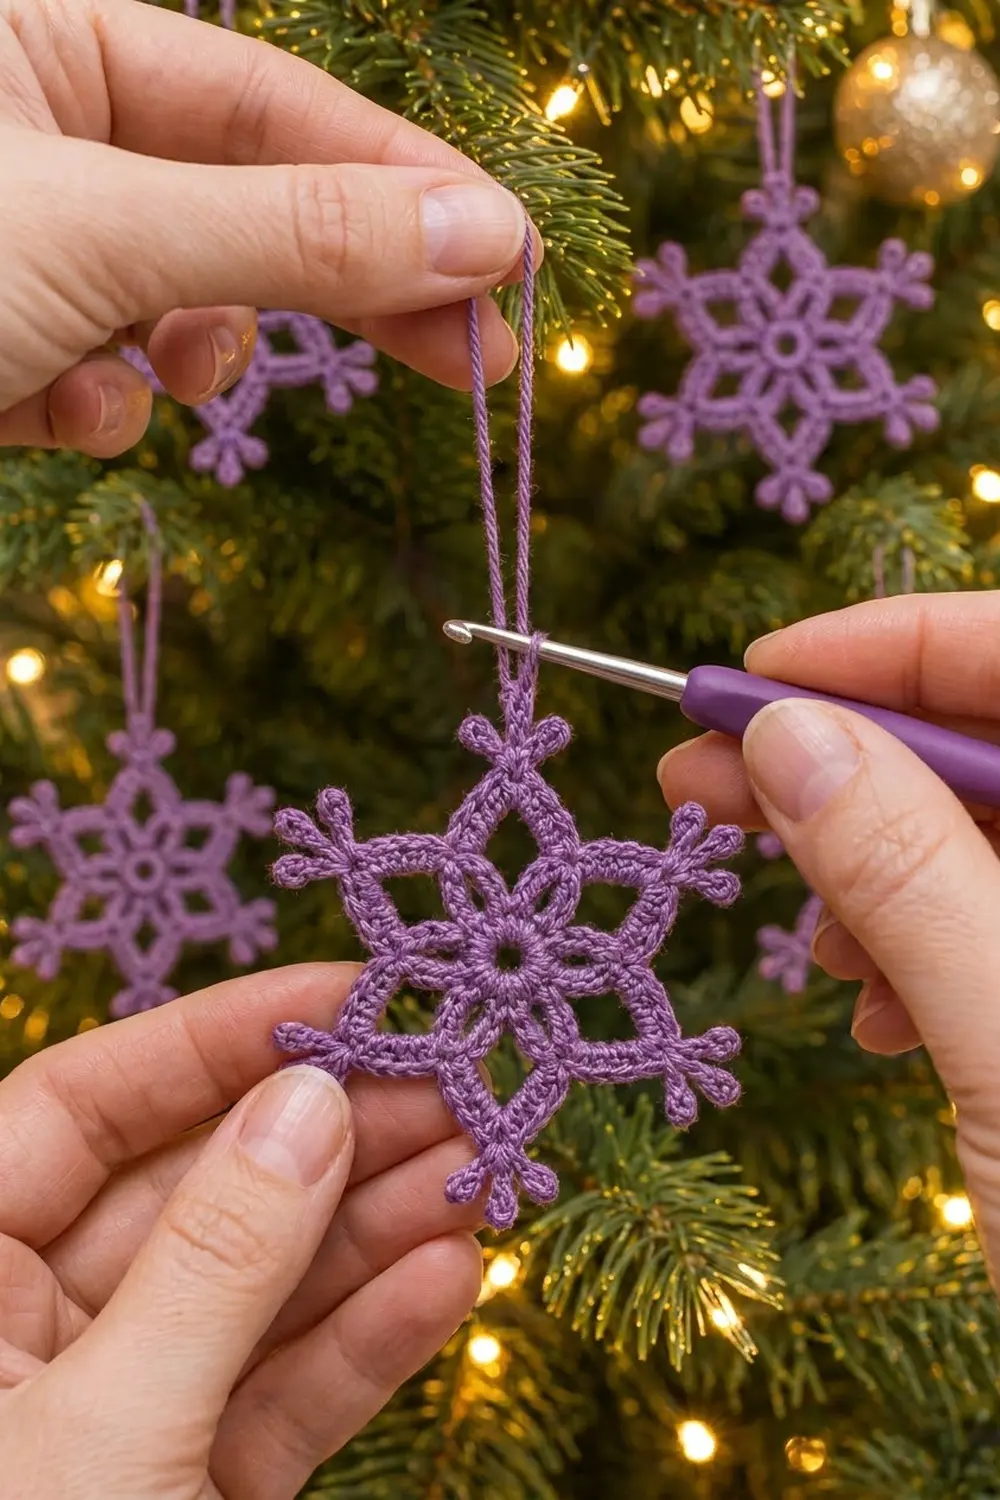
The size of the Lilac Frost Snowflake builds step by step: a 0.75 in (1.9 cm) center ring, petals reaching about 2.25 in (5.7 cm) across, a frame of about 2.75 in (7.0 cm), and Tridents that bring the finished ornament to about 4.5 in (11.4 cm) tip to tip. If each checkpoint matches, the final piece will match too. Once you’ve made one, it’s easy to make a few more for the tree or to tuck into holiday gift wrap.
Happy crocheting!