

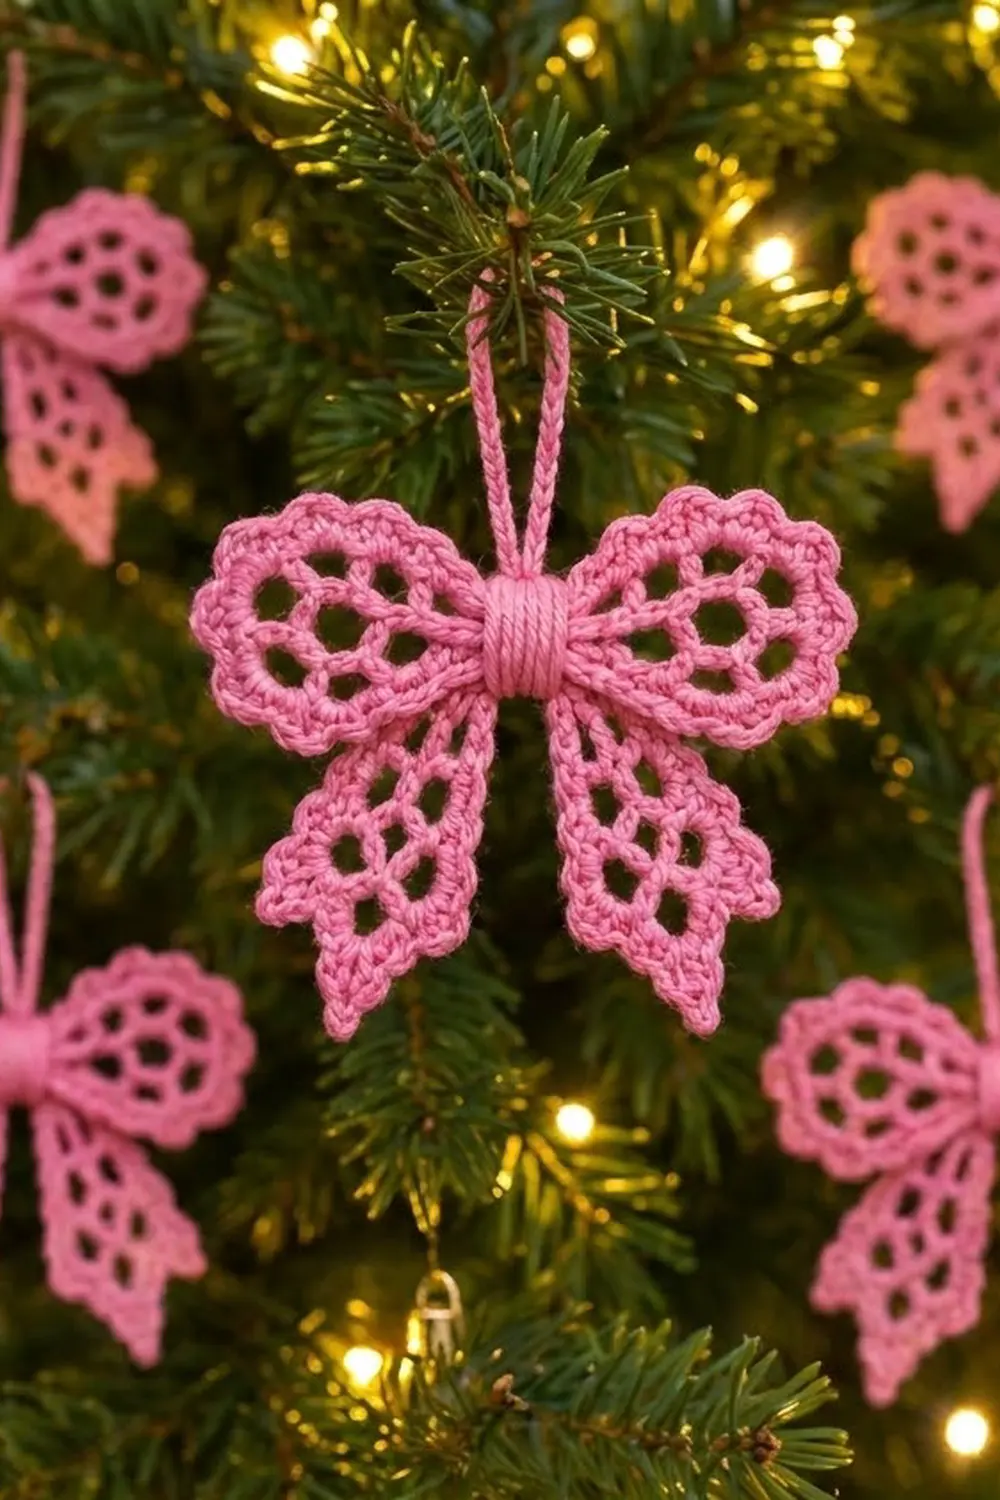
This little lace bow is a quick ornament with a lot of charm. Two scalloped mesh wings sit over two picot-edged tails, and a neat band of wrapped yarn covers the center. A slim chain loop on top lets it hang from a branch, a gift, or a wreath.
The sample uses one cheerful pink mercerized cotton. The fine yarn gives crisp stitches and clean lace holes. It also looks lovely in classic red, ivory, or sage.
All instructions use US crochet terms. The finished bow measures about 4.25 in (10.8 cm) wide and 4 in (10.2 cm) tall, not counting the hanging loop. The loop adds about 1.5 in (3.8 cm) above the bow.
Here’s the construction. You crochet two fan-shaped wings in rows from the center point outward, then add a frame and scallop border. You crochet two mesh tails in rows from the top down, finish each with a pointed tip and a picot edging, then block all four parts. Finally, you gather them at the center, wrap that point tightly with yarn, and sew on a chain loop.
Finished Size and Construction
- Finished size: 4.25 in (10.8 cm) wide × 4 in (10.2 cm) tall, plus a 1.5 in (3.8 cm) loop
- Skill level: Intermediate
- Terminology: US crochet terms
- Yarn weight: Super Fine (#1), mercerized cotton (fingering / size 3 thread)
- Hook: 2.25 mm (B-1)
- Number of pieces: 1 finished ornament, made from 4 lace parts plus 1 chain loop
- Layout: Two wings point to point; two tails behind them, angled down in a V
- Wing size: 2 in (5.1 cm) from center point to scallop tip × 2.25 in (5.7 cm) tall
- Wing size before border: 1.75 in (4.4 cm) from center point to the top of Row 5
- Wing border depth: 0.25 in (0.6 cm)
- Tail size: 1.5 in (3.8 cm) wide × 2.75 in (7.0 cm) long
- Tail size before border: 1.25 in (3.2 cm) wide × 2.5 in (6.4 cm) long
- Tail border depth: 0.125 in (0.3 cm)
Materials
Yarn: Use a smooth, mercerized cotton in Super Fine (#1) weight, or size 3 crochet thread. Mercerized cotton holds lace shapes well and shows the mesh openings clearly. Avoid fuzzy or very stretchy yarns, because the holes will blur and the scallops will go floppy.
- Pink: 8 g, about 24 m (26 yd), enough for one complete bow, including the wrap and the hanging loop
These amounts include a small safety margin for gauge differences and swatching.
Tools:
– 2.25 mm (B-1) crochet hook
– Tapestry needle
– Small scissors
– 1 locking stitch marker
– Blocking mat or folded towel
– Rust-proof pins
– Spray bottle, plus spray starch if you like (optional)
Abbreviations (US Terms)
- ch – chain
- sl st – slip stitch
- sc – single crochet
- hdc – half double crochet
- dc – double crochet
- tr – treble crochet
- sp(s) – space(s)
- st(s) – stitch(es)
- RS – right side
- rep – repeat
Special stitches:
– Picot: Ch 3, then sl st in the 3rd ch from the hook.
– Shell: 5 dc in the same stitch.
Gauge and Checkpoints
Base gauge: 8 sc = 1 in (2.5 cm) with a 2.25 mm hook.
Make one wing completely, including its border, before you start anything else. It takes about 20 minutes and confirms your gauge on the actual lace.
Wing checkpoints:
– After Row 1, the half circle is 0.75 in (1.9 cm) across its flat edge.
– After Row 5, the distance from the center ring to the top of Row 5 is 1.75 in (4.4 cm).
– After the border, the distance from the center point to the scallop tip is 2 in (5.1 cm).
Tail checkpoints:
– After Row 1, the strip is 1.25 in (3.2 cm) wide.
– After Row 9, the tail is 2.5 in (6.4 cm) long from the foundation to the tip.
– After the border, the tail is 1.5 in (3.8 cm) wide and 2.75 in (7.0 cm) long.
If your wing comes out too big, go down to a 2.0 mm hook. If it comes out too small, go up to a 2.5 mm hook. Don’t add stitches or loops to fix the size. The repeats are counted to fit the border exactly.
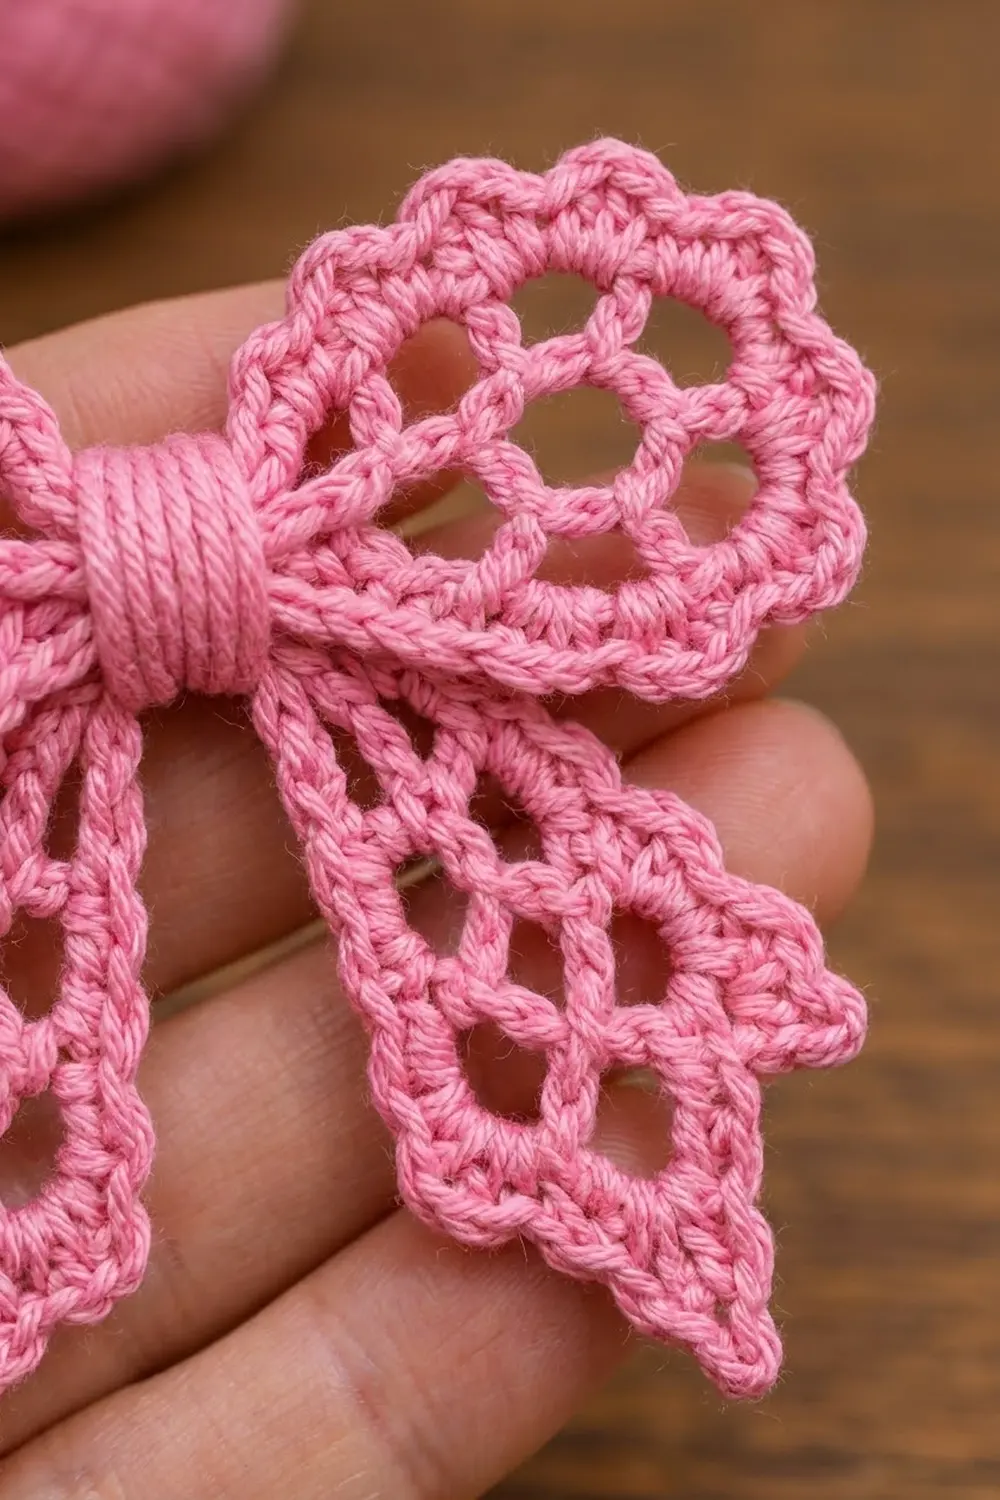
Wing (Make 2)
The wing is worked in rows that fan out from a magic ring. The ring becomes the pointed center of the bow.
Row 1 (RS): Make a magic ring. Ch 3 (counts as dc), then work 8 dc in the ring. Pull the ring snug, but keep it slightly open. Turn. (9 dc)
Row 2: Ch 5 (counts as dc + ch 2). [Dc in next dc, ch 2] 7 times, then dc in the top of the turning ch. Turn. (9 dc, 8 ch-2 sps)
These 9 spokes spread the fan into a half circle.
Row 3: Ch 1. Sc in the first dc, then [ch 4, skip the next ch-2 sp, sc in the next dc] 8 times. The last sc goes in the 3rd ch of the turning ch. Turn. (9 sc, 8 ch-4 loops)
Row 4: Ch 6 (counts as dc + ch 3). Sc in the first ch-4 loop, [ch 5, sc in the next ch-4 loop] 7 times, then ch 3, dc in the last sc. Turn. (8 sc, 7 ch-5 loops, 2 ch-3 half loops at the ends)
This offset row turns the straight spokes into rounded, honeycomb-like openings.
Row 5 (RS): Ch 1. Sc in the first dc, then [ch 5, sc in the next ch-5 loop] 7 times. Ch 5, sc in the 3rd ch of the turning ch-6. Don’t turn. (9 sc, 8 ch-5 loops)
Checkpoint: The wing measures 1.75 in (4.4 cm) from the ring to the top of Row 5. Leave the yarn attached and go straight to the Wing Border.
Tail (Make 2)
The tail is worked in rows from the top (the end that goes under the wrap) down to the point.
Row 1 (RS): Ch 11. Sc in the 2nd ch from the hook and in each ch across. Turn. (10 sc)
Row 2: Ch 1. Sc in the first sc, then [ch 4, skip 2 sc, sc in the next sc] 3 times. Turn. (4 sc, 3 ch-4 loops)
Row 3: Ch 5 (counts as dc + ch 2). Sc in the first ch-4 loop, ch 4, sc in the next loop, ch 4, sc in the next loop. Ch 2, dc in the last sc. Turn. (3 sc, 2 ch-4 loops, 2 ch-2 half loops)
Row 4: Ch 1. Sc in the first dc, then [ch 4, sc in the next ch-4 loop] 2 times. Ch 4, sc in the 3rd ch of the turning ch-5. Turn. (4 sc, 3 ch-4 loops)
Rows 5–8: Repeat Rows 3 and 4 two more times. Row 8 ends with 4 sc and 3 ch-4 loops.
Row 9 (pointed tip, RS): Ch 1. Sc in the first sc, 3 sc in the next loop, sc in the next sc. Work (hdc, dc, tr, ch 3, tr, dc, hdc) in the center loop. Sc in the next sc, 3 sc in the last loop, sc in the last sc. Don’t turn. (16 sts plus a ch-3 tip: 8 sts on each side of the tip)
The stitches get taller toward the middle, which pulls the bottom edge into a single point.
Checkpoint: The tail is 1.25 in (3.2 cm) wide and 2.5 in (6.4 cm) long. Leave the yarn attached for the Tail Border.
Border
Border gauge: 4 stitches of the frame round make one scallop about 0.5 in (1.3 cm) wide. On the tails, the edging adds 0.125 in (0.3 cm) on every side.
Wing Border
Continue from Row 5 with the RS facing. You’re at the top corner.
Rnd 6 (frame): Ch 1. Work down the side edge over the row ends: 2 sc around the Row 4 end, 1 sc in the Row 3 end, 2 sc around the Row 2 end, and 2 sc around the Row 1 end (7 sc). Work 1 sc in the magic ring at the center point. Work up the other side the same way (7 sc). Then work across the top: sc in the first sc of Row 5, and [5 sc in the next ch-5 loop, sc in the next sc] 8 times. Join with a sl st to the first sc. (64 sc: 7 + 1 + 7 on the sides and point, 49 across the top curve)
The last sc of the top repeat lands in the last sc of Row 5, so that corner is counted only once.
Rnd 7 (scallops): Ch 1. Sl st in the same sc and in each of the next 14 sc, which covers both sides and the point (15 sl sts). You’re now at the first of the 49 top stitches. Sc in it, then [skip 1 sc, shell in the next sc, skip 1 sc, sc in the next sc] 12 times. Join with a sl st to the first sl st and fasten off. (12 shells, 13 sc across the top; 15 sl sts along the sides)
Why the math works: Each scallop repeat uses 4 stitches, and one extra sc anchors the start: 4 × 12 + 1 = 49. The slip stitches keep the inner edges smooth and thin, so they gather neatly under the wrap.
Tail Border
Continue from Row 9 with the RS facing. You’re at the bottom corner of the first long side.
Rnd 10: Ch 1, then work four sections and join:
- Side A (going up): Sc in the next 2 row ends, then [picot, sc in the next 3 row ends] 3 times. (11 sc, 3 picots)
- Top: Sc in each of the 10 foundation ch loops. (10 sc)
- Side B (going down): [Sc in the next 3 row ends, picot] 3 times, then sc in the next 2 row ends. (11 sc, 3 picots)
- Tip: Sc in each of the next 8 sts of Row 9. Work (2 sc, ch 3, 2 sc) in the ch-3 tip sp, then sc in each of the next 8 sts. (20 sc plus the ch-3 point)
Join with a sl st to the first sc and fasten off. (52 sc, 6 picots, 1 ch-3 point)
Why the math works: Rows 1–8 give 11 row-end positions per side. That’s 1 for each sc row and 2 for each dc row: 1 + 1 + 2 + 1 + 2 + 1 + 2 + 1 = 11. Row 9’s corner stitches are counted in the tip section, so they’re never counted twice. The top 10 sc match the 10 stitches of Row 1.
Hanging Loop (Make 1)
Ch 26. Sl st in the back bump of the 2nd ch from the hook and in each ch across. (25 sl sts, about 3.25 in / 8.3 cm long) Fasten off and leave a 6 in (15.2 cm) tail for sewing.
Final Blocking
- Weave in all ends on the wings and tails, except the loop’s sewing tail.
- Lightly mist all four parts until they’re damp, not soaked.
- Pin each wing flat as a fan, 2 in (5.1 cm) from point to scallop and 2.25 in (5.7 cm) tall. Put a pin in the tip of each shell.
- Pin each tail to 1.5 in (3.8 cm) × 2.75 in (7.0 cm). Open the mesh holes and pin out the tip point.
- Add spray starch if you want a crisp ornament. Let everything dry completely.
- Assemble: Lay the two wings point to point, slightly overlapping. Place the tails behind them, with their top edges crossed at the center and the tips angled down and out in a V.
- Cut 18 in (45.7 cm) of yarn. Pinch the center and wrap it tightly 12 times, laying each wrap beside the last to build a 0.5 in (1.3 cm) band. Thread the end onto the needle, run it under the wraps on the back, and knot it securely.
- Fold the hanging loop in half. Sew both ends to the back of the wrap so the loop stands 1.5 in (3.8 cm) above the bow.
- Check that the bow is 4.25 in (10.8 cm) wide and 4 in (10.2 cm) tall. Shape it with your fingers if needed.
Final Quality-Control Checklist
- Each wing has 12 even shells on its outer curve.
- The wing mesh shows 8 open loops in Row 5, with none twisted.
- Each tail has 3 picots on each side and one clear point.
- The two wings match within 0.125 in (0.3 cm).
- The wrap is snug, smooth, and 0.5 in (1.3 cm) wide.
- The hanging loop sits centered and doesn’t twist.
- No yarn ends show on the front.
Troubleshooting
The wing cups instead of lying flat. Your Row 5 loops are too short. Chain more loosely, or go up a hook size.
The wing ruffles. Your chains are too loose. Go down a hook size, or chain more firmly.
The scallops don’t fit. Recount Rnd 6. There must be exactly 49 sc across the top.
The tail point is blunt. Make sure you worked the tr stitches and the ch-3 in the center loop. Then pin the point firmly when you block.
The tails twist. Block them flat and starch them before you assemble.
The wrap slips. Wrap more tightly, and anchor the end under at least 4 wraps on the back.
Care
Hand wash in cool water with mild soap. Press out the water in a towel, then reshape and pin flat to dry.
Final Notes
The measurement chain is short and reliable. Row 1 of the wing is 0.75 in (1.9 cm) across. Row 5 reaches 1.75 in (4.4 cm), and the border adds 0.25 in (0.6 cm) for a 2 in (5.1 cm) wing. Each tail grows from 1.25 in (3.2 cm) × 2.5 in (6.4 cm) to 1.5 in (3.8 cm) × 2.75 in (7.0 cm) after its border. Gathered and wrapped, the parts make one bow 4.25 in (10.8 cm) wide and 4 in (10.2 cm) tall.
Check each stage against these numbers, and every bow you make will match the last. Happy crocheting!