
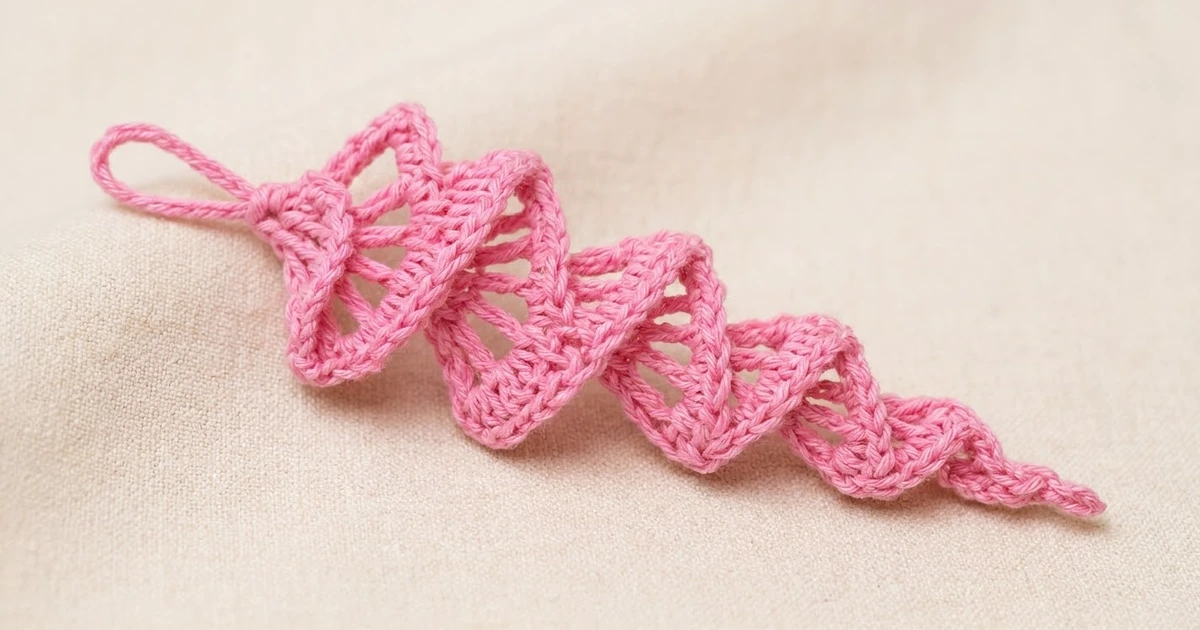
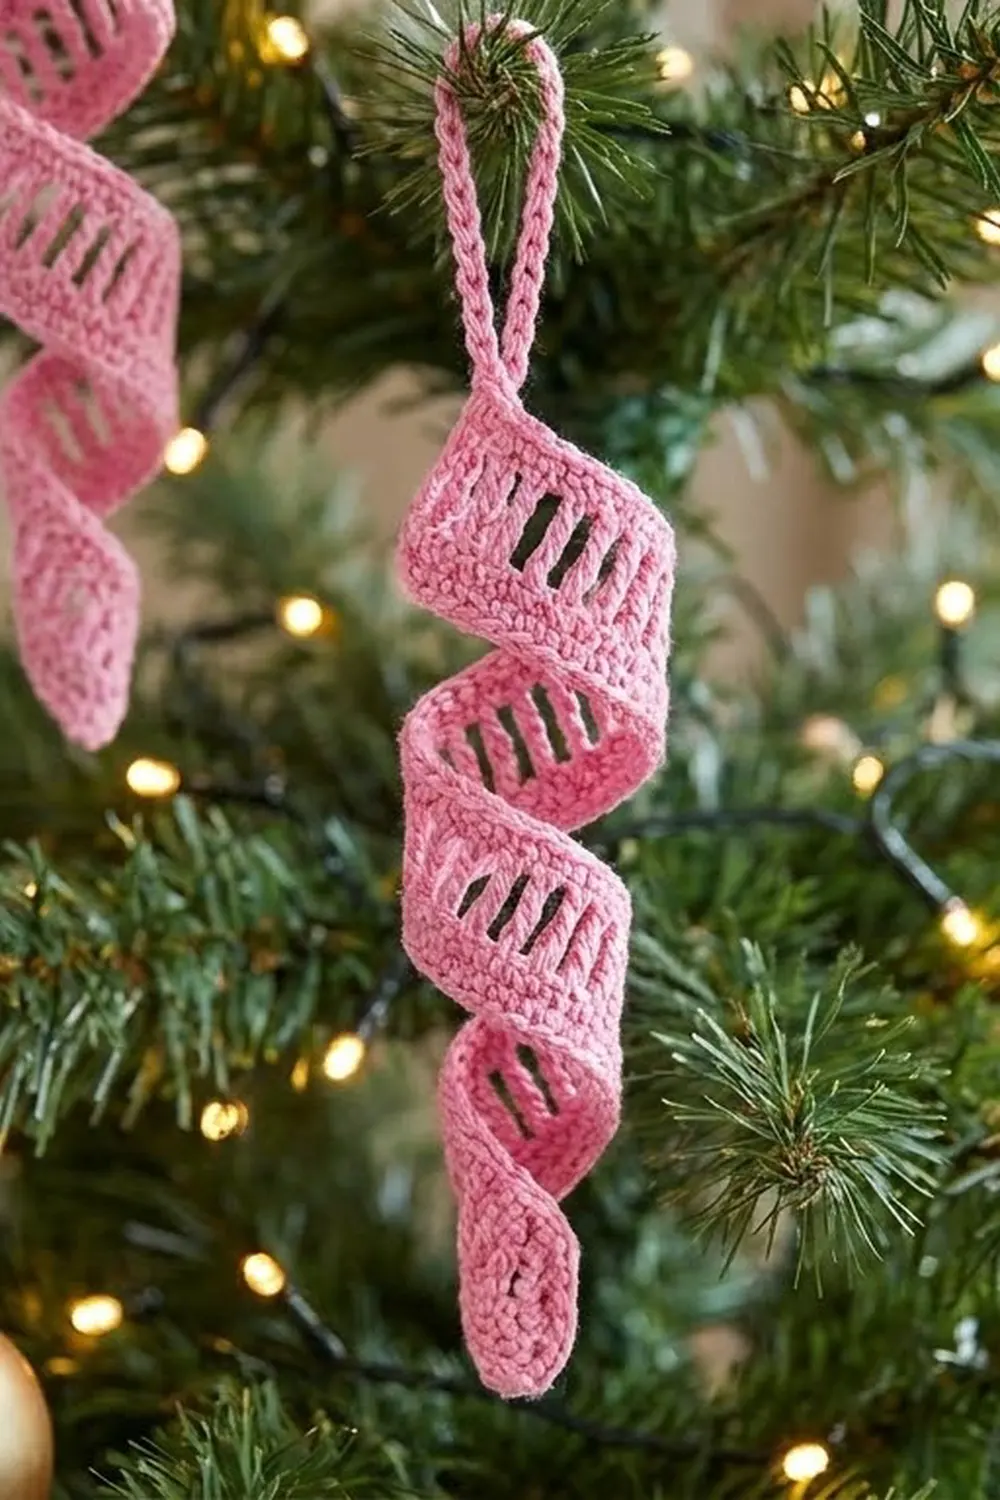
The Sugar Twist Icicle is a small, quick ornament that looks like a twist of pink candy. It is one lacy ribbon that coils into a tight corkscrew. It is wide and airy at the top and narrows to a fine point at the bottom, so it catches the light nicely on a tree branch.
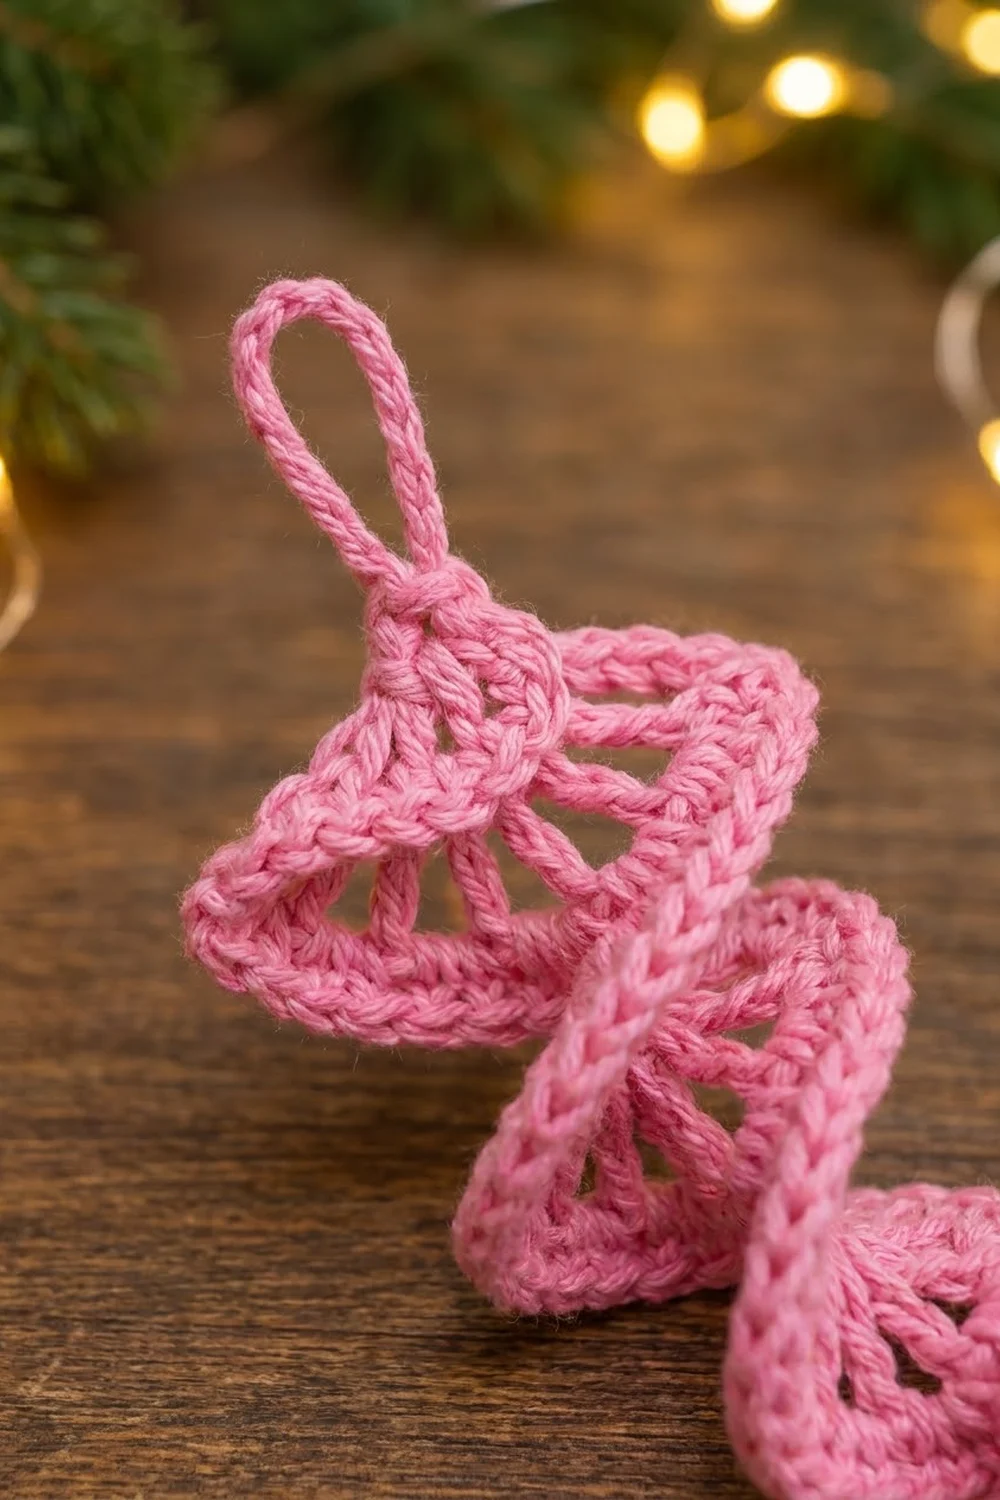
The sample is worked in a single bright bubblegum pink. Each coil has an open band of tall “spoke” stitches with small gaps between them, and a firm single crochet edge on the outside that keeps every turn of the spiral crisp. A chain loop at the top makes it ready to hang.
This pattern uses US crochet terms. The finished ornament measures about 5.5 in (14.0 cm) long without the loop, plus a 1.5 in (3.8 cm) hanging loop, for a total of about 7 in (17.8 cm). It is about 1.75 in (4.4 cm) wide at the widest coil.
Here is how it’s made. You work one foundation chain, then work back along it with stitches that get taller as you go: slip stitches, then single crochet, half double crochet, double crochet and treble crochet, placed two or three to a chain. All those extra stitches make the ribbon coil on its own. At the top you chain a hanging loop, then work a single crochet edge back down to the tip. A light blocking sets the twist.
Finished Size and Construction
- Finished size: 5.5 in (14.0 cm) long plus a 1.5 in (3.8 cm) loop; 1.75 in (4.4 cm) wide at the widest coil
- Skill level: Easy
- Terminology: US crochet terms
- Yarn weight: DK (light #3), cotton or cotton blend
- Hook: 3.5 mm (E-4)
- Number of pieces: 1
- Layout: One continuous spiral ribbon, worked in two rows
- Piece size: 7 in (17.8 cm) flat foundation chain, which coils down to 5.5 in (14.0 cm)
- Size before border: about 5 in (12.7 cm) long and 1.5 in (3.8 cm) wide after Row 1
- Border depth: one row of single crochet, about 0.25 in (0.6 cm)
Materials
Yarn advice: Use a smooth, mercerized or matte cotton in DK weight. Cotton holds the spiral shape well and shows the open spokes clearly. Acrylic also works but will need more stiffening when you block. Avoid fuzzy yarns, because they blur the gaps between the spokes.
- Pink (main and only color): 10 g / about 25 m (27 yd)
That amount includes a margin. One ornament actually uses about 6 g / 15 m (16 yd). The extra covers a test piece, swatching and the long tails.
Tools:
– 3.5 mm (E-4) crochet hook
– Tapestry needle
– Scissors
– A pencil or a 0.25 in (0.6 cm) dowel, about 8 in (20.3 cm) long, for blocking
– Spray starch or a 1:1 mix of white glue and water (optional, for a firmer twist)
– Rust-proof pins
Abbreviations (US Terms)
- ch – chain
- sl st – slip stitch
- sc – single crochet
- hdc – half double crochet
- dc – double crochet
- tr – treble crochet (yarn over twice, insert hook, pull up a loop, [yarn over, pull through 2 loops] 3 times)
- sp – space
- st(s) – stitch(es)
Special stitch:
– V-st: (stitch, ch 1, stitch) worked in the same chain. In this pattern a V-st is made with hdc, dc or tr, as each section says. Each V-st makes 2 stitches and 1 ch-1 sp.
Back bump: Every stitch in Row 1 goes into the back bump of the foundation chain. This leaves a neat chain edge along the inside of the spiral.
Gauge and Checkpoints
Gauge isn’t critical for an ornament, but it controls both the length and how tightly the spiral coils. Make one test ornament first and measure it before you make a batch.
Gauge: 10 ch = 2 in (5.1 cm). One tr is about 0.75 in (1.9 cm) tall.
Checkpoint 1, foundation chain: The 35 working chains (not counting the turning chain) should measure 7 in (17.8 cm) when laid flat without stretching.
Checkpoint 2, after Row 1: The ribbon coils on its own into a spiral about 5 in (12.7 cm) long. The tr section should be about 0.75 in (1.9 cm) deep, measured from the foundation chain to the top of the tr.
Checkpoint 3, after the edge row: The spiral is about 5.5 in (14.0 cm) long and about 1.75 in (4.4 cm) wide at the top coil.
If your piece is too big: Go down to a 3.25 mm hook, or chain more tightly. A loose chain makes a long, floppy spiral that won’t stay coiled.
If your piece is too small: Go up to a 3.75 mm hook. If the spiral is tight but the right length, that’s fine. Tight coils just look a bit more candy-like.
Pattern
Foundation
Ch 36.
The last chain you made becomes the turning chain. The other 35 chains are your working chains. Counting from the hook, chain 1 is at the tip of the icicle and chain 35 is at the top.
Row 1: Spoke Row (worked from tip to top)
Work every stitch into the back bump of the chain.
Tip section (chains 1–4): Sl st in 2nd ch from hook and in each of next 3 ch. (4 sl st)
Single crochet section (chains 5–10): 3 sc in each of next 6 ch. (18 sc)
Half double section (chains 11–18): Hdc V-st (hdc, ch 1, hdc) in each of next 8 ch. (16 hdc, 8 ch-1 sp)
Double crochet section (chains 19–26): Dc V-st (dc, ch 1, dc) in each of next 8 ch. (16 dc, 8 ch-1 sp)
Treble section (chains 27–35): Tr V-st (tr, ch 1, tr) in each of next 9 ch. (18 tr, 9 ch-1 sp)
Row 1 total: 4 sl st + 18 sc + 16 hdc + 16 dc + 18 tr = 72 stitches, plus 25 ch-1 spaces. You have used all 35 chains: 4 + 6 + 8 + 8 + 9 = 35.
As you work, the ribbon starts to twist around itself. That’s what should happen. Don’t flatten it, just let it coil.
The ch-1 spaces between the legs of each V-st make the open spoke band you see in the finished piece. They get taller and wider toward the top because the stitches get taller.
Hanging Loop
Don’t fasten off. Ch 16, then sl st in the top of the last tr you made. This forms a loop of about 1.5 in (3.8 cm) that stands straight up from the widest end.
Twist the loop once before you sl st if you want it to hang facing forward. This is optional.
Border: Single Crochet Edge Row
For this single-piece ornament, the border is the outer edge of the ribbon. It is one row of single crochet worked back down the spiral, along the tops of the Row 1 stitches, from the top to the tip. This edge gives each coil the firm, slightly raised rim you see in the photo.
Border gauge: One sc goes in each stitch and one sc goes in each ch-1 space. Over the open sections, that works out to about 5 sc per 1 in (2.5 cm) along the outer edge.
Row 2: Edge Row (worked from top to tip)
Ch 1, then turn the work so the tops of the Row 1 stitches face you. Leave the hanging loop pointing upward.
Treble section: Sc in the top of the last tr (the same stitch that holds the loop’s sl st). Sc in the next ch-1 sp, then sc in each of the next 2 tr. Repeat from * until 1 ch-1 sp and 1 tr are left in this section. Sc in that last ch-1 sp, then sc in the last tr.
(18 sc in the tr + 9 sc in the ch-1 sp = 27 sc)*
Double crochet section: Work the same way, with 1 sc in each dc and 1 sc in each ch-1 sp.
(16 + 8 = 24 sc)
Half double section: Work the same way, with 1 sc in each hdc and 1 sc in each ch-1 sp.
(16 + 8 = 24 sc)
Single crochet section: Sc in each sc. (18 sc)
Tip section: Sl st in each of the 4 sl st. (4 sl st)
Row 2 total: 27 + 24 + 24 + 18 = 93 sc, plus 4 sl st at the tip.
Fasten off and leave a 6 in (15.2 cm) tail.
Why the Math Works
There are no corners on this piece, so the counts work section by section, not side by side.
In the open sections, every V-st turns into exactly 3 edge stitches: 2 for the stitches and 1 for the ch-1 space. That gives 9 V-sts × 3 = 27, then 8 × 3 = 24, and 8 × 3 = 24.
In the solid section, each sc gets exactly one sc, so 18 stays 18.
Because Row 2 adds nothing extra anywhere, the edge stays exactly as long as the Row 1 tops. The coil keeps the shape set by Row 1 and doesn’t ruffle or pull straight.
The coiling itself comes from the ratio of edge length to chain length. In the sc section there are 3 stitches per chain. In the V-st sections, there are 3 edge stitches per chain once Row 2 is worked. Since the outer edge is about three times as long as the inner chain, it has to coil.
The taller stitches at the top push the outer edge farther from the center. That’s why the top coils are wider and the spiral tapers.
Finishing
Weave the tip tail up through the back of the sl st section to stiffen the point, then trim. Weave the starting tail into the foundation chain.
Final Blocking
- Wet the ornament with cool water and gently squeeze out the extra. Don’t wring it.
- Optional: dip it in spray starch or the glue-and-water mix for a firm twist, then blot it with a towel.
- Slide the ornament onto the pencil or dowel, with the foundation chain against the dowel and the sc edge facing out.
- Wind the ribbon evenly. Space the coils so the full length is 5.5 in (14.0 cm) from the top of the treble section to the tip.
- Pin the tip and the base of the loop to the dowel, or tape them with low-tack tape.
- Gently fan out each treble and double V-st so the spaces open evenly.
- Let it dry completely, at least 8 hours or overnight.
- Slide it off the dowel. Check that the widest coil measures about 1.75 in (4.4 cm) across and the loop is 1.5 in (3.8 cm) tall.
Final Quality-Control Checklist
- Row 1 has 72 stitches and 25 ch-1 spaces.
- Row 2 has 93 sc and 4 sl st.
- The stitch heights change in the right order from tip to top: sl st, sc, hdc, dc, tr.
- The spoke gaps are visible and even in the hdc, dc and tr sections.
- The sc edge is smooth, with no puckers or loose loops.
- The finished length is 5.5 in (14.0 cm) and the widest coil is 1.75 in (4.4 cm).
- The hanging loop is 1.5 in (3.8 cm), secure, and centered on the top.
- All tails are woven in and nothing pokes out at the tip.
Troubleshooting
The spiral won’t coil, it just lies in a wavy strip. Your foundation chain is probably too loose. Re-chain more tightly or use a smaller hook. Also check that you worked 3 sc per chain and V-sts, not single stitches.
The coils are uneven or flare out sideways. You may have skipped a ch-1 space in Row 2 or worked 2 sc into one. Recount each section against 27, 24, 24 and 18.
The point is blunt. Pull the sl st tip section firm, and weave the tail up through it to stiffen it.
The loop flops sideways. Undo the loop’s sl st and attach it to the exact top of the last tr, not its side.
The ornament droops after hanging for a while. Re-block it with starch or the glue mix, and let it dry fully on the dowel.
The spaces close up and look solid. Your ch-1 stitches are too tight. Make each ch-1 a little looser, or gently stretch the spaces open while blocking.
Care
Spot clean with cool water and mild soap, then reshape it on a dowel and let it air dry. If you used starch, refresh the stiffening each season.
Final Notes
The measurement chain is short and easy to check. Start with 35 working chains at 7 in (17.8 cm). They coil to about 5 in (12.7 cm) after Row 1, with a 0.75 in (1.9 cm) treble band. The 0.25 in (0.6 cm) edge row brings the ornament to 5.5 in (14.0 cm) long and 1.75 in (4.4 cm) wide, and the loop adds 1.5 in (3.8 cm) on top. If each checkpoint matches, your Sugar Twist will hang as a neat, tapered candy spiral. Make one, check it, then make a whole pink cluster for the tree.
Happy crocheting!