

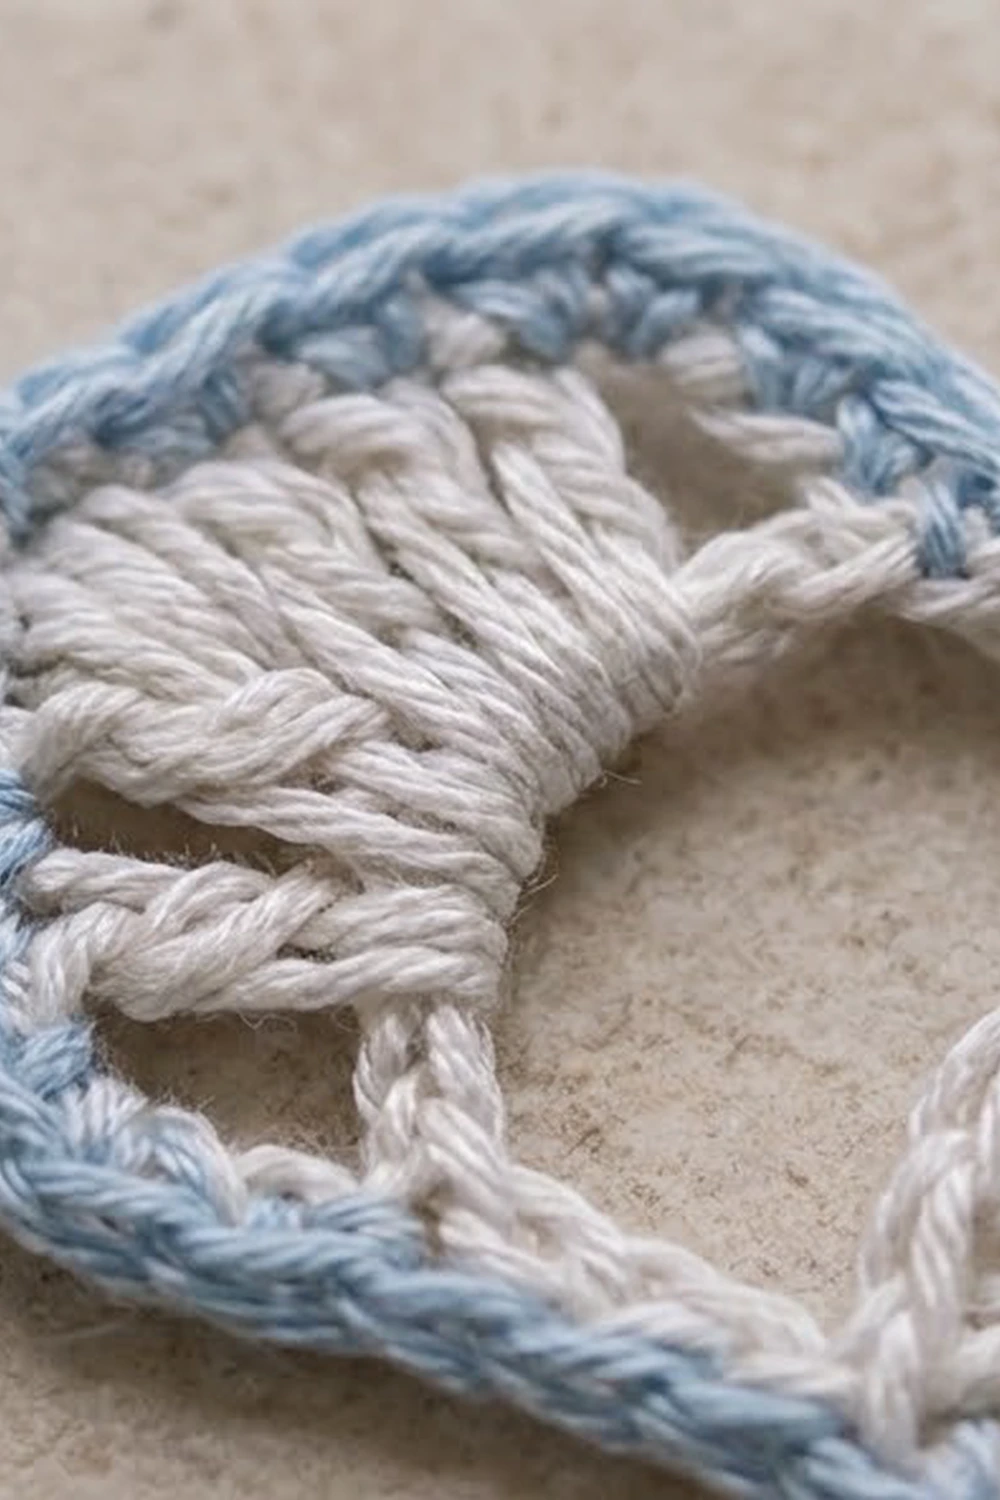
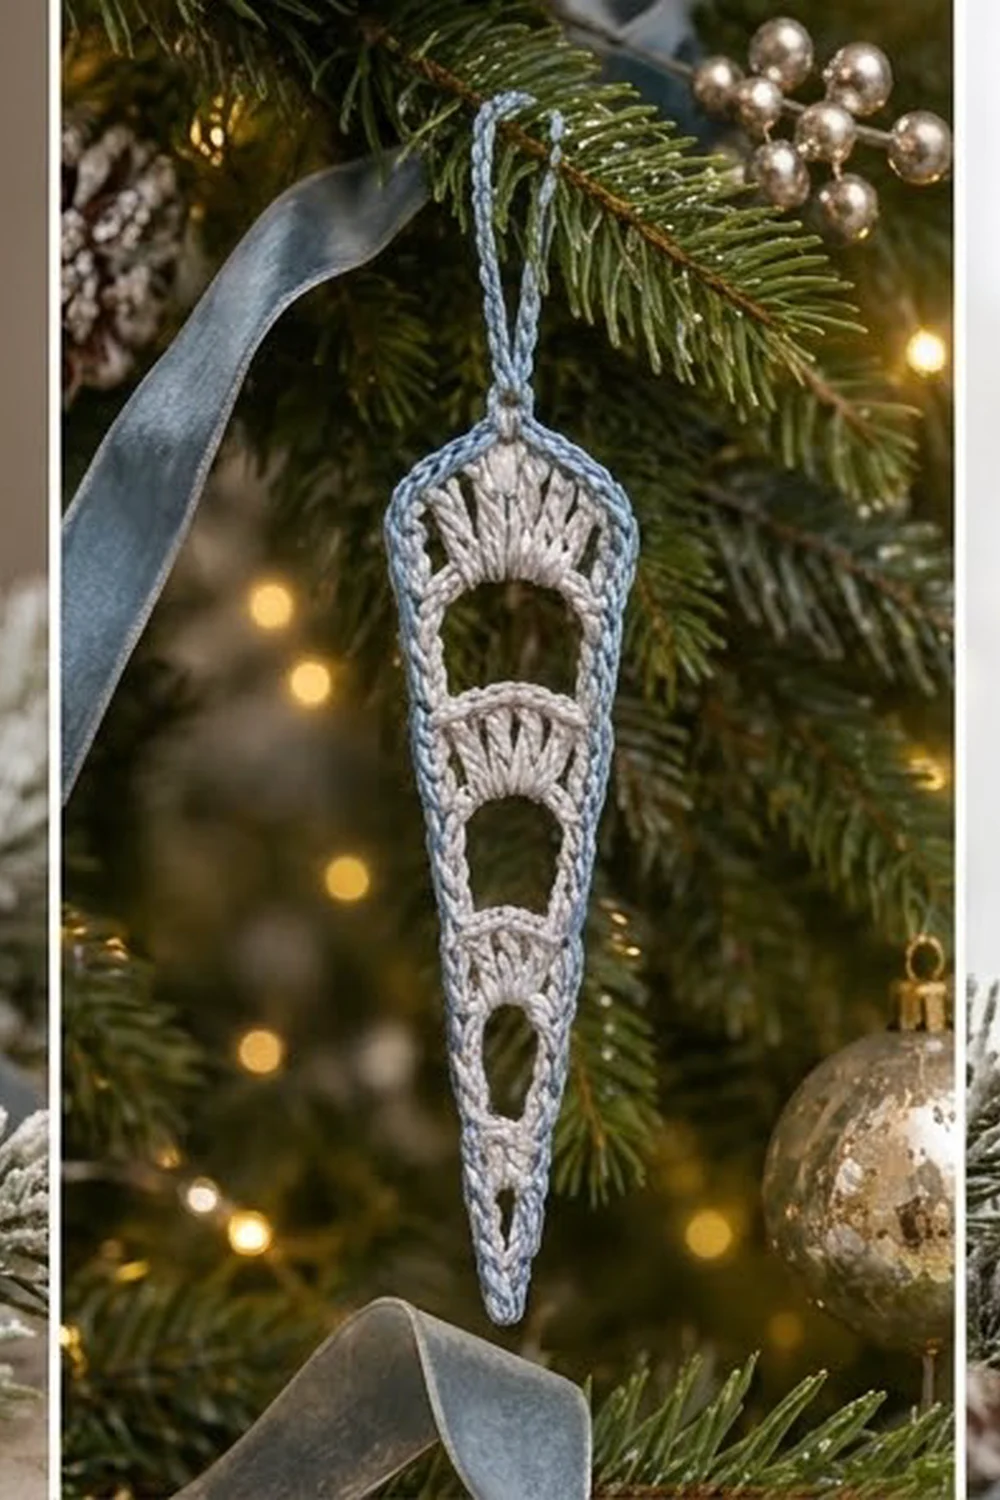
This lacy icicle ornament looks like a long drip of frost caught on a branch. The white body is made of stacked open tiers. Each tier has a rounded window topped with a little fan of stitches, and the tiers grow from a fine point up to a softly rounded cap.
A single round of pale blue single crochet frames the whole shape and gives it a cool outline, like ice catching the light. The same blue continues into a sturdy hanging loop, so you don’t need ribbon or a hook to hang it.
The pattern uses US crochet terms. The finished ornament measures about 1.5 in (3.8 cm) wide at the widest point and 5.5 in (14.0 cm) long. The loop adds 1.25 in (3.2 cm), for a total hanging length of about 6.75 in (17.1 cm).
The body is worked flat in turned rows, starting at the tip. Tall “opening rows” make the windows, and “fan rows” fill each window’s top with double crochet. Two short single crochet rows round off the top. The blue edging goes around everything in one round, and the loop is built at the top center.
Finished Size and Construction
- Finished size: 1.5 in (3.8 cm) wide × 5.5 in (14.0 cm) long, plus a 1.25 in (3.2 cm) loop
- Skill level: Easy-intermediate (tall stitches, working into chain spaces, edging into row ends)
- Terminology: US crochet terms
- Yarn weight: Size 3 cotton crochet thread (light fingering)
- Hook: 2.5 mm (B-1 / C-2)
- Number of pieces: 1
- Layout: Single flat piece, worked tip to top
- Body size before edging: 1.25 in (3.2 cm) × 5.25 in (13.3 cm)
- Edging depth: about 0.125 in (0.3 cm) on each side, one round
Materials
Use a smooth, mercerized cotton thread. It shows the fans clearly and holds its shape after blocking. Avoid fuzzy or very soft acrylics, because the open windows will sag and lose their round outline.
- White (Color A): 5 g (about 7 m), for the body
- Pale blue (Color B): 3 g (about 4 m), for the edging and loop
Quantities include a margin for swatching, weaving in ends, and one restart.
Tools:
– 2.5 mm crochet hook
– Tapestry needle
– Scissors
– Ruler or tape measure
– Blocking mat and rustproof pins
– Spray bottle with water (optional: a light fabric stiffener)
Abbreviations (US Terms)
- ch – chain
- sl st – slip stitch
- sc – single crochet
- sc2tog – single crochet 2 together
- dc – double crochet
- dtr – double treble crochet
- sp – space
- st(s) – stitch(es)
- tch – turning chain
Special stitch: double treble crochet (dtr). Yarn over 3 times and insert the hook into the stitch. Yarn over and pull up a loop (5 loops on hook). Then [yarn over, pull through 2 loops] 4 times.
Turning chains: In this pattern, ch 5 counts as 1 dtr and ch 3 counts as 1 dc. A ch 1 never counts as a stitch.
Gauge and Checkpoints
This is a small piece, so the ornament itself works as the gauge test. Make one, measure at each checkpoint, and adjust your hook before you make a set.
Base gauge: 8 dc = 1 in (2.5 cm) wide. One dc row is about 0.33 in (0.8 cm) tall, and one dtr row is about 0.65 in (1.7 cm) tall.
Checkpoints (body, before blocking):
– After Row 3: about 0.6 in (1.5 cm) wide × 1.1 in (2.8 cm) tall
– After Row 7: about 0.9 in (2.3 cm) wide × 3.1 in (7.9 cm) tall
– After Row 11: about 1.25 in (3.2 cm) wide × 5 in (12.7 cm) tall
– After Row 13: about 1.25 in (3.2 cm) wide × 5.25 in (13.3 cm) tall
If your piece is too big: go down to a 2.25 mm hook, or keep the dtr wraps snug on the hook.
If your piece is too small: go up to a 2.75 mm hook. Also check that your chain spaces aren’t tight, because tight chains pinch the windows into ovals.
Height matters more than width here. If you’re within 0.25 in (0.6 cm) of the lengths above, carry on.
Body (Color A, White)
Work flat in rows and turn at the end of each row. Opening rows (O) make the windows, and fan rows (F) fill their tops. Each opening row skips every stitch between its two edge stitches.
Row 1 (tip): Ch 2, 3 sc in 2nd ch from hook. Turn. (3 sc)
Tier 1
Row 2 (O1): Ch 5 (counts as dtr), dtr in first sc, ch 1, skip next sc, 2 dtr in last sc. Turn. (4 dtr, one ch-1 sp)
Row 3 (F1): Ch 3 (counts as dc), dc in next dtr, 3 dc in ch-1 sp, dc in next dtr, dc in top of tch. Turn. (7 dc)
Tier 2
Row 4 (O2): Ch 5, dtr in first st, ch 3, skip next 5 sts, 2 dtr in last st (top of tch). Turn. (4 dtr, one ch-3 sp)
Row 5 (F2): Ch 3, dc in next dtr, 5 dc in ch-3 sp, dc in next dtr, dc in top of tch. Turn. (9 dc)
Tier 3
Row 6 (O3): Ch 5, dtr in first st, ch 5, skip next 7 sts, 2 dtr in last st. Turn. (4 dtr, one ch-5 sp)
Row 7 (F3): Ch 3, dc in next dtr, 7 dc in ch-5 sp, dc in next dtr, dc in top of tch. Turn. (11 dc)
Tier 4
Row 8 (O4): Ch 5, dtr in first st, ch 7, skip next 9 sts, 2 dtr in last st. Turn. (4 dtr, one ch-7 sp)
Row 9 (F4): Ch 3, dc in next dtr, 9 dc in ch-7 sp, dc in next dtr, dc in top of tch. Turn. (13 dc)
Tier 5
Row 10 (O5): Ch 5, dtr in first st, ch 9, skip next 11 sts, 2 dtr in last st. Turn. (4 dtr, one ch-9 sp)
Row 11 (F5): Ch 3, dc in next dtr, 11 dc in ch-9 sp, dc in next dtr, dc in top of tch. Turn. (15 dc)
How the tiers work: Each fan row has 4 edge dc plus the fan, so its count is 4 + fan size. The next opening row uses only the first and last stitch, so it skips everything else: fan size + 2 stitches. The windows don’t close up because the dtr posts stand tall and the chain bridges the gap. Each fan has 2 more dc than the chains it sits on, so it cups upward into the soft arc you see in the photos.
Top Cap
Row 12: Ch 1, sc2tog over first 2 sts, sc in next 11 sts, sc2tog over last 2 sts (the last dc and the top of the tch). Turn. (13 sc)
Row 13: Ch 1, sc2tog, sc in next 9 sts, sc2tog. (11 sc)
Fasten off Color A and weave in the tail at the tip only. Leave the top tail for now and weave it in under the edging later.
Check that the body is about 1.25 in (3.2 cm) × 5.25 in (13.3 cm).
Edging and Hanging Loop (Color B, Pale Blue)
Edging Gauge
Along the row ends, aim for about 6 sc per inch (2.5 cm). Work 4 sc into the side of each dtr row, 2 sc into the side of each dc row, and 1 sc into the side of each sc row. These ratios match the row heights, so the edge lies flat without ruffling or cupping.
Per-Side Counts
- Top edge: 11 sc, one in each stitch of Row 13. This count includes both top corner stitches.
- Each long side: 1 (Row 1) + 5 × 4 (dtr rows) + 5 × 2 (dc rows) + 2 (Rows 12–13) = 33 sc
- Tip: 3 sc into the base of the foundation chain
Round total: 11 + 33 + 33 + 3 = 80 sc
Round 1
With the right side facing, join Color B with sl st in the 6th (center) sc of Row 13.
- Ch 1. Sc in the same st and in the next 5 sts, ending at the corner. (6 sc)
- Working down the first long side into row ends, work 33 sc as listed above.
- Work 3 sc into the base of the foundation ch at the tip.
- Working up the second long side, work 33 sc.
- Sc in the remaining 5 sts of Row 13. (5 sc)
- Sl st in the first sc to join.
The top is split as 6 + 5 = 11 stitches, so the round total is 6 + 33 + 3 + 33 + 5 = 80 sc.
Why the math works: Each top corner stitch is counted once, as part of the 11 top stitches, so no corner is added twice. The 3 sc at the tip turn the point sharply without bunching. Because both sides use the same row-end ratios, they are mirror images and the ornament hangs straight.
Hanging Loop
- Ch 20, then sl st in the same sc at top center to form a ring.
- Work 26 sc into the ch-20 loop. That is 6 more than the chain count, which keeps the loop round and firm.
- Sl st in the base sc and fasten off.
The loop should stand about 1.25 in (3.2 cm) tall. Weave all ends into the edging, not the lace, so they stay invisible.
Final Blocking
- Lightly spritz the ornament until it’s damp but not dripping. If you want a crisper result, use diluted fabric stiffener.
- Lay it right side up on the blocking mat.
- Pin the tip, then pin the center top so the body measures 5.5 in (14.0 cm) long.
- Pin the widest point at 1.5 in (3.8 cm), then check that both sides form straight, even tapers to the tip.
- Open each window by pinning gently inside the rounded hole. Push each fan upward into an even arc.
- Pin the loop upright so it dries straight.
- Let it dry completely, at least 4–6 hours, before unpinning.
Final Quality-Control Checklist
- [ ] Body has 13 rows: 1 tip row, 5 tiers of 2 rows each, and 2 cap rows
- [ ] Fan rows count 7, 9, 11, 13, and 15 dc
- [ ] Cap rows count 13 and 11 sc
- [ ] Edging round counts 80 sc (11 top, 33 per side, 3 at tip)
- [ ] Loop has 26 sc over a ch-20
- [ ] Blocked size is 1.5 in (3.8 cm) × 5.5 in (14.0 cm), plus a 1.25 in (3.2 cm) loop
- [ ] Windows are open and round, and fans arc evenly
- [ ] Ornament hangs straight, with no twist or lean
- [ ] All ends are woven into the blue edging
Troubleshooting
Windows look like slits. Your chain spaces are too tight. Chain more loosely, or go up a hook size for the chains only.
Fans ruffle or flip forward. Your dc are too loose. Tighten them slightly, or block the fans flatter with pins.
Ornament leans to one side. One side has a different row-end count. Recount both sides; each should be 33 sc.
Edging ripples. You worked too many sc into the dtr row ends. Stick to exactly 4 per dtr row.
Edging pulls the sides inward. You worked too few sc. Make sure each dc row end has 2 sc.
Tip is blunt. Work all 3 tip sc into the base of the foundation chain, not into the side of Row 1.
Loop flops over. Pack all 26 sc tightly onto the ch-20, then block the loop upright.
Care
Spot clean, or hand wash gently in cool water. Then reshape and pin flat to dry, especially if you used stiffener.
Final Notes
The measurement chain is simple:
– Row 3 is about 1.1 in (2.8 cm) tall.
– Row 7 is about 3.1 in (7.9 cm) tall.
– Row 11 is about 5 in (12.7 cm) tall.
– The cap brings the body to 5.25 in (13.3 cm).
– The 80-stitch blue edging finishes the ornament at 1.5 in (3.8 cm) × 5.5 in (14.0 cm), and the loop adds 1.25 in (3.2 cm).
If each checkpoint matches, the finished icicle will too. Make a few for the tree, a gift topper, or a window, and enjoy watching them catch the light.
Happy crocheting!