

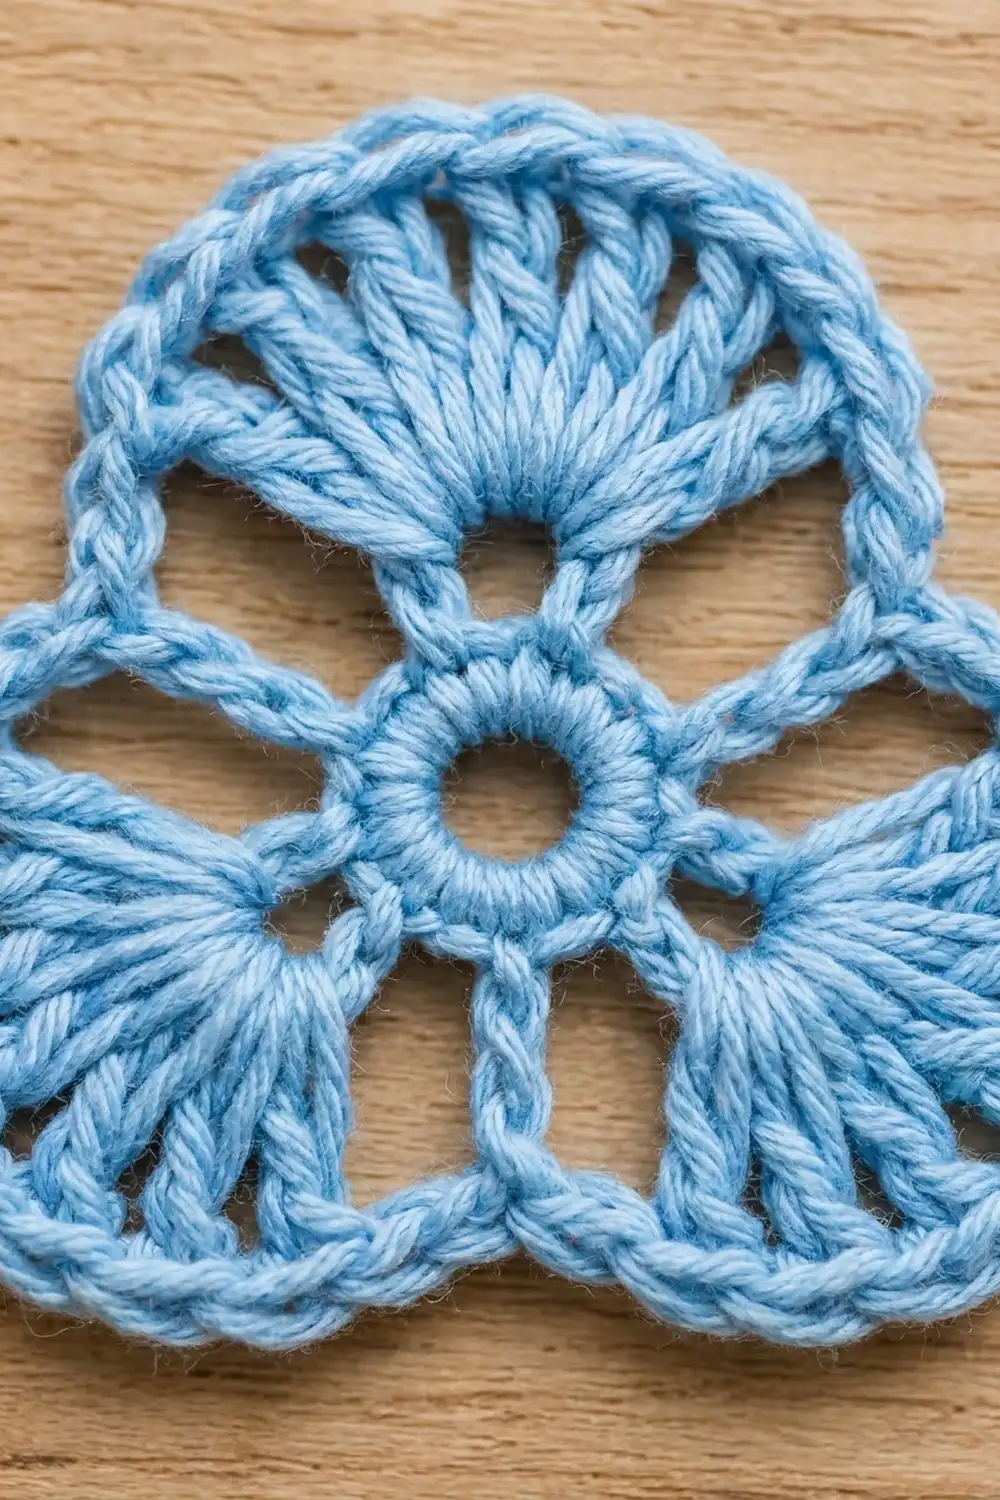
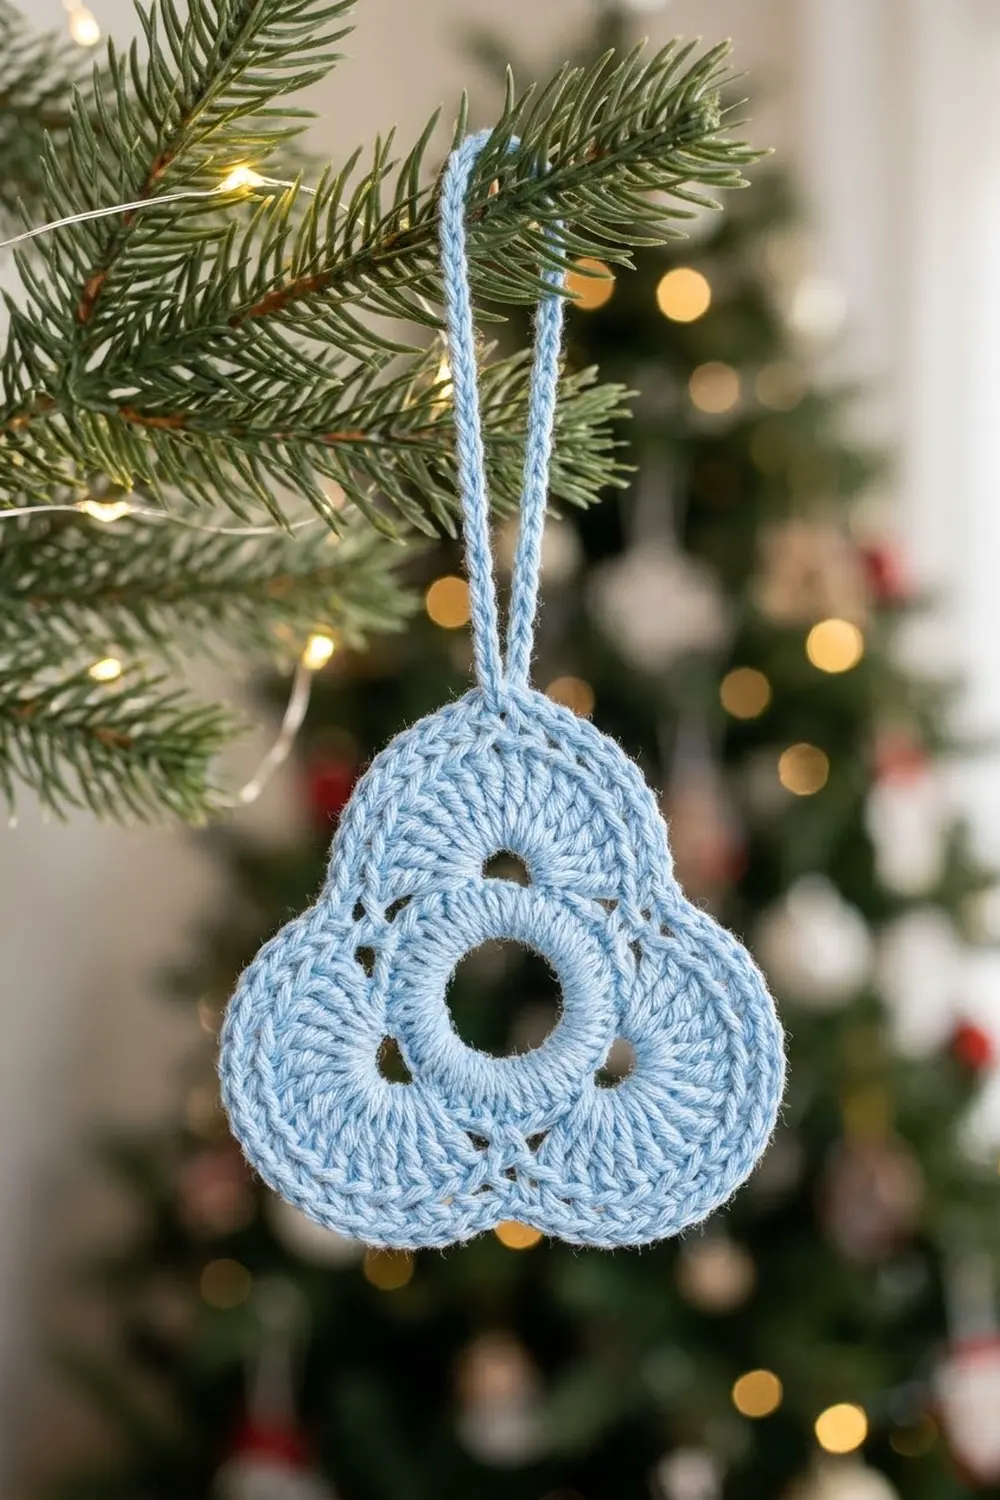
The Frosted Trefoil Ornament is a small, lacy motif with three rounded lobes around an open center ring. Each lobe holds a fan of tall treble stitches. Three slim chain bars divide the fans and leave little windows that let the tree lights shine through.
The sample uses one soft light blue cotton, which gives it a frosty, snowflake-like look. It also works well in white, silver-gray, or pale gold. The style is classic thread-lace, but a DK-weight yarn makes it quick to work and sturdy enough to hang without stiffening.
This pattern uses US crochet terms. The finished ornament is 3.75 in (9.5 cm) wide and 3.5 in (8.9 cm) tall, plus a hanging loop of about 2.75 in (7.0 cm).
You work the whole piece in the round in five rounds. First you make a center ring, then a round of chain spaces. Next come three fans and three chain-loop bars. After that, a framing round of single crochet and chain arches, and finally a smoothing border with the hanging loop worked at the end. There are no separate pieces to sew.
Finished Size and Construction
- Finished size: 3.75 in (9.5 cm) wide × 3.5 in (8.9 cm) tall, without the loop
- Hanging loop: about 2.75 in (7.0 cm) long
- Skill level: Easy to Intermediate
- Terminology: US crochet terms
- Yarn weight: DK / light worsted (weight 3) cotton or cotton blend
- Hook: 3.5 mm (E-4)
- Number of pieces: 1 single motif
- Layout: three lobes around a center ring: one lobe points up and two point down
- Piece size after Rnd 3: 3 in (7.6 cm) wide
- Size before border (after Rnd 4): 3.5 in (8.9 cm) wide × 3.25 in (8.3 cm) tall
- Border depth: 0.125 in (0.3 cm) on each side, from one round of single crochet
Materials
Yarn: Use a smooth, mercerized or combed cotton in DK weight. Cotton shows the stitches clearly and holds the fan shape after blocking. Acrylic also works, but it may curl slightly more and needs steam blocking.
- Light blue (main color): 12 g / about 40 m (44 yd) for one ornament
The quantity includes a generous margin for a gauge swatch and the hanging loop. One 50 g ball makes about four ornaments.
Tools:
– 3.5 mm (E-4) crochet hook
– Tapestry needle
– Scissors
– Stitch marker
– Blocking mat and rust-proof pins
– Spray bottle with water (optional: light spray starch)
Abbreviations (US Terms)
- ch – chain
- sl st – slip stitch
- sc – single crochet
- tr – treble crochet (yarn over twice, insert hook, pull up a loop, [yarn over, pull through 2 loops] 3 times)
- sc3tog – single crochet 3 together (pull up a loop in each of the next 3 stitches, yarn over, pull through all 4 loops)
- sp – space
- st(s) – stitch(es)
- rnd – round
Special stitch – Bar loop: (sc, ch 7, sc) worked into the same chain space. The ch-7 lies flat as a doubled strand and becomes one of the three dividing bars.
Gauge and Checkpoints
Exact gauge is not critical for an ornament. However, the bar loops and arches must match the fan height or the motif will cup or ruffle. Make one complete test ornament before you make a batch.
Checkpoints:
– After Rnd 1: the center ring is about 0.75 in (1.9 cm) across.
– After Rnd 3: the motif is 3 in (7.6 cm) wide from fan edge to fan edge.
– After Rnd 4: 3.5 in (8.9 cm) wide × 3.25 in (8.3 cm) tall.
– After Rnd 5: 3.75 in (9.5 cm) wide × 3.5 in (8.9 cm) tall.
If your motif is too big: go down to a 3.25 mm (D-3) hook, or work the tr stitches more firmly.
If it’s too small or the fans ruffle: go up to a 3.75 mm (F-5) hook.
If only the bars seem off: a bar that’s too short pulls the rim inward. A bar that’s too long leaves it slack. Change the ch-7 to ch-6 or ch-8 instead of changing hooks.
Pattern
Rnd 1 – Center Ring
Ch 6, sl st to the first ch to form a ring.
Ch 1 (does not count as a stitch), work 18 sc into the ring. Sl st to the first sc to join. (18 sc)
Pack the stitches snugly around the ring so it stays open and round.
Rnd 2 – Chain Spaces
Ch 1, sc in the same st as the join. Ch 3, skip 2 sc, sc in the next sc. Repeat from * 4 more times. Ch 3, skip the last 2 sc, and sl st to the first sc to join. (6 sc, 6 ch-3 sps)
Each repeat uses 3 stitches of Rnd 1 (1 worked, 2 skipped), and 6 repeats × 3 = 18. The six spaces alternate between fan spaces and bar spaces. Place a marker in the first ch-3 space. That space and every second space after it will hold a fan.
Rnd 3 – Fans and Bars
Sl st into the first (marked) ch-3 sp.
Fan 1: Ch 4 (counts as the first tr), then work 10 tr in the same sp. (11 tr)
Skip the next sc. Work a bar loop (sc, ch 7, sc) in the next ch-3 sp. Skip the next sc. Work 11 tr in the next ch-3 sp. Repeat from * once more (Fans 2 and 3).
Skip the next sc. Work a bar loop in the last ch-3 sp. Sl st to the top of the beginning ch-4 to join. Fasten off.
Count: 33 tr (3 fans of 11), 6 sc, 3 ch-7 loops.
Lay the piece flat. Each fan should spread into a half circle. Each ch-7 loop should lie straight out between two fans, reaching about as far as the fan tops. Check: 3 in (7.6 cm) wide.
Rnd 4 – Frame
Join the yarn with a sl st at the tip (middle) of any ch-7 bar loop. The lobe just clockwise from this bar should be the one you plan as the top lobe.
Work 3 sc into the tip of the ch-7 loop. This catches both strands and pinches the loop into a flat double bar. Ch 4, skip the first tr of the next fan, and sc in each of the next 9 tr. Ch 4, skip the last tr of the fan. Repeat from * 2 more times. Sl st to the first sc to join.
Count per repeat: 3 sc + ch 4 + 9 sc + ch 4 = 20 sts.
Total: 36 sc and 6 ch-4 sps, or 60 sts counting chains.
The ch-4 arches bridge the gap between each bar and the side of its neighboring fan. This leaves the two small open windows beside every fan. Check: 3.5 in (8.9 cm) wide × 3.25 in (8.3 cm) tall.
Rnd 5 – Border
See the Border section below.
Border
Border gauge: One round of sc adds about 0.125 in (0.3 cm) per side. That’s 0.25 in (0.6 cm) in total width and height. This brings the motif from 3.5 × 3.25 in (8.9 × 8.3 cm) to 3.75 × 3.5 in (9.5 × 8.9 cm).
Rnd 5: Ch 1. Sc3tog over the 3 bar sc (1 st). Work 5 sc in the ch-4 sp. [Sc in each of the next 2 sc, 2 sc in the next sc] 3 times (12 sts). Work 5 sc in the next ch-4 sp. Repeat from * 2 more times. Sl st to the first st to join. Don’t fasten off.
Count per lobe section: 1 + 5 + 12 + 5 = 23 sts.
Total: 3 × 23 = 69 sts.
Why the math works:
– The 9 sc across each fan top become 12 stitches (9 worked once + 3 increases). This rounds the outer curve so it lies flat.
– Each ch-4 arch gets 5 sc. That’s one more than its chain count, which is the normal allowance for working around a chain.
– At each bar, the 3 sc are reduced to 1 with sc3tog. This forms the small dip between the lobes and keeps the concave points from flaring.
– The section starts on a bar and ends just before the next bar, so each lobe is complete and the 3 sections add up to the full round with no stitches left over.
Hanging loop: Sl st across to the 12th stitch of the top lobe’s section. This is the center of that section (1 + 5 + 6 = 12). Ch 30, then sl st into the same stitch. Fasten off and weave in the end.
The loop measures about 2.75 in (7.0 cm). For a longer loop, add chains in groups of 4.
Alternative: if you’d rather keep the round unbroken, fasten off after the join. Then attach a new strand at the 12th stitch for the loop.
Final Blocking
- Weave in all ends along the back of the sc stitches. Don’t trim them until after blocking.
- Wet the ornament fully in cool water. Press out the water in a towel without wringing.
- Lay it face up on the blocking mat.
- Pin the center ring into a circle about 0.75 in (1.9 cm) across.
- Pin the three bars straight, pointing outward at even 120° angles.
- Pin each lobe into a smooth curve. The finished size is 3.75 in (9.5 cm) wide × 3.5 in (8.9 cm) tall.
- Spread each fan so all 11 tr stitches radiate evenly with no gaps bunched together.
- Pin the hanging loop straight so it dries without twisting.
- Lightly mist with spray starch if you want a crisper ornament.
- Let it dry completely, then remove the pins and trim the ends.
Final Quality-Control Checklist
- Center ring has 18 sc and is open and round.
- Each fan has 11 tr.
- Three bar loops lie flat and are pinched by 3 sc at their tips.
- Rnd 4 has 36 sc and 6 ch-4 arches.
- Rnd 5 has 69 sts, 23 per lobe.
- Each lobe has two small, even windows beside its fan.
- The three dips between lobes are matched.
- The motif measures 3.75 in (9.5 cm) × 3.5 in (8.9 cm).
- The loop is centered on the top lobe and isn’t twisted.
- All ends are woven in securely.
Troubleshooting
Center ring closes up: The ch-6 ring is too tight, or you worked fewer than 18 sc. Start again with a slightly looser foundation chain.
Fans cup upward: The tr stitches are too short for 11 to fit in the space. Loosen the yarn-overs, or go up half a hook size.
Fans ruffle: The stitches are too loose. Go down half a hook size.
Rim pulls in at the bars: The bar loops are too short. Use ch 8 instead of ch 7.
Rim waves at the bars: The bar loops are too long. Use ch 6.
Windows look uneven: Make sure you skipped exactly the first and last tr of each fan in Rnd 4.
Wrong count in Rnd 5: Check that each ch-4 got 5 sc, and that you worked 3 increases per fan.
Loop is off-center: Recount the top lobe from its sc3tog and attach at the 12th stitch.
Care
Hand wash in cool water with mild soap, then reshape and dry flat. Store the ornament flat between tissue paper so the fans keep their shape.
Final Notes
The measurement chain is simple to follow:
– An 18-sc ring that is 0.75 in (1.9 cm) across.
– Three 11-tr fans that make the motif 3 in (7.6 cm) wide.
– A 60-stitch frame round that brings it to 3.5 × 3.25 in (8.9 × 8.3 cm).
– A 69-stitch border that finishes it at 3.75 × 3.5 in (9.5 × 8.9 cm).
Check your counts at each stage, and every ornament in your batch will match. Make a few in different pale shades and hang them together on the tree.
Happy crocheting!