

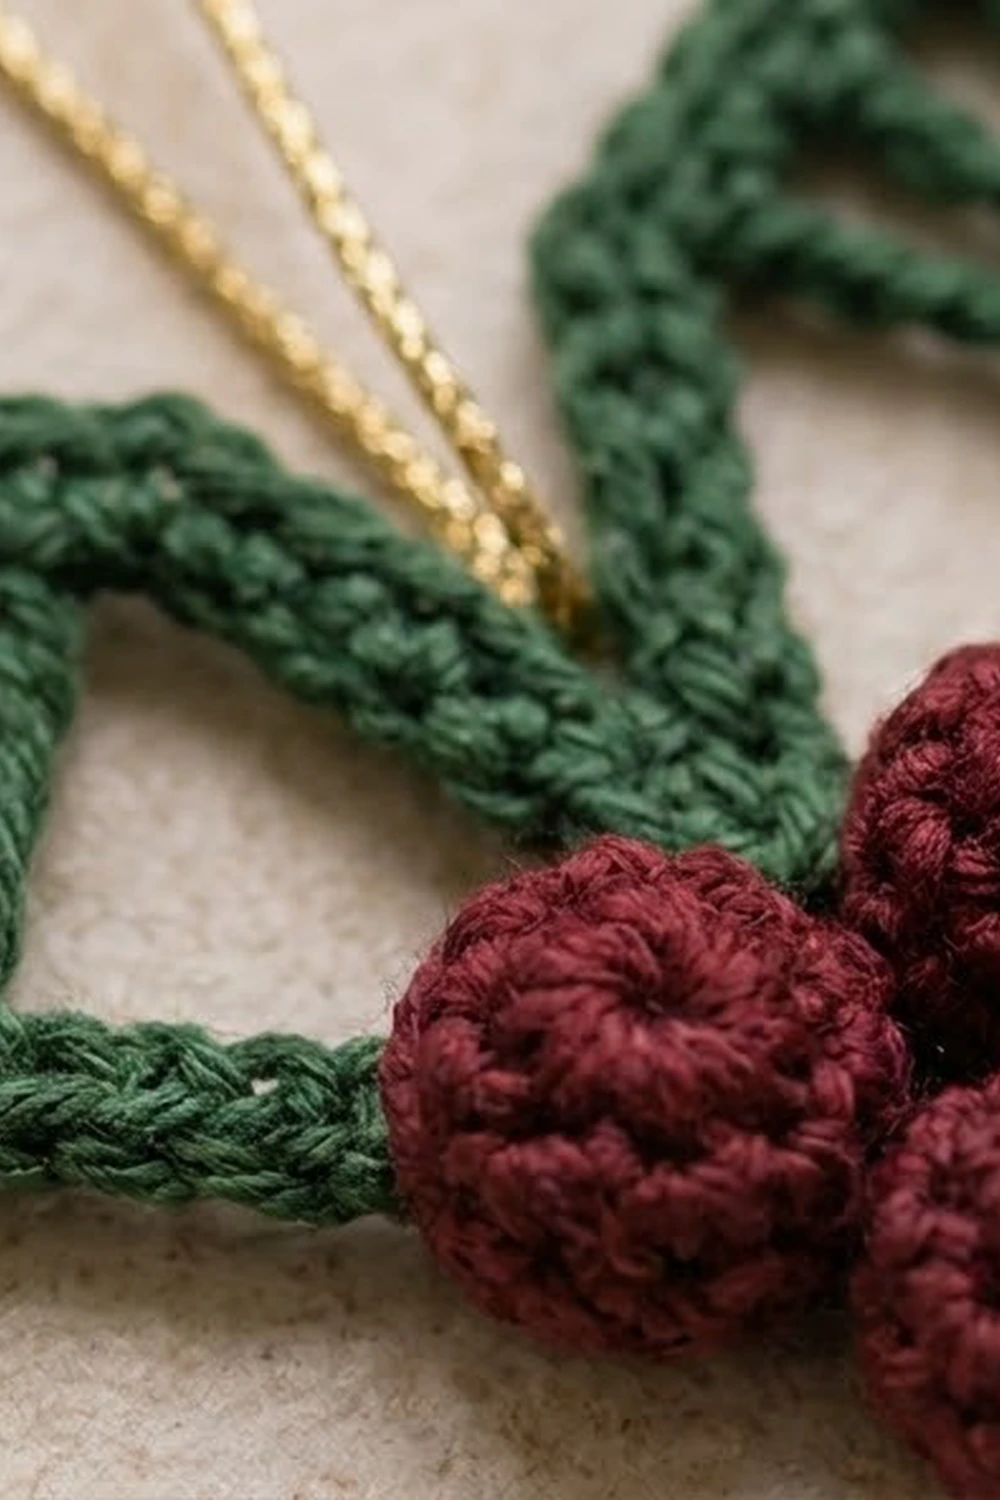
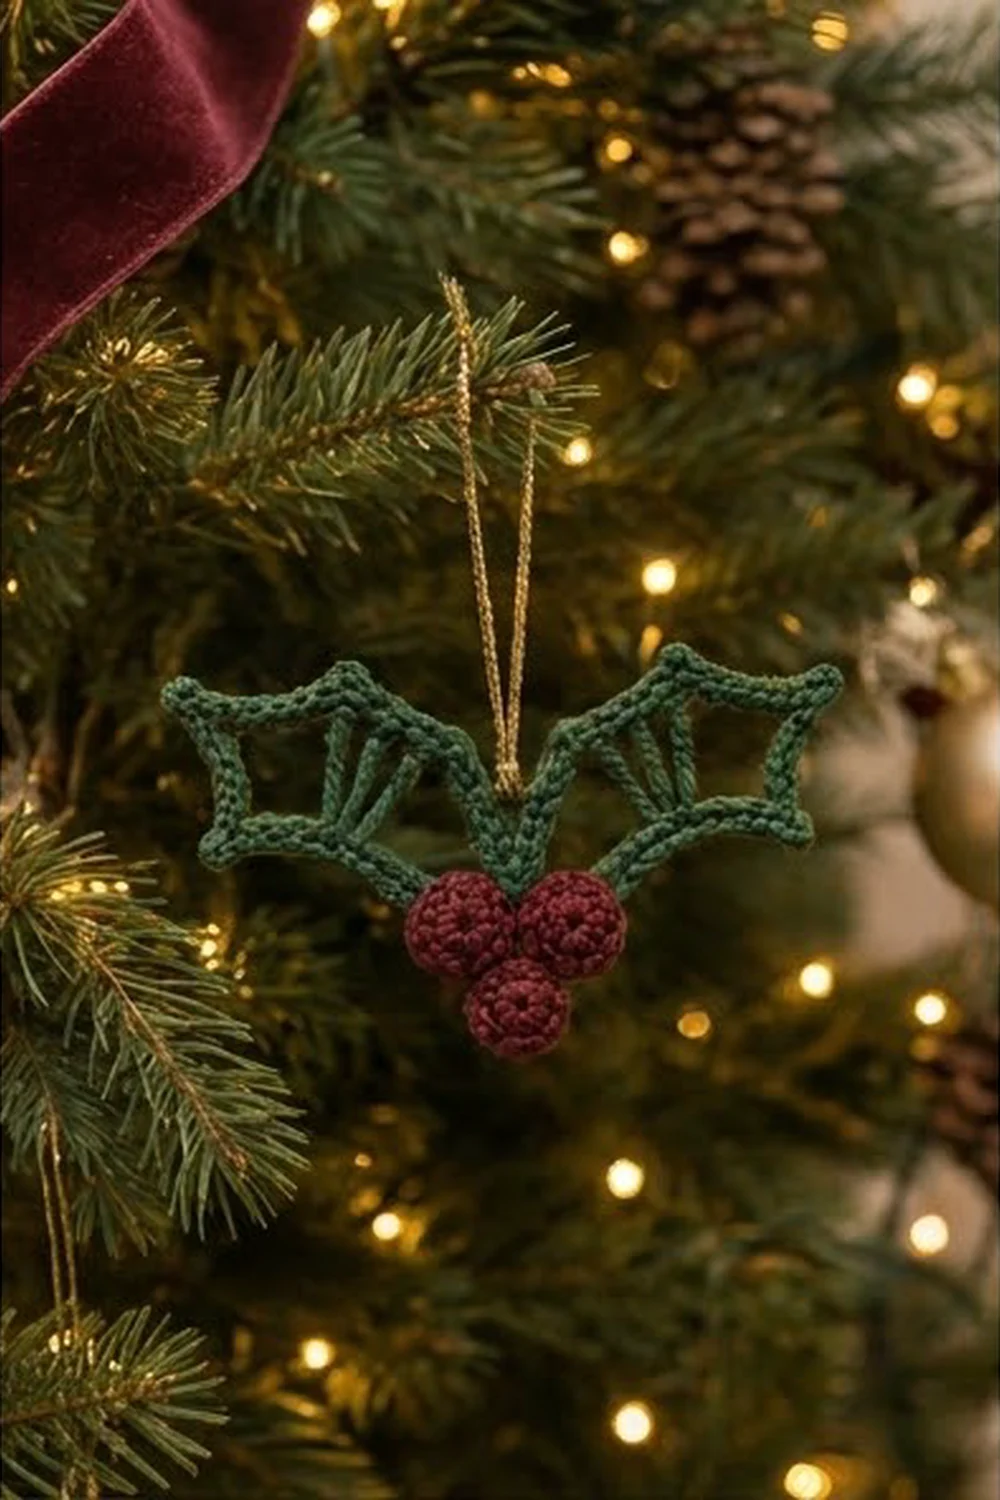
The Twin Sprig Holly Ornament is a small, airy holly sprig. Two lacy green leaves spread out from a single point, and a cluster of three plump burgundy berries covers the spot where they meet. A gold metallic loop sits in the notch between the leaves, so the ornament hangs level on a branch.
The palette is classic Christmas: deep forest green, rich burgundy and a touch of gold. The style is light and graphic rather than solid. Each leaf is an open frame with long stitches fanning out inside it, so the tree lights show through.
This pattern uses US crochet terms. The finished ornament measures about 4 in (10.2 cm) wide and 2.5 in (6.4 cm) tall, not counting the hanging loop.
Construction is simple:
– Work 10 long spokes into one magic ring to build both leaf frames at once.
– Work a single crochet edging with picot points all the way around.
– Make three small stuffed berries and sew them over the center.
– Tie on the gold loop.
Finished Size and Construction
- Finished size: 4 in (10.2 cm) wide × 2.5 in (6.4 cm) tall, excluding the loop
- Skill level: Easy-intermediate (triple treble crochet and working around stitch posts)
- Terminology: US crochet terms
- Yarn weight: DK (3), cotton or cotton blend
- Hook: 3.5 mm (E-4)
- Number of pieces: 4 (one leaf piece containing both leaves, plus 3 berries)
- Layout: Two leaves in a wide V; berries in a triangle (two on top, one below) over the shared center
- Leaf piece size: 4 in (10.2 cm) tip to tip after edging
- Size before border: about 3.5 in (8.9 cm) tip to tip after Round 1
- Border depth: about 0.25 in (0.6 cm), including the picot points
Materials
Choose a smooth, mercerized DK cotton. It shows the stitch structure clearly and blocks crisply. Avoid fuzzy or very splitty yarns, because they hide the open spokes.
- Color A – Forest Green: 6 g, about 14 m (leaves)
- Color B – Burgundy: 3 g, about 7 m (berries, stuffing and sewing)
- Color C – Gold metallic thread or cord: 12 in (30.5 cm) (hanging loop)
Tools:
– 3.5 mm (E-4) crochet hook
– Tapestry needle
– Scissors
– Stitch marker
– Blocking mat and rust-proof pins
– Spray bottle with water
– Ruler or tape measure
All quantities include a margin of about 25% for your gauge swatch and sewing tails.
Abbreviations (US Terms)
- ch – chain
- sl st – slip stitch
- sc – single crochet
- sc2tog – single crochet 2 together
- trtr – triple treble crochet
- sp – space
- st(s) – stitch(es)
- MR – magic ring
Special stitches
- Triple treble (trtr): Yarn over 4 times. Insert the hook into the ring and pull up a loop (7 loops on hook). Then [yarn over, pull through 2 loops] 5 times.
- Picot point: Ch 3, then sl st into the 3rd ch from the hook. This makes each sharp holly tip.
Gauge and Checkpoints
Gauge: 19 sc = 4 in (10.2 cm) with the 3.5 mm hook. One trtr should measure about 1.7 in (4.3 cm) tall.
Make one leaf piece before you start a batch. It works as your gauge swatch, and it only takes about 15 minutes.
Checkpoints
- After Round 1: Each trtr spoke is 1.7 in (4.3 cm) long. Fanned out flat, the frame is about 3.5 in (8.9 cm) tip to tip.
- After Round 2: Each 8-sc post edge is about 1.7 in (4.3 cm), and each 12-sc top edge is about 2.5 in (6.4 cm). Total width is 4 in (10.2 cm).
- Each berry: About 0.7 in (1.8 cm) across after stuffing.
If it’s too big:
– If spokes are longer than 1.85 in (4.7 cm), or the width is over 4.25 in (10.8 cm), go down to a 3.25 mm (D-3) hook.
If it’s too small:
– If spokes are shorter than 1.55 in (3.9 cm), or the width is under 3.75 in (9.5 cm), go up to a 3.75 mm (F-5) hook.
Spoke length and edging length must match. If the edging ruffles, your sc are looser than your trtr. If the edging cups or pulls, your sc are tighter. See Troubleshooting.
Part 1: Leaf Frame (Color A)
Both leaves grow from one magic ring. Spokes 1–5 form the left leaf and spokes 6–10 form the right leaf. Spoke 1 becomes the left leaf’s lower edge, spoke 5 its inner edge, spoke 6 the right leaf’s inner edge, and spoke 10 the right leaf’s lower edge. The three middle spokes in each leaf stay bare and form the open fan inside.
Round 1 (spokes):
1. With Color A, make a MR. Ch 6. This counts as trtr, spoke 1.
2. Left leaf: [ch 3, trtr in MR] 4 times. You now have spokes 1–5 and 4 ch-3 sps.
3. Right leaf: work trtr in MR (spoke 6) directly next to spoke 5, with no chain between them.
4. [Ch 3, trtr in MR] 4 times. You now have spokes 6–10 and 4 more ch-3 sps.
Do not join. Pull the MR tail firmly to close the ring completely, then secure the tail with a knot on the back.
Round 1 total: 10 trtr (including the beginning ch-6) and 8 ch-3 sps, 4 per leaf.
Spread the piece flat:
– Spokes 1 and 10 point outward and slightly upward to form the two lower edges.
– Spokes 5 and 6 point upward side by side to form the center notch.
Checkpoint: about 3.5 in (8.9 cm) from the top of spoke 1 to the top of spoke 10.
Do not fasten off. Your hook is at the top of spoke 10, ready for the border.
Part 2: Berries (make 3, Color B)
Work in continuous rounds. Place a marker in the first stitch of each round.
- Round 1: 6 sc in MR. (6 sts)
- Round 2: 2 sc in each st around. (12 sts)
- Round 3: Sc in each st around. (12 sts)
- Round 4: Sc2tog 6 times. (6 sts)
Stuff the berry firmly with short scraps of Color B so no light-colored stuffing can show through.
- Round 5: Sc2tog 3 times. (3 sts)
Fasten off and leave a 6 in (15.2 cm) tail. Thread the tail through the last 3 sts, pull it closed, and keep the tail for sewing.
Each berry should be a firm ball about 0.7 in (1.8 cm) across. Set the berries aside until after blocking.
Border: Leaf Edging (Color A)
The border is one continuous round. It covers spokes 1, 5, 6 and 10 to create the thick outlined frame, fills each top space, and adds a picot point at the top of every spoke.
Border gauge: 19 sc = 4 in (10.2 cm). That works out to 8 sc ≈ 1.7 in (4.3 cm) and 12 sc ≈ 2.5 in (6.4 cm).
Round 2:
Right leaf lower edge:
1. Ch 1. Working down the post of spoke 10, work 8 sc evenly around the post, ending at the ring.
Left leaf lower edge:
2. Turn the work slightly. Working up the post of spoke 1, work 8 sc evenly around the post.
3. Make a picot point at the top of spoke 1. This is the left outer tip.
Left leaf top edge:
4. [3 sc in the next ch-3 sp, picot point at the top of the next spoke] 3 times. These are the picots at spokes 2, 3 and 4.
5. Work 3 sc in the last ch-3 sp of the left leaf.
6. Make a picot point at the top of spoke 5. This is the left inner corner.
Center notch:
7. Work 8 sc down the post of spoke 5.
8. Work 8 sc up the post of spoke 6.
9. Make a picot point at the top of spoke 6. This is the right inner corner.
Right leaf top edge:
10. [3 sc in the next ch-3 sp, picot point at the top of the next spoke] 3 times. These are the picots at spokes 7, 8 and 9.
11. Work 3 sc in the last ch-3 sp.
12. Make a picot point at the top of spoke 10. This is the right outer tip.
13. Sl st into the first sc of the round. Fasten off and weave in the ends.
Counts per side (each leaf):
– Lower edge: 8 sc
– Top edge: 12 sc (3 + 3 + 3 + 3), with 3 picots between them
– Inner edge: 8 sc
– Corner picots: 2 (outer tip and inner corner)
Each leaf has 28 sc and 5 picots. The full round has 56 sc and 10 picots, one picot per spoke.
Why the math works:
– Each covered post is one trtr, about 1.7 in (4.3 cm). At 4.75 sc per inch, 8 sc fill exactly 1.7 in (4.3 cm).
– Each ch-3 space opens to about 0.6 in (1.5 cm) at the top of the fan. 3 sc measure 0.63 in, which rounds to 0.6 in (1.5 cm), so the top edge lies flat.
– The edging adds about 0.25 in (0.6 cm) at each outer tip. That brings 3.5 in (8.9 cm) up to 4 in (10.2 cm).
Final Blocking
- Pin the leaf piece face up on the mat.
- Open the center notch so spokes 5 and 6 form a V of about 40 degrees.
- Angle the lower edges (spokes 1 and 10) about 10–15 degrees above horizontal.
- Pin each of the 10 picot points out sharply. Pin the top of each bare inner spoke so the fan spaces open evenly.
- Check the measurements: 4 in (10.2 cm) tip to tip, and each top edge 2.5 in (6.4 cm) long.
- Mist with water until damp. For acrylic blends, steam lightly instead, keeping the iron off the yarn.
- Let the piece dry completely, about 2 hours.
- Unpin. Sew two berries side by side over the closed ring, then sew the third centered below them, using the berry tails. Stitch through the leaf edging and into the neighboring berries so the cluster stays firm.
- Fold the gold thread in half. Thread both ends through the notch between spokes 5 and 6, just above the berries, and knot them on the back. Trim so the loop stands about 2.5 in (6.4 cm) tall.
Final Quality-Control Checklist
- Exactly 5 spokes per leaf: 2 covered edges and 3 bare inner spokes.
- 10 picot points in total, all pointed and evenly spaced.
- 56 sc in the border: 8 / 12 / 8 per leaf.
- Ring fully closed and hidden under the berries.
- Each berry is a firm ball about 0.7 in (1.8 cm) across, with no stuffing showing.
- Berries in a triangle: two on top, one centered below.
- Finished size 4 in (10.2 cm) × 2.5 in (6.4 cm).
- Loop centered, so the ornament hangs level.
- All ends woven in on the back.
Troubleshooting
- Edging ruffles along the posts: Your sc are loose. Work 7 sc per post instead of 8, or go down half a hook size for Round 2 only.
- Edge curls or the leaf cups: Your sc are tight. Work 9 sc per post, or loosen your tension.
- Spokes look slanted or uneven: Pull up the first loop of each trtr to the same height, and keep all 10 trtr worked into the same ring.
- Notch won’t open: Pin it wider during blocking and mist again. Cotton holds its blocked shape well.
- Berries look lumpy: Stuff with small amounts of scraps and roll each berry between your palms before closing it.
- Ornament tips forward: Move the loop slightly toward the back of the edging, then re-knot.
Care
Hand wash gently in cool water, press out the water in a towel, and reshape and dry flat. Store flat or hanging so the picot points stay crisp.
Final Notes
The measurement chain is short and reliable:
| Stage | Measurement |
|---|---|
| Gauge | 19 sc = 4 in (10.2 cm) |
| Each trtr spoke | 1.7 in (4.3 cm) |
| Frame after Round 1 | 3.5 in (8.9 cm) tip to tip |
| Covered edges | 8 sc per post |
| Top edges | 12 sc per leaf, about 2.5 in (6.4 cm) |
| Border depth | 0.25 in (0.6 cm) |
| Finished ornament | 4 in (10.2 cm) × 2.5 in (6.4 cm) |
| Each berry | 0.7 in (1.8 cm) |
Check your first spoke, and the rest of the ornament falls into place. Once you know the rhythm, one ornament takes well under an hour.
Happy crocheting!