

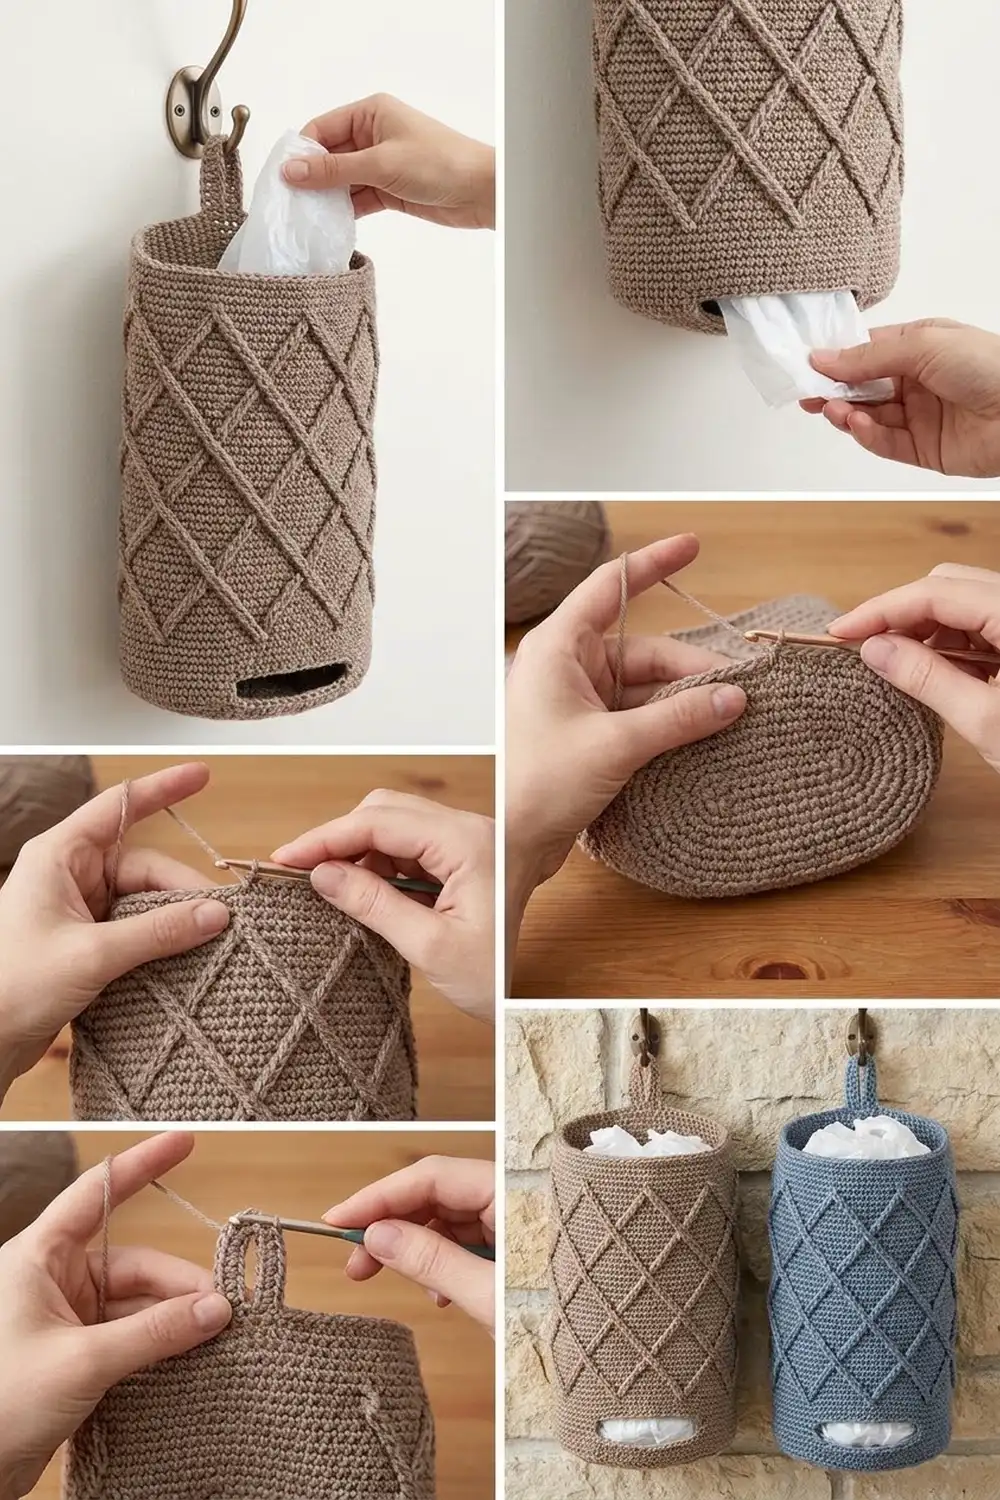
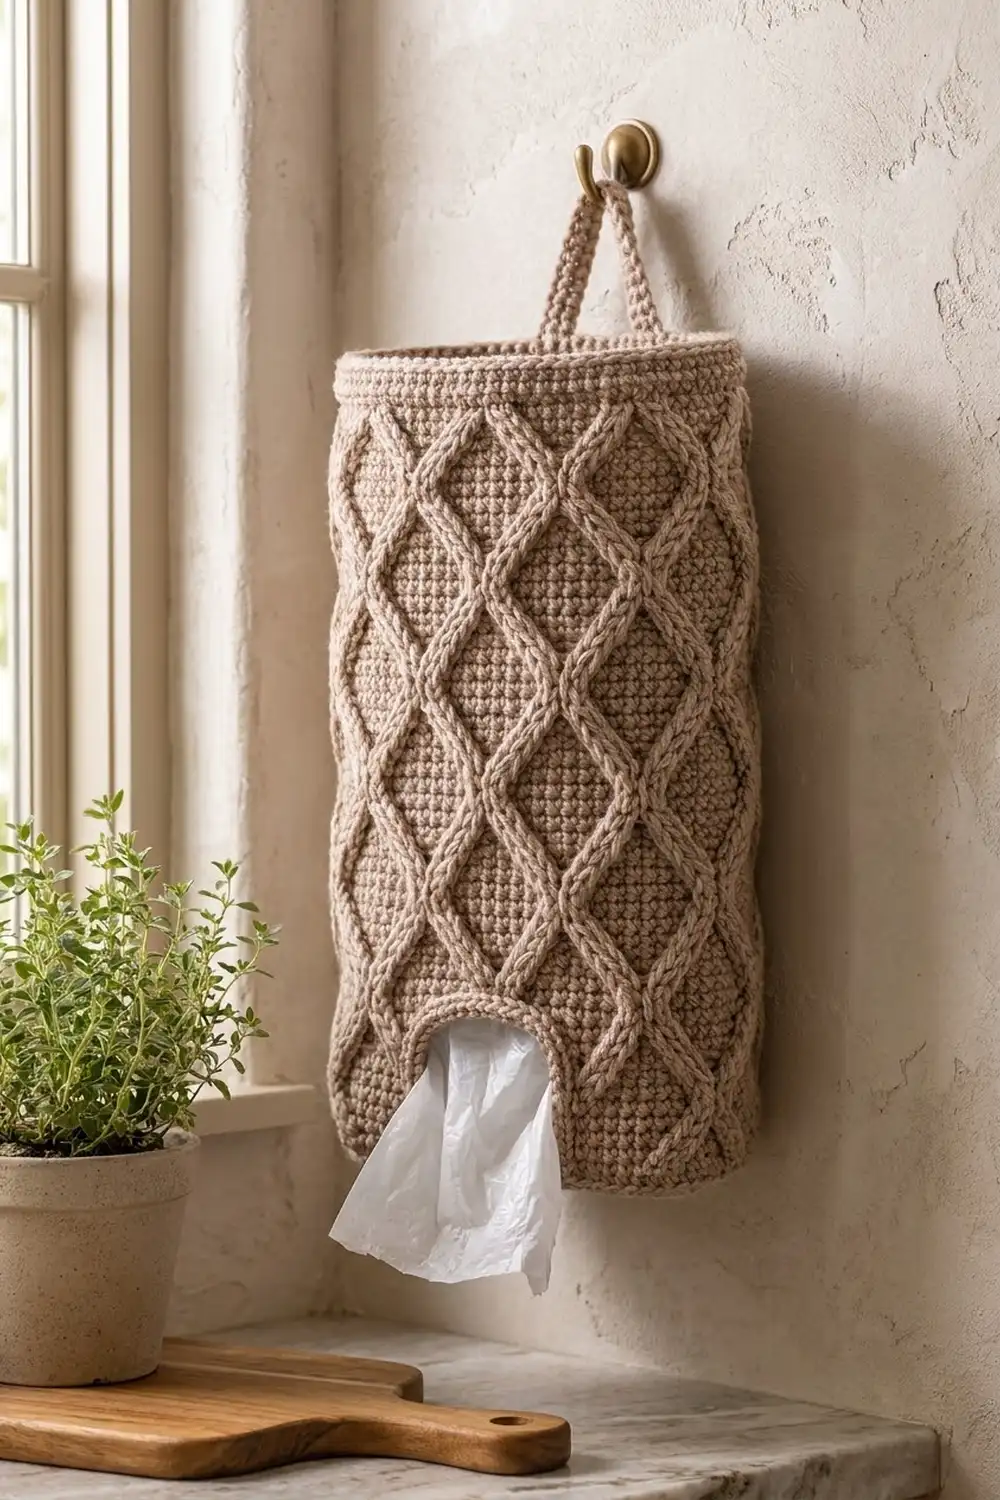
This bag holder is a tall tube with an oval base, covered in a raised diamond lattice. Two-stitch front post lines run diagonally over a firm single crochet background, cross each other, and form neat diamonds up to the rim. A small opening with rounded corners at the bottom front lets you pull out one bag at a time, and a narrow strap at the back holds it on a hook.
The sample is made in warm taupe, a soft mushroom beige that suits stone, wood, and cottage kitchens. Dusty blue or any other solid shade works just as well. Solid colors show the cable texture best.
The pattern uses US crochet terms. The finished holder is about 6.5 in (16.5 cm) wide when flat and 14 in (35.6 cm) tall, not counting the hanging loop. The loop rises about 2.75 in (7.0 cm) above the rim.
It is made in one piece. You work an oval base, turn up the sides, and make a plain band with the opening built in as flat rows. Then come the lattice, a plain rim, the strap, and a short edging around the opening.
Finished Size and Construction
- Finished size: 6.5 in (16.5 cm) wide when flat x 14 in (35.6 cm) tall
- Skill level: Intermediate
- Terminology: US crochet terms
- Yarn weight: Worsted (#4)
- Hook: 4.0 mm (G-6)
- Number of pieces: 1 (the strap is worked directly onto the rim)
- Layout: One oval tube, with the opening centered on the bottom front and the strap centered on the back
- Piece size: 60 sts around, about 13.25 in (33.7 cm) around
- Base: about 5.5 x 2.75 in (14.0 x 7.0 cm)
- Size before border (rim): 12.8 in (32.5 cm) tall
- Border depth: 1.2 in (3.0 cm) rim, plus a 2-round edging around the opening
Materials
Yarn: Use a smooth worsted-weight acrylic, cotton blend, or wool blend with clear stitch definition. Avoid fluffy or variegated yarns, which hide the lattice. A firm yarn helps the holder keep its shape when full.
- Taupe (main color): 250 g, about 450 m
For the blue version, use the same amount of dusty blue.
Tools:
- 4.0 mm (G-6) crochet hook
- 4 locking stitch markers
- Tapestry needle
- Scissors
- Measuring tape
- Rolled towel or small box for blocking
These amounts include a margin of about 15 percent. Front post trebles use much more yarn than single crochet, so keep the margin.
Abbreviations (US Terms)
- ch – chain
- sl st – slip stitch
- sc – single crochet
- sc2tog – single crochet 2 together
- BLO – back loop only
- FPtr – front post treble crochet
- FPX – front post cross (see below)
- st(s) – stitch(es)
- rnd(s) – round(s)
- RS / WS – right side / wrong side
FPtr (front post treble): Yarn over twice. Insert your hook from front to back to front around the post of the stitch named, yarn over and pull up a loop, then [yarn over, pull through 2 loops] 3 times. Every FPtr in this pattern goes around a stitch two rounds below. Always skip the stitch in the current round that sits behind the FPtr.
FPX (front post cross, worked over 4 sts): Two pairs of FP stitches from the previous cable round sit below these 4 sts. Pair 1 is the first pair you reach as you work; Pair 2 is the next pair.
1. Skip the next 2 sts.
2. Work 1 FPtr around each post of Pair 1.
3. Go back to the 2 skipped sts. Working behind the 2 sts you just made, work 1 FPtr around each post of Pair 2.
The two lines now cross.
Gauge and Checkpoints
Gauge: 18 sc and 20 rnds = 4 in (10.2 cm) in sc worked in joined rounds.
Use the base as your test piece. Finish base Rnd 6 and measure it before you go on.
- After base Rnd 6: 60 sts, about 5.5 x 2.75 in (14.0 x 7.0 cm).
- After body Rnd 14: 2.8 in (7.1 cm) tall and 13.25 in (33.7 cm) around.
- After body Rnd 28 (first full diamond): 5.6 in (14.2 cm) tall.
- After body Rnd 64: 12.8 in (32.5 cm) tall.
- After the rim: 14 in (35.6 cm) tall.
If your base is too big, go down 0.5 mm. If it is too small, go up 0.5 mm. Never change the stitch counts, because the lattice depends on exactly 60 sts.
Base
Ch 15.
Rnd 1: Sc in 2nd ch from hook, sc in next 12 ch, 3 sc in last ch. Working along the other side of the chain, sc in next 12 ch, 2 sc in last ch (the same ch as the first sc). Join with a sl st to the first sc. (30 sts)
The base now has two straight sides of 12 sts and two curved ends of 3 sts. Each round adds 6 sts, 3 at each end.
Rnd 2: Ch 1, sc in next 12 sts, 2 sc in each of next 3 sts, sc in next 12 sts, 2 sc in each of next 3 sts. Join. (36 sts)
Rnd 3: Ch 1, sc in next 12 sts, [2 sc in next st, sc in next st] 3 times, sc in next 12 sts, [2 sc in next st, sc in next st] 3 times. Join. (42 sts)
Rnd 4: Ch 1, sc in next 12 sts, [2 sc in next st, sc in next 2 sts] 3 times, sc in next 12 sts, [2 sc in next st, sc in next 2 sts] 3 times. Join. (48 sts)
Rnd 5: Ch 1, sc in next 12 sts, [2 sc in next st, sc in next 3 sts] 3 times, sc in next 12 sts, [2 sc in next st, sc in next 3 sts] 3 times. Join. (54 sts)
Rnd 6: Ch 1, sc in next 12 sts, [2 sc in next st, sc in next 4 sts] 3 times, sc in next 12 sts, [2 sc in next st, sc in next 4 sts] 3 times. Join. (60 sts)
Checkpoint: about 5.5 x 2.75 in (14.0 x 7.0 cm).
Body: Lower Band and Opening
Rnd 1: Ch 1, sc in BLO of each st around. Join. (60 sts) This turns the sides up.
Rnds 2–3: Ch 1, sc in each st around. Join. (60 sts) Fasten off at the end of Rnd 3.
Flatten the cup so the long sides become the front and back. Mark the 14 center sts on the front. Leave these unworked; they form the bottom edge of the opening.
Row 4 (RS): Join yarn in the first st after the marked group. Ch 1, sc in the same st and in the next 45 sts. Turn. (46 sts)
Rows 5–12: Ch 1, sc in each st across. Turn at the end of every row except Row 12. (46 sts)
That makes 9 rows, so Row 12 is a RS row and ends next to the gap.
Rnd 13: Ch 14, then sl st to the first sc of Row 12 to close the ring. Ch 1, sc in each of the 46 sc, then sc in each of the 14 ch. Join. (46 + 14 = 60 sts)
Rnd 14: Ch 1, sc in each st around. Join. (60 sts)
Checkpoint: The opening is 14 sts wide, about 3.1 in (7.9 cm), and 9 rows tall, about 1.8 in (4.6 cm). The band is 2.8 in (7.1 cm) tall.
From here on, st 1 is the first st after the opening, and the opening sits below sts 47–60.
Body: Diamond Lattice
Every cable round is followed by a plain sc round. In each cable round, work every FPtr around the FP stitch from the previous cable round that sits diagonally below it, one stitch over. This makes each line lean one stitch per cable round. Every round has 60 sts: 6 repeats of 10 sts.
Rnd 15 (set-up): Ch 1, sc in first st, [FPtr around each of next 4 sts of Rnd 13, sc in next 6 sts] 5 times, FPtr around each of next 4 sts of Rnd 13, sc in last 5 sts. Join. (1 + 50 + 4 + 5 = 60 sts)
This places the V points over sts 2–5, 12–15, and so on. The last V point sits over sts 52–55, centered above the opening.
Rnd 16 and every even rnd through Rnd 64: Ch 1, sc in each st around, including the tops of the FPtr. Join. (60 sts)
Rnd 17: Ch 1, [FPtr 2, sc in next 2 sts, FPtr 2, sc in next 4 sts] 6 times. Join. (60 sts)
Rnd 19: Ch 1, FPtr 1, sc in next 4 sts, FPtr 2, sc in next 2 sts, [FPtr 2, sc in next 4 sts, FPtr 2, sc in next 2 sts] 5 times, FPtr 1. Join. (1 + 4 + 2 + 2 + 50 + 1 = 60 sts)
The single FPtr at the start of the round and the single FPtr at the end form one line across the join.
Rnd 21 (side cross): Ch 1, [sc in next 6 sts, FPX] 6 times. Join. (60 sts)
Rnd 23: Work as Rnd 19. The lines now move back toward each other. (60 sts)
Rnd 25: Work as Rnd 17. (60 sts)
Rnd 27 (center cross): Ch 1, [sc in next st, FPX, sc in next 5 sts] 6 times. Join. (60 sts)
Rnd 28: Work a plain sc round. (60 sts)
Rnds 29–64: Work Rnds 17–28 three more times, for 4 lattice repeats in total.
Checkpoint: 12.8 in (32.5 cm) tall. Each diamond is about 2.2 in (5.6 cm) wide and 2.4 in (6.1 cm) tall.
Border: Rim, Strap, and Opening Edging
Border gauge: Same as the body: 18 sc and 20 rnds = 4 in (10.2 cm).
Rim, Rnds 65–70: Ch 1, sc in each st around. Join. (60 sts: 30 on the front and 30 on the back when flat) Fasten off.
Strap, Row 1: The center of the back sits opposite the opening, between sts 23 and 24. With RS facing, join yarn in st 16 of Rnd 70. Ch 1, sc in the same st and in the next 3 sts. Turn. (4 sts)
Rows 2–36: Ch 1, sc in each st across. Turn. (4 sts)
The strap is 0.9 in (2.3 cm) wide and 7.2 in (18.3 cm) long. Leave a 12 in (30.5 cm) tail. Make sure the strap isn’t twisted, then sew the last row over sts 28–31 of Rnd 70, across the top and 0.5 in (1.3 cm) down the inside of the rim. This leaves 8 sts, or 1.8 in (4.6 cm), between the strap ends, and the loop arches about 2.75 in (7.0 cm) high.
Opening Edging, Rnd 1: Join yarn in the first unworked st of Rnd 3 at the bottom of the opening. Ch 1, then work:
– 14 sc across the bottom
– 9 sc up the side, 1 in each row end
– 14 sc in the free loops of the 14 chains at the top
– 9 sc down the other side
Join. (14 + 9 + 14 + 9 = 46 sts)
Opening Edging, Rnd 2: Ch 1, then work:
– 1 sc in each of the 14 bottom sts
– 1 sc in each of the next 8 side sts
– sc2tog over the last side st and the first top st
– 1 sc in each of the next 12 top sts
– sc2tog over the last top st and the first side st
– 1 sc in each of the last 8 side sts
Join and fasten off. (14 + 8 + 1 + 12 + 1 + 8 = 44 sts)
Why the math works: The rim keeps all 60 sts, so it matches the body width without flaring. Sc stitches are close to square at this gauge (4.5 sts and 5 rows per inch), so 9 sc lie flat along the 1.8 in (4.6 cm) sides of the opening. The two sc2tog stitches round the top corners into an arch, while the bottom corners stay square.
Final Blocking
- Weave in all ends on the inside, through sc stitches only.
- Fill the holder firmly with a rolled towel or a box about 6 x 2.75 in (15.2 x 7.0 cm) so it takes its oval shape.
- Mist it lightly with water, or hold a steam iron 1 in (2.5 cm) above it. Never press the cables.
- Pat the diamonds even, straighten the rim, and ease the opening into a clean arch.
- Check the size: 6.5 in (16.5 cm) wide when flat and 14 in (35.6 cm) tall.
- Let it dry completely before you remove the filling.
Final Quality-Control Checklist
- Every round has 60 sts.
- The base measures about 5.5 x 2.75 in (14.0 x 7.0 cm).
- The opening is centered on the front, with a V point directly above it.
- Every cross has Pair 2 behind Pair 1.
- The holder is 14 in (35.6 cm) tall and 6.5 in (16.5 cm) wide when flat.
- The strap is centered on the back, untwisted, and firmly sewn.
- The opening edging has 44 sts and rounded upper corners.
Troubleshooting
Wobbly lines: Work each FPtr around the post diagonally below it, not the one straight below.
Holes beside the cables: Skip the st behind every FPtr, and keep the background sc snug.
Tube pulls in: Work the FPtr more loosely, or go up 0.5 mm for the cable rounds only.
Opening gapes: Pull the 14 ch of Rnd 13 snug, and work exactly 9 sc along each side of the opening.
Strap stretches: Work a row of sl st along each long edge to firm it up.
Count off by 2: Make sure each FPX covers exactly 4 sts, with no extra sc.
Care
Hand wash in cool water, roll in a towel to press out the water, and dry flat with the holder filled to keep its shape. Do not tumble dry.
Final Notes
Here is how the measurements build up:
– The 60-st base measures 5.5 x 2.75 in (14.0 x 7.0 cm).
– The 14-round band, with its 3.1 in (7.9 cm) opening, is 2.8 in (7.1 cm) tall.
– Four lattice repeats plus the set-up rounds bring the body to 12.8 in (32.5 cm).
– The 1.2 in (3.0 cm) rim brings the holder to its finished 14 in (35.6 cm).
Check your gauge at the base and keep 60 sts in every round, and the diamonds will meet cleanly all the way around.
Happy crocheting!