

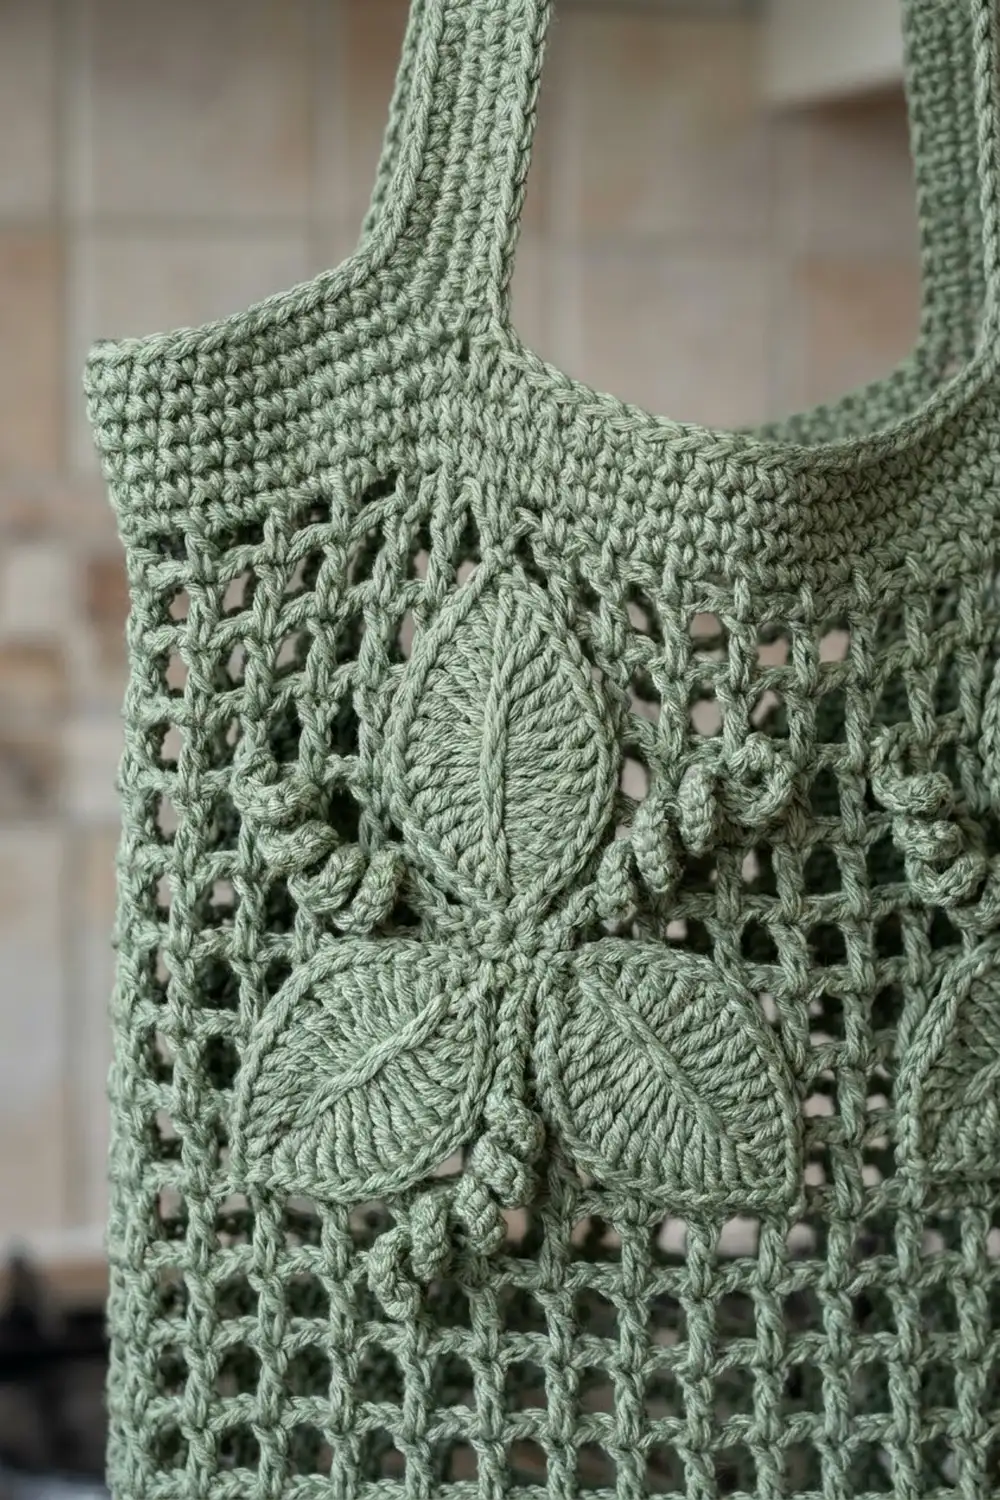
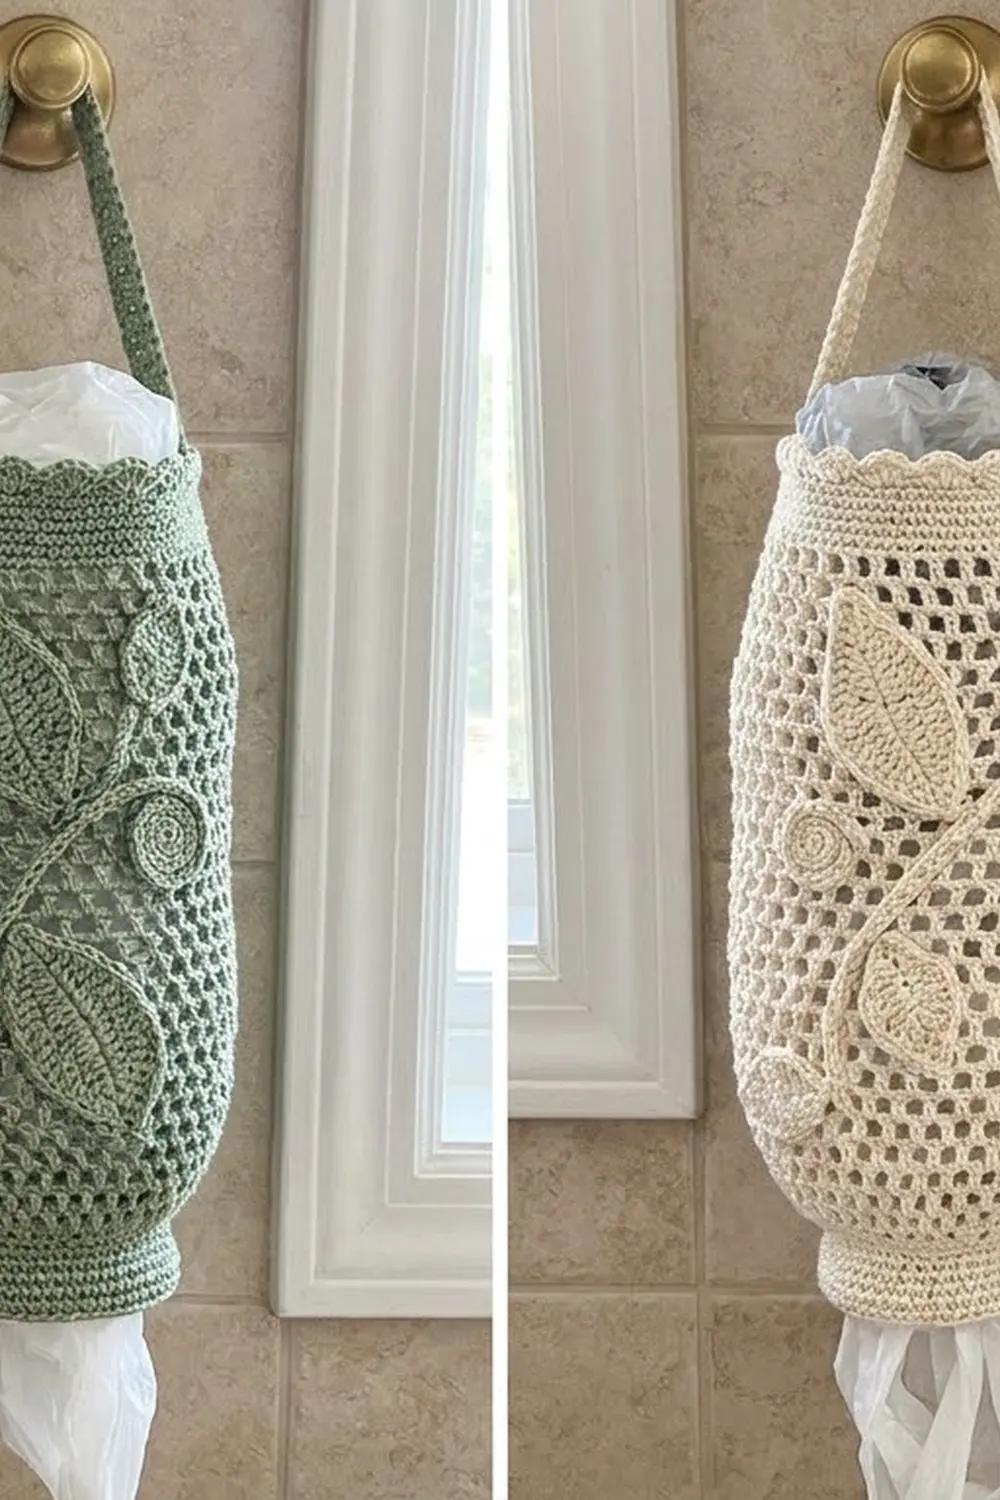
This hanging bag holder pairs an open, airy mesh body with a raised leaf-and-vine appliqué on the front. Made in soft cream cotton, it looks like heirloom Irish lace but does an everyday job in the kitchen. You stuff grocery bags in through the top and pull them out one at a time through the round opening at the bottom.
The body is one seamless tube. A solid single crochet band at the top leads into a chain-loop mesh, which tapers down to a firm, rolled rim around the dispensing hole. A small shell scallop edges the top, and a narrow strap lets the holder hang from a wall hook. Three large leaves, four small leaves, a curving vine, and four coiled tendrils are made separately and sewn onto the front. The same pattern works in any solid color; sage green is a lovely alternative.
The pattern uses US crochet terms. The finished holder is 18 in (45.7 cm) long, not counting the strap, and 8 in (20.3 cm) wide when laid flat. The strap adds a hanging loop of 6.9 in (17.5 cm).
You’ll work the top band, the mesh body, the decrease rounds, and the bottom rim in one continuous piece. Then you’ll add the scalloped border and the strap, make and sew on the appliqués, and block the holder over a rolled towel.
Finished Size and Construction
- Finished size: 18 in (45.7 cm) long × 8 in (20.3 cm) flat width; circumference 16 in (40.6 cm)
- Skill level: Intermediate
- Terminology: US crochet terms
- Yarn weight: DK / light worsted (#3) cotton
- Hook: 3.5 mm (E-4)
- Number of pieces: 1 body (worked in one piece), 1 strap, 12 appliqués (3 large leaves, 4 small leaves, 1 vine, 4 tendrils)
- Layout: single hanging tube; appliqué cluster centered on the front half
- Body length before border: 17.4 in (44.2 cm)
- Border depth: 0.6 in (1.5 cm)
- Bottom opening: 8 in (20.3 cm) around, about 2.5 in (6.4 cm) across
Materials
Yarn: Use a smooth, mercerized or combed DK cotton. Cotton holds the leaf shapes crisply, doesn’t stretch out under the weight of the bags, and shows off the raised veins. Avoid fuzzy or very splitty yarns, because the mesh and appliqué edges will lose definition.
- Cream (main color): 150 g, about 345 m (three 50 g / 115 m balls)
- Body: about 85 g
- Border and strap: about 15 g
- Appliqués: about 25 g
For the sage green version, buy the same amount in green.
The quantities include a margin of about 20% for your gauge swatch, sewing tails, and small differences in tension.
Tools:
- 3.5 mm (E-4) crochet hook
- Tapestry needle
- 4 locking stitch markers
- Rustproof pins
- Tape measure
- A piece of cardboard about 7 × 14 in (17.8 × 35.6 cm) to slide inside while you sew
- A rolled towel and a spray bottle for blocking
Abbreviations (US Terms)
- ch – chain
- sl st – slip stitch
- sc – single crochet
- hdc – half double crochet
- dc – double crochet
- tr – treble crochet
- rev sc – reverse single crochet (crab stitch)
- BLO – back loop only
- st(s) – stitch(es)
- sp – space
- rnd(s) – round(s)
Special stitch – loop-dec (single crochet two loops together): Insert your hook into the next ch-4 loop, yarn over, and pull up a loop. Insert into the following ch-4 loop, yarn over, and pull up a loop. Yarn over and pull through all 3 loops on the hook. This uses 2 mesh loops but anchors only 1 new loop, which reduces the round by 1 loop.
Gauge and Checkpoints
Single crochet gauge: 18 sc and 20 rnds = 4 in (10.2 cm).
Mesh gauge: 6 ch-4 loops and 6 rnds = 4 in (10.2 cm).
Test first. Before starting the body, make one large leaf (below) plus a small sc swatch 20 sts wide and 10 rows tall. The swatch should measure 4.4 in (11.2 cm) wide and 2 in (5.1 cm) tall. The leaf should be about 3.5 in (8.9 cm) long. If both match, your body will match too.
Checkpoints:
- After Rnd 3: circumference 16 in (40.6 cm), band height 0.6 in (1.5 cm)
- After Rnd 12: total length 6.6 in (16.8 cm)
- After Rnd 24: total length 14.6 in (37.1 cm)
- After Rnd 27: total length 16.6 in (42.2 cm)
- After Rnd 31: total length 17.4 in (44.2 cm)
If your work is too big, go down to a 3.25 mm hook. If it’s too small, go up to a 3.75 mm hook. Check the band circumference first, because it sets the width of everything below it. Mesh length is easy to adjust: add or remove plain mesh rounds between Rnds 5 and 24, and allow 0.67 in (1.7 cm) per round.
Body
The body is worked top-down in joined rounds, with the right side facing you throughout. Don’t turn.
Foundation: Ch 72 and join with a sl st to the first ch to form a ring, taking care not to twist the chain. This join marks the left side fold. Count 36 sts from the join and place a marker in st 37 for the right side fold. Sts 1–36 are the front.
Rnd 1: Ch 1, sc in each ch around, then join with a sl st to the first sc. (72 sc)
Rnds 2–3: Ch 1, sc in each st around, then join. (72 sc)
Checkpoint: circumference 16 in (40.6 cm), height 0.6 in (1.5 cm).
Rnd 4 (conversion to mesh): Ch 1, sc in the first st. Ch 4, skip 2 sts, sc in the next st. Repeat from * 22 more times. Ch 4, skip the last 2 sts, and join with a sl st to the first sc.
Count: 24 sc anchors × 3 sts each = 72 sts used, which makes 24 ch-4 loops.
Rnd 5: Sl st into the first ch-4 loop twice to reach its center. Ch 1, sc in the same loop. Ch 4, sc in the next loop. Repeat from * 22 more times. Ch 4 and join to the first sc. (24 loops)
Rnds 6–24: Repeat Rnd 5. (24 loops in each round)
That gives 21 mesh rounds (Rnds 4–24) measuring 14 in (35.6 cm). Checkpoint after Rnd 24: 14.6 in (37.1 cm) total.
Rnd 25 (decrease): Sl st twice to reach the center of the first loop and ch 1. [Sc in the next loop, ch 4] 4 times, loop-dec over the next 2 loops, ch 4. Repeat from * 3 more times, then join.
Count: 4 repeats × 6 loops used = 24 loops worked, making 4 × 5 = 20 loops.
Rnd 26 (decrease): Sl st to the center of the first loop and ch 1. [Sc in the next loop, ch 4] 3 times, loop-dec over the next 2 loops, ch 4. Repeat from * 3 more times, then join.
Count: 4 × 5 = 20 loops worked, making 16 loops.
Rnd 27 (decrease): Sl st to the center of the first loop and ch 1. [Sc in the next loop, ch 4] twice, loop-dec over the next 2 loops, ch 4. Repeat from * 3 more times, then join.
Count: 4 × 4 = 16 loops worked, making 12 loops.
Checkpoint: 16.6 in (42.2 cm) total.
Rnd 28 (conversion to solid rim): Sl st into the first loop and ch 1. Work 3 sc in each ch-4 loop around, then join.
Count: 12 loops × 3 sc = 36 sc.
Rnds 29–30: Ch 1, sc in each st around, then join. (36 sc)
Rnd 31: Ch 1 and rev sc in each st around, working from left to right. Join. (36 rev sc)
The crab stitch rolls outward and forms the thick, corded rim around the dispensing hole. Fasten off and weave in the end.
Checkpoint: 17.4 in (44.2 cm) long. The opening is 8 in (20.3 cm) around and about 2.5 in (6.4 cm) across.
Strap
Ch 6.
Row 1: Sc in the 2nd ch from the hook and in each ch across, then turn. (5 sc)
Rows 2–18: Ch 3 (counts as dc), dc in each of the next 4 sts, then turn. (5 dc)
Row 19: Ch 1, sc in each st across. (5 sc)
Fasten off and leave a 12 in (30.5 cm) tail.
The strap is 1.1 in (2.8 cm) wide and 8.9 in (22.6 cm) long. The dc rows give it the open, ladder-like look shown in the photo. Sew it on after the border (see below).
Appliqués
Leave an 8 in (20.3 cm) sewing tail on every appliqué piece.
Large Leaf (make 3)
Ch 14. Number the 13 working chs #1–#13, with #1 being the 2nd ch from the hook.
Rnd 1:
– Sc in #1, hdc in #2–#3, dc in #4–#6, tr in #7–#9, dc in #10–#11, hdc in #12.
– Work 3 sc in #13 (the stem end).
– Rotate and work along the opposite side of the foundation: hdc in #12, dc in #11–#10, tr in #9–#7, dc in #6–#4, hdc in #3–#2.
– Work (sc, ch 2, sc) in #1 (the tip). Join with a sl st to the first sc.
Count: 12 + 3 + 11 + 2 = 28 sts plus a ch-2 tip.
Rnd 2: Ch 1. Working in the BLO, sc in each of the 12 sts along the first side. In the 3 stem sts, work sc, 2 sc in the center st, sc. Sc in each of the 11 sts along the second side, then sc in the next sc. Work (sc, ch 3, sc) in the ch-2 tip and sc in the last sc. Join.
Count: 12 + 4 + 11 + 1 + 2 + 1 = 31 sc plus a ch-3 point.
Working in the BLO leaves a raised ridge around the edge of the leaf.
Veins: Draw up a loop at the stem end and surface sl st along the center foundation chain to the tip, which makes a raised midrib. Then work 3 short surface sl st veins on each side, angled from the midrib toward the edge, each about 0.75 in (1.9 cm) long. At the stem end, ch 5 and sl st back along the chain to make a short stalk.
Each large leaf measures about 3.5 in (8.9 cm) × 2.25 in (5.7 cm).
Small Leaf (make 4)
Ch 9. Number the working chs #1–#8.
Rnd 1:
– Sc in #1, hdc in #2, dc in #3–#5, hdc in #6–#7.
– Work 3 sc in #8.
– Working on the opposite side: hdc in #7–#6, dc in #5–#3, hdc in #2.
– Work (sc, ch 2, sc) in #1. Join.
Count: 7 + 3 + 6 + 2 = 18 sts plus a ch-2 tip.
Surface sl st a center vein from the stem to the tip. Each small leaf is about 2 in (5.1 cm) × 1.25 in (3.2 cm).
Vine (make 1)
Ch 61. Sc in the 2nd ch from the hook and in each ch across. (60 sc)
This makes a firm cord about 13.3 in (33.8 cm) long.
Tendril (make 4)
Ch 21. Sc in the 2nd ch from the hook and in each ch across. (20 sc)
Each tendril is about 4.5 in (11.4 cm) long. Roll one end into a tight flat spiral of about 1.5 turns and tack the coil with the tail, leaving the rest straight.
Border
The top border is worked into the free loops on the underside of the foundation chain, with the body turned upside down. It uses the same single crochet gauge: 18 sts = 4 in (10.2 cm).
Border Rnd 1: Join the yarn at the left side fold. Ch 1 and sc in each free loop around, then join. (72 sc: 36 on the front, 36 on the back)
Border Rnd 2: Ch 1. Sc in the next st, skip 2 sts, 5 dc in the next st, skip 2 sts. Repeat from * 11 more times. Join to the first sc.
Count: 12 repeats × 6 sts = 72 sts used, which makes 12 scallops (6 across the front, 6 across the back).
Why the math works: Each shell repeat uses exactly 6 stitches, and 72 ÷ 6 = 12 with nothing left over. Since 36 is also divisible by 6, both the front and the back hold exactly 6 whole scallops, and a sc lands at each side fold. Each scallop is 1.33 in (3.4 cm) wide, and the border is 0.6 in (1.5 cm) deep. With the border added, the 17.4 in (44.2 cm) body becomes 18 in (45.7 cm) long.
Attach the strap: Line up one end of the strap with the left side fold and the other end with the marker at the right side fold. Each end should overlap 1 in (2.5 cm) inside the top band. Whipstitch all 4 edges of each overlap securely. The free loop measures 8.9 − 2 = 6.9 in (17.5 cm).
Sewing On the Appliqués
- Slide the cardboard inside the body so your needle can’t catch the back layer.
- Pin the vine in a loose S-curve up the center front. Start 2.5 in (6.4 cm) above the bottom rim and finish 1.5 in (3.8 cm) below the top band, curving toward the upper left.
- Tuck the stalks of the 3 large leaves under the vine: one at the lower right, one in the middle on the left, and one at the upper right. Place the 4 small leaves in the gaps between them.
- Tuck the straight ends of the tendrils under the vine so the coiled ends sit in the open spaces.
- Whipstitch every piece around its outer edge, catching the mesh bars beneath it. Keep the stitches small and snug but not puckering.
Final Blocking
- Weave in all the ends. Then roll a towel firmly into a cylinder about 5 in (12.7 cm) across.
- Mist the holder until it’s damp but not soaked.
- Slide the holder over the towel roll and smooth the mesh so the loops open evenly.
- Pull the top band gently until the holder measures 8 in (20.3 cm) wide when flattened.
- Pinch each leaf into shape, push the veins up from underneath, and open out the scallops.
- Check that the length is 18 in (45.7 cm), then let it dry completely, lying horizontally.
Final Quality-Control Checklist
- [ ] Band is 72 sts; circumference 16 in (40.6 cm)
- [ ] Mesh holds 24 loops in every round from Rnd 4 to Rnd 24
- [ ] Decrease rounds count 20, 16, and 12 loops
- [ ] Bottom rim is 36 sts, and the opening is about 2.5 in (6.4 cm) across
- [ ] Border has 12 even scallops, 6 on the front and 6 on the back
- [ ] Strap ends are centered on the side folds and firmly sewn
- [ ] All 12 appliqués are secured, with no stitches through the back layer
- [ ] Finished length is 18 in (45.7 cm)
Troubleshooting
Mesh spirals or slants: Always join to the first sc of the round and start each new round from the center of a loop. Recount the loops every few rounds.
Band ruffles or pulls in: Check your sc gauge. A tight foundation chain is the usual cause, so chain with a hook one size larger.
Leaf curls up: Your tension in the tr section is too tight. Block the leaf flat on its own before sewing it on.
Bottom opening is too loose: Work Rnd 29 with a 3.25 mm hook, or thread a round of elastic cord through Rnd 30.
Bags fall straight out: The opening is too large. Work Rnd 28 with 2 sc per loop (24 sts), then continue with 24 sts for Rnds 29–31.
Appliqués show sewing stitches: Use the tail from each piece, and catch only the BLO ridge on the edge.
Care
Hand wash in cool water with a mild detergent and gently press out the water. Reshape the holder over a towel roll and let it dry flat. Don’t put it in the dryer.
Final Notes
Everything starts with the 72-stitch band. At 18 sc per 4 in, it measures 16 in (40.6 cm) around. That band turns into 24 even mesh loops for 14 in (35.6 cm). Three decrease rounds take it down to 12 loops, and 12 loops × 3 sc gives the 36-stitch rim, so the body measures 17.4 in (44.2 cm). The 0.6 in (1.5 cm) scallop border brings the finished length to 18 in (45.7 cm). If you check each of those numbers as you reach it, your holder will hang neatly and dispense bags smoothly.
Happy crocheting!