
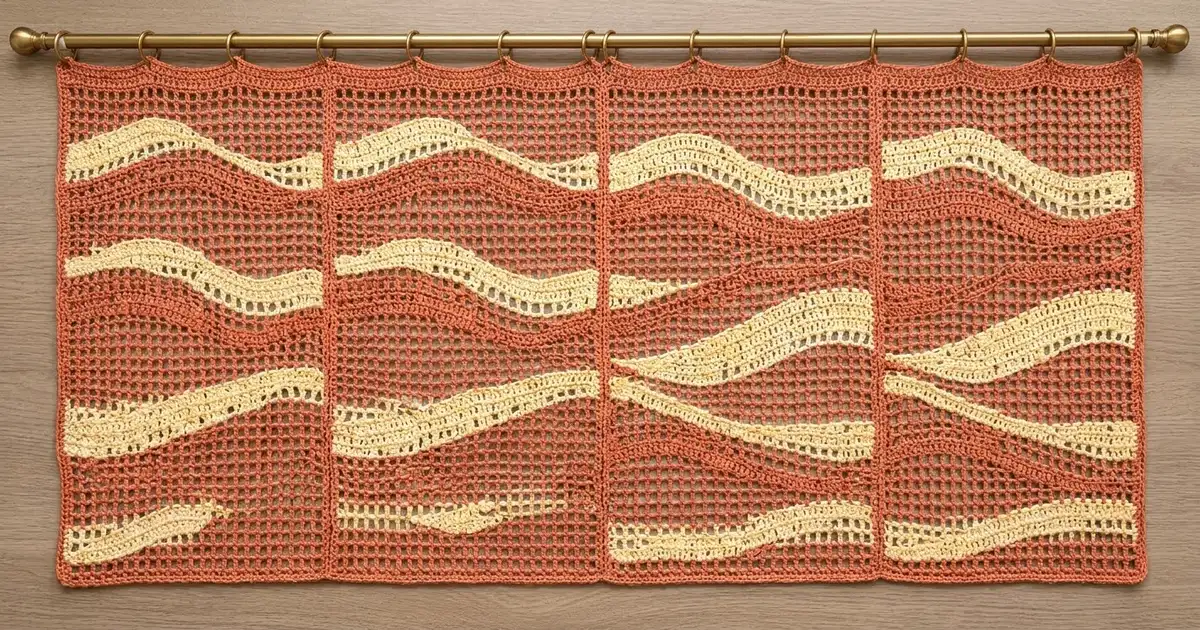
Terracotta Tide is an airy filet-mesh curtain panel with soft cream waves running across a warm terracotta grid. Light comes through every open square, and the waves give the panel a relaxed, coastal look.
The panel uses two colors: terracotta for the mesh and cream for the waves. The cream bands keep an even depth while their edges rise and fall. You get that curve by changing stitch heights within a single row, not by cutting or shaping the outside edges, so the sides stay straight.
This pattern uses US crochet terms. One finished panel measures 31 x 73 in (78.7 x 185.4 cm) including the border. For a pair like the one in the photo, make two panels.
You make five identical vertical strips, join them with slip-stitch seams, and finish with a two-round single crochet border. Clip rings attach to the top edge.
Finished Size and Construction
- Finished panel size: 31 x 73 in (78.7 x 185.4 cm)
- Skill level: Intermediate
- Terminology: US
- Yarn weight: Worsted (#4) cotton
- Hook: 4.5 mm (US 7)
- Number of pieces: 5 strips per panel
- Layout: 5 strips side by side (5 across x 1 down)
- Strip size: 6 x 72 in (15.2 x 182.9 cm)
- Size before border: 30 x 72 in (76.2 x 182.9 cm)
- Border depth: 0.5 in (1.3 cm) on each edge
Materials
Use a smooth, mercerized or matte worsted cotton of about 1.55 m per gram, which is roughly 110 m per 70 g ball. Cotton holds the mesh crisp and does not stretch much when it hangs.
Yarn (one panel):
– Terracotta: 750 g / 1,160 m (1,269 yd)
– Cream: 110 g / 170 m (186 yd)
These quantities include a margin of about 10% for swatching, tails, and differences in tension. Double them for a pair.
Tools:
– 4.5 mm (US 7) crochet hook
– Tapestry needle
– Stitch markers
– Measuring tape
– Rust-proof pins and a large blocking surface
– 10 to 12 curtain clip rings
Abbreviations (US Terms)
- ch – chain
- sl st – slip stitch
- sc – single crochet
- hdc – half double crochet
- dc – double crochet
- tr – treble crochet (yo twice)
- sk – skip
- sp – space
- yo – yarn over
- RS / WS – right side / wrong side
Special stitch: mesh. One mesh is one post plus one ch-1 sp. A post is any stitch (sc, hdc, dc, or tr) worked into the post below it. Ch-1 spaces are always skipped.
Gauge and Checkpoints
Gauge: 10 mesh and 9 rows = 4 x 4 in (10.2 x 10.2 cm) in plain dc mesh. One mesh is 0.4 in (1.0 cm) wide.
Treat your first strip as the test piece and measure it at each checkpoint before starting the others.
- After Row 1: the strip is 6 in (15.2 cm) wide.
- After Row 18 (one repeat): the strip is 8 in (20.3 cm) long.
- After all 162 rows: the strip is 72 in (182.9 cm) long, measured lying flat without stretching.
If the strip is too big, go down 0.5 mm in hook size. If it is too small, go up 0.5 mm. Small differences in length add up over 9 repeats, so fix gauge at the first checkpoint rather than later.
Strip Pattern (Make 5)
Odd rows are RS rows. Every row has 16 posts and 15 ch-1 spaces, which is 31 stitches and 15 mesh.
Plain mesh row: Ch 4 (counts as dc, ch 1), sk ch-sp, dc in next dc. Ch 1, sk ch-sp, dc in next dc; repeat from * 13 times in total. Ch 1, dc in 3rd ch of turning ch. Turn. (16 dc, 15 ch-1 sp)
Foundation
With terracotta, ch 34.
Row 1 (RS): Dc in 6th ch from hook (the skipped chs count as dc and ch-1 sp). Ch 1, sk next ch, dc in next ch; repeat from * across. Turn. (16 dc, 15 ch-1 sp = 31 sts)
Chain math: the first dc uses 6 chs and the 14 repeats use 2 chs each, so 6 + 28 = 34.
Rows 2–7: Work 6 plain mesh rows. On Row 2 only, work the last dc into the 4th ch of the beginning 5 skipped chs.
Wave Shaping Row
Row 8 (WS, terracotta): Ch 4 (counts as dc, ch 1; this is post 1), dc in next dc (post 2). [Ch 1, tr in next dc] 4 times (posts 3–6). Ch 1, dc in next dc (post 7). Ch 1, hdc in next dc (post 8). [Ch 1, sc in next dc] 4 times (posts 9–12). Ch 1, hdc in next dc (post 13). [Ch 1, dc in next dc] twice (posts 14–15). Ch 1, dc in 3rd ch of turning ch (post 16).
On the final yo of the last dc, pull through with cream. Leave terracotta hanging at this edge. Turn.
Post count: 1 + 1 + 4 + 1 + 1 + 4 + 1 + 2 + 1 = 16 posts, 15 ch-1 sp.
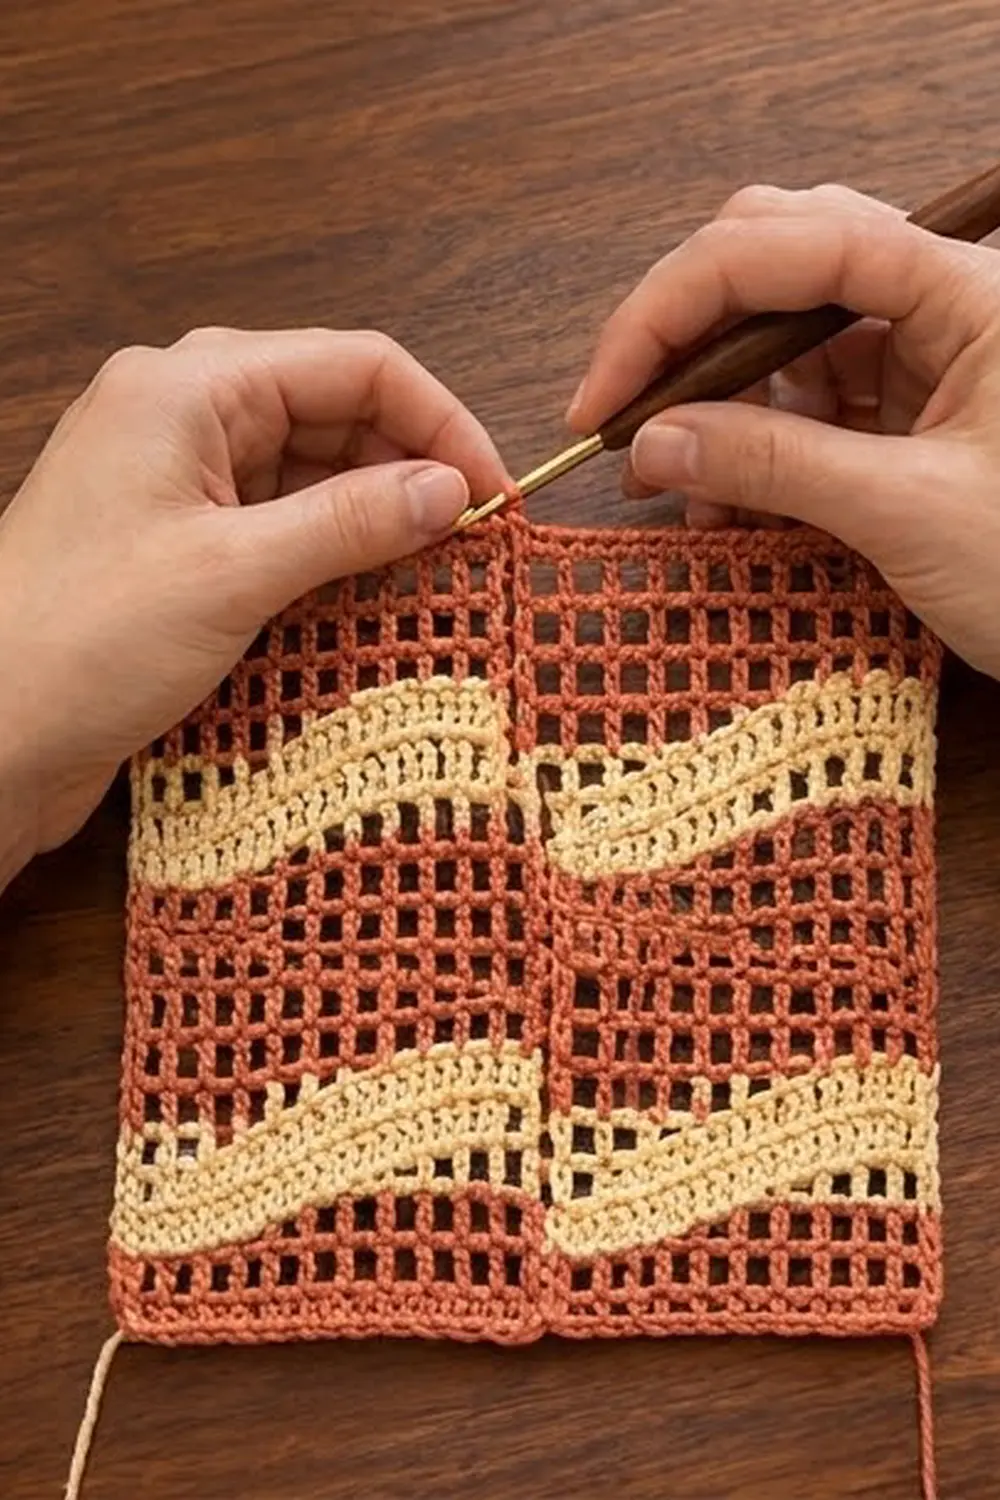
The tr posts make a crest and the sc posts make a trough, while both edge posts stay dc height. This means the side edges stay straight and the wave lines up with the next strip at the seam.
Cream Wave Band
Rows 9–10 (cream): Work 2 plain mesh rows. These rows simply follow the wavy top of Row 8.
At the end of Row 10, pull the last loop through with terracotta, which is waiting at this edge. Cut cream, leaving a 6 in (15.2 cm) tail. Turn. (16 dc, 15 ch-1 sp)
Flattening Row
Row 11 (RS, terracotta): Ch 4 (counts as dc, ch 1), dc in next dc. Ch 1, dc in next dc. Ch 1, hdc in next dc. [Ch 1, tr in next dc] 4 times. Ch 1, hdc in next dc. Ch 1, dc in next dc. [Ch 1, sc in next dc] 4 times. Ch 1, dc in next dc. Ch 1, dc in 3rd ch of turning ch. Turn.
Post count: 1 + 1 + 1 + 1 + 4 + 1 + 1 + 4 + 1 + 1 = 16 posts, 15 ch-1 sp.
Row 11 is worked in the opposite direction from Row 8, so its tr posts land over Row 8’s sc posts and its sc posts land over Row 8’s tr posts. Each column ends up with one short and one tall post, which flattens the top edge again.
Rows 12–18: Work 7 plain mesh rows.
Checkpoint: the strip measures 8 in (20.3 cm) from the foundation.
Remaining Repeats
Rows 19–162: Work the 18-row repeat 8 more times. In each repeat, Rows 1–7 are plain terracotta mesh (Row 1 is now a plain row, not the foundation), Row 8 is the wave row, Rows 9–10 are cream, Row 11 is the flattening row, and Rows 12–18 are plain.
That gives 9 cream bands in total. Fasten off after Row 162.
Checkpoint: 6 x 72 in (15.2 x 182.9 cm), with 162 row ends on each side.
Make All Pieces
Make 5 identical strips per panel. Each strip uses about 140 g terracotta and 22 g cream. The remaining 50 g of terracotta covers the seams and border.
Lay the strips out like this, all with the RS facing up and the foundation chains at the bottom:
[ S1 ][ S2 ][ S3 ][ S4 ][ S5 ]
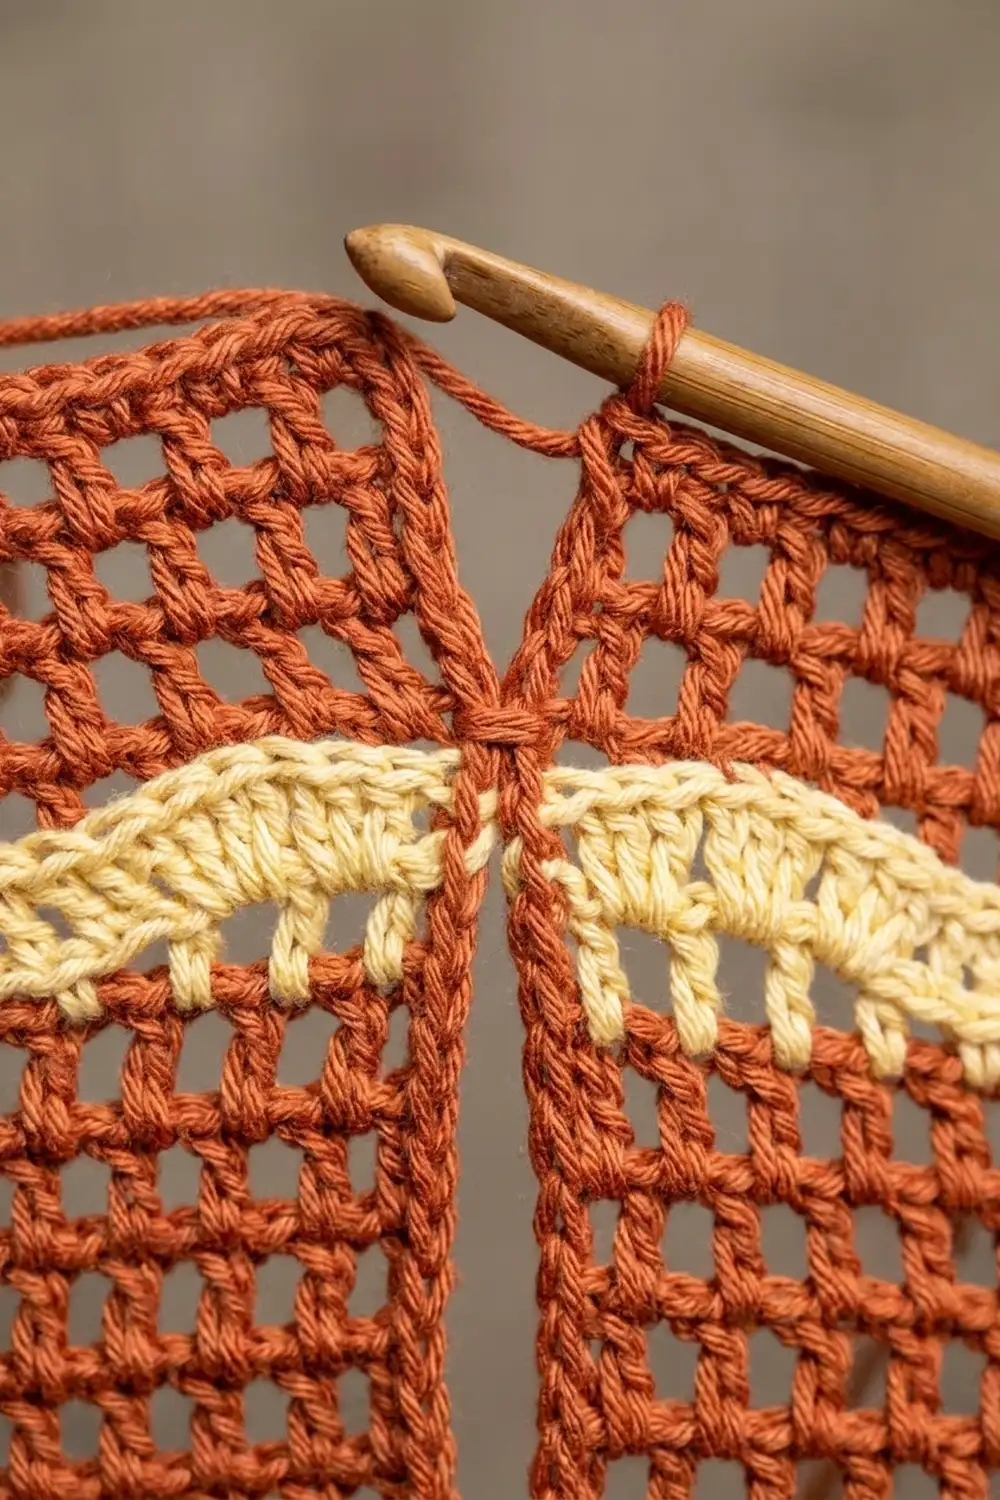
Every strip starts its wave rows at the same edge, so post 16 of one strip sits next to post 1 of the next. Both are dc posts, so the waves continue smoothly across each seam.
Joining
Method: sl st seam on the WS.
Place two neighboring strips RS together, matching the foundation corners. With terracotta, join at the bottom corner. Insert the hook under the end post of both strips and work 2 sl st around each row-end post pair, 1 at the lower half and 1 at the upper half. That gives 2 sl st per row and 324 sl st per seam.
Match rows one to one, and check that the cream bands meet at each band so the seam stays even.
Tension: work the slip stitches as loosely as the mesh itself. A tight seam pulls the panel in and makes it pucker. If it pulls, go up one hook size for the seams.
Join S1 to S2, then S3, S4, and S5, for 4 seams in total. The seam sits inside the edge posts and adds no measurable width.
Checkpoint: after each seam, the joined width is 12, 18, 24, then 30 in (30.5, 45.7, 61.0, 76.2 cm). The length stays 72 in (182.9 cm).
Border
Border gauge: worked into stitches along the top and bottom, the border runs about 5 sc per 1 in (2.5 cm), which is 2 sc per 0.4 in (1.0 cm) mesh. Worked into row ends along the sides, it runs about 4.5 sc per 1 in (2.5 cm), which is 2 sc per row. Two sc rounds measure 0.5 in (1.3 cm) deep.
Round 1 (RS): With terracotta, join in the top right corner stitch, which is the last dc of S1’s Row 162.
- Top edge: work 1 sc in each dc and each ch-1 sp across all strips. That is 5 strips x 31 sts = 155 sts along the top. The first and last of those 155 are the corner dc.
- Corners: at each of the 4 corner stitches, work 3 sc in that stitch instead of 1.
- Long sides: work 2 sc in each row end, for 162 x 2 = 324 sc per side. These do not include the corner stitches.
- Bottom edge: work 1 sc into the base of each foundation stitch, for 5 x 31 = 155 sts.
Sl st to the first sc.
The count is 958 sc worked into the edge (155 + 155 + 324 + 324) plus 8 extra corner sc, for 966 sc in total. Counting from corner center to corner center, the top and bottom each have 157 sc and each side has 328 sc.
Round 2: Ch 1, then sc in each sc around, working 3 sc in each corner center sc. Sl st to the first sc and fasten off.
The count is 966 sc worked 1 per existing stitch plus 8 extra corner sc, for 974 sc in total. Counting from corner center to corner center, the top and bottom each have 159 sc and each side has 330 sc.
Why the math works: each border stitch matches the mesh underneath it. That is 2 sc per mesh across and 2 sc per row down, so the edge lies flat without ruffling or cupping. The 3-sc corners add just enough to turn the corner. The border adds 0.5 in (1.3 cm) on every edge, so the panel grows from 30 x 72 in to 31 x 73 in (78.7 x 185.4 cm).
Final Blocking
- Weave in all cream tails along the seams, running them up through the edge posts.
- Soak the panel in cool water for 20 minutes, then gently press the water out. Do not wring it.
- Roll it in towels to remove more water.
- Lay it flat and pin it to 31 x 73 in (78.7 x 185.4 cm).
- Pin along the side edges first, then square up the corners.
- Straighten the grid by running your fingers along the plain mesh columns.
- Leave it pinned until it is completely dry.
Final Quality-Control Checklist
- Each strip has 16 posts per row and 162 rows.
- All 9 cream bands line up across all 5 strips.
- Each wave row has 4 tr and 4 sc in the right places.
- Every flattening row restores a flat top line.
- Each seam has 324 sl st and does not pucker.
- Border Round 2 totals 974 sc.
- The panel measures 31 x 73 in (78.7 x 185.4 cm).
Troubleshooting
- Waves don’t meet at the seams: a strip is turned the wrong way. Lay all strips RS up with the foundation at the bottom.
- Side edge bulges at the cream bands: the terracotta strand was carried too tightly or too loosely. Carry it with a little slack.
- Top line stays wavy after Row 11: you worked Row 11 in Row 8’s order. Reverse it so the tr posts sit over the sc posts.
- Border ruffles: your sc are larger than the border gauge. Go down one hook size for the border.
- Panel is too long when hung: cotton can relax over time. Re-block it and dry it flat.
Care
Hand wash or machine wash cold in a mesh bag, and dry flat. Re-block after washing to keep the grid square.
Final Notes
Everything here follows one measurement chain. Ten mesh = 4 in (10.2 cm), so a 15-mesh strip is 6 in (15.2 cm) wide. One 18-row repeat is 8 in (20.3 cm), and nine repeats give 72 in (182.9 cm). Five joined strips make 30 in (76.2 cm) across, and the 0.5 in (1.3 cm) border brings the panel to 31 x 73 in (78.7 x 185.4 cm). Check each link as you go and the panel will hang straight.
Happy crocheting!