

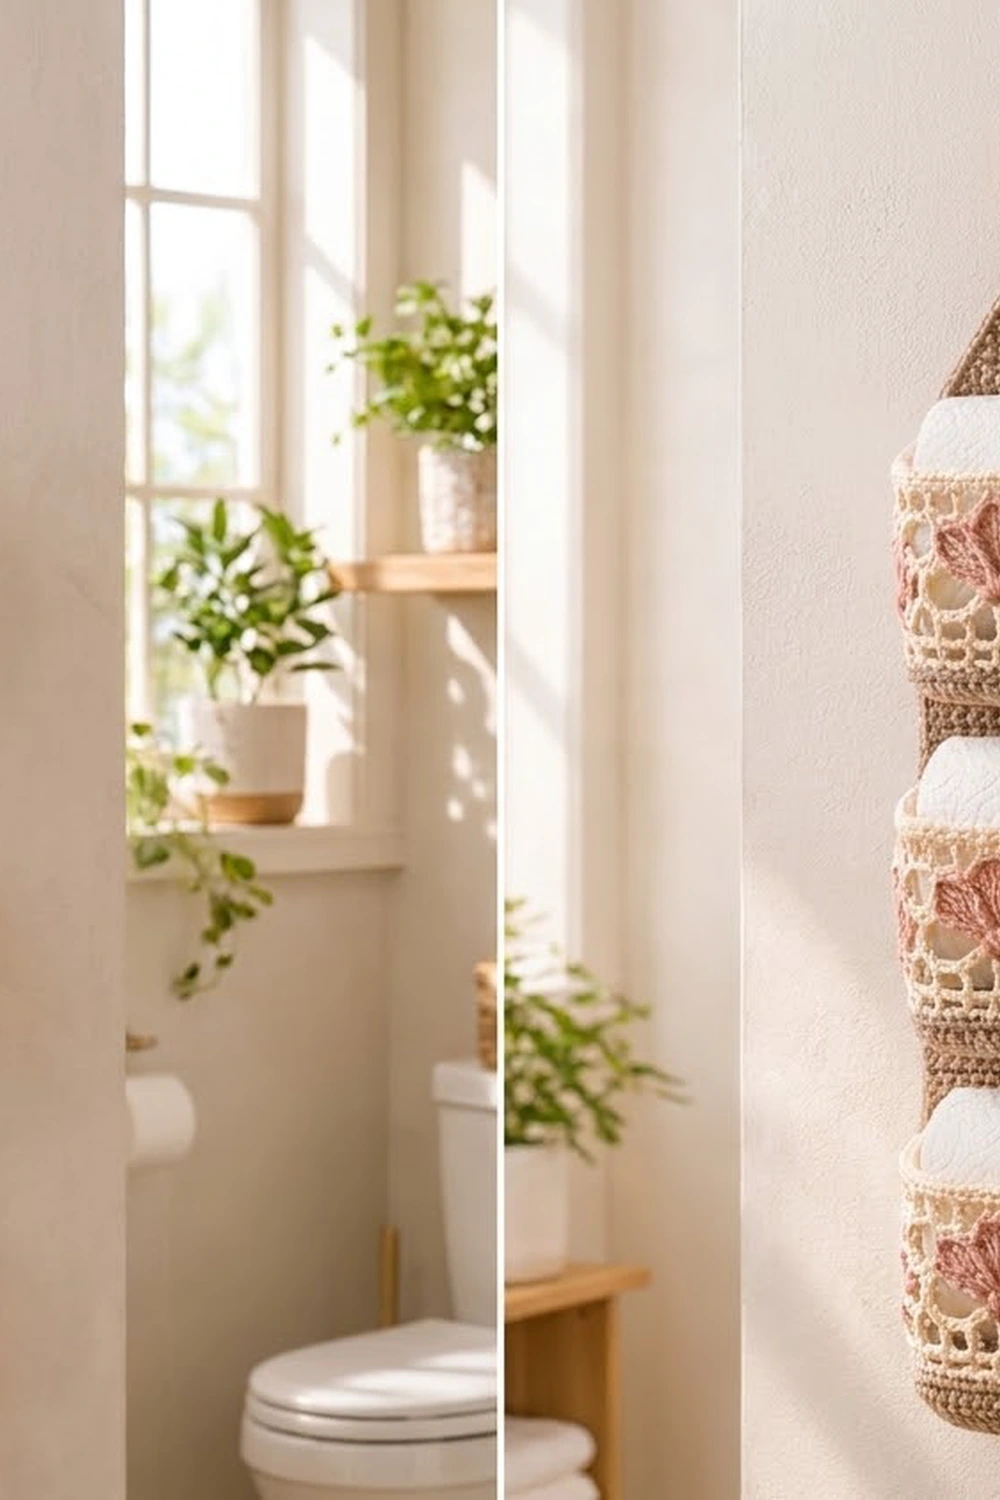
This hanging toilet paper holder keeps three spare rolls neatly off the floor. It has a solid taupe backing strip, three rounded pocket baskets and a wooden ring at the top, so you can hang it from a door hook, a towel hook or a wall peg.
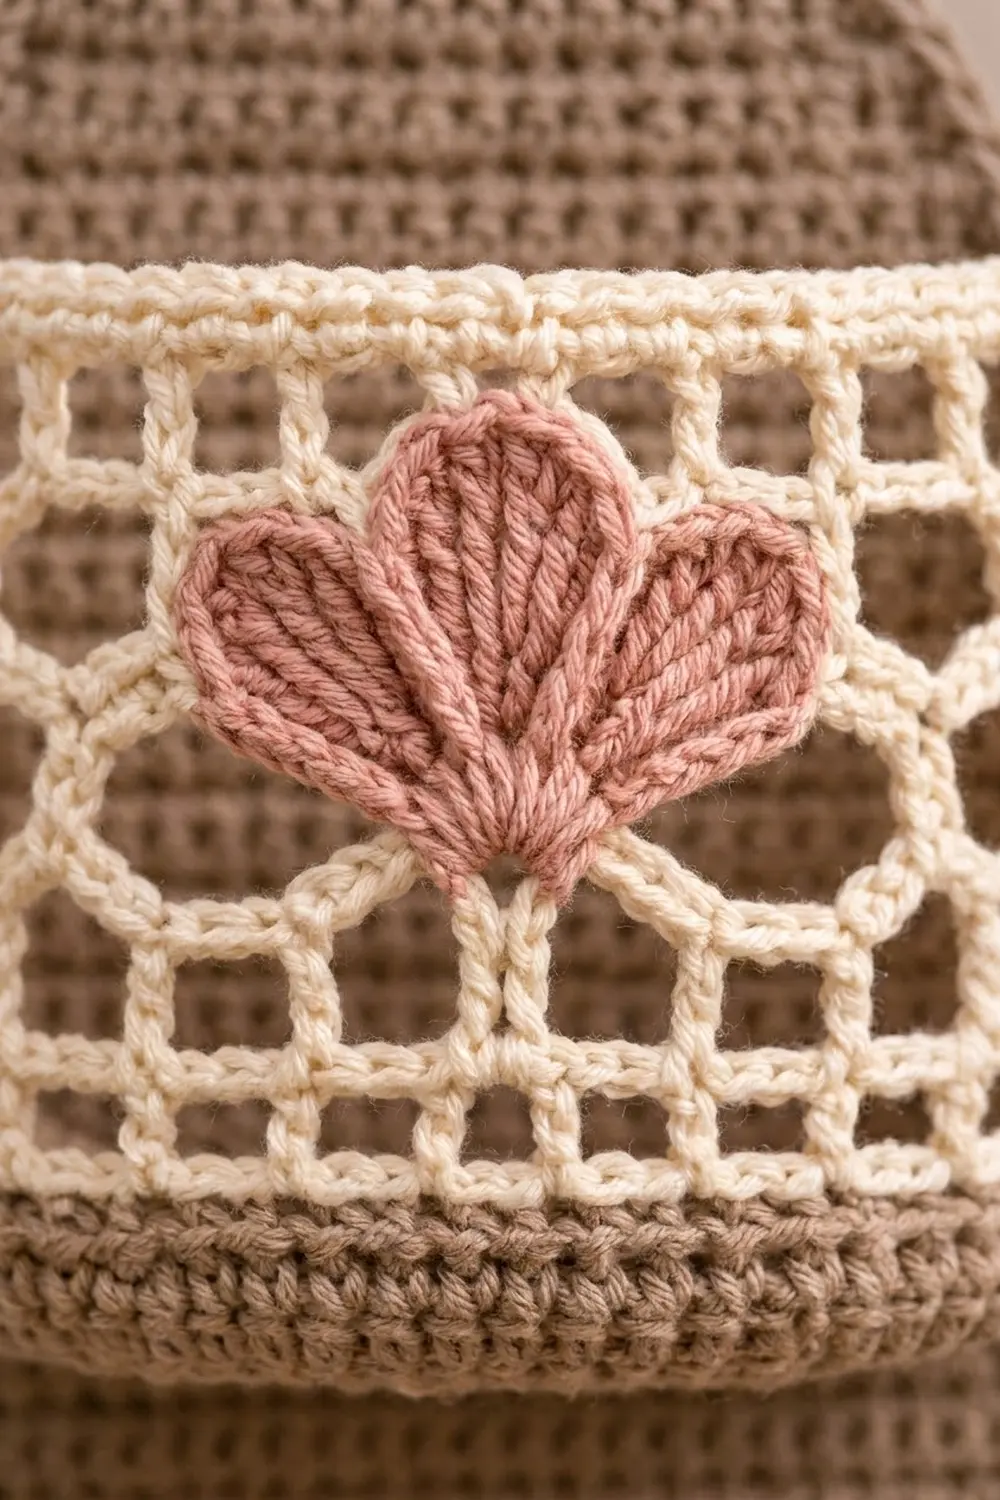
Each pocket starts with a sturdy taupe base. Above it, an airy cream filet mesh lets a little of the roll show through, and three dusty pink fans sit on the front. The colors are soft and warm, in a quiet cottage style.
The pattern uses US crochet terms. The finished holder is about 6 in (15.2 cm) wide and 23 in (58.4 cm) long, not counting the ring. Each pocket is 3 in (7.6 cm) tall.
You crochet the strip flat in rows. Each pocket is worked in joined rounds, starting from an oval base. Next you make small fan appliqués and sew them onto the pockets. Then you sew the pockets to the strip, work one border round around the strip and fold the top tab over the ring.
Finished Size and Construction
- Finished size: 6 in (15.2 cm) wide x 23 in (58.4 cm) hanging length, ring not included
- Skill level: Intermediate
- Terminology: US crochet terms
- Yarn weight: Worsted (#4) cotton or cotton blend
- Hook: 4.0 mm (G-6)
- Number of pieces: 1 backing strip, 3 pockets, 9 fan appliqués (3 large, 6 small)
- Layout: 3 pockets in one vertical column, 6 in (15.2 cm) apart
- Pocket size: 15 in (38.1 cm) around, 7.5 in (19.1 cm) wide laid flat, 3 in (7.6 cm) tall
- Strip size before border: 5.5 in (14.0 cm) x 24 in (61.0 cm), with the tab unfolded
- Border depth: 0.25 in (0.6 cm), one round of single crochet
Materials
Use a smooth worsted cotton or cotton blend. Cotton holds its shape, so the pockets won’t sag under a full roll. Avoid fuzzy yarns, because they blur the mesh.
- Color A, taupe: 130 g / 220 m (strip, pocket bases, lower bands)
- Color B, cream: 50 g / 85 m (pocket mesh and rims)
- Color C, dusty pink: 20 g / 34 m (fan appliqués)
These amounts include a margin of about 15 percent. How much you actually use depends on your tension and your yarn brand.
Tools:
- 4.0 mm (G-6) crochet hook
- Wooden ring, 3 in (7.6 cm) outer diameter
- Tapestry needle
- 6 locking stitch markers
- Scissors and measuring tape
- Rustproof pins and a blocking mat
Abbreviations (US Terms)
- ch – chain
- sl st – slip stitch
- sc – single crochet
- hdc – half double crochet
- dc – double crochet
- hdc2tog – half double crochet 2 together
- BLO – back loop only
- sp – space
- st(s) – stitch(es)
- rep – repeat
Special stitch – hdc2tog: Yarn over, insert the hook in the next st and pull up a loop. Yarn over, insert the hook in the following st and pull up a loop. Yarn over and draw through all 5 loops on the hook.
Gauge and Checkpoints
- Single crochet: 16 sc and 18 rounds = 4 in (10.2 cm)
- Half double crochet: 16 hdc and 12 rows = 4 in (10.2 cm)
Make one complete pocket and measure it before you start the strip. Check these points as you go:
- Pocket base after Round 7: about 5.5 x 3.5 in (14.0 x 8.9 cm), lying flat.
- Pocket after Round 17: 15 in (38.1 cm) around the rim and 3 in (7.6 cm) tall.
- Strip after Row 1: 5.5 in (14.0 cm) wide.
- Strip after Row 27: 9 in (22.9 cm) long.
If your work is too big, change to a 3.75 mm (F-5) hook. If it is too small, change to a 4.5 mm (7) hook. The strip and the pockets must match in gauge, because you’ll join them stitch for stitch.
Pocket (Make 3)
Use Color A. Join each round with a sl st to the first st. The ch 1 at the start of a sc round does not count as a stitch.
Base
Ch 12.
Round 1: Sc in the 2nd ch from hook and in the next 9 ch, then 3 sc in the last ch. Working along the opposite side of the chain, sc in the next 9 ch, then 2 sc in the last ch (the same ch as the first sc). Join. (24 sc)
Each end of the oval has 3 sts and each straight side has 9. One end is split across the join: it is made up of the first st of the round and the last 2 sts.
Round 2: Ch 1, 2 sc in first st, sc in next 9 sts, 2 sc in each of next 3 sts, sc in next 9 sts, 2 sc in each of last 2 sts. Join. (30 sc)
Rounds 3–7: Ch 1, sc in next n sts, 2 sc in next st, sc in next 9 sts, (sc in next n sts, 2 sc in next st) 3 times, sc in next 9 sts, (sc in next n sts, 2 sc in next st) twice. Join. Use n = 1 for Round 3, n = 2 for Round 4, n = 3 for Round 5, n = 4 for Round 6 and n = 5 for Round 7.
Stitch counts: Round 3: 36 sc. Round 4: 42 sc. Round 5: 48 sc. Round 6: 54 sc. Round 7: 60 sc. Each round adds 3 sts at each end, and both straight sides stay at 9 sts.
Checkpoint: the base measures 5.5 x 3.5 in (14.0 x 8.9 cm), with rounded ends and straight long sides.
Walls
Round 8: Ch 1, sc in BLO of each st around. Join. (60 sc) This round turns the wall upward and leaves a ridge of free front loops around the base.
Rounds 9–10: Ch 1, sc in each st around. Join. (60 sc) Fasten off Color A.
Round 11: Join Color B in any st. Ch 1, sc in each st around. Join. (60 sc)
Round 12 (mesh set-up): Ch 5 (counts as dc + ch 2), skip next 2 sts, dc in next st, ch 2, skip next 2 sts. Rep from * around. Join with a sl st to the 3rd ch of the beginning ch-5. (20 dc, 20 ch-2 sps)
Rounds 13–14: Ch 5 (counts as dc + ch 2), dc in next dc, ch 2. Rep from * around. Join to the 3rd ch of the beginning ch-5. (20 dc, 20 ch-2 sps) The dc stack directly on top of each other, which makes square windows.
Round 15 (conversion round): Ch 1, sc in same st, 2 sc in next ch-2 sp, sc in next dc, 2 sc in next ch-2 sp. Rep from * around. Join. (20 sc worked 1 per dc + 40 sc worked 2 per space = 60 sc)
Rounds 16–17: Ch 1, sc in each st around. Join. (60 sc) Fasten off and weave in the ends.
Checkpoint: the rim is 15 in (38.1 cm) around, and the pocket lies 7.5 in (19.1 cm) wide when flat. The wall is 3 in (7.6 cm) tall. That’s 7 sc rounds at about 0.22 in (0.6 cm) each, plus 3 mesh rounds at 0.5 in (1.3 cm) each.
Fan Appliqués
Use Color C. Work each fan in rows into a magic ring, without joining. The ring becomes the narrow point at the bottom, and the petals open upward.
Large Fan (make 3)
Row 1: Make a magic ring. Ch 3 (counts as dc), 2 dc in ring, ch 1, 3 dc in ring, ch 1, 3 dc in ring. Pull the ring closed and turn. (9 dc, 2 ch-1 sps)
Row 2: Ch 3 (counts as dc), dc in same st, 2 dc in each of next 2 dc, sc in ch-1 sp, 2 dc in each of next 3 dc, sc in ch-1 sp, 2 dc in each of next 2 dc, 2 dc in top of beginning ch-3. (18 dc + 2 sc) This gives 3 petals of 6 dc each, with an sc between petals. Fasten off and leave a 10 in (25.4 cm) tail.
The large fan is about 2 in (5.1 cm) wide and 1.25 in (3.2 cm) tall.
Small Fan (make 6)
Row 1: Make a magic ring. Ch 3 (counts as dc), dc in ring, ch 1, 2 dc in ring, ch 1, 2 dc in ring. Pull the ring closed and turn. (6 dc, 2 ch-1 sps)
Row 2: Ch 3 (counts as dc), dc in same st, 2 dc in next dc, sc in ch-1 sp, 2 dc in each of next 2 dc, sc in ch-1 sp, 2 dc in next dc, 2 dc in top of beginning ch-3. (12 dc + 2 sc) This gives 3 petals of 4 dc each. Fasten off and leave a long tail.
The small fan is about 1.5 in (3.8 cm) wide and 1 in (2.5 cm) tall.
Placing the fans: Flatten the pocket so the round joins sit at center back. On the front, center a large fan over Rounds 13–14, point toward the base. Place a small fan about 2 in (5.1 cm) to each side of it, over Rounds 12–13. Whipstitch around the edge of each fan, catching the mesh behind it.
Backing Strip
Use Color A. The turning ch-2 does not count as a stitch.
Ch 24.
Row 1: Hdc in 3rd ch from hook and in each ch across. Turn. (22 hdc)
Rows 2–54: Ch 2, hdc in each st across. Turn. (22 hdc)
Checkpoint: 5.5 x 18 in (14.0 x 45.7 cm).
Taper
Rows 55–63: Ch 2, hdc2tog, hdc across to last 2 sts, hdc2tog. Turn. Row 55 has 20 sts, and each row after it has 2 fewer: 18, 16, 14, 12, 10, 8, 6. Row 63: 4 sts.
Tab
Rows 64–72: Ch 2, hdc in each st across. Turn. (4 hdc) Don’t fasten off. Put the live loop on a marker to use for the border later.
Checkpoint: the strip measures 24 in (61.0 cm) long: an 18 in (45.7 cm) body, a 3 in (7.6 cm) taper and a 3 in (7.6 cm) tab.
Make All Pieces
- Color A: 1 backing strip, plus Rounds 1–10 of all 3 pockets
- Color B: Rounds 11–17 of all 3 pockets
- Color C: 3 large fans and 6 small fans
Layout, from top to bottom:
      [ wooden ring ]
         [ tab ]
        /  taper  \
      |  7-row gap   |
      | POCKET 3 |  rows 38-47
      |  gap     |
      | POCKET 2 |  rows 20-29
      |  gap     |
      | POCKET 1 |  rows 2-11
      |__________|
Joining
Sew the pockets on with Color A and a tapestry needle, using whipstitch.
Stitch-to-stitch logic: The back half of each pocket has 30 sts. Skip 5 sts at each side and mark the center 20. On the strip, mark sts 2–21, which leaves one edge column free on each side for the border. Both pieces have the same gauge, so the 20 pocket sts match the 20 strip sts exactly.
- Pocket 1: Lay the strip right side up with Row 1 at the bottom. Pin the 20 marked front loops of the base ridge from Round 8 along strip Row 2. Whipstitch them one to one.
- Press the back wall flat against the strip. Pin the 20 marked rim sts of Round 17 along strip Row 11 and whipstitch them one to one. The pocket wall is 3 in (7.6 cm) tall, which matches 9 hdc rows.
- Pocket 2: Sew the base along Row 20 and the rim along Row 29.
- Pocket 3: Sew the base along Row 38 and the rim along Row 47.
Tension: Pull each stitch snug but not tight. If the seam is too tight, the strip puckers. If it is too loose, the pocket tips forward under a roll.
Size checkpoint: The pockets are 18 rows (6 in / 15.2 cm) apart. The strip should still be 5.5 in (14.0 cm) wide, with 7 rows, about 2.33 in (5.9 cm), between the top pocket and the taper.
Border
Border gauge: 16 sc = 4 in (10.2 cm), which is 4 sc per inch. Hdc rows run 3 per inch, so you need 4 sc for every 3 rows.
Round 1: Using the live loop at the tab, ch 1. Each corner stitch gets 3 sc. Work the edges in this order:
- Tab top: 3 sc in first st, sc in next 2 sts, 3 sc in last st. (8 sc, corners included)
- Tab side: 4 sc per 3 rows over 9 rows. (12 sc)
- Taper edge: 5 sc per 3 rows over 9 rows. (15 sc)
- Body side: 4 sc per 3 rows over 54 rows. (72 sc)
- Bottom edge: 3 sc in first st, sc in next 20 sts, 3 sc in last st. (26 sc, corners included)
- Second body side, taper edge and tab side: 72, 15 and 12 sc.
Join to the first sc. (8 + 12 + 15 + 72 + 26 + 72 + 15 + 12 = 232 sc) Fasten off.
Why the math works: At 3 rows per inch, 54 rows is 18 in (45.7 cm). At 4 sc per inch, 72 sc is also 18 in, so the sides lie flat. The taper edge runs diagonally: each row moves 0.25 in (0.6 cm) across and 0.33 in (0.8 cm) up. Nine rows therefore make about 3.75 in (9.5 cm) of edge, which 15 sc covers. Along the bottom, the 22 sts become 20 straight sc plus two 3-sc corners. Each corner is counted only once, on the bottom edge or the tab top.
After the border, the strip measures 6 x 24.5 in (15.2 x 62.2 cm).
Final Blocking
- Soak the holder in cool water, then gently press out the excess without wringing.
- Roll it in a towel to remove more water.
- Lay it flat and pin the strip to 6 x 24.5 in (15.2 x 62.2 cm).
- Stuff each pocket loosely with a plastic bag or a dry roll so it dries rounded.
- Pin the fan petals open.
- Let everything dry completely.
- Slide the tab through the ring, fold 1.5 in (3.8 cm) of it down the back and whipstitch it in place. The hanging length is now 23 in (58.4 cm).
Final Quality-Control Checklist
- The strip is 6 in (15.2 cm) wide along the whole body.
- All three pockets are 3 in (7.6 cm) tall and 15 in (38.1 cm) around.
- The mesh windows are square, and the dc line up vertically.
- The fans are centered, with points down and petals spread open.
- The pocket seams are secure and even, with no puckering.
- The border lies flat and doesn’t ruffle along the taper.
- The tab is sewn firmly around the ring.
- All ends are woven in on the back.
Troubleshooting
- Base cups upward: Your increases are too tight. Use a hook one size larger for the base only.
- Base ruffles: Make sure each round adds exactly 6 sts.
- Mesh slants: Work each dc into the dc below it, not into the ch-2 space.
- Pocket leans forward: Add a second line of whipstitch along the rim.
- Border waves on the sides: Rework the side with 1 fewer sc in every 12 sts. Keep the corners the same.
- Fans curl: Steam them lightly before sewing them on.
Care
Hand wash in cool water and lay flat to dry, reshaping the pockets while damp. Don’t tumble dry, because heat can shrink cotton and distort the mesh.
Final Notes
Every measurement depends on gauge. At 16 sts to 4 in (10.2 cm), a 60-st pocket is 15 in (38.1 cm) around and a 22-st strip is 5.5 in (14.0 cm) wide. At each seam, 20 pocket sts match 20 strip sts. The 54-row body is 18 in (45.7 cm) long and takes 72 border sc per side. With the border, the strip is 6 x 24.5 in (15.2 x 62.2 cm), and folding the tab over the ring gives a hanging length of 23 in (58.4 cm).
Happy crocheting!