

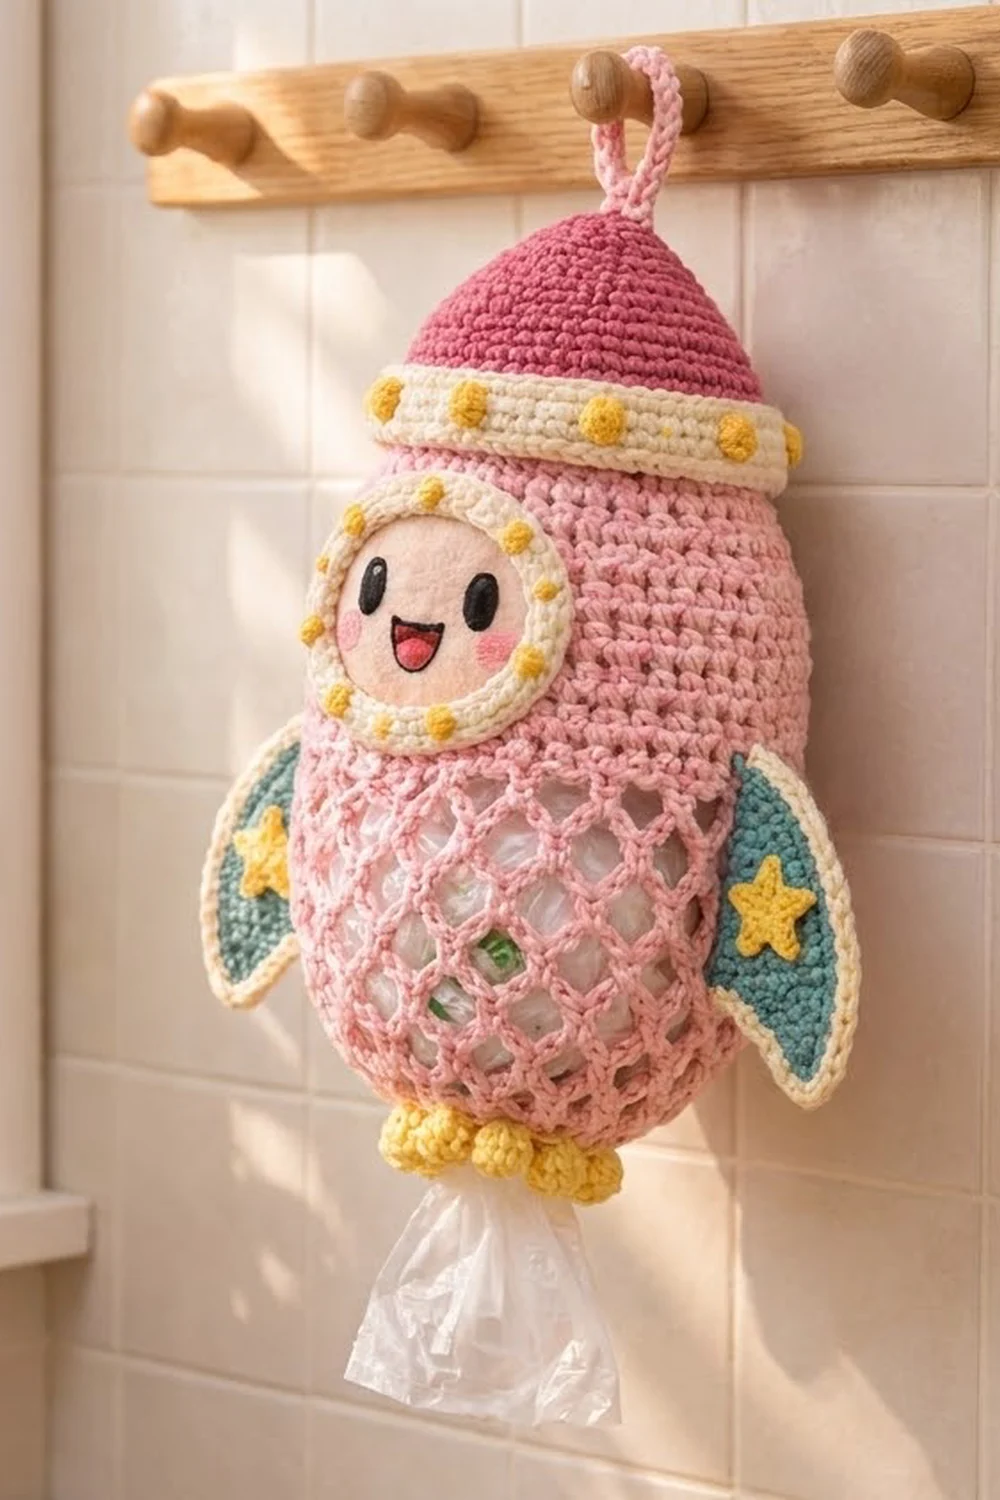
Little Astro is a cheerful rocket that hangs on a hook and keeps plastic grocery bags tidy. You stuff bags in under a flip-top nose cone and pull them out one at a time through the small opening at the bottom.
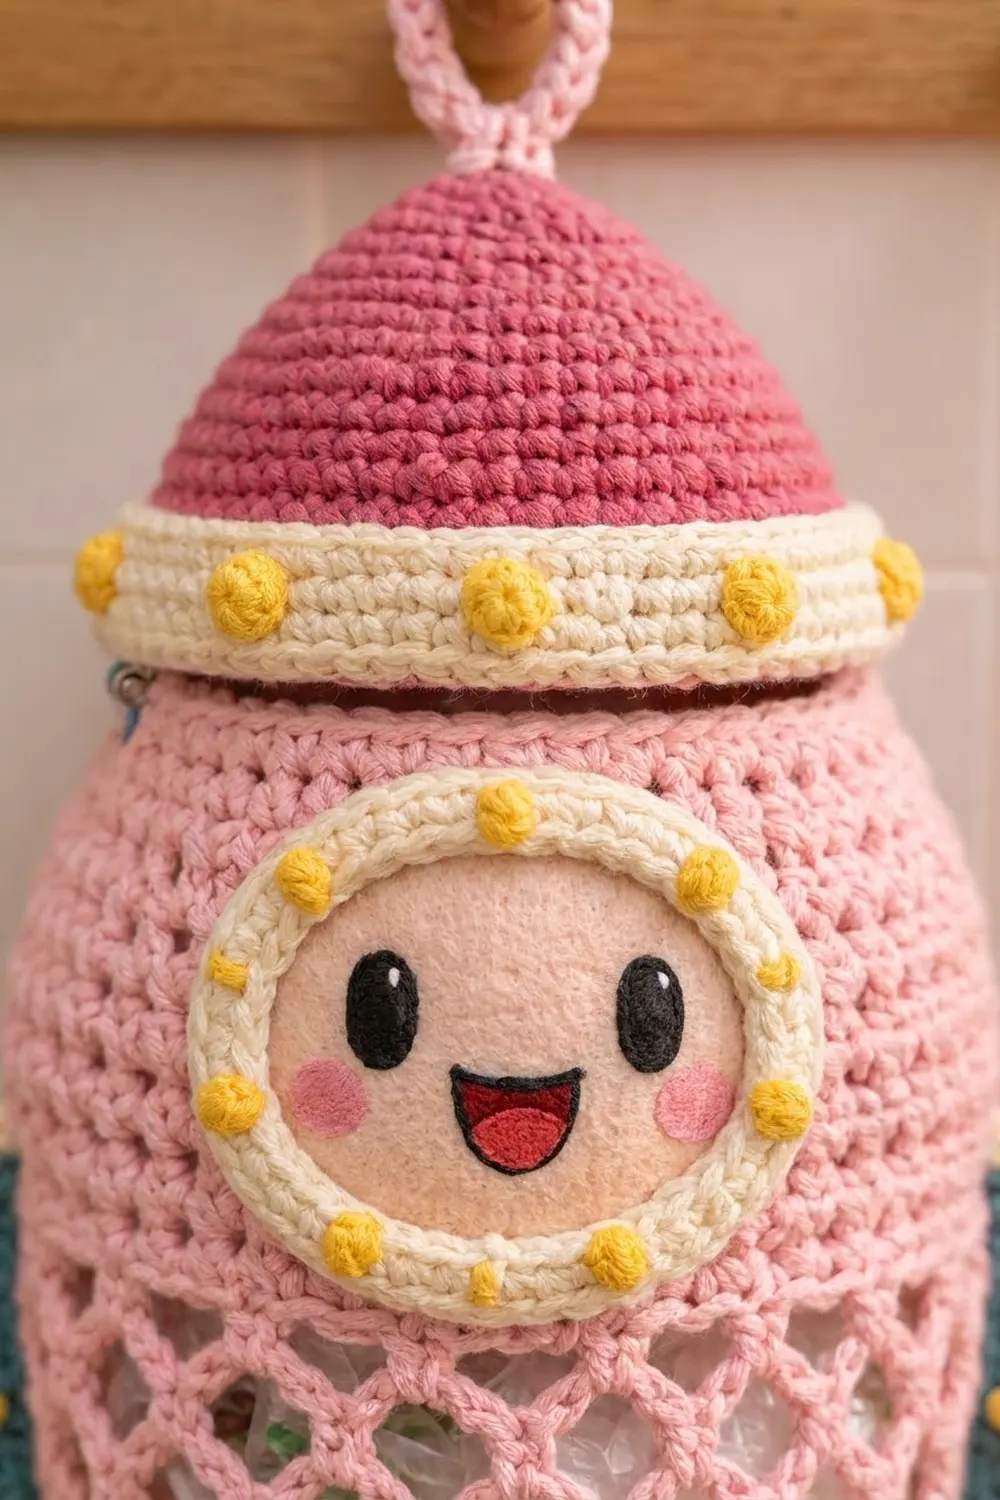
The body is soft pink. The top third is solid single crochet, and the lower part is an open diamond mesh, so you can see how many bags are left. On top is a raspberry nose cone with a cream band and yellow dots. The front has a smiling peach face inside a cream porthole. Two teal fins with cream edging and yellow stars sit on the sides, and yellow bobbles circle the bottom opening.
This pattern uses US terms. The finished holder is about 15.5 in (39.4 cm) tall including the hanging loop and about 14.25 in (36.2 cm) wide across the fins. When filled, the body is about 5.75 in (14.6 cm) across.
The body is worked top down in joined rounds: solid rounds first, then chain-loop mesh, then a narrow rim. The cone is worked from the tip down and sewn on at the back to act as a hinge. The porthole, fins, stars and dots are made separately and sewn on.
Finished Size and Construction
- Finished size: 15.5 in (39.4 cm) tall with the loop and 13.75 in (34.9 cm) without it. It is 14.25 in (36.2 cm) across the fins.
- Skill level: Intermediate
- Terminology: US
- Yarn weight: Worsted (#4) cotton or cotton blend
- Hook: 4.5 mm (US 7)
- Number of pieces: 1 body, 1 nose cone with loop, 1 porthole, 2 fins, 2 stars and 26 dots, all assembled into one item
- Layout: The cone goes on top, the porthole is centered on the front, there’s one fin on each side, and the bobble trim goes around the bottom.
- Body size: 9 in (22.9 cm) wide laid flat at its widest point and about 9.5 in (24.1 cm) tall
- Fin size before edging: 3.25 in (8.3 cm) wide x 3.75 in (9.5 cm) tall
- Fin edging depth: 2 rounds, about 0.5 in (1.3 cm)
Materials
Use a smooth cotton or cotton blend. It holds its shape, the mesh doesn’t sag much, and it washes well. Fuzzy yarns blur the mesh, so avoid them. The amounts below assume about 85 m per 50 g.
- Pink (body): 100 g, 170 m
- Raspberry (nose cone and loop): 30 g, 51 m
- Cream (cone band, porthole frame, fin edging): 25 g, 43 m
- Teal (fins): 20 g, 34 m
- Yellow (stars, dots, bobble trim): 15 g, 26 m
- Peach (face): 8 g, 14 m
- Embroidery yarn or floss: about 2 m each of black and red, plus scraps of white and pink
All quantities include a margin of about 15%.
Tools: 4.5 mm (US 7) hook, tapestry needle, embroidery needle, 8 stitch markers, pins, scissors and a measuring tape.
Abbreviations (US Terms)
- ch: chain
- sl st: slip stitch
- sc: single crochet
- dc: double crochet
- 2 sc: 2 sc in the same stitch (increase)
- sc2tog: single crochet 2 together (decrease)
- BLO: back loop only
- MR: magic ring
- sp: space
- st(s): stitch(es)
- RS / WS: right side / wrong side
Bobble: [Yarn over, insert the hook in the stitch, pull up a loop, yarn over, pull through 2 loops] 5 times in the same stitch. Then yarn over and pull through all 6 loops on the hook. A bobble counts as 1 stitch.
Gauge and Checkpoints
Gauge: 16 sc and 18 rounds = 4 in (10.2 cm)
Make the porthole first as your test piece. It’s quick to make and easy to measure.
Checkpoints:
- Peach face after Rnd 5: 2.25 in (5.7 cm) across
- Porthole after Rnd 8: 3.25 in (8.3 cm) across
- Body after Rnd 1: 14 in (35.6 cm) around
- Body after Rnd 14: 18 in (45.7 cm) around and 3.1 in (7.9 cm) tall
- Cone rim: 14 in (35.6 cm) around, the same as body Rnd 1
- Fin before edging: 3.25 in (8.3 cm) x 3.75 in (9.5 cm)
If your pieces are too big, use a hook 0.5 mm smaller. If they’re too small, use a hook 0.5 mm larger. Make the cone and the body with the same hook so their rims match.
Body
Work in joined rounds. At the end of each round, sl st to the first sc. The ch 1 at the start of a round doesn’t count as a stitch.
Solid section (pink):
Rnd 1: Ch 56 and sl st to the first ch to form a ring, without twisting it. Ch 1, then sc in each ch around. (56)
Rnds 2–3: Sc around. (56)
Rnd 4: [Sc 6, 2 sc] 8 times. (64)
Rnds 5–6: Sc around. (64)
Rnd 7: [Sc 7, 2 sc] 8 times. (72)
Rnds 8–14: Sc around. (72)
Checkpoint: the body should measure 18 in (45.7 cm) around, 9 in (22.9 cm) wide laid flat and 3.1 in (7.9 cm) tall.
Mesh section (pink):
Rnd 15: Ch 1 and sc in the first st. Ch 5, skip 3 sts, sc in the next st. Repeat from * around. End with ch 5, skip the last 3 sts and sl st to the first sc. (18 ch-5 loops, because 72 ÷ 4 = 18)
Rnds 16–19: Sl st in the first 3 ch to reach the middle of the loop. Ch 1, then sc in the same loop. Ch 5, sc in the next loop. Repeat from * around. End with ch 5 and sl st to the first sc. (18 ch-5 loops)
Rnds 20–22: Work as Rnd 16, but sl st in only the first 2 ch and use ch 4. (18 ch-4 loops)
Rnds 23–24: Work as Rnd 16, but sl st in only the first 2 ch and use ch 3. (18 ch-3 loops)
Each round of loops sits offset from the round before, which forms the diamonds. The shorter chains taper the mesh toward the bottom.
Bottom rim (pink):
Rnd 25 (conversion): Ch 1, then 2 sc in each ch-3 sp around. (18 loops x 2 sc = 36)
Rnd 26: [Sc 7, sc2tog] 4 times. (32)
Rnd 27: Sc around. (32) Fasten off.
Checkpoint: the bottom opening measures 8 in (20.3 cm) around. The mesh is about 5.5 in (14.0 cm) tall when relaxed. Rnd 28 is in the Border section.
Nose Cone (Lid)
Work from the tip down in joined rounds.
With raspberry:
Rnd 1: 8 sc in a MR. (8)
Rnd 2: 2 sc in each st. (16)
Rnd 3: Sc around. (16)
Rnd 4: [Sc 1, 2 sc] 8 times. (24)
Rnd 5: Sc around. (24)
Rnd 6: [Sc 2, 2 sc] 8 times. (32)
Rnd 7: Sc around. (32)
Rnd 8: [Sc 3, 2 sc] 8 times. (40)
Rnd 9: Sc around. (40)
Rnd 10: [Sc 4, 2 sc] 8 times. (48)
Rnd 11: Sc around. (48)
Rnd 12: [Sc 5, 2 sc] 8 times. (56)
Rnds 13–15: Sc around. (56) Fasten off.
Adding 8 sts every other round gives an even cone with a soft point.
Cream band:
Rnd 16: Join cream. Ch 1, then sc in the BLO of each st. (56) This makes a clean line where the colors change.
Rnds 17–19: Sc around. (56) Fasten off and leave a 24 in (61.0 cm) tail.
Checkpoint: the rim is 14 in (35.6 cm) around and the cone is about 4.25 in (10.8 cm) tall. The rim has 56 sts, the same as body Rnd 1.
Hanging loop: Join raspberry at the tip. Ch 16 and sl st back into the tip. Ch 1, work 24 sc over the chain loop and sl st to the tip. Fasten off. The loop is about 1.75 in (4.4 cm) long.
Porthole
With peach:
Rnd 1: 6 sc in a MR. (6)
Rnd 2: 2 sc in each st. (12)
Rnd 3: [Sc 1, 2 sc] 6 times. (18)
Rnd 4: [Sc 2, 2 sc] 6 times. (24)
Rnd 5: [Sc 3, 2 sc] 6 times. (30) Fasten off.
With cream:
Rnd 6: [Sc 4, 2 sc] 6 times. (36)
Rnd 7: [Sc 5, 2 sc] 6 times. (42)
Rnd 8: [Sc 6, 2 sc] 6 times. (48) Fasten off and leave a long tail.
Face: Use satin stitch in black to make two upright oval eyes, each 0.4 in (1.0 cm) tall and 0.6 in (1.5 cm) apart. Add a small white highlight to each eye. Below the eyes, outline a wide D-shaped open smile in black and fill its lower half with red. Use satin stitch in pink for the cheeks, just outside the eyes.
Fins (Make 2)
Work in rows. Ch 1 and turn at the end of each row. The ch 1 doesn’t count as a stitch. Row 1 is the RS. The inner edge is where RS rows begin, and the outer edge is where they end.
With teal:
Row 1 (RS): Ch 5. Sc in the 2nd ch from the hook and in each ch across. (4)
Row 2 (WS): 2 sc in the first st, then sc across. (5)
Row 3 (RS): Sc across to the last st, then 2 sc in the last st. (6)
Rows 4–10: Repeat Rows 2–3 three more times, then work Row 2 once more. Every row increases at the outer edge. (Row 10: 13)
Rows 11–13: Sc across. (13)
Row 14 (WS): Sc across to the last 2 sts, then sc2tog. (12)
Row 15 (RS): Sc2tog, then sc across. (11)
Rows 16–17: Repeat Rows 14–15. (Row 16: 10; Row 17: 9) Fasten off.
The inner edge stays straight for most of the fin. The decreases at the bottom of the inner edge pull the bottom edge upward, which leaves a swept point at the lower outer corner.
Stars (Make 2) and Dots (Make 26)
Star (yellow): Work 5 sc in a MR and sl st to join. Ch 3, sl st in the 2nd ch from the hook, sc in the next ch, then sl st in the next sc of the ring. Repeat from * 4 more times. (5 points) The star is about 1.25 in (3.2 cm) across.
Dot (yellow): Work 5 dc in a MR, pull the ring tight and sl st to the first dc. Fasten off and leave a 6 in (15.2 cm) tail. Each dot is about 0.4 in (1.0 cm) across. You need 14 for the cone and 12 for the porthole.
Border: Fin Edging and Bottom Bobble Trim
Border gauge: 16 sc = 4 in (10.2 cm), the same as the main fabric. Work each row-end sc into the outermost stitch of that row.
Fin edging, Rnd 1 (cream): Join cream in the last st of Row 17, which is the outer bottom corner.
- Bottom edge: 3 sc in the corner st, sc in the next 7 sts, then 3 sc in the inner corner st. Side total: 13
- Inner edge: 1 sc in each row-end from Row 16 up to Row 2. Side total: 15
- Top edge (Row 1 foundation): 3 sc in the corner ch, sc in the next 2 ch, then 3 sc in the other corner ch. Side total: 8
- Outer edge: 1 sc in each row-end from Row 2 down to Row 16. Side total: 15
Sl st to the first sc. Rnd 1 total: 13 + 15 + 8 + 15 = 51.
Fin edging, Rnd 2 (cream): Ch 1 and sc in each st, working 3 sc in the center st of each corner. (51 + 8 = 59) Fasten off and leave a long tail for sewing.
Why the math works: The top has 4 sts and the bottom has 9. Each of those rows has a corner stitch at both ends, which makes the 4 corners. The long sides use only row-ends 2 to 16 (15 each), so no corner is counted twice. Both long sides slant, so they are longer than straight fabric and can take 1 sc per row-end without ruffling. Adding 2 extra stitches at each corner (8 per round) keeps the corners flat.
Bottom bobble trim, Rnd 28 (yellow): Join yellow in any st of body Rnd 27 and ch 1. Sc in the next 3 sts, then bobble in the next st. Repeat from * around and sl st to the first sc. (24 sc + 8 bobbles = 32) Fasten off.
Why the math works: 32 sts ÷ 4 = exactly 8 repeats, so the bobbles are evenly spaced.
Assembly
- Cone dots: Sew 14 dots around the middle of the cream band, one every 4 sts (56 ÷ 4 = 14).
- Porthole dots: Sew 12 dots on cream Rnd 7, one every 4 sts of Rnd 8 (48 ÷ 4 = 12).
- Porthole: Center it on the front of the body with its top edge at Rnd 4. Its lower part overlaps the first mesh rounds. Whipstitch it on around Rnd 8.
- Fins: Pin the fins to the sides with their tops at Rnd 12. Sew through the cream edging along the inner edge into the body’s stitches and loops. Sew a star to the center of each fin.
- Hinge: Set the cone on body Rnd 1 so the stitches line up one-to-one. Whipstitch the 20 back sts together through both layers, then go over them a second time. The front 36 sts stay free so the cone can tip back for refilling.
Final Blocking
- Fill the body with crumpled bags or a small towel.
- Lightly mist the cone, porthole and fins with water.
- Pin the fins flat to 4.25 in (10.8 cm) x 4.75 in (12.1 cm), with the points pinned out.
- Ease the mesh so the diamonds are even.
- Let it dry completely before hanging.
Final Quality-Control Checklist
- Body Rnd 14 has 72 sts and measures 18 in (45.7 cm) around.
- Every mesh round has 18 loops.
- The bottom has 32 sts with 8 evenly spaced bobbles.
- The cone rim has 56 sts and lines up with body Rnd 1.
- The hinge is double-stitched across 20 back sts.
- Each fin has 59 sts in edging Rnd 2, and the two fins match.
- The porthole is centered and the face is level.
- All ends are woven in and the loop is secure.
Troubleshooting
- The mesh twists: You probably missed the sl sts into the middle of a loop. Count 18 loops after every mesh round.
- The cone flares out: You added increases on plain rounds. Increase only on even-numbered rounds.
- The cone is looser than the body: Remake the cone with a hook 0.5 mm smaller.
- The fin edging ruffles: Check that each long side has exactly 15 sts.
- The fin corners cup: Check that Rnd 1 has 51 sts.
- Bags stick at the bottom: Skip Rnd 26 and work Rnd 27 over 36 sts. Then work Rnd 28 as sc 3, bobble 9 times (27 sc + 9 bobbles = 36). This makes the opening 9 in (22.9 cm) around.
Care
Hand wash in cool water, reshape and dry flat. Don’t wring it or put it in the dryer.
Final Notes
Everything follows from the gauge of 16 sc = 4 in (10.2 cm). The 56-st opening measures 14 in (35.6 cm). The body grows to 72 sts and 18 in (45.7 cm), turns into 18 mesh loops and narrows to a 32-st opening of 8 in (20.3 cm). The 56-st cone matches the opening one-to-one. Each fin’s 51-st edging comes straight from its row counts. If your porthole and cone checkpoints match, the rest will fit.
Happy crocheting!