

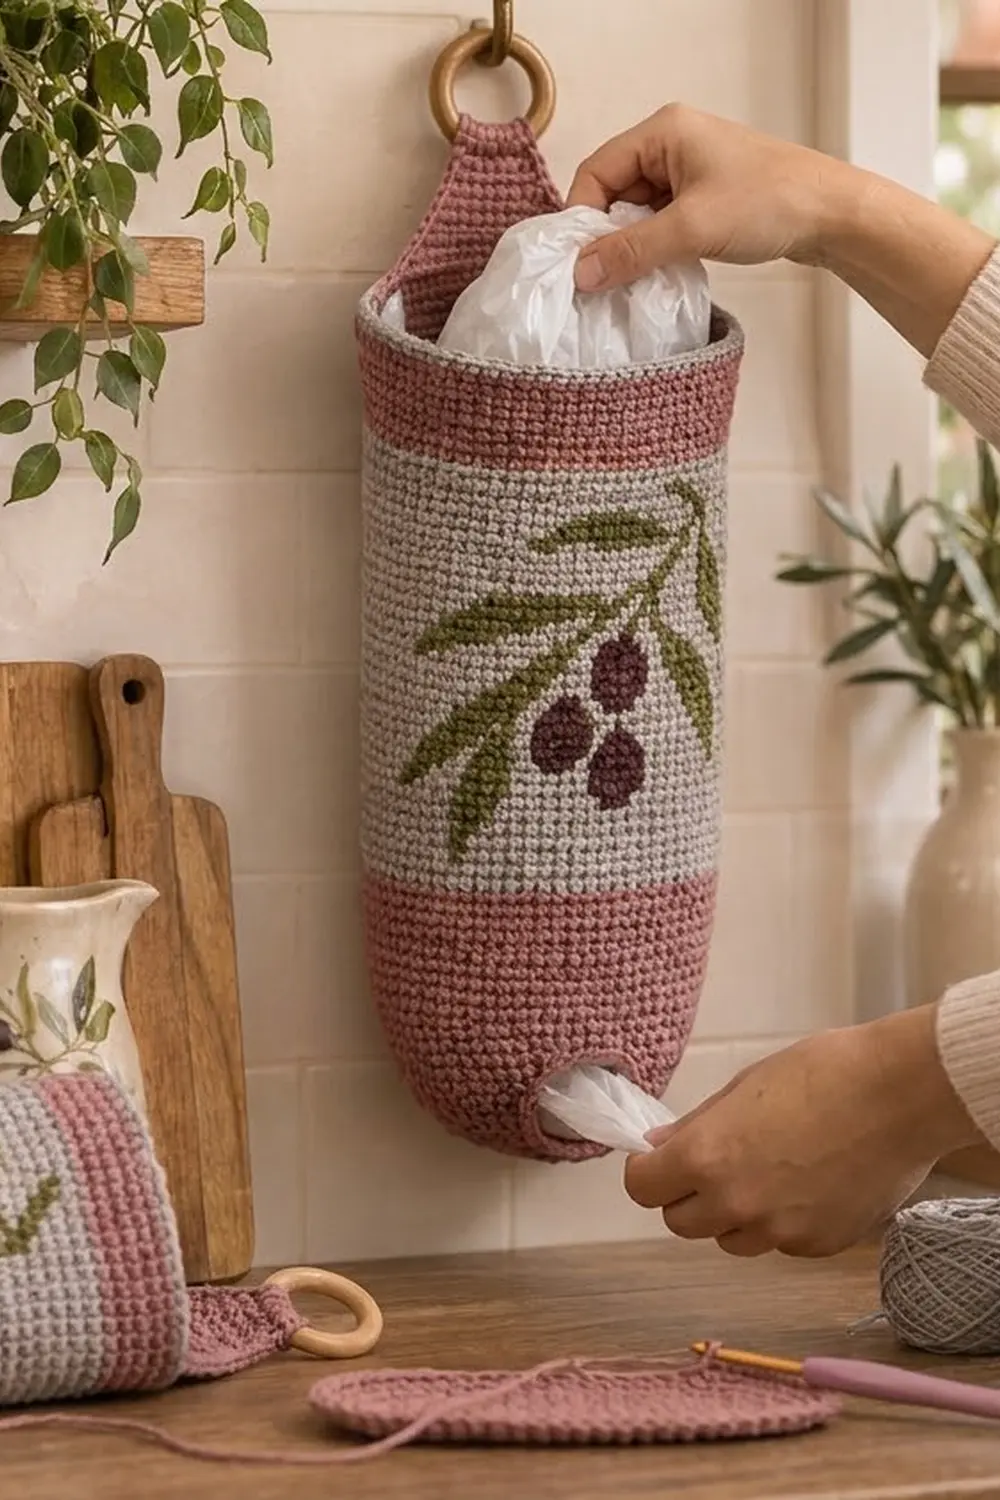
This holder keeps grocery bags tidy and easy to reach. You stuff bags in through the open top and pull them out one at a time through a round hole near the bottom. It hangs from a wooden ring, so a single wall hook is all you need.
The design uses four colors. Dusty rose forms the bottom and top bands, light heather gray fills the middle, and an olive-green branch with three plum olives sits on the front. A thin gray slip-stitch line finishes the rim and the tab. The style is calm and rustic and fits a farmhouse or Mediterranean kitchen.
The finished holder measures 7 in (17.8 cm) wide when flat and 14 in (35.6 cm) tall in the body. It is about 18 in (45.7 cm) from the base to the top of the tab, not counting the ring. All terms are US crochet terms.
You make it in one piece. First you work an oval base in rounds. The tube rises straight from the base in a continuous spiral, with the dispensing hole worked in as you go. Then a flat tab is worked in rows from the back of the rim, a two-round border goes around the opening, and the tab is folded around the ring and stitched down.
Finished Size and Construction
- Finished size: 7 in (17.8 cm) wide flat × 14 in (35.6 cm) tall body; about 18 in (45.7 cm) to the top of the tab
- Skill level: Intermediate (tapestry crochet, working in the round)
- Terminology: US
- Yarn weight: Worsted (#4), cotton or cotton blend
- Hook: 4.5 mm (US 7)
- Number of pieces: 1, plus a wooden ring
- Layout: a single tube with an attached tab
- Circumference: 56 sts = 14 in (35.6 cm)
- Size before border: the same as the finished size; the border only finishes the edges
- Border depth: about 0.25 in (0.6 cm)
Materials
Cotton or a cotton blend works best. It holds its shape, doesn’t stretch much and washes well. Pick smooth yarns with clear stitch definition so the olive motif stays crisp.
- Color A, dusty rose: 75 g / 130 m
- Color B, light heather gray: 70 g / 120 m
- Color C, olive green: 15 g / 25 m
- Color D, deep plum: 6 g / 10 m
All quantities include a margin of about 15% for your gauge swatch and for tension differences.
Tools:
– 4.5 mm (US 7) crochet hook
– Wooden ring, 2 in (5.1 cm)
– Stitch markers (at least 3)
– Tapestry needle
– Scissors
– Measuring tape
– A rolled towel for blocking
Abbreviations (US Terms)
- ch – chain
- sc – single crochet
- sc2tog – single crochet 2 together
- sl st – slip stitch
- sk – skip
- st(s) – stitch(es)
- rnd(s) – round(s)
- RS – right side
- WS – wrong side
Special technique – tapestry color change: Work the last sc before a color change until 2 loops are left on the hook. Yarn over with the new color and pull it through. Lay the colors you aren’t using along the tops of the stitches and work over them, so they travel hidden inside the stitches.
Gauge and Checkpoints
Gauge: 16 sc and 18 rnds = 4 in (10.2 cm) in sc worked in the round.
Make a swatch in the round, carrying one extra strand for at least part of it, because carried yarn slightly thickens the stitches. Treat the base as your test piece: measure it before you start the walls.
Checkpoints:
– After Rnd 5 (base): the oval measures about 5.5 in × 2.5 in (14.0 cm × 6.4 cm), with 56 sts around.
– After Rnd 23 (rose band): the walls measure 4 in (10.2 cm) up from the base.
– After Rnd 59 (gray section): the walls measure 12 in (30.5 cm), and the flattened tube is 7 in (17.8 cm) wide.
– After Rnd 68: the body measures 14 in (35.6 cm).
– After Tab Row 24: the tab measures about 5.3 in (13.5 cm).
If the work is too big, go down to a 4.0 mm hook. If it is too small, go up to a 5.0 mm hook. A difference of up to 0.5 in (1.3 cm) in circumference is fine. A bigger difference changes how the motif sits on the front.
Pattern
Work in continuous spiral rounds and don’t join. Move the marker up to the first stitch of every round.
Base (Color A)
Ch 16.
Rnd 1: 3 sc in the 2nd ch from the hook, sc in the next 13 ch, 3 sc in the last ch. Rotate the work and sc in the next 13 ch along the underside. (32 sts)
Rnd 2: [2 sc in each of the next 3 sts, sc in the next 13 sts] twice. (38 sts)
Rnd 3: [(sc 1, 2 sc in the next st) 3 times, sc 13] twice. (44 sts)
Rnd 4: [(sc 2, 2 sc in the next st) 3 times, sc 13] twice. (50 sts)
Rnd 5: [(sc 3, 2 sc in the next st) 3 times, sc 13] twice. (56 sts)
In Rnd 5, sts 16–28 are the front straight edge and sts 44–56 are the back. The round starts at one curved end, so the spiral jog stays at the side.
Lower Rose Band and Dispensing Hole (Color A)
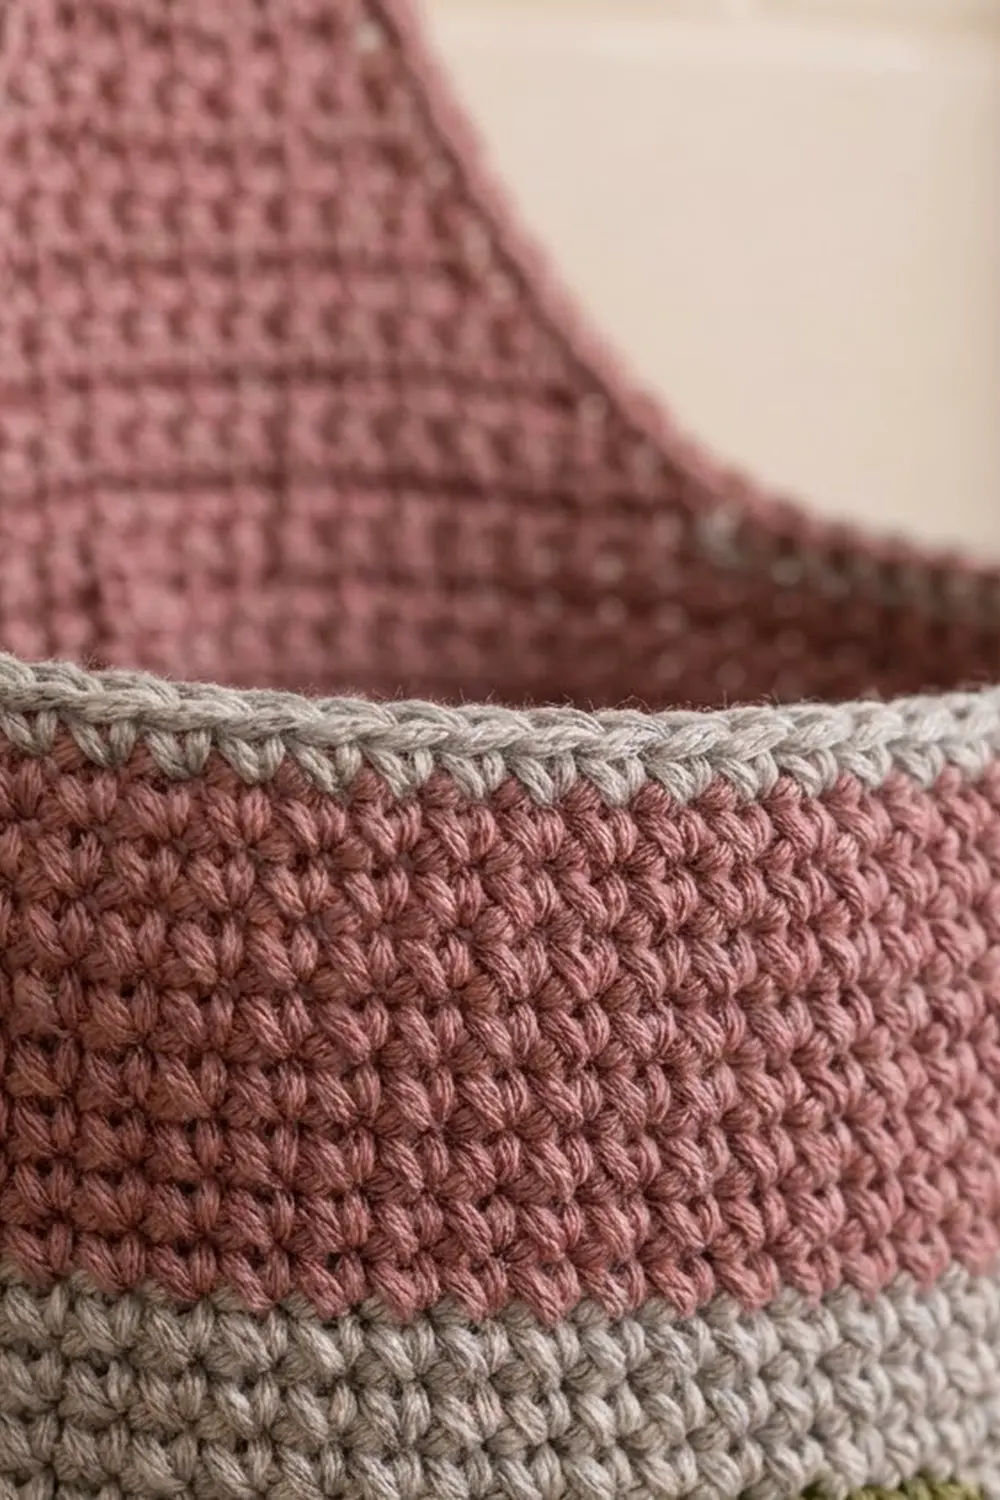
Rnds 6–8: Sc in each st around. (56 sts)
Working into both loops with no increases lets the walls curve up gently, which gives the softly rounded bottom.
Rnd 9 (hole): Sc 17, ch 8, sk 8 sts, sc 31. (48 sc + 8 ch)
Rnd 10: Sc 17, sc in each of the 8 ch, sc 31. (56 sts)
The hole sits over sts 18–25 and is centered on the front at the same point as the motif. It is 2 in (5.1 cm) wide and opens into a round shape when bags push through it.
Rnds 11–23: Sc in each st around. (56 sts)
Checkpoint: the walls measure 4 in (10.2 cm).
Gray Section with Olive Branch (Color B, C, D)
Rnd 24: Change to Color B in the last st of Rnd 23. Sc around. (56 sts) Cut Color A, leaving a 6 in (15.2 cm) tail.
Rnds 25–29: Sc around in Color B. (56 sts)
Rnds 30–52 (motif): Join Color C at the start of Rnd 30 and carry it all the way around every round through Rnd 52, so the fabric stays the same thickness. Each round is:
Sc 11 in Color B (sts 1–11), work the 20 chart sts (sts 12–31), sc 25 in Color B (sts 32–56). (56 sts)
Join Color D at the start of Rnd 32 and carry it all the way around through Rnd 38, then cut it. Chart Row 1 is Rnd 30 and Row 23 is Rnd 52.
Reading the chart: Each line is one chart row, shown as it looks from the front. Work Row 1 first, which is the bottom line. Right-handed crocheters read each row from right to left. Left-handed crocheters read each row from left to right, which mirrors the branch.
. = Color B (gray), L = Color C (green), O = Color D (plum)
Row 23  ................LL..
Row 22  ...............LL...
Row 21  ...............L....
Row 20  .....L.........L..L.
Row 19  ......LL......L.LL..
Row 18  .......LL....LLL....
Row 17  ........LL...L......
Row 16  .........LL.L.......
Row 15  ...........L........
Row 14  .L.........L....L...
Row 13  ..LL......L...LL....
Row 12  ...LL....L..LLL.....
Row 11  ....LL...LLLL.......
Row 10  .....LL.L....L......
Row  9  .......L..OOOL......
Row  8  .......L..OOOLOOO...
Row  7  LL....L...OOOLOOO...
Row  6  .LL..L.......LOOO...
Row  5  ..LL.L......OOO.....
Row  4  ....L.......OOO.....
Row  3  ...L........OOO.....
Row  2  ...L................
Row  1  ..L.................
The stem climbs diagonally from the lower left to the upper right. The leaves are 2-stitch diagonal bands that point outward on both sides. The three 3 × 3 plum olives hang below the stem on a short green stalk. The motif is 20 sts × 23 rnds, or 5 in × 5.1 in (12.7 cm × 13.0 cm).
Rnd 52 end: Cut Color C.
Rnds 53–59: Sc around in Color B. (56 sts)
There are 6 plain gray rounds below the motif and 7 above it. Checkpoint: the walls measure 12 in (30.5 cm).
Upper Rose Band (Color A)
Rnd 60: Change to Color A in the last st of Rnd 59. Sc around. (56 sts) Cut Color B.
Rnds 61–68: Sc around. (56 sts)
At the end of Rnd 68, sl st in the next st to smooth the step at the end of the spiral. Fasten off. Checkpoint: the body measures 14 in (35.6 cm).
Hanging Tab (Color A, worked in rows)
Count around Rnd 68 from the marker. The tab is centered on the back, opposite the hole.
Row 1 (RS): Join Color A in st 40. Sc in sts 40–56, then sc in sts 1–3. Turn. (20 sts)
Row 2: Ch 1, sc2tog, sc 16, sc2tog. Turn. (18 sts)
Row 3: Ch 1, sc2tog, sc 14, sc2tog. Turn. (16 sts)
Row 4: Ch 1, sc2tog, sc 12, sc2tog. Turn. (14 sts)
Row 5: Ch 1, sc2tog, sc 10, sc2tog. Turn. (12 sts)
Row 6: Ch 1, sc2tog, sc 8, sc2tog. Turn. (10 sts)
Row 7: Ch 1, sc2tog, sc 6, sc2tog. Turn. (8 sts)
Rows 8–24: Ch 1, sc 8. Turn. (8 sts)
Fasten off. The tab starts 5 in (12.7 cm) wide, tapers over 7 rows, and becomes a 2 in (5.1 cm) wide strip. Checkpoint: the tab measures about 5.3 in (13.5 cm). The 36 rim sts that are not part of the tab (sts 4–39) stay free and form the top opening.
Border
Border gauge: the same as the body. Along the tab edges, 1 row end is about 0.22 in (0.6 cm) tall, while 1 sc is 0.25 in (0.6 cm) wide. That is why some row ends are skipped below.
Rnd 1 (Color A): With RS facing, join in st 4 of Rnd 68.
– Rim: sc in sts 4–39. (36 sts)
– Tab left edge: sc up the row ends, skipping the row ends of Rows 8, 16 and 24. (21 sts)
– Tab top: sc across the top of Row 24. (8 sts)
– Tab right edge: sc down the row ends, skipping Rows 24, 16 and 8. (21 sts)
Sl st to the first sc. (86 sts) Fasten off.
Rnd 2 (Color B): Join in any sc of Rnd 1. Sl st loosely in each st around. (86 sl sts) Fasten off.
Why the math works: The rim takes 1 sc per existing st, so 36 sts stay exactly 36 and the opening keeps its 9 in (22.9 cm) length without flaring. Each tab edge is 24 rows, or 5.3 in (13.5 cm), long. At 4 sts per inch that edge needs 21.3 sts, so 21 sc keep it flat. The tab top uses 1 sc per st, so it stays at 8. The total is 36 + 21 + 8 + 21 = 86.
Attach the ring: Pass the top of the tab through the wooden ring from front to back. Fold the top 6 rows, about 1.3 in (3.3 cm), down onto the WS and whipstitch the edge firmly across. About 4 in (10.2 cm) of tab stays visible above the rim.
Final Blocking
- Weave in all ends on the WS, inside stitches of the same color.
- Lightly spray the holder with water, or hover a steam iron over it without touching the fabric.
- Fill the tube with a rolled towel to make it round and even.
- Gently straighten the motif rows and line up the stem diagonal.
- Press the hole into a round shape with your fingers.
- Lay the holder flat and check that it is 7 in (17.8 cm) wide and 14 in (35.6 cm) tall.
- Let it dry completely before you take out the towel.
Final Quality-Control Checklist
- [ ] The base has 56 sts and lies flat and oval.
- [ ] The walls are 56 sts in every round.
- [ ] The hole is centered on the front and below the motif.
- [ ] The motif sits on sts 12–31, from Rnd 30 to Rnd 52.
- [ ] No carried strands show through the gray.
- [ ] The tab is centered on the back, with 20 sts tapering to 8.
- [ ] Border Rnd 1 has 86 sts and lies flat.
- [ ] The ring is secure and the fold is stitched across its full width.
- [ ] All ends are woven in and the measurements match.
Troubleshooting
Green or plum shows through the gray: Tug the carried strands snug every few stitches, or move to a smaller hook.
The motif leans: The jog at the end of each round shifts stitches slightly. Count from the marker every motif round instead of trusting where it sits visually.
The hole is too tight: Rework Rnd 9 with ch 9, sk 9 and sc 30. Then in Rnd 10, sc 17, sc in each of the 9 ch, and sc 30 to keep 56 sts.
The rim ruffles: Your border tension is too loose. Rework Rnd 1 with a smaller hook.
The tab flares: Make sure you skipped the 3 row ends on each edge.
The tube twists: Block it on a towel roll and keep the tab aligned with the back.
Care
Hand wash or machine wash cold on a gentle cycle, then reshape and lay flat to dry. Don’t tumble dry, so the holder keeps its shape.
Final Notes
The sizes all build from the gauge. 16 sc and 18 rnds over 4 in (10.2 cm) give a base of 56 sts. Those 56 sts make a 14 in (35.6 cm) circumference, which flattens to 7 in (17.8 cm) wide. Sixty-three body rounds give 14 in (35.6 cm) of height: 4 in (10.2 cm) of rose, 8 in (20.3 cm) of gray and 2 in (5.1 cm) of rose. The 20-st motif centers above the 8-st hole, the 20-st tab tapers to 8 sts, and the 86-st border keeps every edge flat. If you check each measurement as you go, the holder will hang straight and dispense smoothly.
Happy crocheting!