
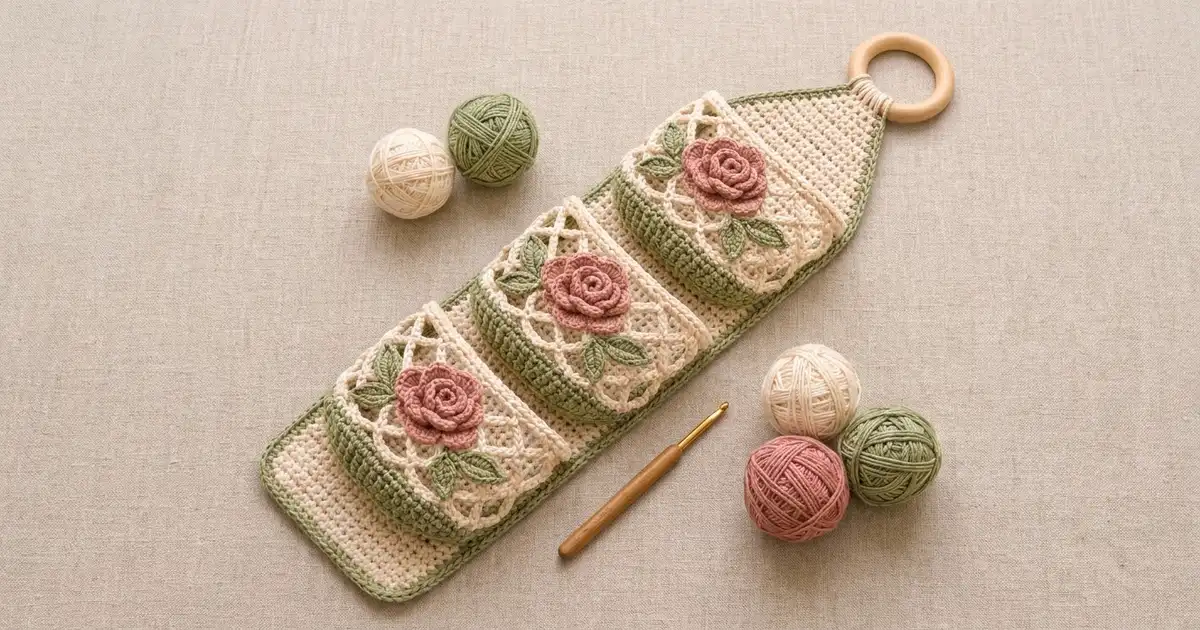
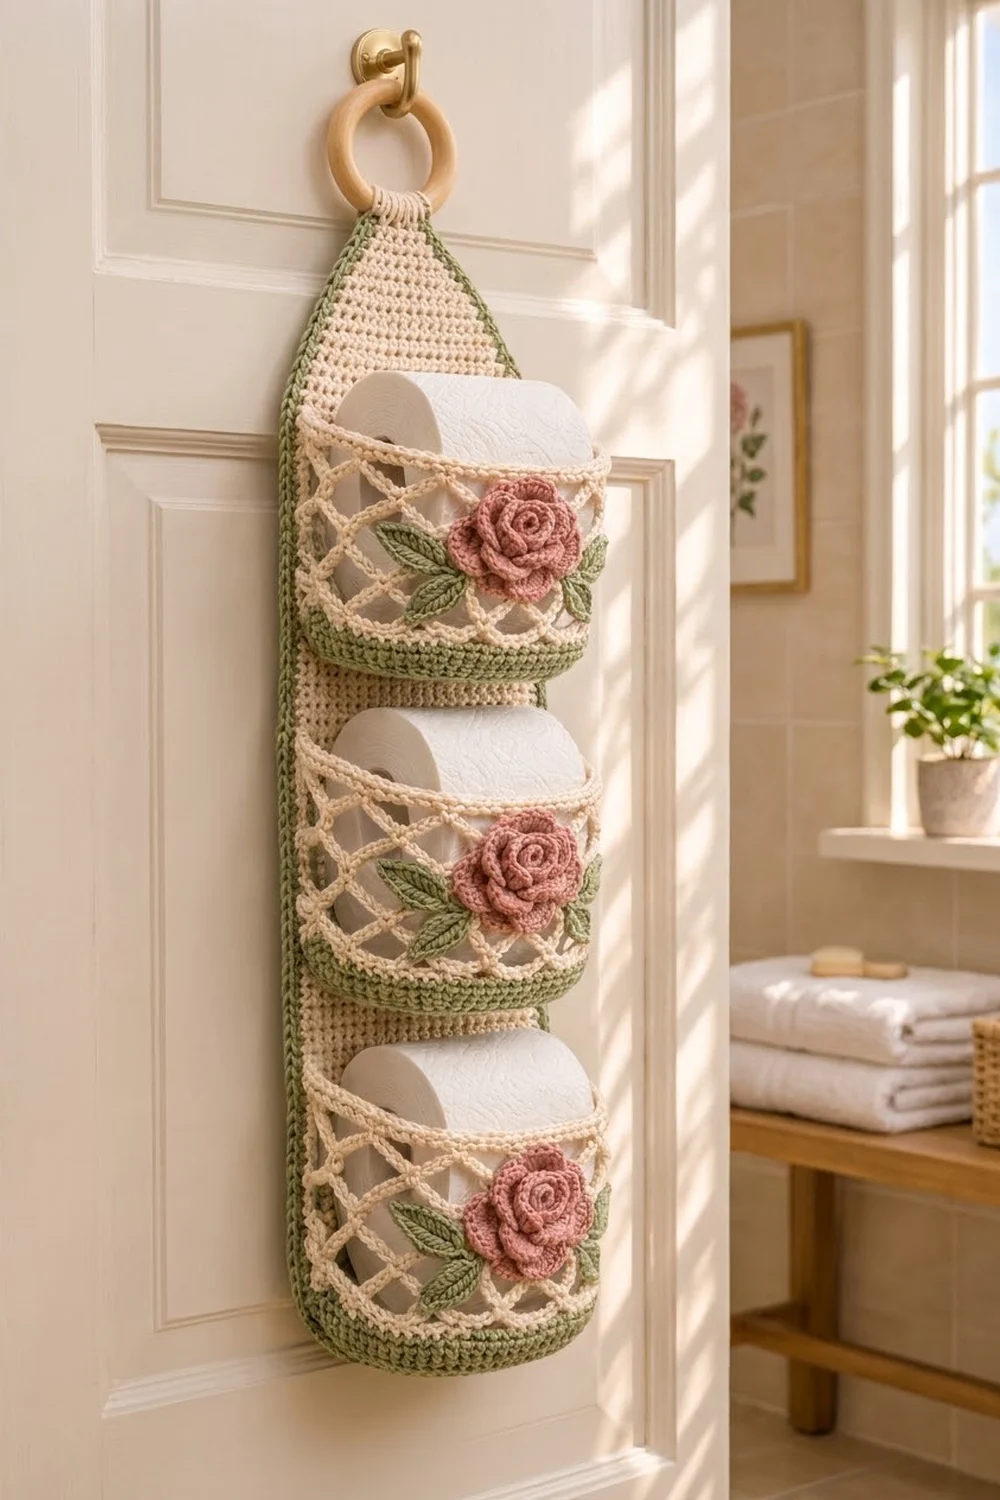
This hanging holder stores three spare rolls on the back of a bathroom door. A tall cream panel holds three soft pockets. Each pocket has a sage green base, an open diamond trellis and a rolled dusty-pink rose between two leaves.
The colors are cream, sage green and dusty rose, which gives the holder a cottage-garden look. The trellis mesh lets the white rolls show through, and the solid panel behind keeps everything flat and tidy against the door.
The pattern uses US crochet terms. The finished panel is 7 in (17.8 cm) wide and 20.5 in (52.1 cm) long from the bottom edge to the base of the tab. With the tab and the 2 in (5.1 cm) wooden ring, the holder hangs about 23 in (58.4 cm) long.
You make the pieces in this order: a backing panel worked in rows with a tapered top, a two-row green edging, three pockets worked in the round from an oval base, three rolled roses and six leaves. Then you sew everything together and fold the tab around the ring.
Finished Size and Construction
- Finished size: 7 in (17.8 cm) wide × 20.5 in (52.1 cm) long, plus tab and ring; about 23 in (58.4 cm) total
- Skill level: Easy-intermediate
- Terminology: US crochet terms
- Yarn weight: Worsted (#4), cotton or cotton blend
- Hook: 5 mm (H-8)
- Number of pieces: 13 (1 backing panel, 3 pockets, 3 roses, 6 leaves)
- Layout: 3 pockets stacked vertically on one panel
- Pocket size: about 6.25 in (15.9 cm) wide when flattened, about 4 in (10.2 cm) tall
- Panel size before border: 6 in (15.2 cm) wide × 20 in (50.8 cm) long
- Border depth: 0.5 in (1.3 cm), 2 rows
Materials
Use a smooth worsted cotton. It holds its shape and stands up to bathroom humidity, and it makes the trellis look crisp. Acrylic also works, but the pockets will be softer. The amounts below assume about 85 m per 50 g.
- Cream: 100 g, about 170 m (backing panel, pocket mesh and rims)
- Sage green: 50 g, about 85 m (border, pocket bases, leaves)
- Dusty pink: 25 g, about 43 m (roses)
Tools:
- 5 mm (H-8) crochet hook
- Wooden ring, 2 in (5.1 cm) across
- Tapestry needle
- Stitch markers
- Rust-proof pins
- Tape measure
All yarn quantities include a margin of about 15% for your gauge swatch and sewing tails.
Abbreviations (US Terms)
- ch – chain
- sl st – slip stitch
- sc – single crochet
- hdc – half double crochet
- dc – double crochet
- sc2tog – single crochet 2 together
- BLO – back loop only
- sk – skip
- st(s) – stitch(es)
- RS / WS – right side / wrong side
Special stitch – sc2tog: Insert the hook in the next st, yarn over and pull up a loop. Insert the hook in the following st, yarn over and pull up a loop. Yarn over and pull through all 3 loops on the hook. This works 2 sts into 1 and is used to decrease.
Gauge and Checkpoints
Gauge: 14 sc and 16 rows = 4 in (10.2 cm) in sc worked in rows. That is 3.5 sts and 4 rows per 1 in (2.5 cm).
Make one pocket before you start the panel. It uses every technique in the pattern and shows you quickly whether your gauge is right.
Checkpoints:
- Pocket base after Rnd 3: about 6 in (15.2 cm) long × 1.75 in (4.4 cm) wide
- Pocket after Rnd 7: the wall stands about 1 in (2.5 cm) tall
- Finished pocket: about 4 in (10.2 cm) tall and 6.25 in (15.9 cm) wide when flattened
- Panel after Row 64: 6 in (15.2 cm) wide × 16 in (40.6 cm) long
- Panel after the border: 7 in (17.8 cm) wide
If your pieces are too big, go down half a hook size. If they are too small, go up half a hook size. A pocket smaller than 6 in (15.2 cm) wide will be too tight for a standard roll, which is about 4.5 in (11.4 cm) across.
Backing Panel
Work the panel in cream.
Ch 22.
Row 1 (RS): Sc in the 2nd ch from the hook and in each ch across. (21 sc)
Rows 2–64: Ch 1, turn, sc in each st across. (21 sc)
Checkpoint: 6 in (15.2 cm) × 16 in (40.6 cm).
Taper: The odd rows decrease and the even rows are worked plain.
Row 65: Ch 1, turn, sc2tog, sc to the last 2 sts, sc2tog. (19 sc)
Row 66: Ch 1, turn, sc in each st across. (19 sc)
Rows 67–80: Repeat Rows 65–66 seven more times. Each pair of rows leaves you with 2 fewer sts: 17, 15, 13, 11, 9, 7, then 5 sc after Row 79. Row 80 has 5 sc.
That gives 8 decrease rows. 21 − (8 × 2) = 5 sts. The taper is 16 rows, or 4 in (10.2 cm), tall.
Tab, Rows 81–90: Ch 1, turn, sc in each st across. (5 sc)
The tab is 2.5 in (6.4 cm) long. Fasten off and leave a 12 in (30.5 cm) tail.
Checkpoint: the panel measures 20 in (50.8 cm) from the bottom edge to the base of the tab.
Pocket (make 3)
Work the pocket in the round with the RS facing you. Do not turn. Join every round with a sl st to the first st.
Base (sage green)
Ch 16.
Rnd 1: 3 sc in the 2nd ch from the hook, sc in the next 13 ch, 3 sc in the last ch. Working along the other side of the foundation chain, sc in the next 13 ch. Join. (32 sc)
Rnd 2: Ch 1, 2 sc in each of the next 3 sts, sc in the next 13, 2 sc in each of the next 3 sts, sc in the next 13. Join. (38 sc)
Rnd 3: Ch 1, (sc in the next st, 2 sc in the next st) 3 times, sc in the next 13, (sc in the next st, 2 sc in the next st) 3 times, sc in the next 13. Join. (44 sc)
Each curved end grows from 3 to 6 to 9 sts. Each straight side stays at 13 sts.
Walls (sage green)
Rnd 4: Ch 1, sc in the BLO of each st around. Join. (44 sc)
Working in the back loops makes a clear ridge, so the wall turns up from the base.
Rnds 5–6: Ch 1, sc in each st around. Join. (44 sc)
Fasten off the green.
Rnd 7 (cream): Join cream in any st on the curve at one end, ch 1, sc in each st around. Join. (44 sc)
Place a marker on the first st of this round. That curved end becomes one side seam of the pocket.
Trellis mesh (cream)
Rnd 8: Ch 1, sc in the first st, *ch 5, sk 3, sc in the next st; repeat from * 9 more times, ch 5, sk 3. Join to the first sc. (11 ch-5 loops)
Check the count: 44 sts ÷ 4 = 11 loops.
Rnd 9: Sl st in each of the first 3 ch of the next loop, ch 1, sc in the same loop. *Ch 5, sc in the next loop; repeat from * 9 more times, ch 5. Join to the first sc. (11 loops)
Rnds 10–11: Repeat Rnd 9. (11 loops)
Each new sc sits in the middle of a loop from the round below. That staggers the loops and makes the diamond trellis.
Rim (cream)
Rnd 12: Sl st into the next loop, ch 1, 4 sc in each ch-5 loop around. Join. (44 sc)
The rim goes back to the base count: 11 loops × 4 sc = 44 sc.
Rnd 13: Ch 1, sc in each st around. Join. (44 sc)
Fasten off and leave a 24 in (61 cm) tail.
Checkpoint: about 4 in (10.2 cm) tall. Flattened, the pocket is 22 sts wide, which at 3.5 sts per inch is about 6.25 in (15.9 cm).
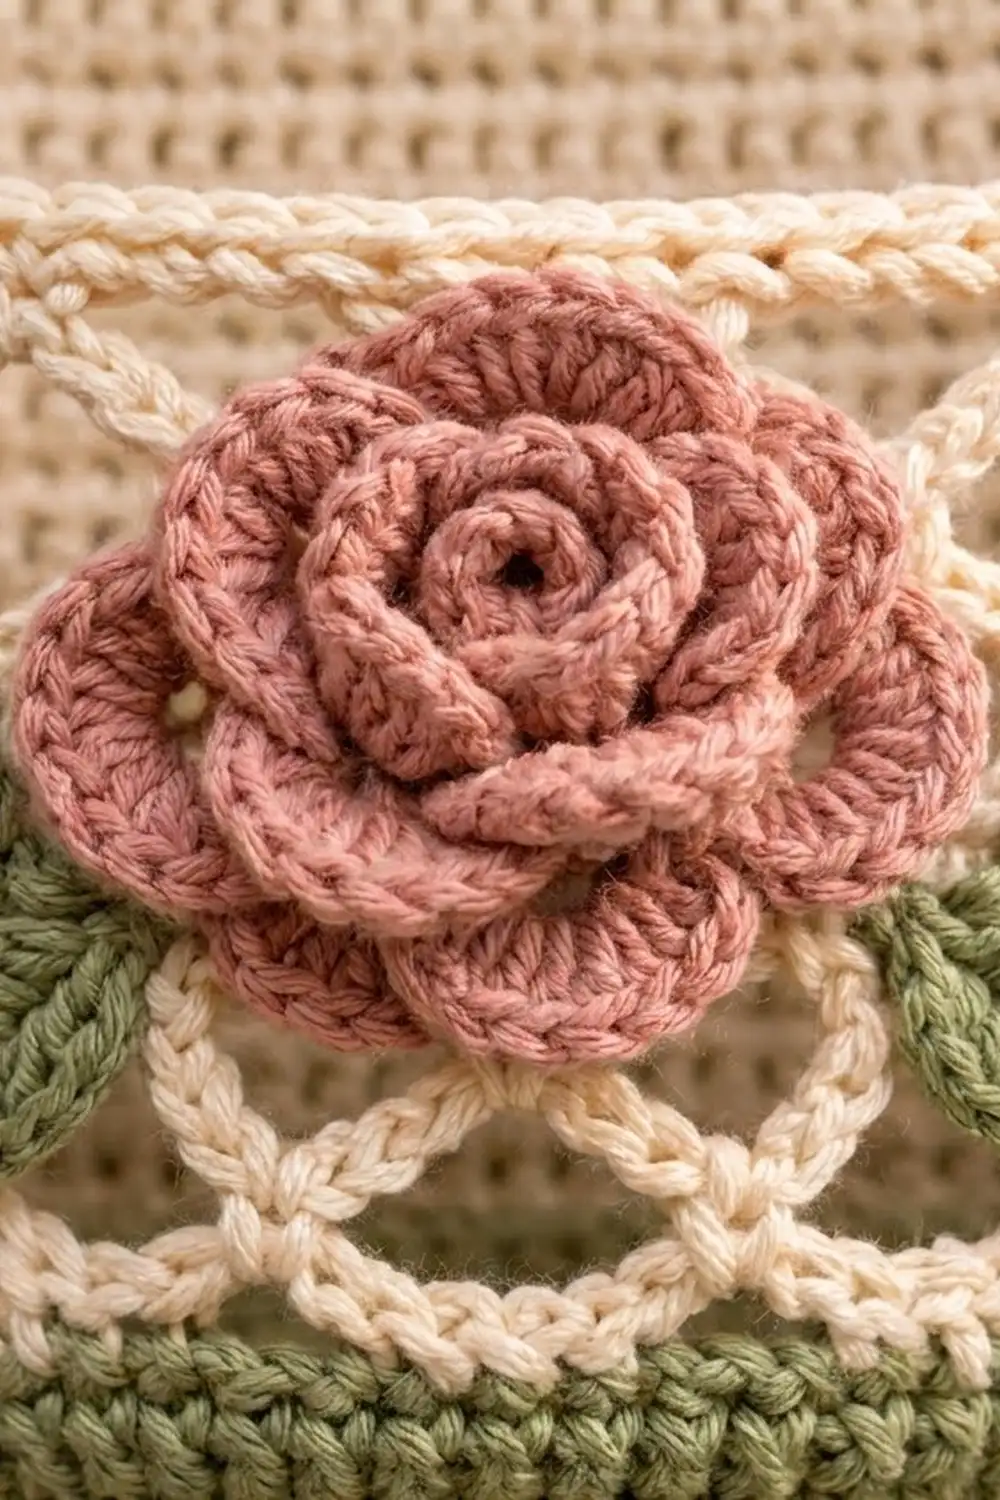
Rose (make 3)
Work the rose in dusty pink.
Ch 30.
Row 1: Sc in the 2nd ch from the hook and in each ch across. (29 sc)
Row 2: Ch 1, turn, sc in the first st.
- *Sk 1, 5 hdc in the next st, sk 1, sc in the next st; repeat from * 2 more times. This makes 3 small inner petals.
- *Sk 1, 7 dc in the next st, sk 1, sc in the next st; repeat from * 3 more times. This makes 4 larger outer petals.
You now have 7 petals. Check the count: 1 + (7 × 4) = 29 base sts.
Fasten off and leave a 12 in (30.5 cm) tail.
Shape the rose: Start at the small-petal end and roll the strip tightly. Let the larger petals spiral loosely around the outside. Use the tail to stitch through all layers at the base 3–4 times.
The finished rose is about 2.5 in (6.4 cm) across.
Leaf (make 6)
Work the leaves in sage green.
Ch 9.
Rnd 1: Working along the chain:
- Sc in the 2nd ch from the hook, hdc in the next ch, dc in the next 3 ch, hdc in the next ch, sc in the next ch, 3 sc in the last ch.
- Working along the other side of the chain: sc in the next ch, hdc in the next ch, dc in the next 3 ch, hdc in the next ch, sc in the next ch.
(17 sts)
Tip: Ch 2, sl st in the 2nd ch from the hook, then sl st in the first sc.
Fasten off and leave a 10 in (25.4 cm) tail.
The leaf is about 2 in (5.1 cm) long and pointed at both ends. If you like, add a center vein: sl st along the middle of the leaf in green on the RS.
Make All Pieces
| Piece | Qty | Colors |
|---|---|---|
| Backing panel | 1 | Cream, with green border |
| 3 | Green base and band, cream mesh and rim | |
| Rose | 3 | Dusty pink |
| Leaf | 6 | Sage green |
Layout (front view, top to bottom):
        [ wooden ring ]
         [ cream tab ]
          /  taper  \
   |  gap: rows 59-64        |
   |  [ POCKET 3 ] rows 42-58|
   |  gap: rows 38-42        |
   |  [ POCKET 2 ] rows 22-38|
   |  gap: rows 18-22        |
   |  [ POCKET 1 ] rows 2-18 |
   |_________________________|
Each pocket’s back takes up 16 rows, or 4 in (10.2 cm), of the panel. The gaps between pockets are 4 rows, or 1 in (2.5 cm).
Joining
Appliqués first: Sew the rose and leaves on before you attach each pocket, while you can still reach inside.
- Flatten the pocket so the marked side seam is at one edge.
- Center the rose on the front, over Rnds 9–11.
- Tuck a leaf under each side of the rose, angled upward.
- Whipstitch each piece in place through the mesh with its own tail.
Attach the pockets: Use whipstitch through the back halves of the pockets.
- Rim: With the pocket’s back half facing the panel, pin the 22 back sts of Rnd 13 across the panel row that matches the layout. That is Row 18 for Pocket 1. You are sewing 22 rim sts across 21 panel sts, so ease in the 1 extra st near the center.
- Base: Pin the 22 back sts of Rnd 4 (the ridge) across Row 2. Whipstitch them down with green yarn.
- Pockets 2 and 3: Repeat Steps 1–2. Sew Pocket 2 at Rows 22 and 38, and Pocket 3 at Rows 42 and 58.
Tension: Make each sewing stitch snug but not tight. If the panel puckers sideways, take the seam out and sew it again more loosely.
Checkpoint: the panel should still measure 6 in (15.2 cm) wide behind every pocket.
You can work the border before or after you attach the pockets. Working it first makes it easier to handle.
Border
Work the border only around the sides and bottom of the panel. The tab stays cream. The border uses the same gauge as the panel.
Border Row 1 (green):
- With the RS facing you, join green at the right edge at the end of Row 80 (the base of the tab), ch 1.
- Work 1 sc in each row end down to Row 1. (80 sc)
- Along the foundation chain, work 3 sc in the first st for the corner, sc in the next 19 sts, and 3 sc in the last st for the corner. (25 sc)
- Work 1 sc in each row end up the left side to Row 80. (80 sc)
Total: 80 + 25 + 80 = 185 sc.
Border Row 2: Ch 1, turn, sc in each st. Work 3 sc in the center st of each 3-sc corner group. That adds 2 sts at each corner: 185 + 4 = 189 sc.
Count by side:
- Each long side: 81 sc
- Bottom: 27 sc between the corner center sts
- Total: 81 + 27 + 81 = 189
Fasten off.
Why the math works: Each sc row is about 0.25 in (0.6 cm) tall, so working 1 sc per row end lets the sides lie flat. The 3-sc corners keep the corners square without cupping. Two rows of sc add 0.5 in (1.3 cm) on each side, so the panel grows from 6 in (15.2 cm) to 7 in (17.8 cm) wide and from 20 in (50.8 cm) to 20.5 in (52.1 cm) long.
Attach the Ring
- Pass the tab through the wooden ring from front to back.
- Fold it down onto the WS.
- Whipstitch the last 4 rows (Rows 87–90), which are 1 in (2.5 cm) deep, to the back of the taper.
Final Blocking
- Mist the whole holder lightly with water. Do not soak it.
- Lay the panel flat and pin it to 7 in (17.8 cm) × 20.5 in (52.1 cm).
- Push a rolled towel or a spare roll into each pocket so the trellis dries open and even.
- Gently straighten the diamond loops with your fingers.
- Fluff the rose petals and shape the leaf tips to a point.
- Let everything dry completely before you take out the pins.
Final Quality-Control Checklist
- Panel is 7 in (17.8 cm) wide and square at the bottom corners
- Taper edges are even on both sides
- Each pocket has 11 open trellis loops all the way around
- Rims and bases are sewn straight across the matching rows
- Roses are centered and the leaves are symmetrical
- Tab seam is secure around the ring
- All yarn tails are woven in at least 2 in (5.1 cm) and trimmed
Troubleshooting
- Pocket too tight for a roll: Your gauge is too firm. Remake the pocket with a 5.5 mm hook.
- Trellis loops sag: Make each ch-5 a little snugger, or change to ch-4 loops in every round.
- Panel edges wave: You worked too many border sts. Keep to exactly 1 sc per row end.
- Panel edges pull in: You worked too few border sts. Count each side again (81 sc per long side in Row 2).
- Rose looks flat: Roll the inner end tighter and stitch through the base more firmly.
- Pocket gapes away from the panel: Add a few tacking stitches at each side seam.
Care
Hand wash in cool water and lay flat to dry. Take the rolls out before washing, and reshape the pockets while they are damp.
Final Notes
Here is the measurement chain:
- Gauge: 3.5 sts and 4 rows per 1 in (2.5 cm).
- Panel: 21 sts wide, which is 6 in (15.2 cm).
- Length: 64 straight rows plus 16 taper rows make 20 in (50.8 cm).
- Border: two rows bring the panel to 7 in (17.8 cm) × 20.5 in (52.1 cm).
- Pockets: 44 sts around, so each flattened pocket is 22 sts, or about 6.25 in (15.9 cm), wide. It fits inside the green border.
Check each stage as you go and the holder will hang straight.
Happy crocheting!