

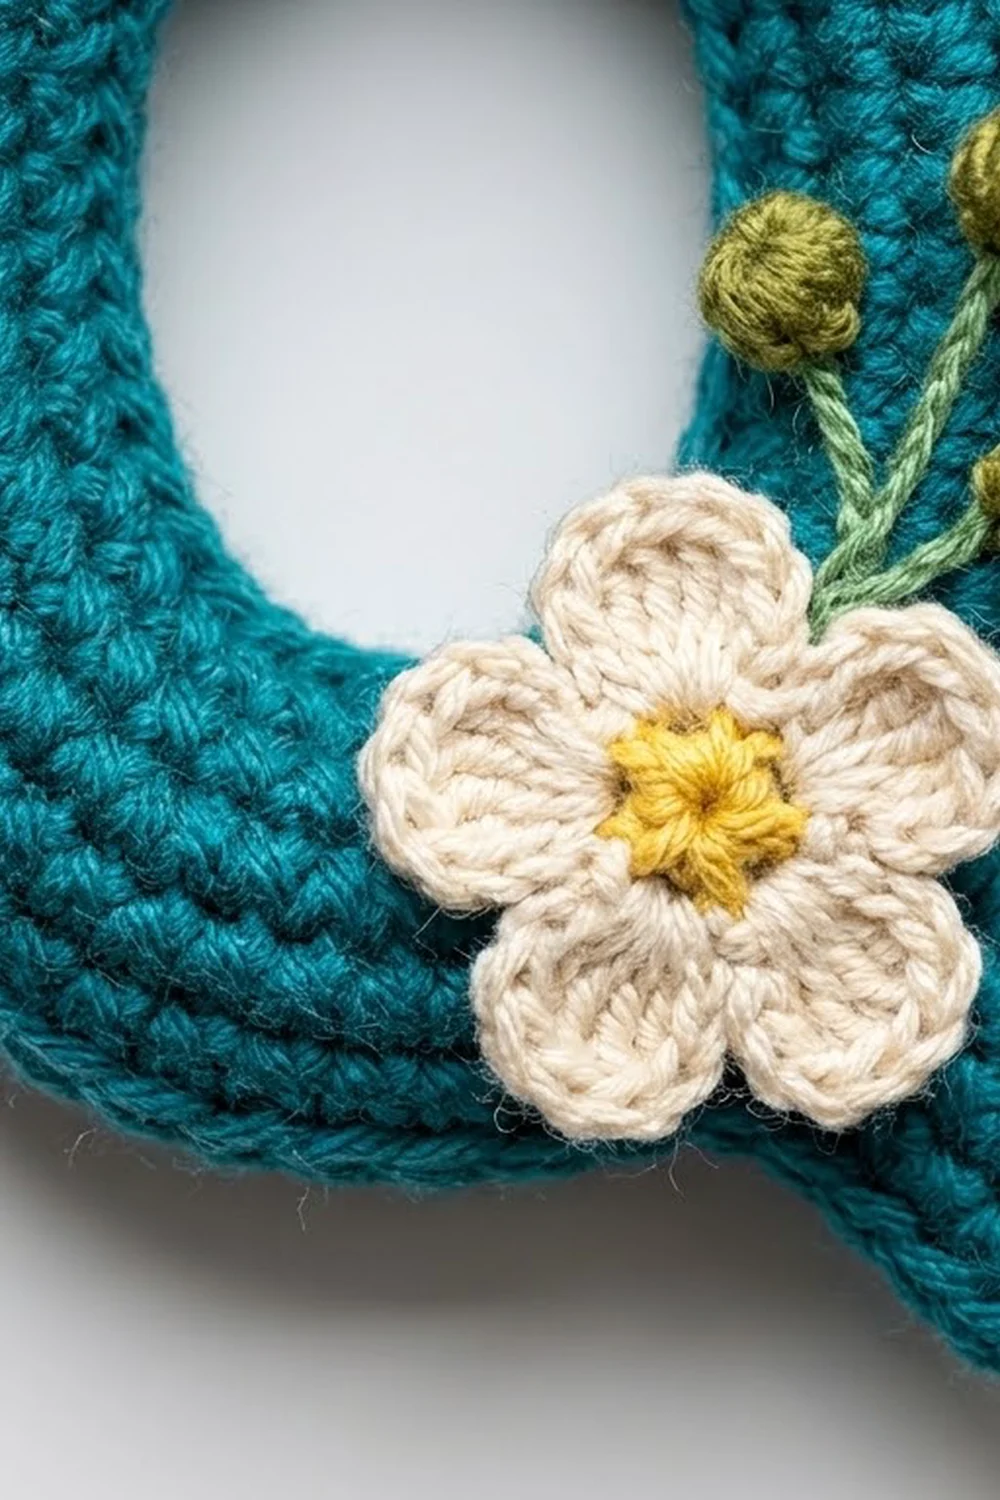
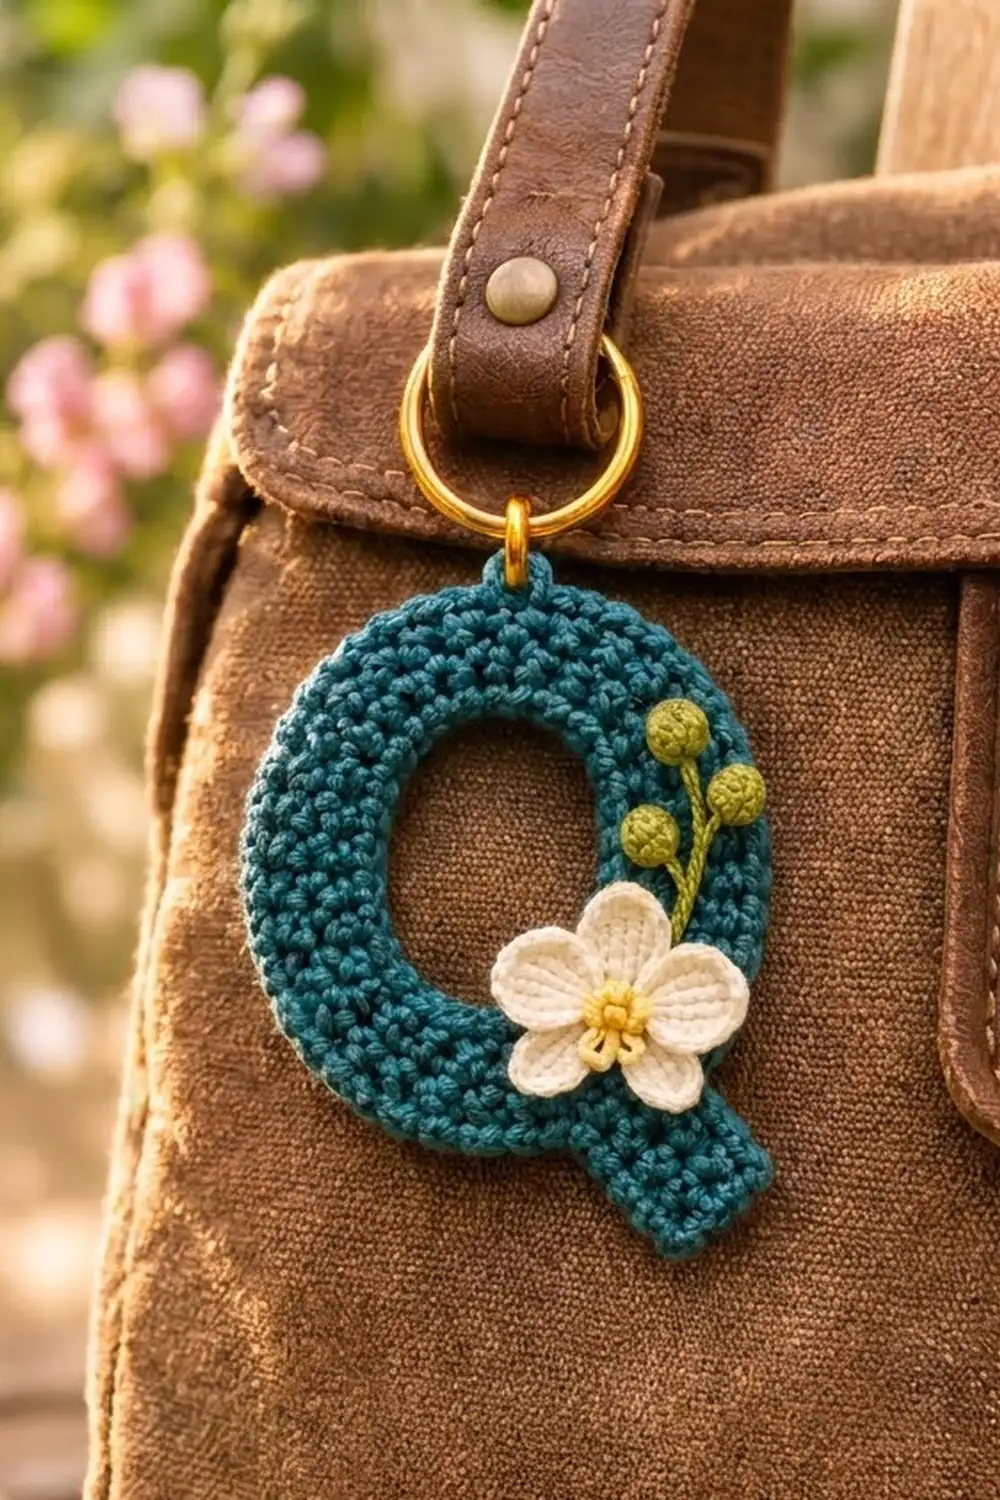
This little charm is a capital letter Q in deep teal single crochet. A cream five-petal flower and a sprig of green berries are sewn onto the lower right curve. A gold split ring at the top makes it ready to clip onto a bag strap, a key set, or a zipper pull.
The colors are teal for the letter, cream for the petals, buttery yellow for the flower center, and olive green for the stem and berries. The style is neat and slightly botanical. The single crochet gives the letter a firm, pebbly texture that holds its shape on a keychain.
The pattern uses US crochet terms. The finished letter measures about 3.25 in (8.3 cm) wide and 3.75 in (9.5 cm) tall, not counting the hardware.
Here is how it comes together. You chain a ring and work five rounds of single crochet outward to make the oval of the Q, adding stitches only on the top and bottom curves. Next, you work a short tail in rows from the lower right edge. A slip-stitch edging tidies the outer edge. Finally, you make the flower and berries separately, sew them on, embroider the stem, and add the hardware.
Finished Size and Construction
- Finished size: 3.25 in (8.3 cm) wide x 3.75 in (9.5 cm) tall
- Skill level: Easy / advanced beginner
- Terminology: US crochet terms
- Yarn weight: DK (light worsted, weight 3), mercerized cotton
- Hook: 3.0 mm
- Number of pieces: 1 letter, plus 1 flower and 3 berries sewn on
- Layout: Single charm, no joining needed
- Oval ring size (after Round 5): 2.9 in (7.4 cm) wide x 3.4 in (8.6 cm) tall
- Size before border: 3.25 in (8.3 cm) x 3.75 in (9.5 cm), including the tail
- Border depth: a slip-stitch edging, less than 0.1 in (0.3 cm), so it does not change the size
Materials
Mercerized cotton works best. It has a soft sheen, shows clear stitch definition, and does not fuzz with daily handling. A soft acrylic DK also works, but the letter will be a little floppier.
- Teal (main color): 10 g, about 24 m
- Cream (petals): 3 g, about 7 m
- Olive green (berries and stem): 2 g, about 5 m
- Yellow (flower center): 1 g, about 2 m
All quantities include a margin for your gauge swatch and weaving in ends.
Tools
- 3.0 mm crochet hook
- 4 stitch markers
- Tapestry needle
- Sharp embroidery needle
- 1 gold split ring, 1 in (2.5 cm) across
- 1 gold jump ring, 0.25 in (0.6 cm) across
- 2 pairs of flat-nose pliers
- Blocking mat and rust-proof pins
- Scissors
Abbreviations (US Terms)
- ch – chain
- sl st – slip stitch
- sc – single crochet
- hdc – half double crochet
- dc – double crochet
- inc – 2 sc in the same stitch
- st(s) – stitch(es)
- MR – magic ring
- RS – right side
Special stitch: 5-dc popcorn (pc). Work 5 dc in the indicated space. Drop the loop from your hook. Insert the hook from front to back into the first dc. Pick up the dropped loop and pull it through. This closes the stitch into a small, round bump.
Gauge and Checkpoints
Gauge: 6 sc and 6 rows = 1 in (2.5 cm) in single crochet.
Work a swatch of 12 sc for 12 rows. It should measure 2 in (5.1 cm) square. Tight, firm stitches matter here, because a keychain needs to keep its shape.
Treat the letter itself as your test piece. Check your measurements at these points:
- Foundation ring: The 28-ch ring should be about 4.7 in (11.9 cm) around.
- After Round 3: The band is 0.5 in (1.3 cm) wide. The outer oval is 2.25 in (5.7 cm) wide x 2.75 in (7.0 cm) tall.
- After Round 5: The band is 0.83 in (2.1 cm) wide. The outer oval is 2.9 in (7.4 cm) wide x 3.4 in (8.6 cm) tall. The opening is 1.25 in (3.2 cm) wide x 1.75 in (4.4 cm) tall.
- After the tail: The tail is 0.83 in (2.1 cm) wide and extends 1 in (2.5 cm) from the ring.
If the letter is too big, go down to a 2.75 mm hook. If it is too small or feels stiff, go up to a 3.25 mm hook. Do not change the stitch counts. The oval shaping depends on them.
Pattern
Part 1: The Oval Ring (Teal)
The ring is worked in joined rounds with the RS facing. Each round starts with a ch 1, which does not count as a stitch. You work counterclockwise.
The 28 stitches are divided into four sections, which you mark on Round 1:
- Right side: sts 1–8 (straight)
- Top curve: sts 9–14
- Left side: sts 15–22 (straight)
- Bottom curve: sts 23–28
The two side sections stay at 8 sts in every round. All increases go into the two curves, and that is what makes the ring an oval.
Foundation: Ch 28 and sl st into the first ch to form a ring. Make sure the chain is not twisted.
Round 1: Ch 1, then sc in each ch around. Sl st to the first sc. (28 sts)
Place a marker in st 1, st 9, st 15, and st 23. Each marker shows the start of a section. Move the markers up as you work each round.
Round 2: Ch 1. Sc in each of the next 8 sts (right side). [Sc in next st, inc in next st] 3 times (top curve, now 9 sts). Sc in each of the next 8 sts (left side). [Sc in next st, inc in next st] 3 times (bottom curve, now 9 sts). Sl st to the first sc. (34 sts)
Round 3: Ch 1. Sc in each of the next 8 sts. [Sc in next 2 sts, inc in next st] 3 times (12 sts). Sc in each of the next 8 sts. [Sc in next 2 sts, inc in next st] 3 times (12 sts). Sl st to the first sc. (40 sts)
Checkpoint: 2.25 in (5.7 cm) wide x 2.75 in (7.0 cm) tall. The ring should lie flat. If it ruffles, your hook is too large. If it cups, your hook is too small.
Round 4: Ch 1. Sc in each of the next 8 sts. [Sc in next 3 sts, inc in next st] 3 times (15 sts). Sc in each of the next 8 sts. [Sc in next 3 sts, inc in next st] 3 times (15 sts). Sl st to the first sc. (46 sts)
Round 5: Ch 1. Sc in each of the next 8 sts. [Sc in next 4 sts, inc in next st] 3 times (18 sts). Sc in each of the next 8 sts. [Sc in next 4 sts, inc in next st] 3 times (18 sts). Sl st to the first sc. Fasten off. (52 sts)
Round 5 breaks down as 8 + 18 + 8 + 18 = 52.
| Round | Right | Top | Left | Bottom | Total |
|---|---|---|---|---|---|
| 1 | 8 | 6 | 8 | 6 | 28 |
| 2 | 8 | 9 | 8 | 9 | 34 |
| 3 | 8 | 12 | 8 | 12 | 40 |
| 4 | 8 | 15 | 8 | 15 | 46 |
| 5 | 8 | 18 | 8 | 18 | 52 |
Checkpoint: 2.9 in (7.4 cm) wide x 3.4 in (8.6 cm) tall.
Part 2: The Tail (Teal)
The tail is worked in rows directly into Round 5. It uses 5 stitches centered at the 4:30 clock position, where the bottom curve meets the right side. These are the last 3 sts of the bottom curve (sts 50–52) and the first 2 sts of the right side (sts 1–2).
Row 1: With the RS facing, join teal with a sl st in st 50. Ch 1, then sc in sts 50, 51, 52, 1, and 2. Turn. (5 sts)
Rows 2–6: Ch 1, sc in each st across, turn. (5 sts)
Do not fasten off. Continue straight into the border.
Six rows at 6 rows per inch make a tail 1 in (2.5 cm) long. Five stitches make it 0.83 in (2.1 cm) wide. Because the tail grows straight out from the 4:30 point, it angles down and to the right, just like the tail of a printed Q.
Part 3: The Hanging Point
Put a removable marker in the center stitch of the Round 5 top curve, which is the 9th of its 18 sts. You will attach the jump ring here after blocking.
Border
The border is one round of slip stitches around the whole outer edge. It firms up the edge and evens out the tension. It adds less than 0.1 in (0.3 cm).
Border gauge: Work 1 sl st in each Round 5 stitch, and 1 sl st in each row end of the tail.
Border round: Ch 1 after Row 6, then work loosely:
- Tail end: sl st in each of the 5 sts (5)
- Tail side 1: sl st in each row end (6)
- Bottom curve: sl st in sts 35–49 (15)
- Left side: sl st in sts 27–34 (8)
- Top curve: sl st in sts 9–26 (18)
- Right side: sl st in sts 3–8 (6)
- Tail side 2: sl st in each row end (6)
Sl st to the first sl st and fasten off. (64 sl sts)
Why the math works: Round 5 has 52 sts, and the tail covers 5 of them. That leaves 47 open stitches, which is 15 + 8 + 18 + 6. The tail adds 6 + 5 + 6 = 17 edge stitches. 47 + 17 = 64. Since every stitch gets exactly one slip stitch, the edge neither stretches nor gathers.
Leave the inner edge of the opening as it is. The foundation chain already gives it a clean line.
Flower (Yellow and Cream)
Center: With yellow, make a MR. Ch 1, then work 10 sc into the ring. Pull the ring tight and sl st to the first sc. Fasten off. (10 sts)
Petals: Join cream in any stitch of the center. [In the next st work (hdc, 3 dc, hdc). Sl st in the next st.] Repeat 5 times. Fasten off, leaving a 10 in (25.4 cm) tail for sewing. (5 petals: 25 petal sts + 5 sl sts)
The dc stitches give each petal its vertical lines. The flower measures about 1.25 in (3.2 cm) across.
Stamens: With yellow, work 5 small French knots evenly around the edge of the center.
Berries (Make 3, Green)
Make a MR. Ch 2, then work a 5-dc popcorn into the ring. Ch 1 to lock it. Pull the ring tight and fasten off, leaving an 8 in (20.3 cm) tail. Each berry is about 0.3 in (0.8 cm) across.
Assembly of Appliqués
- Pin the flower over the lower right of the ring, so it covers the joint where the right side meets the tail. Let one petal overlap the outer edge slightly.
- With the cream tail, sew around the center and under each petal tip. Stitch only through the top loops of the teal so the back stays tidy.
- With green and the embroidery needle, chain-stitch a main stem 1 in (2.5 cm) long. Start under the top petal and run it up the right side of the ring.
- Add two branches, each 0.3 in (0.8 cm) long, coming off the stem toward the outer edge.
- Sew one berry to the tip of the main stem and one to the end of each branch. Pass each berry tail through the letter twice and knot it on the back.
Final Blocking
- Weave in all ends on the back of the letter, through the stitches of the same color.
- Lightly mist the letter with water. Avoid soaking the flower.
- Pin the letter flat on the mat, RS up: one pin at the top, one at each side, and one at the tail tip.
- Check the size: 3.25 in (8.3 cm) wide x 3.75 in (9.5 cm) tall.
- Ease the opening into an even oval about 1.25 in (3.2 cm) x 1.75 in (4.4 cm).
- Let it dry completely, at least 4 hours.
- Unpin it. Open the jump ring with the two pliers and pass it through the marked top stitch, catching both Round 5 and Round 4 for strength. Add the split ring and close the jump ring tightly.
Final Quality-Control Checklist
- Round 5 has 52 sts, and the side sections are still 8 sts each.
- The tail is 5 sts wide and 6 rows long.
- The border has 64 sl sts and the edge lies flat.
- The letter is 3.25 in (8.3 cm) x 3.75 in (9.5 cm).
- The flower has 5 even petals, a yellow center, and 5 French knots.
- There are 3 berries, firmly anchored at the stem tips.
- The jump ring is fully closed, with no gap.
- No ends show on the front.
Troubleshooting
- The ring cups like a bowl: You are crocheting too tightly at the curves. Go up half a hook size, or add 1 extra inc per curve on Round 5 only. Then adjust the border count to match.
- The ring ruffles: Your gauge is too loose. Go down half a hook size.
- The oval leans to one side: You drifted between sections. Re-place the markers each round, and make sure each side section still has 8 sts.
- The tail curls: Pin it flat during blocking, and work the border’s slip stitches loosely along the tail sides.
- The petals look floppy: Pull the sl sts between petals snug, or try a 2.75 mm hook for the flower only.
- The jump ring tears through: Move it so it catches two rounds, not one.
Care
Hand wash in cool water with mild soap, press out the water in a towel, and dry flat. Do not tumble dry, and remove the metal hardware before washing if possible.
Final Notes
The size of this charm comes from a short chain of measurements. A 28-ch foundation ring gives an opening of 1.25 in (3.2 cm) x 1.75 in (4.4 cm). Five rounds of sc at 6 rounds per inch add a band 0.83 in (2.1 cm) wide, so the oval reaches 2.9 in (7.4 cm) x 3.4 in (8.6 cm). The 1 in (2.5 cm) tail brings the full letter to 3.25 in (8.3 cm) x 3.75 in (9.5 cm). The 64-stitch slip-stitch border finishes the edge without changing the size. Check your gauge first, and every later measurement will fall into place.
Happy crocheting!