

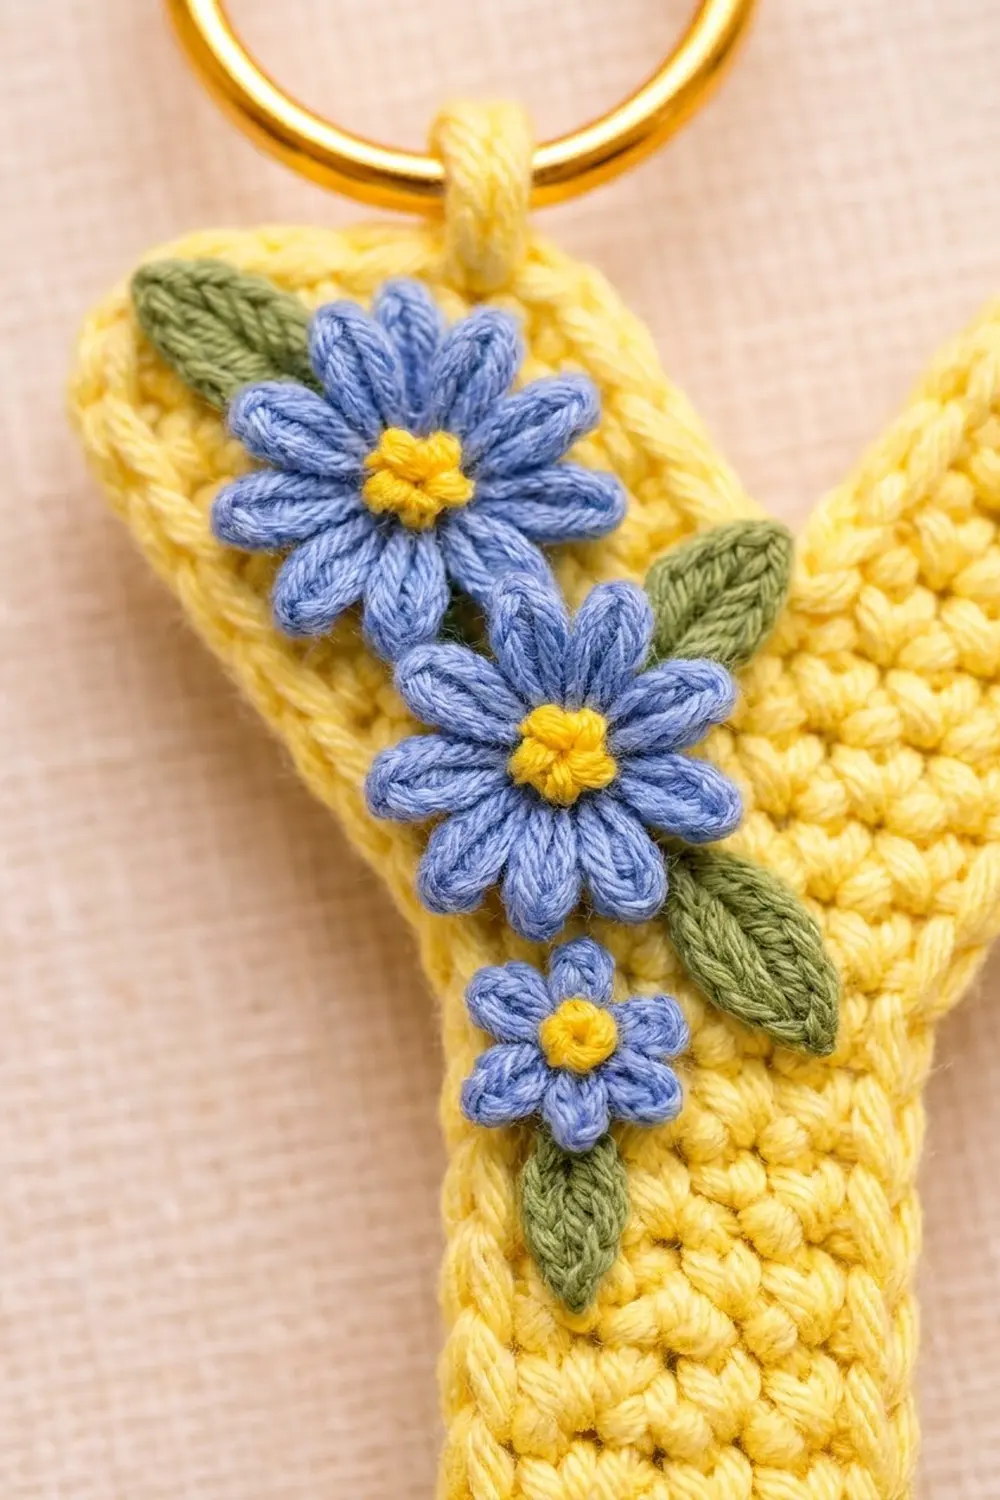
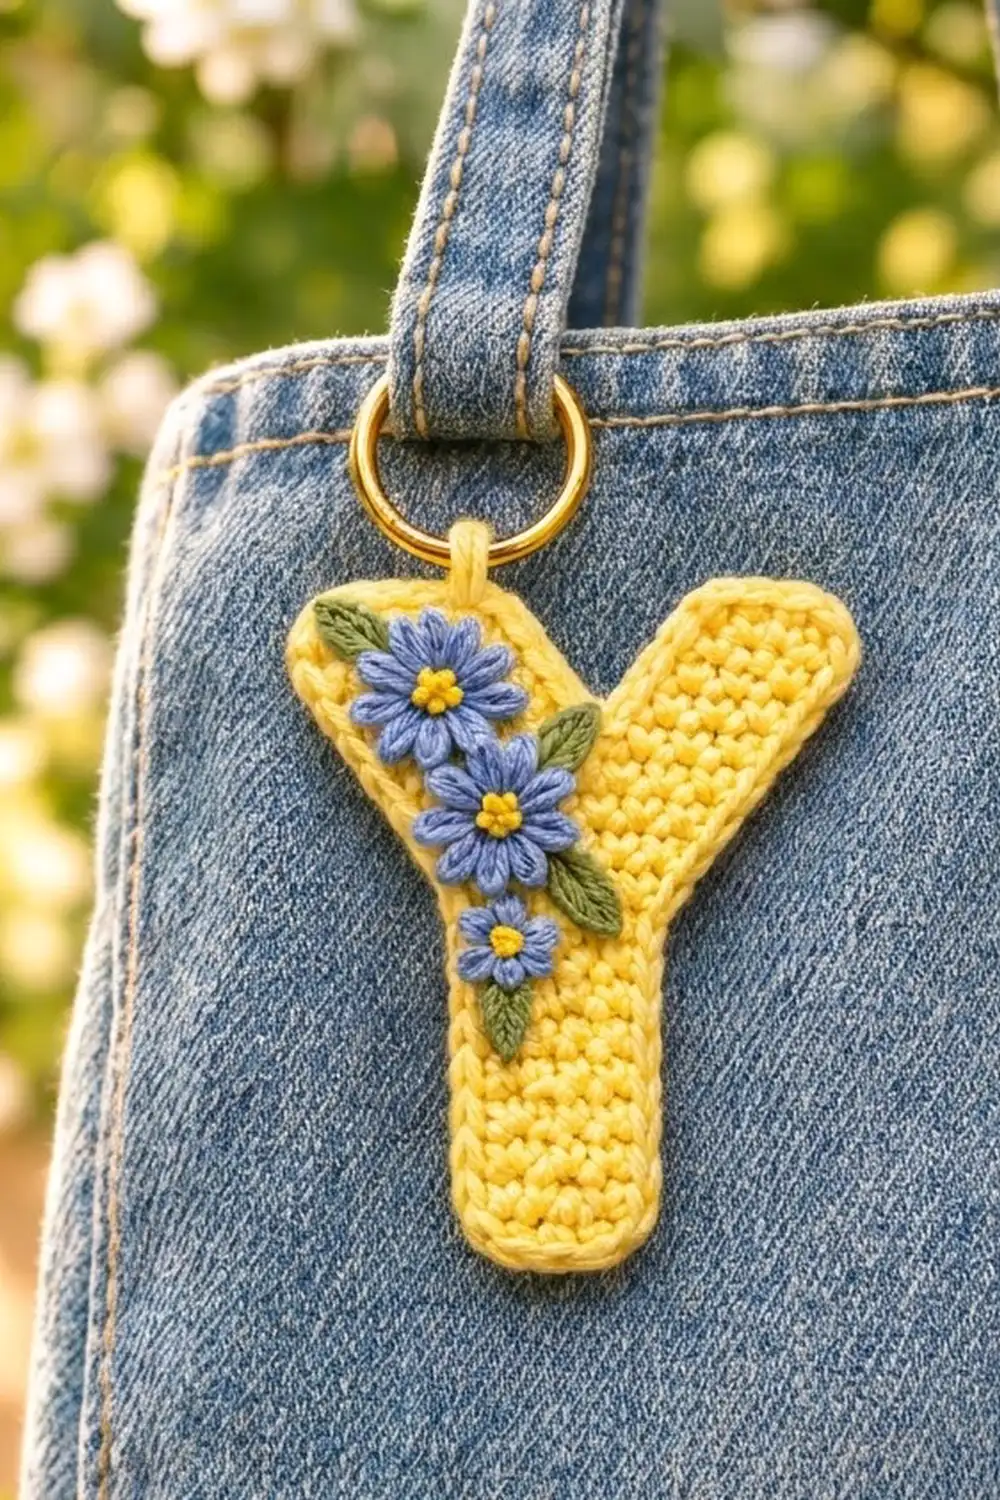
This little keychain is a sunny yellow letter Y, worked flat in tight single crochet and finished with a tidy outline round. Three blue flowers with yellow centers and four small green leaves trail diagonally down the left arm onto the stem. A covered loop at the top of the left arm holds a gold split ring.
The colors are soft butter yellow, periwinkle blue, and sage green. It’s a sweet cottage-garden accessory that looks great on a denim tote, a backpack zipper, or a set of house keys. It also makes a quick personalized gift.
The pattern uses US crochet terms. The finished letter measures about 4.0 in (10.2 cm) wide across the arm tops and 4.4 in (11.2 cm) tall, not counting the loop and ring.
Construction is simple. You crochet the stem in rows, widen it over three rows, then work each arm separately, shifting it outward so it slants. A single round of sc outlines the whole letter, and a covered loop is added at the top. The flowers and leaves are made separately and sewn on.
Finished Size and Construction
- Finished size: 4.0 in (10.2 cm) wide x 4.4 in (11.2 cm) tall
- Skill level: Easy
- Terminology: US crochet terms
- Yarn weight: DK / light worsted (#3) cotton
- Hook: 3.5 mm (E-4)
- Number of pieces: 1 letter body (a single piece), plus 3 flowers and 4 leaves sewn on as appliqués
- Layout: single piece, no joining
- Piece size before border: 3.6 in (9.1 cm) wide x 4.0 in (10.2 cm) tall
- Stem width: 1.2 in (3.0 cm) before border, 1.6 in (4.1 cm) after
- Border depth: 1 round of sc, about 0.2 in (0.5 cm) on every edge
Materials
Choose a smooth mercerized or combed cotton in DK weight. Cotton holds the letter shape crisply and resists stretching on a keychain. Avoid fuzzy or very soft acrylic, which makes the arms floppy.
- Yellow (main color and flower centers): 10 g / 23 m
- Periwinkle blue (petals): 3 g / 7 m
- Sage green (leaves): 2 g / 5 m
These amounts include a comfortable margin for your gauge check, tails, and sewing.
Tools:
- 3.5 mm (E-4) crochet hook
- 1 gold split ring, 1 in (2.5 cm) / 25 mm diameter
- Tapestry needle
- 2 stitch markers
- Blocking mat and rust-proof pins
- Spray bottle with water
- Scissors and a ruler
Abbreviations (US Terms)
- ch – chain
- sl st – slip stitch
- sc – single crochet
- hdc – half double crochet
- dc – double crochet
- sc2tog – single crochet 2 together
- st(s) – stitch(es)
- RS / WS – right side / wrong side
- MR – magic ring
Special stitch – Shift row: a row that keeps the stitch count at 6 but moves the whole arm one stitch outward. Work 2 sc in the outer-edge stitch and sc2tog over the 2 inner-edge stitches. Depending on where the row starts, it reads either “2 sc in first st, sc 3, sc2tog” or “sc2tog, sc 3, 2 sc in last st.” Both give 6 sts.
Gauge and Checkpoints
Gauge: 20 sc and 22 rows = 4 in (10.2 cm) in sc rows. That is 5 sc and 5.5 rows per 1 in (2.5 cm).
Use the stem itself as your test piece. Work Rows 1–10, then measure before continuing.
- After Row 10: 1.2 in (3.0 cm) wide x 1.8 in (4.6 cm) tall
- After Row 13: 2.4 in (6.1 cm) wide at the top edge, 2.4 in (6.1 cm) tall
- After both arms: 3.6 in (9.1 cm) wide across the arm tops, 4.0 in (10.2 cm) tall
- After border: 4.0 in (10.2 cm) wide x 4.4 in (11.2 cm) tall
If your stem is too wide or too tall, go down to a 3.25 mm hook. If it’s too small, go up to a 3.75 mm hook. You want a tight, firm fabric, so if you’re unsure, choose the smaller hook.
Letter Body
The body is worked in rows. The ch 1 at the start of each row does not count as a stitch. Turn at the end of every row.
Stem
With yellow, ch 7.
Row 1 (RS): Sc in 2nd ch from hook and in each ch across. Turn. (6 sts)
Rows 2–10: Ch 1, sc in each st across. Turn. (6 sts)
Checkpoint: 1.2 in (3.0 cm) wide x 1.8 in (4.6 cm) tall.
Flare
These three growth rows widen the stem so both arms can sit side by side.
Row 11: Ch 1, 2 sc in first st, sc 4, 2 sc in last st. Turn. (8 sts)
Row 12: Ch 1, 2 sc in first st, sc 6, 2 sc in last st. Turn. (10 sts)
Row 13 (RS): Ch 1, 2 sc in first st, sc 8, 2 sc in last st. Turn. (12 sts)
Checkpoint: 2.4 in (6.1 cm) wide across Row 13. Place a marker in the 6th st and another in the 7th st to mark the center split.
Left Arm (Arm A)
You are now on the WS, at the outer edge of the arm that sits on the left when the RS faces you. Work over the first 6 sts only.
Row 14 (shift row): Ch 1, 2 sc in first st (outer edge), sc 3, sc2tog (inner edge). Turn. (6 sts)
Rows 15–16: Ch 1, sc in each st across. Turn. (6 sts)
Row 17 (shift row): Ch 1, sc2tog (inner edge), sc 3, 2 sc in last st (outer edge). Turn. (6 sts)
Rows 18–19: Ch 1, sc in each st across. Turn. (6 sts)
Row 20 (shift row): Ch 1, 2 sc in first st (outer edge), sc 3, sc2tog (inner edge). Turn. (6 sts)
Row 21: Ch 1, sc in each st across. Turn. (6 sts)
Row 22 (rounding row): Ch 1, sc2tog, sc 2, sc2tog. (4 sts)
Fasten off. The three shift rows move the arm 3 sts outward. That creates the slant and opens the V.
Right Arm (Arm B)
With the WS facing, join yellow in the 7th st of Row 13, right beside Arm A. You start at the inner edge.
Row 14 (shift row): Ch 1, sc2tog (inner edge), sc 3, 2 sc in last st (outer edge). Turn. (6 sts)
Rows 15–16: Ch 1, sc in each st across. Turn. (6 sts)
Row 17 (shift row): Ch 1, 2 sc in first st (outer edge), sc 3, sc2tog (inner edge). Turn. (6 sts)
Rows 18–19: Ch 1, sc in each st across. Turn. (6 sts)
Row 20 (shift row): Ch 1, sc2tog (inner edge), sc 3, 2 sc in last st (outer edge). Turn. (6 sts)
Row 21: Ch 1, sc in each st across. Turn. (6 sts)
Row 22 (rounding row): Ch 1, sc2tog, sc 2, sc2tog. (4 sts)
Fasten off. Weave in the tails on the WS.
Checkpoint: 4.0 in (10.2 cm) tall from the foundation chain to the arm tops, 3.6 in (9.1 cm) across the outer edges of the arms, and a 1.2 in (3.0 cm) gap between the arm tips.
Flowers and Leaves
Large Flower (make 2)
Rnd 1: With yellow, MR, 8 sc in ring, pull closed, sl st to first sc. (8 sts) Fasten off.
Rnd 2: Join blue in any st. *(Ch 2, dc, ch 2, sl st) in same st, sl st in next st; repeat from * 7 more times. The last sl st lands in the joining st. (8 petals)
Fasten off, leaving a 10 in (25.4 cm) tail for sewing. Each flower measures about 0.9 in (2.3 cm) across.
Small Flower (make 1)
Rnd 1: With yellow, MR, 6 sc in ring, pull closed, sl st to first sc. (6 sts) Fasten off.
Rnd 2: Join blue in any st. *(Ch 2, hdc, ch 2, sl st) in same st, sl st in next st; repeat from * 5 more times. (6 petals)
Fasten off with a 10 in (25.4 cm) tail. The small flower measures about 0.6 in (1.5 cm) across.
Leaf (make 4)
With green, ch 5.
Sc in 2nd ch from hook, hdc in next 2 ch, (sc, ch 2, sc) in last ch for the tip. Working along the other side of the chain: hdc in next 2 ch, sc in last ch, sl st in first sc. (4 sts per side, plus the tip)
Fasten off with an 8 in (20.3 cm) tail. Each leaf is about 0.6 in (1.5 cm) long.
Border
Border gauge: 1 sc in each top or bottom stitch, 1 sc in each row end, and 3 sc in each corner stitch.
With the RS facing, join yellow in the first foundation ch at the bottom right corner. Work into the free loops of the foundation chain.
Rnd 1:
- Bottom edge: 3 sc in first st, sc 4, 3 sc in last st. (10 sts)
- Left outer side: 1 sc in each row end of Rows 1–22. (22 sts)
- Left arm top: 3 sc in first st of Row 22, sc 2, 3 sc in last st. (8 sts)
- Inner edge: 1 sc in each row end of Rows 22–15 of Arm A (8 sts), sc2tog over the Row 14 ends of Arm A and Arm B at the bottom of the V (1 st), 1 sc in each row end of Rows 15–22 of Arm B (8 sts). (17 sts)
- Right arm top: 3 sc in first st, sc 2, 3 sc in last st. (8 sts)
- Right outer side: 1 sc in each row end of Rows 22–1. (22 sts)
Sl st to first sc. Total: 10 + 22 + 8 + 17 + 8 + 22 = 87 sts.
Why the math works: Each outer edge is longer than the straight 4.0 in (10.2 cm) height, because the flare and the slanted arm add length. It comes to about 4.4 in (11.2 cm). At 5 sc per 1 in (2.5 cm), that edge needs 22 sc, which matches the 22 row ends exactly. Each slanted inner arm edge is about 1.75 in (4.4 cm) long and gets one sc per row end. The sc2tog at the V point removes 1 st so the notch stays sharp instead of puckering. The 3-sc groups let the corners turn flat and give the arm tips and stem bottom their softly rounded look.
Hanging Loop
Count the 8 border sts across the left arm top. Join yellow in the 4th st, ch 8, sl st in the 5th st. Work 12 sc into the ch-8 space, then sl st in the 4th st. Fasten off and weave in.
The covered loop stands about 0.75 in (1.9 cm) tall. Open the split ring and thread it through the loop.
Sewing On the Flowers and Leaves
Lay the letter RS up. Arrange the flowers in a diagonal line that runs from the top outer corner of the left arm down toward the stem.
- Place one large flower at the top of the left arm, about 0.2 in (0.5 cm) below the border.
- Place the second large flower just below and to the right of the first, touching it, near where the arm meets the stem.
- Place the small flower on the upper left of the stem, just below the second flower.
- Tuck in the leaves: one at the upper left of the top flower, one to its right, one to the right of the second flower, and one below the small flower, pointing down.
- Pin everything. Sew each piece on with small whip stitches through the back loops of its outer edge. Add a few stitches through each yellow center so it stays flat.
Keep your stitches small and don’t pull them through to the WS, so nothing shows on the back.
Final Blocking
- Remove the split ring.
- Pin the letter RS up on the blocking mat, with one pin at each arm tip and at each bottom corner.
- Check the measurements: 4.0 in (10.2 cm) wide and 4.4 in (11.2 cm) tall.
- Straighten the outer edges and open the V evenly.
- Mist lightly with water until damp, not soaked.
- Let it dry completely, at least 4 hours.
- Unpin and reattach the split ring.
Final Quality-Control Checklist
- Stem is 1.6 in (4.1 cm) wide after the border.
- Both arms slant at the same angle and are the same length.
- Border has 87 sts, with no gaps at the corners or the V.
- Letter measures 4.0 in (10.2 cm) x 4.4 in (11.2 cm).
- Hanging loop is firmly anchored and the ring is closed.
- Flowers and leaves lie flat, and no stitches show on the WS.
- All tails are woven in securely.
Troubleshooting
The arms look straight instead of slanted. Check that each shift row has both the increase at the outer edge and the sc2tog at the inner edge.
The V is puckered. Work the sc2tog at the V point more loosely, or replace it with 1 sc in each Row 14 end (88 sts total).
The border ruffles. Your tension is loose. Go down a hook size for the border only.
The border cups or pulls. Add 1 sc in one row end on each outer side (89 sts total), so both sides stay equal.
The petals curl forward. Block the flowers flat before sewing them on.
The loop stretches. Make sure you covered it with all 12 sc.
Care
Hand wash in cool water with mild soap, press out the water in a towel, and dry flat. Remove the metal ring before washing to prevent rust marks.
Final Notes
The measurements build in four steps. The stem is 1.2 in (3.0 cm) wide after Row 10. The flare widens to 2.4 in (6.1 cm) by Row 13. The arms bring the piece to 3.6 in (9.1 cm) x 4.0 in (10.2 cm). The border adds 0.2 in (0.5 cm) on every edge, for a finished letter of 4.0 in (10.2 cm) x 4.4 in (11.2 cm). Check each stage and your keychain will come out crisp and balanced.
Happy crocheting!