

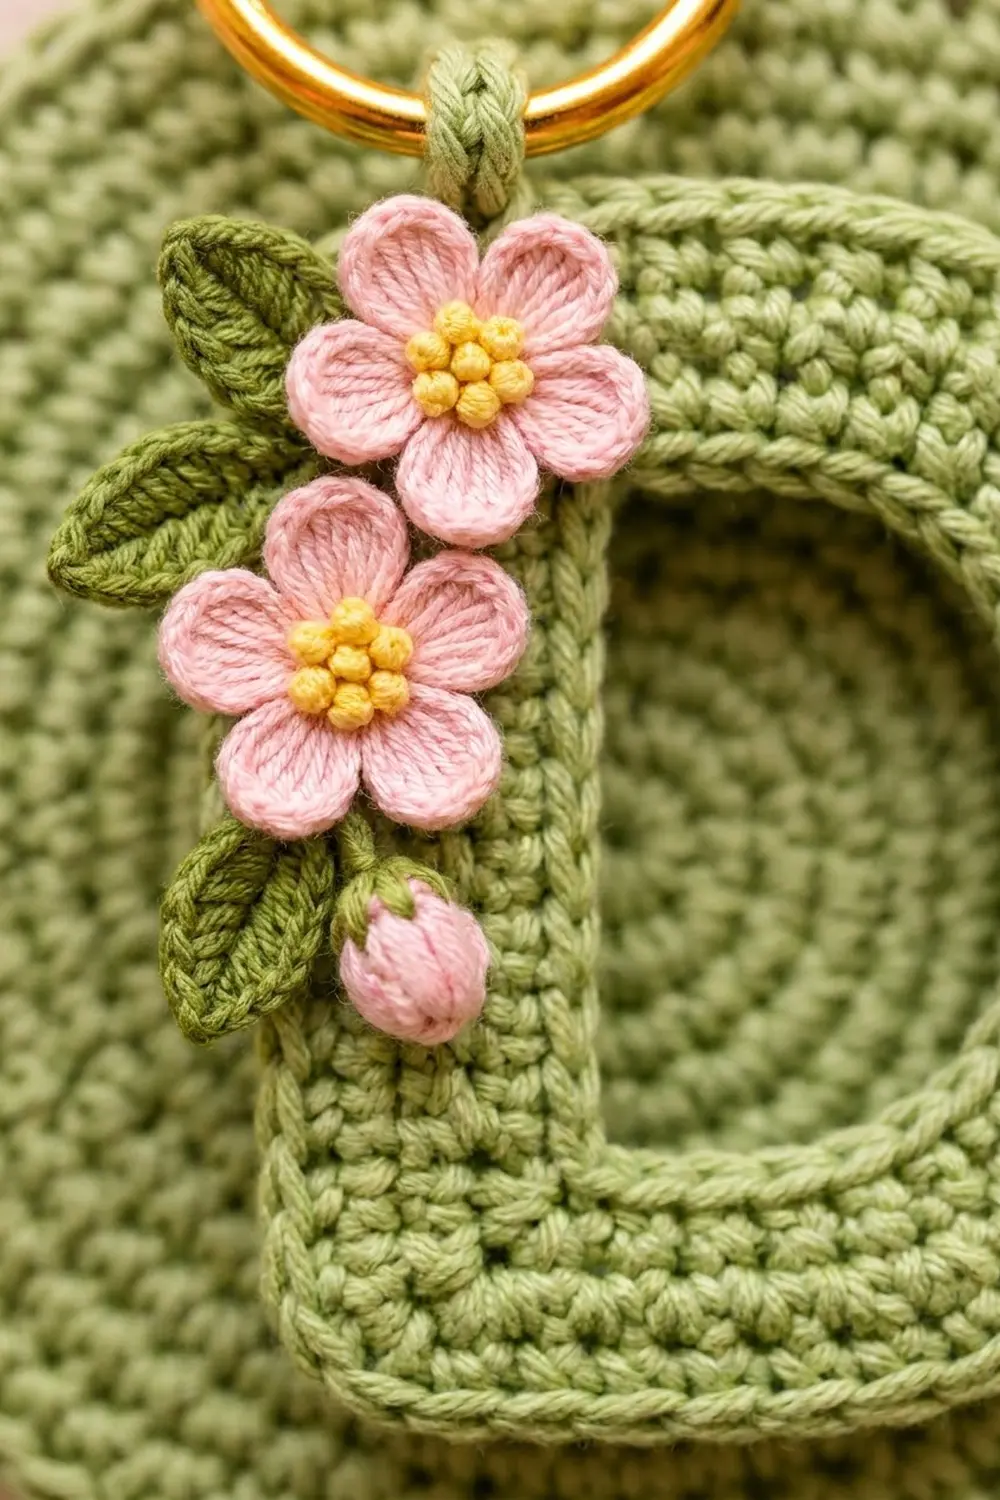
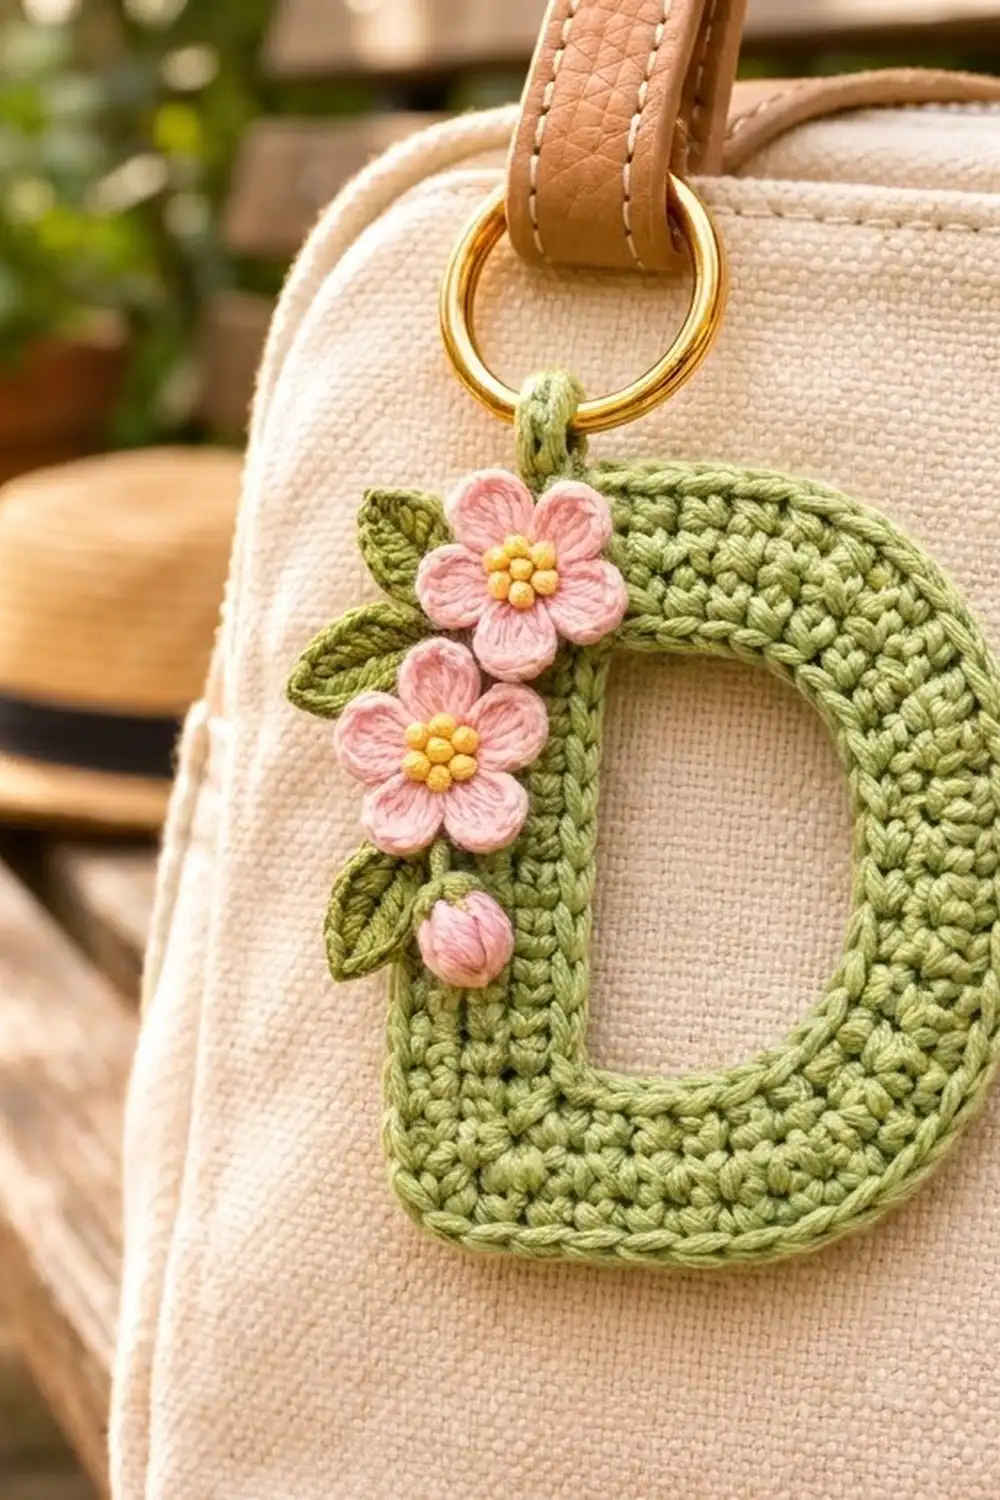
This little letter D is made for initial lovers. It’s a soft sage green monogram with a cluster of pink blossoms down its stem, and it hangs from a bright gold ring. Clip it to a tote, a backpack zipper, or a set of keys, or give it as a personalized gift.
The palette is gentle: sage green for the letter, light pink for two flowers and a bud, warm yellow for the flower centers, and a slightly deeper green for three leaves. Dense single crochet keeps the letter firm, and one outline round on every edge gives it a neat, finished look.
This pattern uses US crochet terms. The finished letter is about 3 in (7.6 cm) wide and 3.75 in (9.5 cm) tall, not counting the ring.
The letter is worked flat in rows. You start at the bottom bar, split the work into a bowl section and a stem section, and then join them back together across the top. One border round goes around the outside and one goes around the hole. Last, you make two flowers, one bud, and three leaves, sew them along the stem, and add the hanging loop and ring.
Finished Size and Construction
- Finished size: 3 in (7.6 cm) wide × 3.75 in (9.5 cm) tall
- Skill level: Easy–intermediate
- Terminology: US
- Yarn weight: Sport (#2 fine) cotton
- Hook: 2.5 mm
- Number of pieces: 1 finished letter body, decorated with 6 small sewn-on appliqués (2 flowers, 1 bud, 3 leaves)
- Layout: Single letter, no joined motifs
- Size before border: 2.75 in (7.0 cm) × 3.5 in (8.9 cm), 15 stitches × 21 rows
- Border depth: about 0.125 in (0.3 cm) on every edge
Materials
Use a smooth mercerized cotton or cotton blend. It shows stitch definition well and holds its shape on a bag. The amounts below assume about 155 m per 50 g.
- Sage green (letter, border, loop): 5 g, about 16 m
- Light pink (flowers, bud): 2 g, about 6 m
- Yellow (flower centers): 1 g, about 3 m
- Deeper leaf green (leaves, bud sepals): 1 g, about 3 m
These quantities include a margin for swatching and sewing tails.
Tools:
– 2.5 mm crochet hook
– 1 gold split ring or key ring, 1 in (2.5 cm) across
– Tapestry needle
– 2 stitch markers
– Scissors
– Blocking mat and rust-proof pins
– A pinch of yarn scraps to stuff the bud
Abbreviations (US Terms)
- ch – chain
- sl st – slip stitch
- sc – single crochet
- hdc – half double crochet
- dc – double crochet
- sc2tog – single crochet 2 together
- st(s) – stitch(es)
- RS – right side
Standing sc: With a slip knot on your hook, insert the hook in the stitch, yarn over and pull up a loop, then yarn over and draw through both loops.
Row-end: The side edge of a row. When you work into a row-end, insert the hook under the outer strand of the last or first stitch of that row.
Gauge and Checkpoints
Gauge: 11 sc and 12 rows = 2 in (5.1 cm) in sc rows.
This piece is small, so you can treat the first 4 rows as your swatch.
- After Row 4: 15 sts, width 2.75 in (7.0 cm).
- After Row 17: height about 2.8 in (7.1 cm). The hole should be about 1.1 in (2.8 cm) wide and 2.2 in (5.6 cm) tall.
- After Row 21: 2.75 in (7.0 cm) × 3.5 in (8.9 cm).
- After the border: 3 in (7.6 cm) × 3.75 in (9.5 cm).
If your piece is too big, go down to a 2.25 mm hook. If it is too small, go up to a 2.75 mm hook. Change hooks if you are off by more than about 0.25 in (0.6 cm) at the Row 4 checkpoint. Don’t change any stitch counts.
Letter Body
Edge reference: The stem edge is the straight left side of the D. The curve edge is the rounded right side.
All shaping happens at the curve edge. Odd rows start at the curve edge, and even rows end there. After Row 1, put a stitch marker in the last stitch (the stem edge) as a reminder.
At the end of every row, ch 1 and turn. The ch-1 never counts as a stitch.
Bottom Bar (growth rows)
Foundation: With sage green, ch 13.
Row 1: Sc in 2nd ch from hook and in each ch across. (12 sts)
Row 2: Sc in each st to last st, 2 sc in last st. (13 sts)
Row 3: 2 sc in first st, sc in each st across. (14 sts)
Row 4: Sc in each st to last st, 2 sc in last st. (15 sts)
These steps round off the bottom of the bowl. Check the 2.75 in (7.0 cm) width now.
Bowl Section
Row 5: Sc in first 4 sts. Leave the remaining 11 sts unworked. (4 sts)
Rows 6–17: Sc in each st across. (4 sts per row)
You now have 13 bowl rows. Fasten off, leaving a 6 in (15.2 cm) tail.
Stem Section
Hold the piece with the Row 4 stitches along the top and the bowl at the right. Count Row 4 from the curve edge. Stitches 1–4 hold the bowl, and stitches 5–10 stay unworked to form the bottom of the hole.
Row 5: Join sage green with a standing sc in stitch 11. Sc in the next 4 sts. (5 sts)
Rows 6–17: Sc in each st across. (5 sts per row)
Row 17 ends at the stem edge. Don’t fasten off.
Top Bar
Row 18: Sc in each of the 5 stem sts, ch 6, then sc in each of the 4 sts at the top of the bowl. (9 sc + 6 ch = 15 sts)
The ch-6 forms the top of the hole and bridges the 6 skipped stitches below it.
Row 19: Sc2tog, then sc in each st and ch across. (14 sts)
Row 20: Sc in each st to last 2 sts, sc2tog. (13 sts)
Row 21: Sc2tog, sc in each st across. (12 sts)
These decreases mirror Rows 1–4 and round off the top of the bowl. Fasten off.
The body is now 2.75 in (7.0 cm) × 3.5 in (8.9 cm). There are 21 rows along each side and 13 rows along each side of the hole.
Flowers (make 2)
Rnd 1: With yellow, make a magic ring. Ch 1, then work 10 sc in the ring. Pull the ring closed and join with a sl st to the first sc. (10 sts) Fasten off.
Rnd 2: Join light pink in any st. (Hdc, 2 dc, hdc) in the next st, sl st in the next st. Repeat from * to * 4 more times. (5 petals: 20 petal sts + 5 sl sts = 25 sts)
Fasten off, leaving an 8 in (20.3 cm) tail for sewing.
Center: With yellow, work 3 small French knots on the center to give it a bumpy, beaded look.
Each flower measures about 0.8 in (2.0 cm) across.
Bud (make 1)
Rnd 1: With light pink, make a magic ring and work 6 sc in the ring. (6 sts) From here, work in a continuous spiral.
Rnd 2: Sc in next st, 2 sc in next st. Repeat from * to * 2 more times. (9 sts)
Rnd 3: Sc in each st around. (9 sts)
Rnd 4: Sc in next st, sc2tog. Repeat from * to * 2 more times. (6 sts)
Push a pinch of scraps inside. Thread the tail through the front loops of the 6 sts and pull them closed. Use this end as the base of the bud.
Sepals: With leaf green, work 3 straight stitches up from the base, each about 0.25 in (0.6 cm) long.
The bud measures about 0.5 in (1.3 cm) tall and 0.4 in (1.0 cm) wide.
Leaves (make 3)
With leaf green, ch 6.
Side 1: Sc in 2nd ch from hook, hdc in next ch, dc in next ch, hdc in next ch, sc in last ch. (5 sts)
Tip: Ch 2.
Side 2: Rotate the piece and work along the underside of the foundation chain. Sc in the first ch, hdc in the next ch, dc in the next ch, hdc in the next ch, sc in the last ch. (5 sts) Sl st to the first sc of Side 1.
Total: 10 sts plus the ch-2 tip.
Fasten off, leaving a tail for sewing. Each leaf is about 0.75 in (1.9 cm) long.
Border
Border gauge: One sc per stitch and one sc per row-end. The border sts lie at roughly the body’s stitch gauge, and the round adds about 0.125 in (0.3 cm) to every edge.
Outer Round
Hold the piece RS facing with Row 21 at the top. Join sage green with a standing sc in the first st of Row 21, at the curve end.
- Top edge: Sc in the next 10 sts (11 sc total, including the standing sc). Work 3 sc in the 12th st, which is the stem corner (3 sc).
- Stem side: Sc in each row-end from Row 20 down to Row 2. (19 sc)
- Bottom stem corner: Work 3 sc in the first foundation ch at the stem end. (3 sc)
- Bottom edge: Sc in each of the remaining 11 foundation chs. (11 sc)
- Curve side: Work 2 sc in the row-end of Row 1, then 1 sc in each row-end of Rows 2–20 (19 sc). Finish with 2 sc in the row-end of Row 21. (23 sc)
Sl st to the first sc.
Round total: 11 + 3 + 19 + 3 + 11 + 23 = 70 sts
The 3-sc stem corners are counted separately from the side counts here. Fasten off.
Inner Round (the hole)
The hole has a 6-st bottom edge (Row 4, sts 5–10), two side edges of 13 row-ends each, and a 6-ch top edge along the underside of the Row 18 ch-6.
- Join with a standing sc in the 2nd bottom st, then sc in the next 3 sts. (4 sc)
- Sc2tog over the last bottom st and the first row-end of the next side. (1)
- Sc in the next 11 row-ends. (11)
- Sc2tog over the last row-end and the first top ch. (1)
- Sc in the next 4 chs. (4)
- Sc2tog over the last ch and the first row-end of the next side. (1)
- Sc in the next 11 row-ends. (11)
- Sc2tog over the last row-end and the first bottom st. (1)
Sl st to the first sc.
Round total: 4 + 1 + 11 + 1 + 4 + 1 + 11 + 1 = 34 sts
Each edge is covered completely: 6 bottom sts, 13 row-ends, 6 top chs, and 13 row-ends.
Why the Math Works
A sc worked into a row-end compresses slightly in cotton. That makes one sc per row-end the right density along the sides.
- Square stem corners: These need 3 sc to turn 90 degrees.
- Curve corners: Rows 1–4 and 18–21 already round these corners, so 2 sc is enough.
- Hole corners: These are concave, so the sc2tog in each corner stops the inner edge from ruffling. It also softens the corners into the D shape.
The result is 70 outer sts and 34 inner sts. Both rounds lie flat, and the letter grows to 3 in (7.6 cm) × 3.75 in (9.5 cm).
Hanging Loop
- Join sage green in the center st of the top stem corner.
- Ch 10, then sl st in the same st.
- Work 14 sc into the ch-10 loop and sl st at the base. Fasten off.
The loop stands about 0.5 in (1.3 cm) tall.
Final Blocking
- Weave in all the letter’s ends before you add any appliqués.
- Mist the letter with water until it is damp, not soaked.
- Pin it RS up to 3 in (7.6 cm) × 3.75 in (9.5 cm). Keep the stem straight and the bowl evenly rounded.
- Pin the hole open so that it stays 1.1 in (2.8 cm) wide.
- Mist the flowers and leaves separately and pat them flat. Open the petals with your fingertips.
- Let everything dry completely.
- Lay out the appliqués on the stem, starting just below the loop. From top to bottom, place a leaf, a flower, a leaf, a flower, the bud, and a leaf. Let them hang about 0.25 in (0.6 cm) past the left edge.
- Tuck the leaves partly under the flowers, and set the bud just under the lower flower.
- Sew each piece down with small stitches through its back. Catch only the back layer of the letter.
- Open the split ring and slide it through the loop.
Final Quality-Control Checklist
- [ ] Rows 1–4 count 12, 13, 14, 15.
- [ ] Rows 18–21 count 15, 14, 13, 12.
- [ ] The bowl has 4 sts and the stem has 5 sts for 13 rows each.
- [ ] The outer border has 70 sts and the inner border has 34 sts.
- [ ] The letter measures 3 in (7.6 cm) × 3.75 in (9.5 cm).
- [ ] Each flower has 5 even petals and a knotted yellow center.
- [ ] The appliqués are secure, with no stitches showing on the front.
- [ ] The ring is closed and the loop is firm.
Troubleshooting
- The bowl and stem don’t line up at Row 18: Count the rows. Both sections need exactly 13 rows (Rows 5–17).
- The hole is twisted: You worked the stem rows in the opposite direction from the bowl. Row 5 of the stem must travel from stitch 11 toward the stem edge.
- The outer edge ruffles: You added extra sc along the sides. Use one per row-end.
- The curve looks pointed: Check that you used 2 sc, not 3 sc, at the curve corners.
- The hole corners pucker: You skipped the sc2tog corners. Redo the inner round.
- The petals curl: Block them damp and press them flat with your fingertips.
Care
Hand wash in cool water with mild soap, press out the water in a towel, and dry flat. Don’t wash the charm with the metal ring attached for long periods.
Final Notes
The measurements build on each other:
- The gauge is 11 sc and 12 rows = 2 in (5.1 cm).
- Row 4 is 15 sts wide, which is 2.75 in (7.0 cm).
- Twenty-one rows give 3.5 in (8.9 cm) of height.
- The 70-st outer round and the 34-st inner round frame the letter at 3 in (7.6 cm) × 3.75 in (9.5 cm).
Check each stage and the blossoms will sit neatly on a well-shaped D. Happy crocheting!