

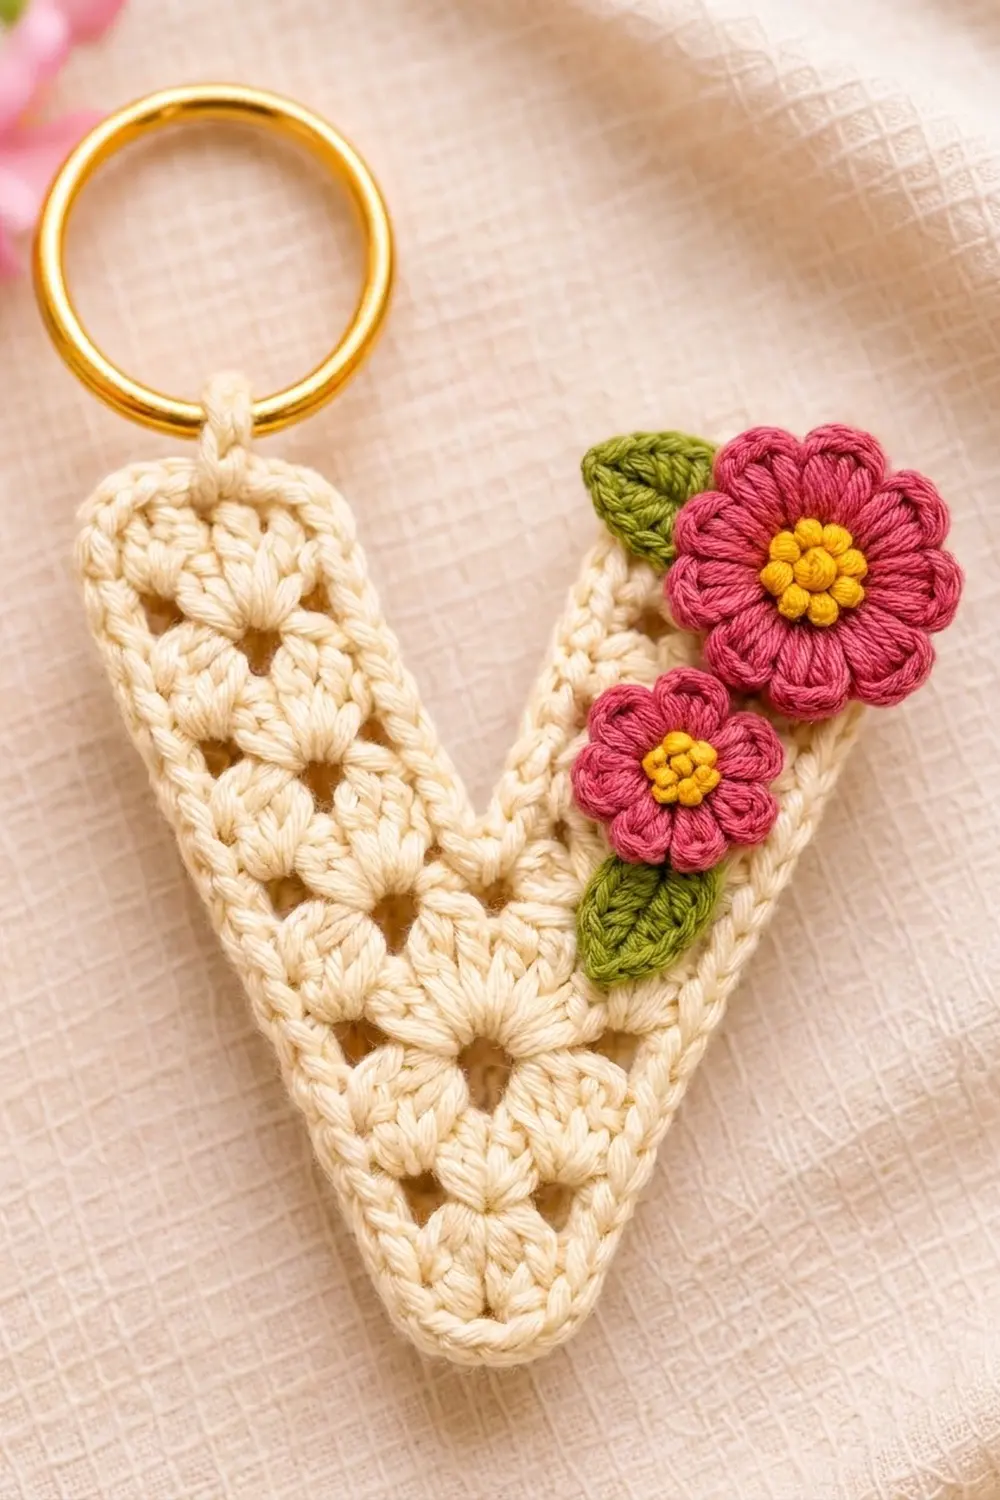
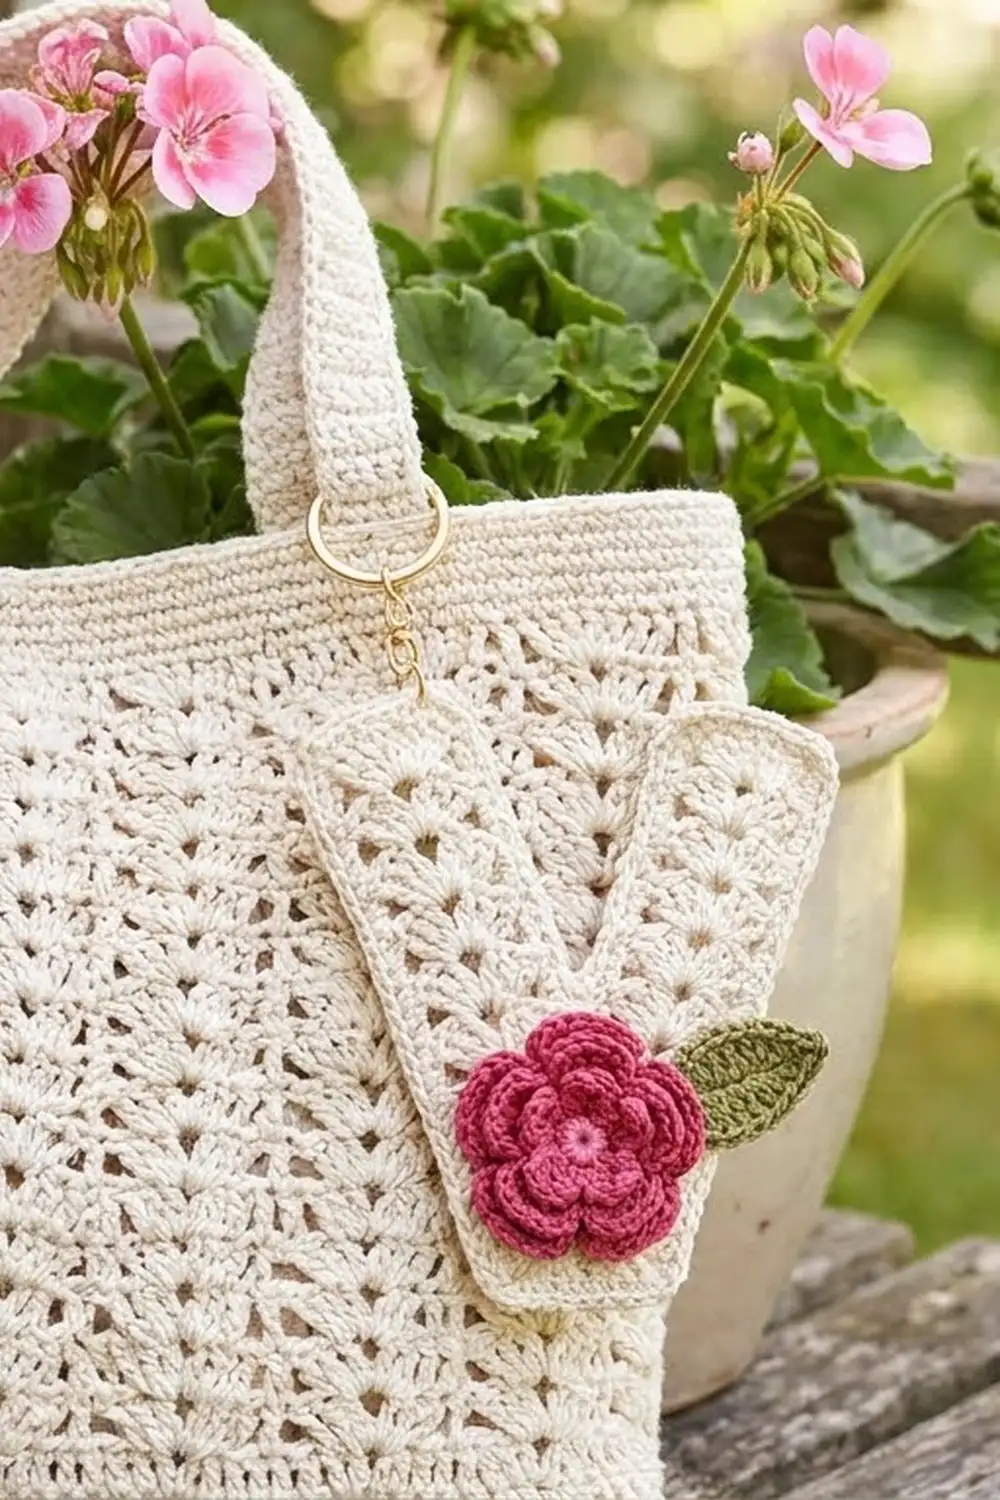
This little letter V keychain is soft, sweet, and quick to make. The letter is worked in creamy cotton with a lacy fan texture, and a cluster of raspberry flowers and olive leaves gives it a garden-party finish. A gold split ring makes it ready for keys, a tote handle, or a zipper pull.
The palette is simple: cream for the letter, raspberry pink for the petals, golden yellow for the flower centers, and olive green for the leaves. It reads as gentle and vintage, and it makes a lovely personalized gift.
This pattern uses US crochet terms. The finished letter measures about 4.5 in (11.4 cm) tall and 4 in (10.2 cm) wide, with arms about 1.5 in (3.8 cm) wide, not counting the ring.
The letter is one piece worked in rounds around a single foundation chain. Increases on one side of the chain and a decrease on the other side create the pointed bottom and the inner notch, and blocking sets the final angle. The flowers and leaves are made separately and sewn on.
Finished Size and Construction
- Finished size: 4.5 in (11.4 cm) tall x 4 in (10.2 cm) wide
- Skill level: Advanced beginner
- Terminology: US terms
- Yarn weight: #2 fine (sport) cotton
- Hook: 2.25 mm (B-1)
- Number of pieces: 1 letter, plus 2 flowers and 2 leaves as appliqués
- Layout: single letter V, flowers on the upper right arm, ring tab on the left arm
- Arm width: 1.5 in (3.8 cm) finished
- Size before border: 4.25 in (10.8 cm) tall x 3.75 in (9.5 cm) wide, arms 1.25 in (3.2 cm) wide
- Border depth: 1 round of sc, about 0.125 in (0.3 cm)
Materials
Choose a smooth mercerized or combed cotton in sport weight. Cotton holds the fan texture crisply and keeps the edge firm, which matters for an item that will be handled every day.
- Cream (A): 8 g, about 25 m
- Raspberry pink (B): 3 g, about 9 m
- Golden yellow (C): 1 g, about 3 m
- Olive green (D): 1 g, about 3 m
Quantities include a small safety margin for gauge swatching and weaving in.
Tools:
- 2.25 mm (B-1) crochet hook
- Gold split key ring, 1.25 in (3.2 cm) across
- Tapestry needle
- 2 stitch markers
- Rustproof pins and a blocking mat or folded towel
- Spray bottle with water
- Scissors
Abbreviations (US Terms)
- ch – chain
- sl st – slip stitch
- sc – single crochet
- hdc – half double crochet
- dc – double crochet
- sc3tog – single crochet 3 together
- FLO / BLO – front loop only / back loop only
- sp – space
- st(s) – stitch(es)
Special stitches:
- Shell: (2 dc, ch 1, 2 dc) in the same stitch.
- Corner shell: (3 dc, ch 1, 3 dc) in the same stitch.
- sc3tog: (insert hook in next st, yarn over, pull up a loop) 3 times, yarn over, pull through all 4 loops on hook.
Gauge and Checkpoints
Gauge: 14 sc and 14 sc rows = 2 in (5.1 cm), worked in Yarn A with a 2.25 mm hook.
Gauge matters more than usual here, because the letter’s shape depends on stitch counts lining up with a fixed length of chain. Make one test letter through Round 2 before committing to a final color or yarn.
Checkpoints:
- After Round 1: a straight strip about 6.5 in (16.5 cm) long and 0.4 in (1.0 cm) wide, with a slight bend at the center.
- After Round 2: each arm about 1 in (2.5 cm) wide at the shell tips.
- After Round 3: arms 1.25 in (3.2 cm) wide; pinned letter 4.25 in (10.8 cm) x 3.75 in (9.5 cm).
- After Round 4: arms 1.5 in (3.8 cm) wide; blocked letter 4.5 in (11.4 cm) x 4 in (10.2 cm).
If your piece is too big: go down to a 2.0 mm hook and restart. If it is too small: go up to a 2.5 mm hook. A difference of 0.25 in (0.6 cm) in the Round 1 strip length is enough to justify changing hooks.
Letter V
Work in joined rounds with the right side facing throughout. Do not turn.
Foundation: With A, ch 46.
Round 1: Sc in 2nd ch from hook, sc in next 21 ch, 3 sc in next ch (outer point made), sc in next 21 ch, 3 sc in last ch (arm end made). Rotate the work to work along the opposite side of the foundation chain. Sc in next 20 ch, sc3tog over next 3 ch (inner notch made), sc in next 20 ch, 2 sc in last ch (the same ch holding the first sc). Sl st to first sc. (92 sc)
The 45 working chains break down as 1 arm-end chain, 21 arm chains, 1 center chain, 21 arm chains, and 1 arm-end chain. Place a marker in the center sc of the outer point and another in the sc3tog. These mark the bottom tip and the notch.
Round 2: Ch 1, sc in next st. [Skip 1 st, shell in next st, skip 1 st, sc in next st] 5 times. Skip 1 st, corner shell in next st (the marked outer point sc), skip 1 st, sc in next st. [Skip 1 st, shell in next st, skip 1 st, sc in next st] 5 times. Skip 1 st, corner shell in next st (center sc of the arm end), skip 1 st, sc in next st. [Skip 1 st, shell in next st, skip 1 st, sc in next st] 10 times; the 5th sc of this section lands in the marked sc3tog. Skip 1 st, corner shell in next st (center sc of the first arm end), skip 1 st. Sl st to first sc.
Count: 20 shells, 3 corner shells, 23 sc. Every shell sits 4 stitches from the next, so the 92 stitches of Round 1 divide into 23 even repeats.
The skipped stitches on either side of each shell open into small triangular windows. These form the lacy texture.
Round 3 (leveling round): Ch 3 (counts as dc) in the same sc. [In the next shell, sc in 2nd dc, sc in ch-1 sp, sc in next dc; dc in next sc] 5 times. In the corner shell, sc in each of the 3 dc, 3 sc in ch-1 sp, sc in each of the 3 dc. Dc in next sc, then repeat the bracketed sequence 5 times. Work the corner shell as before. Dc in next sc, then repeat the bracketed sequence 10 times. Work the last corner shell as before. Sl st to top of beginning ch-3.
Count: 110 sts, made up as follows:
- First arm, outer edge: 21 sts (6 dc + 15 sc)
- Outer point: 9 sc
- Second arm, outer edge: 21 sts
- Arm end: 9 sc
- Inner edge (both arms through the notch): 41 sts (11 dc + 30 sc)
- Arm end: 9 sc
The dc stitches fill the dips between shells so the edge becomes level for the border. Do not fasten off.
Border
Border gauge: 7 sc = 1 in (2.5 cm), matching the main gauge.
Round 4: Ch 1, sc in same st as join and in each st around, with these exceptions:
- Each of the 3 corner groups (9 sts): sc in first 4 sts, 3 sc in 5th st, sc in last 4 sts = 11 sc.
- Inner edge (41 sts): sc in first 19 sts, sc3tog over next 3 sts (the center st is the 6th dc), sc in last 19 sts = 39 sc.
- Each outer arm edge (21 sts): sc in each st = 21 sc.
Sl st to first sc. Count: 110 sts worked 1 per stitch, plus 6 extra corner stitches (2 at each of 3 corners), minus 2 at the notch = 114 sc (21 + 11 + 21 + 11 + 39 + 11).
Why the math works: On the straight edges, each repeat of 4 stitches from Round 1 spans about 0.57 in (1.4 cm). Rounds 2 to 4 also keep 4 stitches per repeat, so the straight edges stay at 7 stitches per inch and lie flat. The convex corners (the arm ends and the outer point) need extra length, so they get the corner shells and the 3-sc increases. The concave notch needs less, so it gets a decrease. Fasten off.
Ring Tab
Lay the letter right side up with the point down. Find the arm end on the left. Count 3 sts from the center sc of that corner toward the outer edge, and join A there.
Row 1: Ch 1, sc in same st and next 2 sts, turn. (3 sc)
Rows 2–8: Ch 1, sc in each st, turn. (3 sc)
The tab measures about 1.1 in (2.8 cm). Slip the split ring onto the tab, fold the tab toward the back, and whipstitch Row 8 to the back of Row 1. Fasten off.
Large Flower
Round 1: With C, make a magic ring, ch 1, 6 sc in ring. Pull the ring closed and sl st to first sc. Fasten off C. (6 sc)
Round 2: Join B in any st, ch 1, 2 sc in each st around, sl st to first sc. (12 sc)
Round 3 (inner petals, FLO): [(Hdc, dc, hdc) in FL of next st, sl st in FL of next st] 6 times. (6 petals)
Round 4 (outer petals, BLO of Round 2): Fold the inner petals forward. [Sl st in BL of next st, (hdc, 3 dc, hdc) in BL of next st] 6 times. Sl st to first sl st. (6 petals)
The outer petals sit between the inner ones, so the flower looks layered. It measures about 1.25 in (3.2 cm). With C, add 4 or 5 small French knots on the center for a bumpy texture.
Small Flower
Round 1: With C, magic ring, ch 1, 5 sc in ring, sl st to first sc. Fasten off C. (5 sc)
Round 2: Join B, ch 1, 2 sc in each st, sl st to first sc. (10 sc)
Round 3 (FLO): [(Hdc, dc, hdc) in FL of next st, sl st in FL of next st] 5 times. (5 petals)
Round 4 (BLO of Round 2): [Sl st in BL of next st, (hdc, 2 dc, hdc) in BL of next st] 5 times. Sl st to first sl st. (5 petals)
The small flower measures about 1 in (2.5 cm). Add 3 French knots with C.
Leaves (Make 2)
With D, ch 7. Sc in 2nd ch from hook, hdc in next ch, dc in next 2 ch, hdc in next ch, sc in last ch, ch 2 for the tip. Working along the opposite side of the chain, sc in first ch, hdc in next ch, dc in next 2 ch, hdc in next ch, sc in last ch. Sl st to first sc. (12 sts + ch-2 tip)
Each leaf is about 1 in (2.5 cm) long and 0.5 in (1.3 cm) wide. Leave a 6 in (15.2 cm) tail for sewing.
Assembly
Do the assembly after blocking the letter (see below).
- Pin the large flower near the top of the right arm so that about a third of it hangs past the outer edge.
- Pin the small flower just below it, slightly toward the inner edge.
- Tuck one leaf behind the upper left of the large flower, pointing up and left. Tuck the other leaf behind the bottom of the small flower, pointing down.
- Sew the leaves first. Then sew each flower through its Round 2 stitches only, so the petals stay free.
Final Blocking
- Lightly mist the letter with water until it is damp but not soaked.
- Lay it right side up on the mat with the point down.
- Pin the outer point first. Then pin the two arm ends so the top measures 4 in (10.2 cm) across and the letter stands 4.5 in (11.4 cm) tall.
- Pin the notch straight down toward the point so both arms are the same length.
- Ease each arm to 1.5 in (3.8 cm) wide, opening the shell windows evenly.
- Leave it to dry completely before attaching the flowers.
Final Quality-Control Checklist
- Round counts confirmed: 92 sts, 23 shells, 110 sts, 114 sts.
- Both arms measure 1.5 in (3.8 cm) wide and are equal in length.
- The outer point is sharp and the notch is centered.
- The border lies flat with no ruffling along the straight edges.
- The tab is secure and the ring turns freely.
- The flowers are sewn firmly with no loose petals at the back.
- All ends are woven in and trimmed.
Troubleshooting
- Edges ruffle: your Round 3 is too loose, or a dc was added. Recount to 21 sts per outer edge.
- Edges cup: the border is too tight. Go up 0.25 mm for Round 4 only.
- The V barely bends: check the 3-sc and sc3tog in Round 1, then re-block with firmer pinning.
- Shells land off the corners: the Round 1 count is wrong. It must be exactly 92.
- The notch puckers: loosen the sc3tog in Round 4, or block the notch open more firmly.
- Flowers flop: stitch through the center round in a full circle, not just one point.
Care
Spot clean or hand wash cool, and reshape flat to dry. Avoid wringing so the petals and the point keep their shape.
Final Notes
The measurement chain is simple. Gauge of 7 sc per 1 in (2.5 cm) sets the Round 1 strip at 6.5 in (16.5 cm). Round 3 brings the arms to 1.25 in (3.2 cm), and the 0.125 in (0.3 cm) border finishes them at 1.5 in (3.8 cm), for a 4.5 in (11.4 cm) x 4 in (10.2 cm) letter. Check each stage, and your V will block straight, sharp, and ready to carry.
Happy crocheting!