

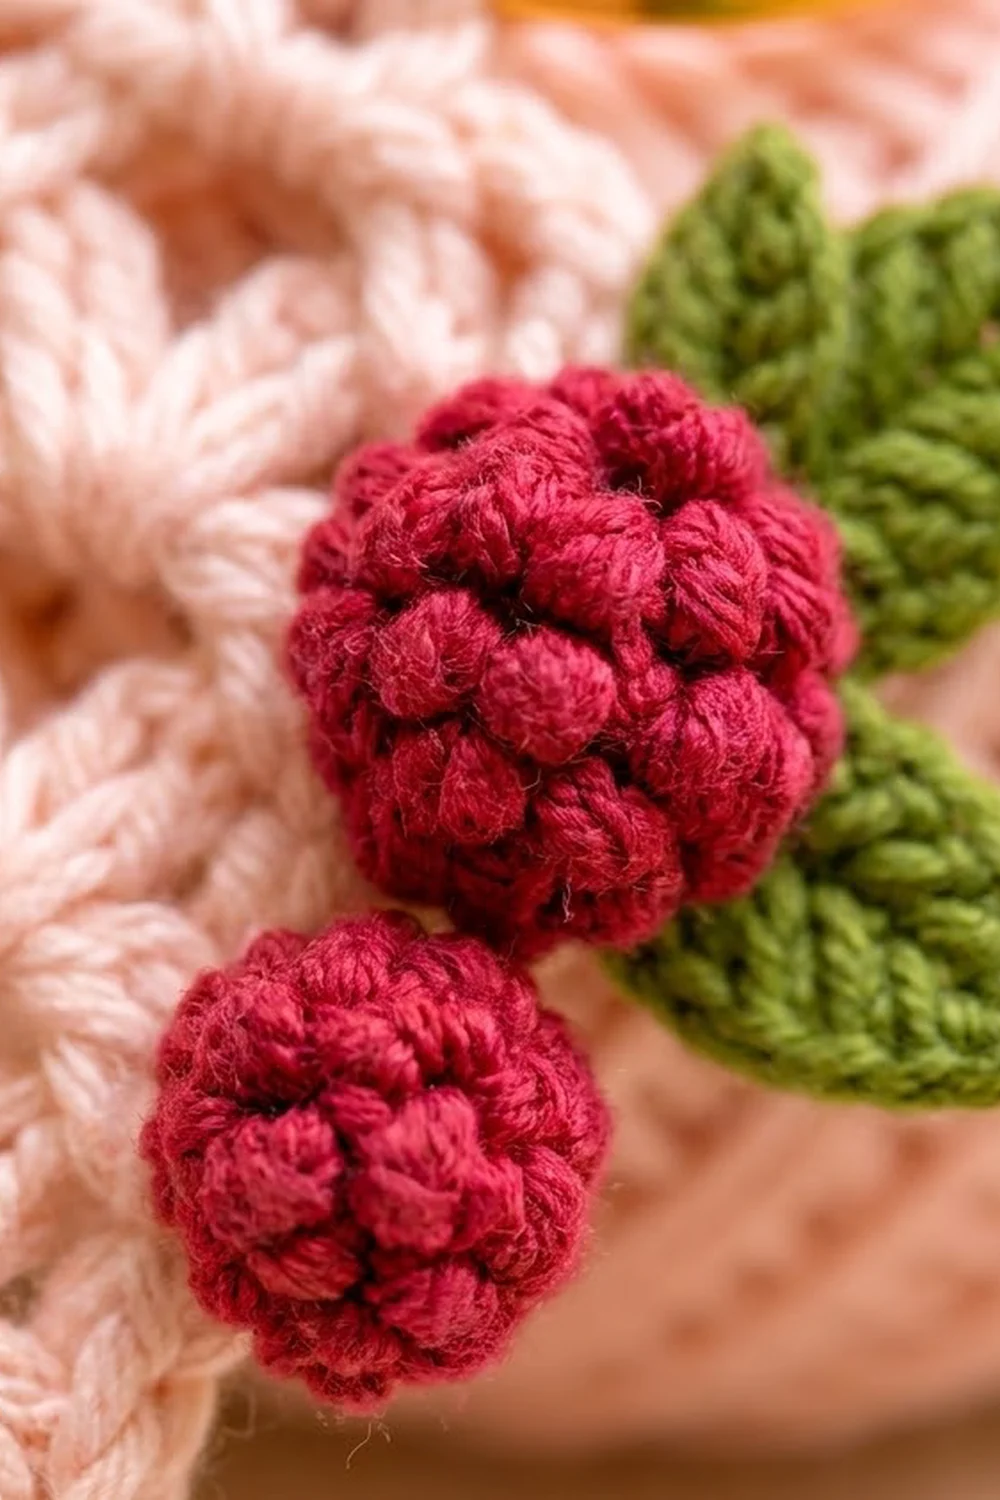
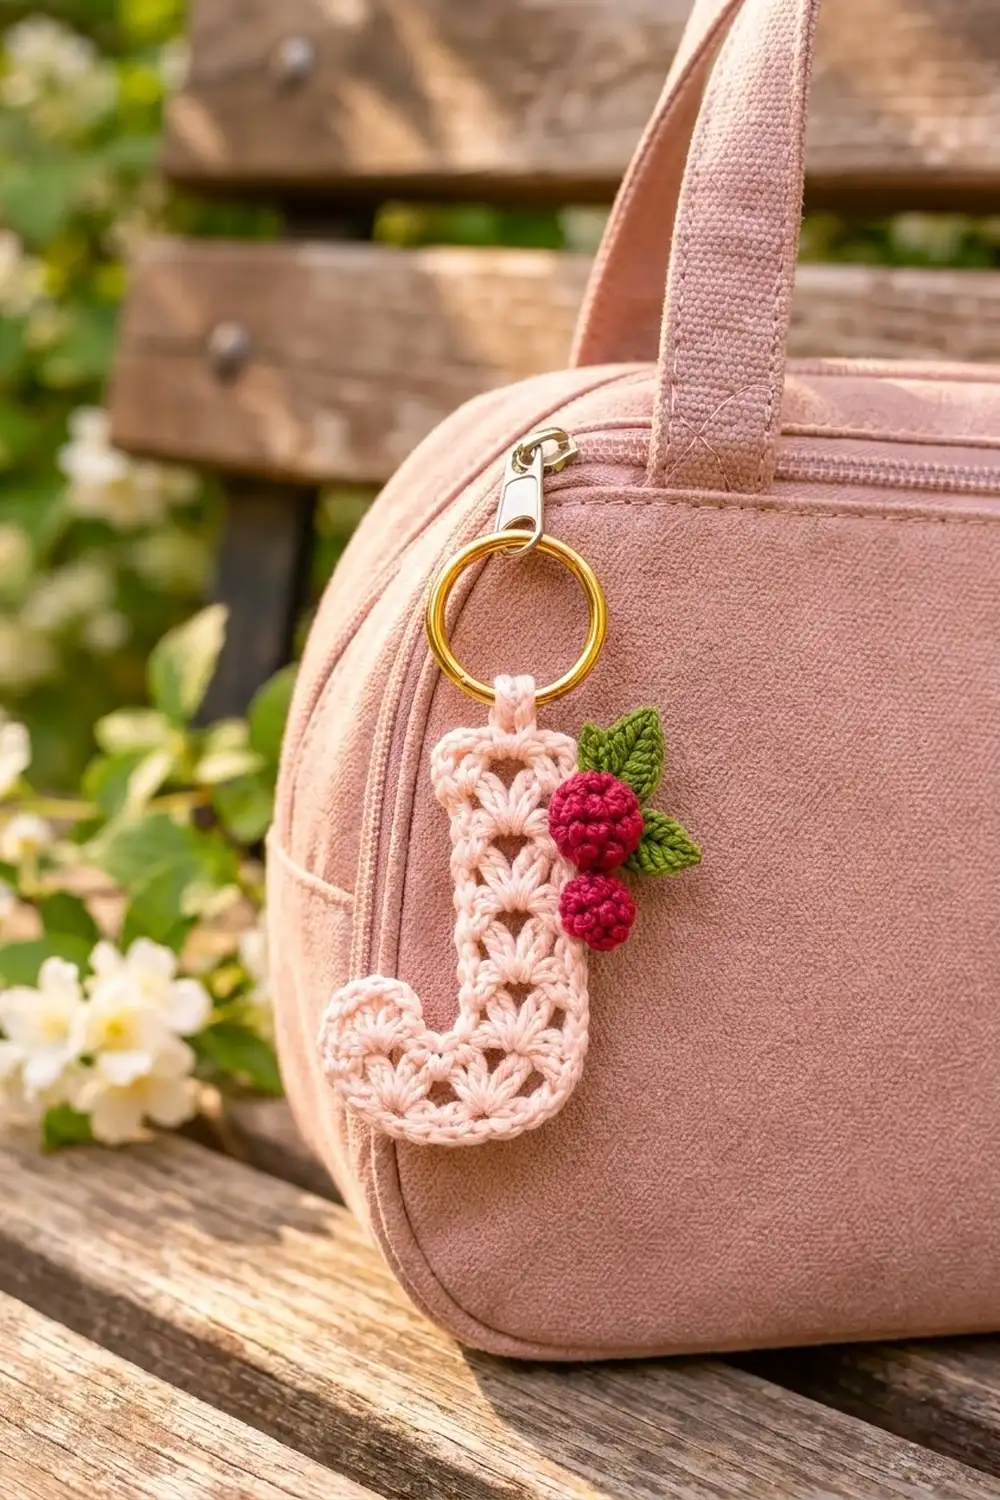
This little letter J keychain is quick to make, pretty, and personal. The letter is worked in a soft blush-pink shell stitch, so each row of fans opens upward like small flowers. Two bobbly raspberries and a pair of moss-green leaves sit near the top, and a gold ring makes it ready to clip onto a bag, a key set, or a gift.
The palette is three colors: pale blush pink for the letter, deep raspberry red for the berries, and moss green for the leaves. The style is cottagecore with a vintage touch, and it works well as a monogram gift.
All terms are US crochet terms. With the border, the finished J measures about 3.2 in (8.1 cm) wide and 4.2 in (10.7 cm) tall. With the tab and ring, the hanging length is about 6 in (15.2 cm).
Construction overview: You work the J flat in rows, starting with a wide bottom bar. Next, the stem rises from the right-hand stitches of the bar, and a short lobe rises from the left-hand stitches. Two rounds of single crochet border the whole outline. Last, you make a hanging tab, two berries, and two leaves, and sew them in place.
Finished Size and Construction
- Finished size: 3.2 in x 4.2 in (8.1 cm x 10.7 cm)
- Skill level: Easy-intermediate
- Terminology: US
- Yarn weight: Sport (2), cotton or cotton blend
- Hook: 2.75 mm (US C-2)
- Number of pieces: 1 letter body, plus 2 berries and 2 leaves sewn on as appliqués
- Layout: a single J shape; this is not an assembled project
- Piece size before border: 2.7 in x 3.7 in (6.9 cm x 9.4 cm)
- Stem width before border: 1.0 in (2.5 cm)
- Border depth: 0.25 in (0.6 cm) on every edge, from 2 rounds of sc
Materials
Use a smooth, mercerized or matte cotton in sport weight. Cotton gives crisp fans and holds its shape on a keychain that gets handled every day. The amounts below assume about 155 m per 50 g.
- Blush pink (main color): 10 g, about 31 m
- Raspberry red: 4 g, about 12 m
- Moss green: 2 g, about 6 m
Tools:
– 2.75 mm (US C-2) crochet hook
– Gold split ring or key ring, 1.25 in (3.2 cm)
– Tapestry needle
– Small amount of fiberfill or matching scrap yarn for stuffing the berries
– Rust-proof pins and a blocking mat
– Scissors and a ruler
All quantities include a margin of about 20% for your gauge swatch and sewing tails.
Abbreviations (US Terms)
- ch – chain
- sl st – slip stitch
- sc – single crochet
- hdc – half double crochet
- dc – double crochet
- sc2tog – single crochet 2 together
- st(s) – stitch(es)
- MR – magic ring
- RS / WS – right side / wrong side
Special stitches
- Fan: 5 dc in the same stitch.
- Bobble (bob): Yarn over, insert hook in the stitch, yarn over and pull up a loop, yarn over and pull through 2 loops. Repeat from * 2 more times in the same stitch. Yarn over and pull through all 4 loops on the hook.
Gauge and Checkpoints
Gauge: 7 sc and 8 sc rows = 1 in (2.5 cm). In the shell pattern, 7 pattern rows = 3 in (7.6 cm), so each dc-height row is about 0.43 in (1.1 cm).
Test first. Rows 1–3 of the pattern (the bottom bar) are your gauge test. Work them, then measure before you go on.
Checkpoints:
– After Row 3: 2.7 in (6.9 cm) wide and about 1.0 in (2.5 cm) tall.
– After Row 10 (stem top): 3.7 in (9.4 cm) tall in total.
– After the lobe: the lobe top sits about 1.5 in (3.8 cm) above the bottom edge.
– After the border: 3.2 in x 4.2 in (8.1 cm x 10.7 cm).
Fixing gauge: If the bar after Row 3 is wider than 2.8 in (7.1 cm), go down one hook size. If it is narrower than 2.6 in (6.6 cm), go up one size. If only the height is off, adjust how far you pull up your dc loops rather than changing the hook.
Letter Body
Orientation note: Row 1 is a WS row. That puts the stem on the right when you look at the RS. If you crochet left-handed and the J reads backward at the Row 4 checkpoint, call the other face the RS. The fabric is reversible.
Bottom Bar
With blush pink, ch 20.
Row 1 (WS): Sc in the 2nd ch from hook and in each ch across. Turn. (19 sc)
Row 2: Ch 1. Sc in the first sc. Skip 2 sts, fan in the next st, skip 2 sts, sc in the next st. Repeat from * 2 more times. Turn. (3 fans + 4 sc = 19 sts)
Row 3: Ch 3 (counts as dc). 2 dc in the first sc. Sc in the center (3rd) dc of the next fan, 5 dc in the next sc. Repeat from * once more. Sc in the center dc of the last fan, 3 dc in the last sc. Turn. (19 sts: 3 + 6 + 6 + 1 + 3)
Number the Row 3 sts 1–19 from where you started the row. The last 3 dc you made are sts 17–19.
Checkpoint: 2.7 in (6.9 cm) wide, about 1.0 in (2.5 cm) tall.
Stem
You now work only over the 7 sts at the end where Row 3 finished (sts 19 down to 13).
Row 4 (RS): Ch 1. Sc in st 19. Skip 2 sts, fan in st 16 (the sc), skip 2 sts, sc in st 13 (the center dc of the second fan). Turn. Leave the rest of the row unworked. (1 fan + 2 sc = 7 sts)
Row 5: Ch 3 (counts as dc). 2 dc in the first sc, sc in the center dc of the fan, 3 dc in the last sc. Turn. (7 sts)
Row 6: Ch 1. Sc in the first dc, skip 2 dc, fan in the sc, skip 2 dc, sc in the top of the turning ch-3. Turn. (7 sts)
Rows 7–9: Repeat Row 5, then Row 6, then Row 5. (7 sts each)
Row 10: Ch 1. Sc in each st across. (7 sc) Fasten off.
The stem has 6 shell rows, so its fans alternate between one centered fan and two half-fans at the edges. That gives the staggered column you see up the letter.
Checkpoint: total height 3.7 in (9.4 cm), stem width 1.0 in (2.5 cm).
Curl Lobe
With the RS facing, join blush pink in st 7 of Row 3 (the center dc of the first fan).
Row L1 (RS): Ch 1. Sc in the same st (st 7). Skip 2 sts, fan in st 4 (the sc), skip 2 sts, sc in st 1 (the top of the ch-3). Turn. (7 sts)
Row L2: Ch 1. Sc in each st across. (7 sc) Fasten off.
Sts 8–12 of Row 3 stay unworked. They form the bottom of the J’s inner curve, a gap of about 0.7 in (1.8 cm).
Checkpoint: the lobe top is about 1.5 in (3.8 cm) from the bottom edge, and the lobe is 0.5 in (1.3 cm) taller than the bar.
Border
Border gauge: 7 sc = 1 in (2.5 cm) on every edge. Along stitch edges, work 1 sc per st. Along row ends, work 3 sc per dc-height row (3/7 in, which matches the 0.43 in row height) and 1 sc per sc row.
There are 6 convex corners: the 2 stem top corners, the 2 bottom corners, and the 2 lobe top corners. Each convex corner gets 3 sc in the corner st. There are 2 concave corners, where the lobe meets the gap and where the gap meets the stem. Each concave corner gets an sc2tog.
Round 1
With the RS facing, join blush pink in the top-right corner st of Row 10. Work clockwise, as follows.
- Stem top: 3 sc in the corner st, sc in the next 5 sts, 3 sc in the corner st. (11 sc)
- Right side, down the outer edge: 1 sc in the end of Row 10, 3 sc in each end of Rows 9–2, 1 sc in the end of Row 1. (1 + 24 + 1 = 26 sc)
- Bottom, across the foundation ch: 3 sc in the first ch, sc in the next 17 ch, 3 sc in the last ch. (23 sc)
- Left side, up the lobe’s outer edge: 1 sc in the end of Row 1, 3 sc in each end of Rows 2–3, 3 sc in the end of Row L1, 1 sc in the end of Row L2. (1 + 6 + 3 + 1 = 11 sc)
- Lobe top: 3 sc in the corner st, sc in the next 5 sts, 3 sc in the corner st. (11 sc)
- Inner curve:
- 1 sc in the end of Row L2, then 2 sc in the end of Row L1.
- Sc2tog over the end of Row L1 and st 8 of Row 3.
- Sc in sts 9, 10, and 11.
- Sc2tog over st 12 and the end of Row 4.
- 2 sc more in the end of Row 4, 3 sc in each end of Rows 5–9, 1 sc in the end of Row 10.
- (3 + 1 + 3 + 1 + 2 + 15 + 1 = 26 sts)
Join with a sl st to the first sc.
Round 1 total: 11 + 26 + 23 + 11 + 11 + 26 = 108 sts.
Round 2
Ch 1. Sc in each st around, with these changes:
– At each convex corner, work 3 sc in the center sc of the 3-sc group.
– At each concave corner, sc2tog over the Round 1 sc2tog and the next st.
Join with a sl st.
Per-edge counts:
– Stem top: 15
– Right side: 26
– Bottom: 27
– Left side: 11
– Lobe top: 15
– Inner curve: 24
Round 2 total: 108 + 12 (6 corners x 2) − 2 (2 concave corners x 1) = 118 sts. Do not fasten off.
Why the math works: Row ends and stitches both come out at 7 sc per inch, so the straight edges lie flat. Each convex corner adds 2 sts per round, which is what a 90-degree turn needs. The sc2tog at each concave corner removes the excess on the inside of the curve, so the gap stays crisp instead of rippling. Two rounds at 8 rounds per inch give 0.25 in (0.6 cm) per side. That takes the body from 2.7 x 3.7 in (6.9 x 9.4 cm) to 3.2 x 4.2 in (8.1 x 10.7 cm).
Hanging Tab
Sl st along the stem top to st 7 of the 15 top sts.
Tab Row 1: Ch 1. Sc in sts 7, 8, and 9. Turn. (3 sc)
Tab Rows 2–8: Ch 1. Sc in each st across. Turn. (3 sc)
The tab measures 0.4 in (1.0 cm) wide and 1 in (2.5 cm) long. Fasten off, leaving an 8 in (20.3 cm) tail. Thread the tab through the ring, fold it to the back, and whipstitch the last row to the base of Row 1 on the WS.
Raspberries (make 2)
With raspberry red, make both berries the same through Rnd 3. Bobbles pop toward the back of the fabric, so after Rnd 3 you turn the berry inside out to bring them to the outside.
Rnd 1: 6 sc in an MR. (6)
Rnd 2: 2 sc in each st. (12)
Rnd 3: Sc in the next st, bob in the next st. Repeat 6 times. (12: 6 sc + 6 bob) Turn the cup inside out so the bobbles face out. Keep working in the same direction.
Large berry only, Rnd 4: Bob in the next st, sc in the next st. Repeat 6 times. (12) The bobbles sit offset from Rnd 3.
Final round (both berries): Sc2tog 6 times. (6) Stuff firmly. Fasten off, leaving a 12 in (30.5 cm) tail. Weave the tail through the front loops to close the berry.
The large berry is about 0.75 in (1.9 cm) across, and the small berry about 0.6 in (1.5 cm).
Leaves (make 2)
With moss green, ch 7.
- Working in the 6 working chains, sc in the 2nd ch from hook, then hdc, dc, dc, and hdc in the next 4 ch.
- In the last ch, work (sc, ch 2, sl st in the 2nd ch from hook, sc) to make the tip.
- Working along the opposite side of the chain, work hdc, dc, dc, hdc, and sc in the next 5 ch.
- Sl st to the first sc.
Each leaf has 5 sts per side plus the tip and is about 0.9 in (2.3 cm) long. Fasten off, leaving a tail. You can add a center vein with surface sl sts in the same green.
Assembly
- Place the large berry over the right border of the stem, with its top about 0.75 in (1.9 cm) below the top edge.
- Place the small berry directly below it, just touching.
- Tuck one leaf behind the large berry, pointing up and left, and the other pointing right.
- Sew the leaves first, then the berries, through the back of each berry only. Keep the stitches small so they disappear into the bobbles.
Final Blocking
- Weave in all ends except the appliqué tails, and do this before you sew anything on.
- Wet the J in cool water and press it in a towel until damp.
- Pin it RS up to 3.2 in x 4.2 in (8.1 cm x 10.7 cm).
- Round the two bottom outer corners slightly so the foot curves like a J.
- Pin each fan point upward and open, and keep the stem a straight 1.5 in (3.8 cm) wide.
- Shape the inner curve smoothly with one pin.
- Let it dry completely, then sew on the berries and leaves.
Final Quality-Control Checklist
- Rows 1–3 have 19 sts, the stem and lobe rows 7 sts, and the tab rows 3 sts.
- The border has 108 sts in Round 1 and 118 in Round 2.
- The six convex corners are crisp, and the inner curve lies flat.
- The finished size is 3.2 in x 4.2 in (8.1 cm x 10.7 cm).
- The tab is sewn securely, and the ring turns freely.
- The berries are firm and the bobbles face outward.
- All ends are woven in on the WS.
Troubleshooting
- Fans lean sideways: You likely missed a skip-2. Count back to the last sc and check.
- Edges ripple: You placed too many row-end sts. Use exactly 3 per dc row.
- Edges cup: Too few row-end sts, or your border is tight. Go up a hook size for the border only.
- The inner curve bunches: Make sure both sc2togs are there in both rounds.
- Berries look smooth: You did not turn the cup inside out after Rnd 3.
- The J reads backward: Treat the other face as the RS. The lace is reversible.
Care
Hand wash in cool water, press out the water in a towel, and lay flat to dry, pinning lightly to reshape. Do not wring the berries.
Final Notes
Each stage builds on the one before:
1. Rows 1–3 make a 19-stitch bar 2.7 in (6.9 cm) wide.
2. A 7-stitch stem brings the body to 3.7 in (9.4 cm) tall.
3. The 7-stitch lobe adds the curl.
4. Two border rounds (108 sts, then 118) add 0.25 in (0.6 cm) on every side, for a finished 3.2 in x 4.2 in (8.1 cm x 10.7 cm).
Check your gauge at the bar, and the rest of the sizes will follow. To make other initials, use the same stitch and border rules.
Happy crocheting!