

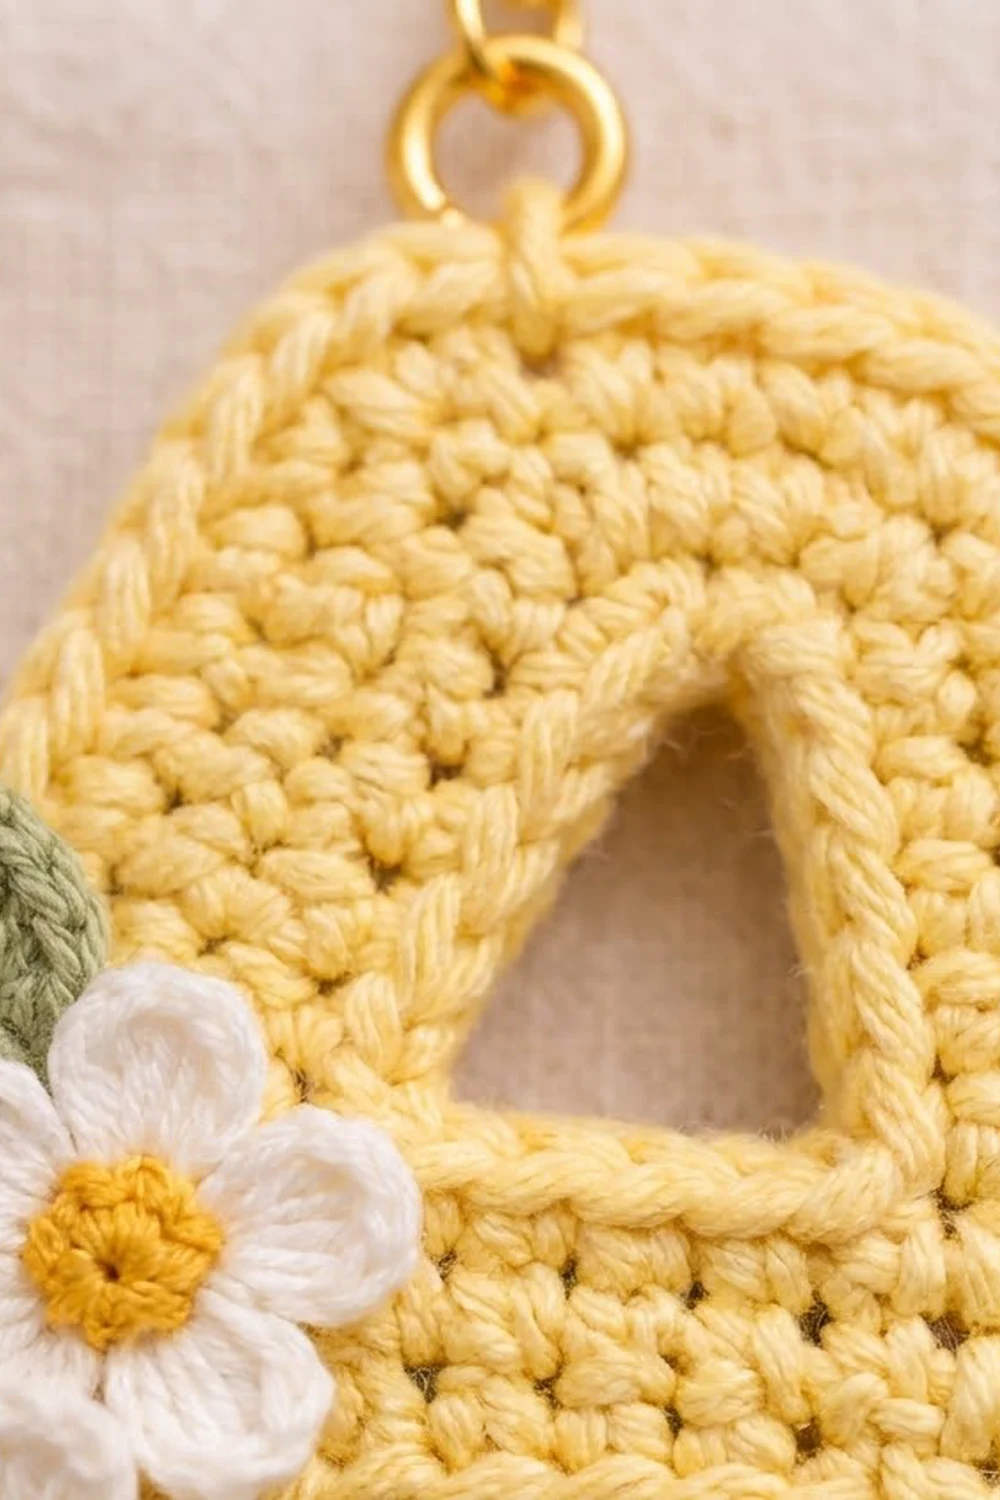
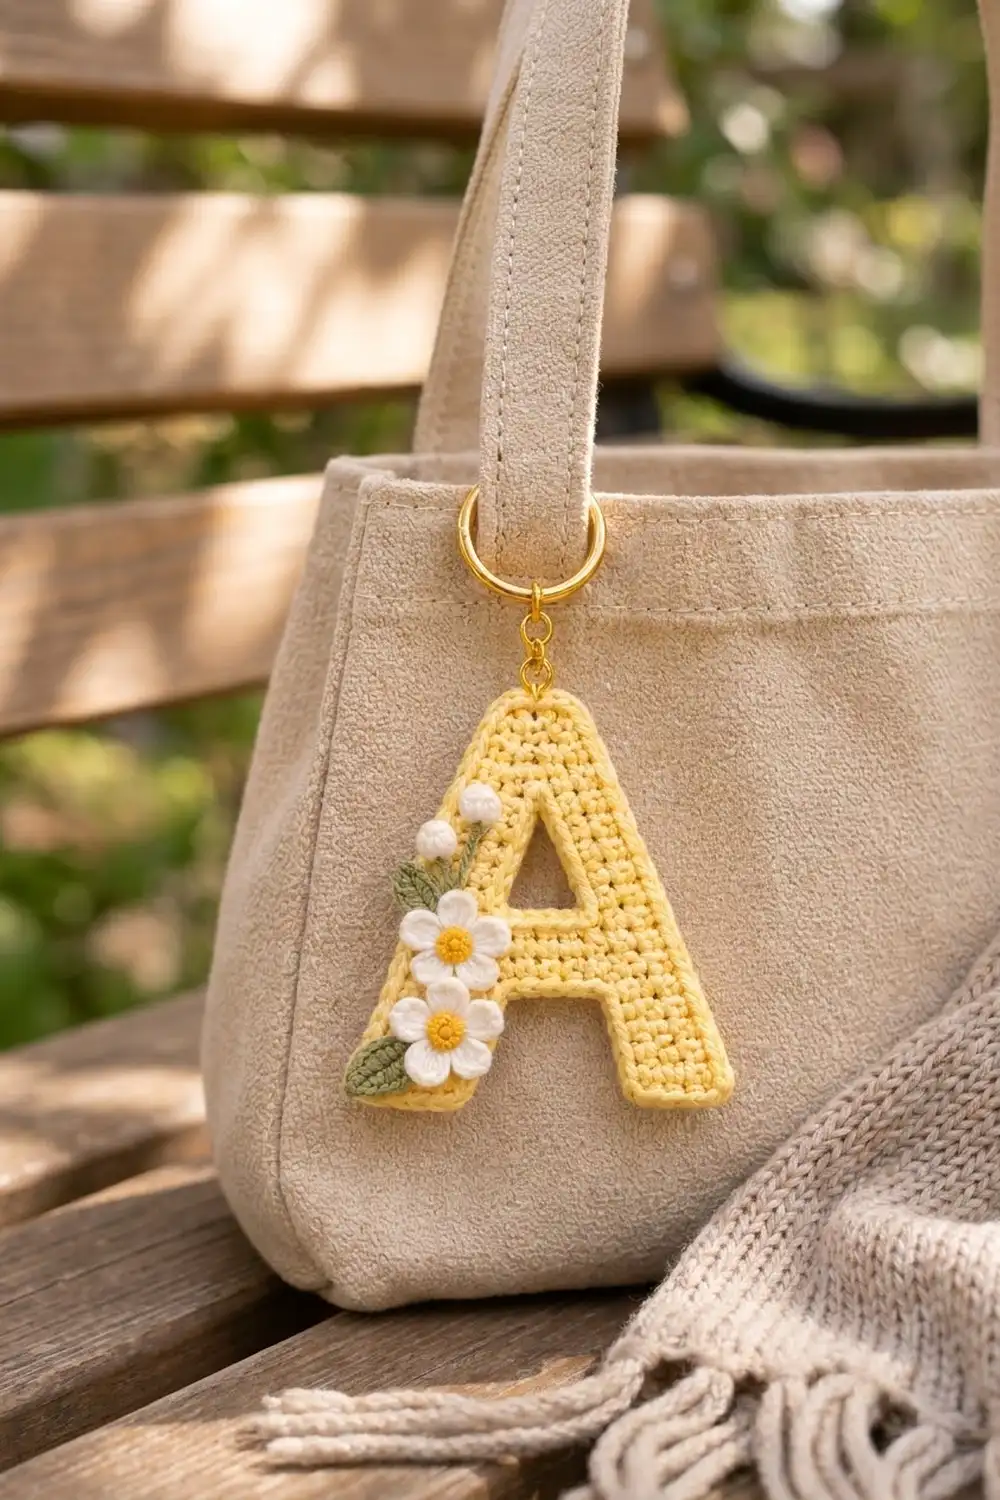
This keychain is a flat letter A in soft butter yellow. A corded outline runs around the outside and around the counter, the triangular hole in the middle of the A. Two white daisies with golden centers, two round white buds, and two sage-green leaves run up the left leg like a tiny bouquet. A gold split ring hangs from the flat top.
The look is clean and gentle: dense single crochet, a crisp rope-like edge, and small flowers that stand up from the background. It makes a sweet personalized gift and uses up cotton scraps.
This pattern uses US crochet terms. The finished letter is 4 in (10.2 cm) tall and 3.7 in (9.4 cm) wide at the base, including the border.
You make the A as one flat piece, in rows from the bottom up. First you make two short legs and join them with a chained crossbar. The piece then splits around the counter and rejoins below the top. Two border rounds outline the outside and the counter. The flowers and leaves are made separately and sewn on.
Finished Size and Construction
- Finished size: 4 in (10.2 cm) tall × 3.7 in (9.4 cm) wide at the base
- Skill level: Easy-intermediate
- Terminology: US
- Yarn weight: DK (light #3) cotton
- Hook: 3.5 mm (US E/4) for the letter; 2.75 mm (US C/2) for the appliqués
- Number of pieces: 1 letter, plus 6 small appliqués (2 daisies, 2 buds, 2 leaves)
- Layout: a single letter; nothing to join
- Letter size before border: 3.5 in (8.9 cm) tall × 3.2 in (8.1 cm) wide
- Border depth: about 0.25 in (0.6 cm) on every edge
Materials
Use a smooth mercerized or combed cotton in DK weight. Cotton shows the stitches crisply and holds the letter’s shape. Acrylic works, but the edges will be softer.
- Color A, butter yellow (letter): 10 g / 25 m
- Color B, white (petals and buds): 3 g / 8 m
- Color C, golden yellow (daisy centers): 1 g / 3 m
- Color D, sage green (leaves and stems): 2 g / 5 m
Tools:
– 3.5 mm (US E/4) and 2.75 mm (US C/2) crochet hooks
– Tapestry needle
– 2 removable stitch markers
– 25 mm gold split keyring and an 8 mm gold jump ring
– 2 pairs of flat-nose pliers
– Pins, a blocking board, and a spray bottle
All yarn amounts include a margin of about 20% for swatching and weaving in ends.
Abbreviations (US Terms)
- ch – chain
- sl st – slip stitch
- sc – single crochet
- hdc – half double crochet
- dc – double crochet
- sc2tog – single crochet 2 together
- rev sc – reverse single crochet
- MR – magic ring
- st(s) – stitch(es)
Reverse single crochet (rev sc): Work from left to right (right to left if you’re left-handed). Insert the hook into the next stitch to the right, yarn over, pull up a loop, yarn over, and pull through both loops. This makes the corded edge.
Shift row: A shift row moves a section 1 stitch sideways without changing its stitch count. You work sc2tog over the 2 stitches at one edge and 2 sc into the stitch at the other edge.
Gauge and Checkpoints
Gauge: 5 sc and 6 rows = 1 in (2.5 cm) with the 3.5 mm hook, worked flat.
Make one leg (Rows 1–4 below) first as your gauge test. It should measure 0.8 in (2.0 cm) wide and 0.67 in (1.7 cm) tall. If it does, keep it as Leg 1.
Checkpoints:
– After Row 4 (each leg): 0.8 in (2.0 cm) wide, 0.67 in (1.7 cm) tall
– After Row 6: 2.8 in (7.1 cm) wide, 1 in (2.5 cm) tall
– After Row 12: 2 in (5.1 cm) tall; the counter is 0.8 in (2.0 cm) wide at its base and 1 in (2.5 cm) tall
– After Row 21: 3.5 in (8.9 cm) tall, 3.2 in (8.1 cm) wide at the base
– After the border: 4 in (10.2 cm) tall, 3.7 in (9.4 cm) wide
If your leg is too big, go down to a 3.25 mm hook. If it’s too small, go up to a 3.75 mm hook. Check the height too: rows that are too tall give a long, thin letter.
Letter A
Use Color A and the 3.5 mm hook. The turning ch 1 never counts as a stitch.
Legs (make 2)
Row 1: Ch 5, sc in 2nd ch from hook and in each of the next 3 ch. (4 sts)
Rows 2–3: Ch 1, turn, sc in each st across. (4 sts)
Row 4 (shift): Ch 1, turn, 2 sc in first st, sc in next st, sc2tog over the last 2 sts. (4 sts)
The edge where Row 4 started is the inner edge. Mark it with a removable marker. The leg now leans 1 stitch toward that edge.
Fasten off Leg 1. Keep Leg 2 on the hook.
Crossbar
Lay Leg 1 to the left of Leg 2. Flip Leg 1 over so its marked inner edge faces Leg 2. Single crochet looks the same on both sides, so flipping it doesn’t show.
Row 5 (joining row): With Leg 2, ch 1, turn, sc in each of the 4 sts of Leg 2. Ch 6. Starting at Leg 1’s inner edge, sc in each of the 4 sts of Leg 1. (8 sc + 6 ch = 14 sts)
Row 6: Ch 1, turn, sc in each of the 4 sc, sc in the back bump of each of the 6 ch, sc in each of the 4 sc. (14 sts)
The ch-6 forms the bottom edge of the crossbar and bridges the 6-stitch gap between the legs.
Split Around the Counter
Row 7, Side A (shift): Ch 1, turn, sc2tog, sc in next 3 sts. (4 sts) Leave the other 10 sts unworked.
Rows 8–9: Ch 1, turn, sc in each st across. (4 sts)
Row 10 (shift): Ch 1, turn, 2 sc in first st, sc in next st, sc2tog. (4 sts)
Rows 11–12: Ch 1, turn, sc across. (4 sts)
Don’t fasten off. Pull up a long loop, put it on a stitch marker, and set Side A aside.
Row 7, Side B (shift): Skip the next 4 unworked sts of Row 6; these form the base of the counter. Join Color A in the next st, ch 1, sc in the same st and the next 2 sts, sc2tog. (4 sts)
Rows 8–9: Ch 1, turn, sc across. (4 sts)
Row 10 (shift): Ch 1, turn, sc2tog, sc in next st, 2 sc in last st. (4 sts)
Rows 11–12: Ch 1, turn, sc across. (4 sts) Fasten off Side B.
Every shift moves its side toward the center. The counter is 4 sts wide in Rows 7–9 and 2 sts wide in Rows 10–12.
Apex
Put Side A’s loop back on the hook.
Row 13 (rejoining shift): Ch 1, turn. On Side A: sc2tog, sc in next st, 2 sc in last st. Continue straight onto Side B: 2 sc in first st, sc in next st, sc2tog. (8 sts)
The two increases fill the 2-stitch gap and close the top of the counter.
Rows 14–15: Ch 1, turn, sc across. (8 sts)
Row 16: Ch 1, turn, sc2tog, sc in next 4 sts, sc2tog. (6 sts)
Rows 17–20: Ch 1, turn, sc across. (6 sts)
Row 21: Ch 1, turn, sc2tog, sc in next 2 sts, sc2tog. (4 sts) Fasten off.
The decreases in Row 21 round the corners of the flat top. Weave in all ends on the back.
Border
Border gauge: In Round 1, work 1 sc per row end along the sides and 1 sc per stitch along the bottom and top. In Round 2, work 1 rev sc per stitch.
Outer Border
Round 1: With Color A and the 3.5 mm hook, join with a sc in the free loop of the inner bottom corner ch of Leg 2. Work 2 more sc in that same ch, then continue:
– Leg 2 bottom: sc in next 2 ch, 3 sc in last ch (8 sc)
– Outer side up: 1 sc in each row end (21 sc)
– Top: sc in each st of Row 21 (4 sc)
– Outer side down: 1 sc in each row end (21 sc)
– Leg 1 bottom: 3 sc in first ch, sc in next 2 ch, 3 sc in last ch (8 sc)
– Inner side of Leg 1, Rows 1–4: 1 sc per row end (4 sc)
– Underside of crossbar: sc in each free loop of the ch-6 (6 sc)
– Inner side of Leg 2, Rows 4–1: 1 sc per row end (4 sc)
Sl st to the first sc. (76 sts)
Round 2: Ch 1, rev sc in each st around. (76 sts) Join and fasten off.
Counter Border
Round 1: Join Color A at the base of the counter. Sc in each of the 4 skipped sts of Row 6 (4 sc). Work 1 sc in each row end up the side (6 sc), 2 sc into the base of the Row 13 increases at the apex (2 sc), and 1 sc in each row end down the other side (6 sc). Sl st to the first sc. (18 sts)
Round 2: Ch 1, rev sc in each st around. (18 sts) Fasten off.
Why the math works: Each slanted side moves 5 stitches (1 in / 2.5 cm) sideways over 21 rows (3.5 in / 8.9 cm), so the edge is about 3.64 in (9.2 cm) long. That puts the 21 sc at about 5.8 per inch, between the stitch gauge (5) and the row gauge (6), so the edge lies flat. The 3 sc at each bottom corner let the border turn without cupping. The inside corners under the crossbar and in the counter get no extra stitches, so they stay crisp. The two rounds add about 0.25 in (0.6 cm) per edge: 3.2 in + 0.5 in = 3.7 in (9.4 cm) wide, and 3.5 in + 0.5 in = 4 in (10.2 cm) tall.
Appliqués
Use the 2.75 mm hook and leave long tails for sewing.
Daisy (make 2)
Round 1: With Color C, MR, 10 sc in ring, pull closed. Join to the first sc with Color B and fasten off C. (10 sts)
Round 2: With Color B, *sl st in next st, (hdc, 3 dc, hdc) in next st; rep from * 4 more times. Sl st to the first sl st. (5 petals) Fasten off.
Each daisy is about 0.75 in (1.9 cm) across.
Bud (make 2)
Round 1: With Color B, MR, 6 sc in ring. (6 sts)
Round 2: Sc2tog 3 times. (3 sts)
Push the starting tail inside as stuffing and close the top with the working tail. Each bud is a firm ball about 0.35 in (0.9 cm) across.
Leaf (make 2)
With Color D, ch 6. Sl st in 2nd ch from hook, sc in next ch, hdc in next ch, dc in next ch, (hdc, ch 2, hdc) in last ch for the tip. Then work along the other side of the foundation ch: dc in next ch, hdc in next ch, sc in next ch, sl st in last ch. Fasten off.
Each leaf is about 0.7 in (1.8 cm) long. The foundation chain forms a natural center vein.
Placement
Everything goes on the left leg, as seen from the front.
- Sew the first leaf with its tip pointing down and out, extending about 0.2 in (0.5 cm) past the bottom-left corner.
- Sew the lower daisy with its center 0.75 in (1.9 cm) above the bottom edge, overlapping the base of the leaf.
- Sew the upper daisy directly above, its petals just touching the lower daisy.
- Tuck the second leaf behind the upper daisy, tip pointing up and out.
- Sew the buds about 0.5 in (1.3 cm) above the upper daisy, one slightly higher than the other.
- With Color D, stem-stitch a stem from each bud down to the upper daisy.
Sew through the front layer of the stitches only, so nothing shows on the back.
Final Blocking
- Mist the letter until it’s damp but not wet.
- Lay it face up on the blocking board.
- Pin the outer bottom corners 3.7 in (9.4 cm) apart.
- Pin the top center so the height is 4 in (10.2 cm).
- Pin the sides straight and open the counter into a clean triangle.
- Leave the flowers unpinned so they keep their shape.
- Let it dry completely. Then open the jump ring and put it through the top center, between the 2 middle border stitches. Add the split ring and close the jump ring.
Final Quality-Control Checklist
- The letter measures 4 in (10.2 cm) × 3.7 in (9.4 cm).
- Both legs lean inward at the same slope.
- The counter is an open triangle, 4 sts wide at its base.
- The outer border has 76 sts and the counter border has 18.
- The petals are evenly spaced and the buds are firm.
- No tails or sewing stitches show on the back.
- The jump ring is fully closed and passes through both border rounds.
Troubleshooting
Legs lean outward: Leg 1 wasn’t flipped before Row 5. Rip back to Row 4 and flip it.
Crossbar puckers: The ch-6 is too tight. Chain more loosely.
Border ruffles: Your rows are shorter than gauge. Work 19 sc instead of 21 on each long side.
Border cups: Add 1 extra sc at each top corner.
Counter closes too early: Check that both Row 10 shifts moved toward the center.
Petals are floppy: Work the petals in hdc instead of dc.
Care
Hand wash in cool water with mild soap, roll it in a towel to press out the water, and dry flat. Keep it out of the dryer to protect the appliqués and the gold hardware.
Final Notes
The measurement chain is simple. One leg at 0.8 in (2.0 cm) wide leads to a 3.2 in (8.1 cm) by 3.5 in (8.9 cm) letter after Row 21. The two border rounds add 0.25 in (0.6 cm) per edge, for a finished keychain 3.7 in (9.4 cm) wide and 4 in (10.2 cm) tall. Check your gauge on the first leg and count stitches at every checkpoint.
Happy crocheting!