

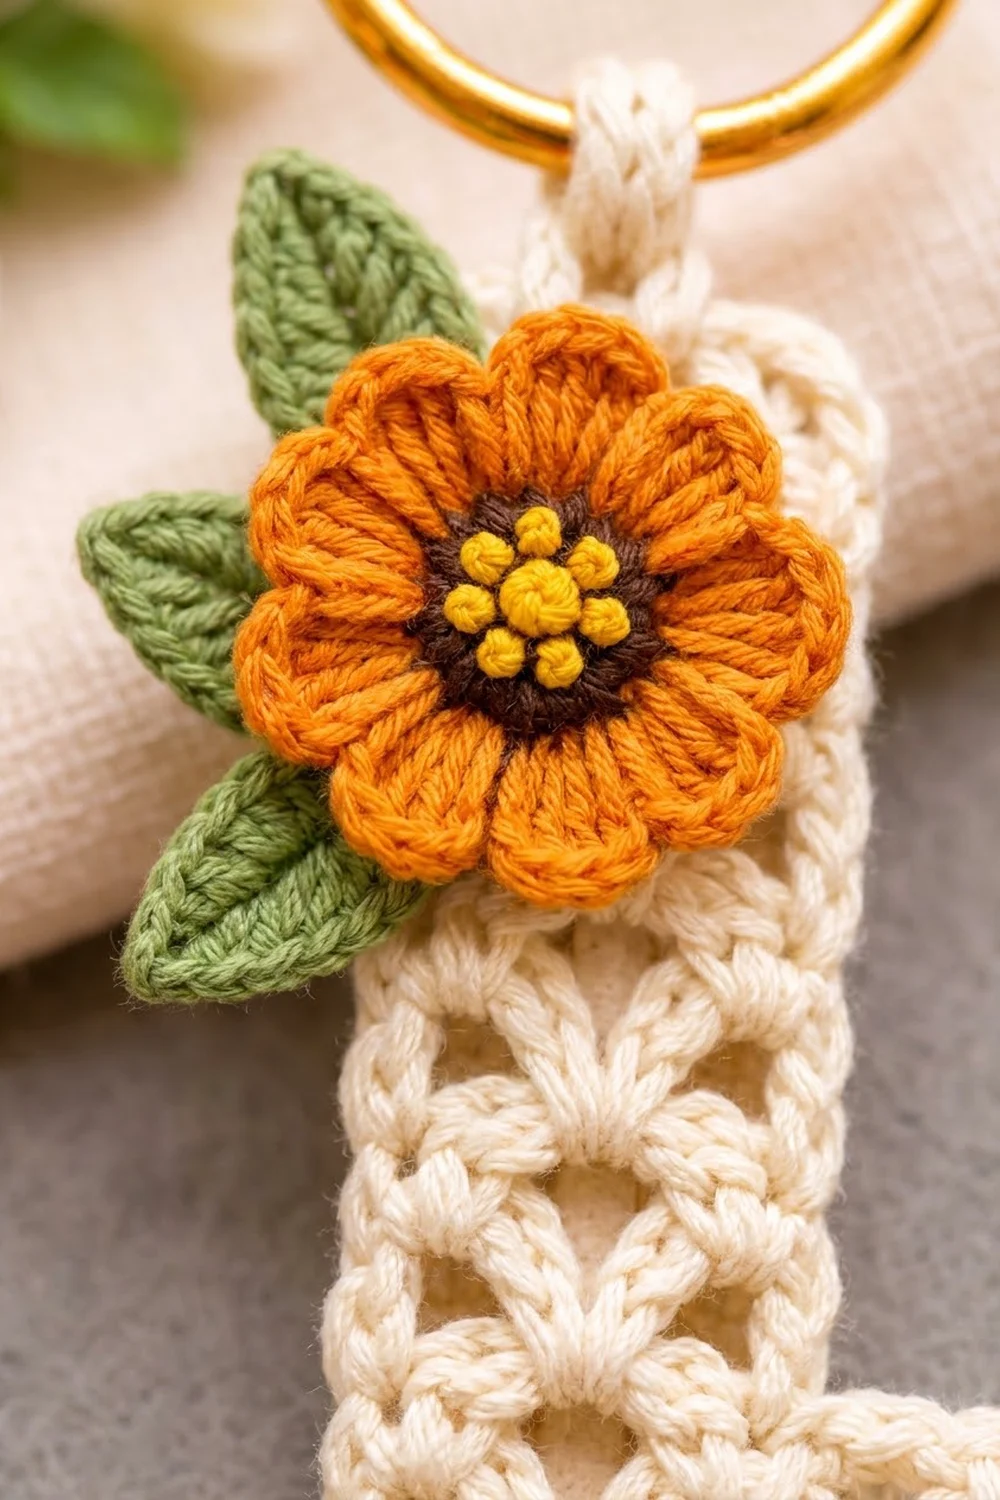
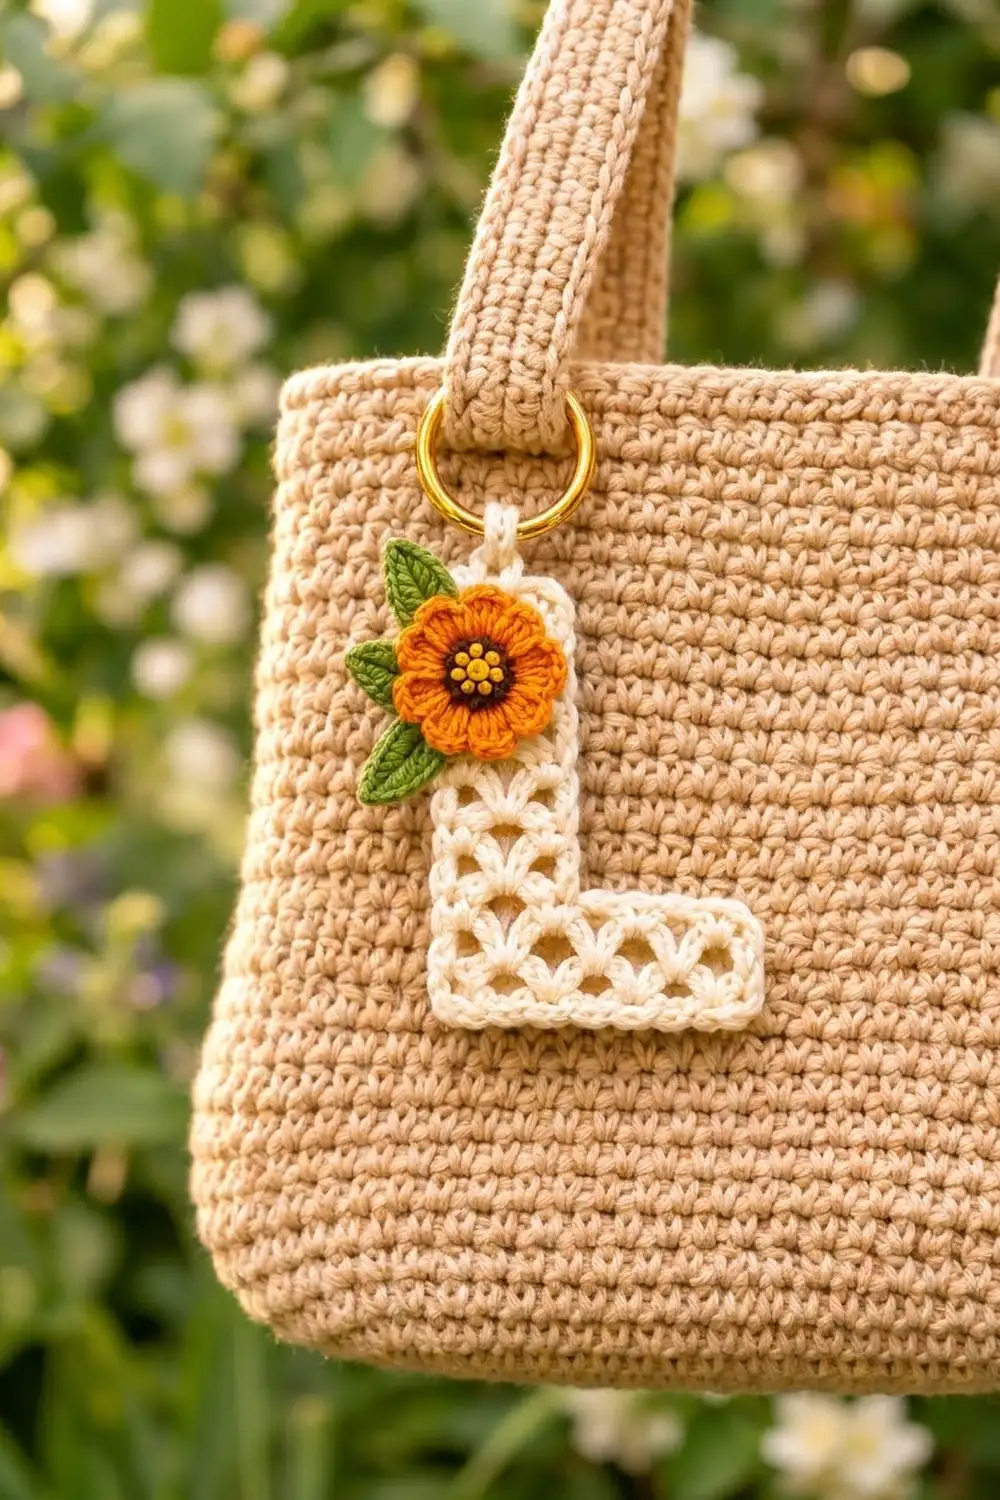
This little charm is a cream letter “L” worked in rows of tiny open fans, framed with a tidy single crochet edge and topped with a bright orange flower. A gold split ring at the top lets you clip it to a tote handle, a zipper pull, or a set of keys.
The colors are warm and simple: cream for the letter, orange petals, a dark brown ring around a sunny yellow center, and two sage-green leaves. The fans make it light and lacy, and the edging keeps the shape crisp enough to read clearly as a letter.
The pattern uses US crochet terms. The finished charm measures 3.5 in (8.9 cm) wide across the foot and 4 in (10.2 cm) tall, not counting the hanging loop and ring.
You work the letter flat in rows from the bottom up. The foot comes first, across all four fans, and then the stem continues over the first two fans only. Next you work two rounds of single crochet around the whole outline and add a chain loop at the top. The flower and leaves are made separately and sewn on.
Finished Size and Construction
- Finished size: 3.5 in (8.9 cm) wide x 4 in (10.2 cm) tall, plus about 0.5 in (1.3 cm) of loop and a 1 in (2.5 cm) ring
- Skill level: Easy to intermediate
- Terminology: US crochet terms
- Yarn weight: Sport weight (#2 fine) cotton
- Hook: 2.75 mm (US C-2)
- Number of pieces: 1 letter, plus 1 flower and 2 leaves for appliqué
- Layout: Single letter “L”; stem on the left, foot extending to the right
- Piece size before border: 3 in (7.6 cm) wide x 3.5 in (8.9 cm) tall; stem 1.75 in (4.4 cm) wide; foot 0.83 in (2.1 cm) tall
- Border depth: 2 rounds of sc, 0.25 in (0.6 cm) on every side
Materials
Choose a smooth mercerized or combed cotton in sport weight. Cotton holds the fans open, keeps the edges sharp, and stands up to life on a bag handle. Avoid fuzzy yarns because they blur the lace.
- Cream (letter, loop): 12 g, about 24 m
- Orange (petals): 3 g, about 6 m
- Sage green (leaves): 2 g, about 4 m
- Yellow (flower center, knots): 1 g, about 2 m
- Dark brown (center ring): 1 g, about 2 m
All quantities include a margin for checking gauge and for sewing tails.
Tools:
- 2.75 mm (US C-2) crochet hook
- Gold split ring or key ring, 1 in (2.5 cm) diameter
- Tapestry needle
- Scissors
- Stitch markers
- Blocking mat and rust-proof pins
- Spray bottle with water
- Ruler or tape measure
Abbreviations (US Terms)
- ch – chain
- sl st – slip stitch
- sc – single crochet
- hdc – half double crochet
- dc – double crochet
- sc2tog – single crochet 2 together
- sp – space
- st(s) – stitch(es)
- RS – right side
Special stitch – Shell: (2 dc, ch 1, 2 dc) in the same stitch or space. Each shell is one small open fan.
Gauge and Checkpoints
Gauge matters here because the letter has to stay crisp and the border math depends on it.
- Gauge: 19 sc = 3 in (7.6 cm); 3 shell rows = 1 in (2.5 cm)
- That is about 6.33 sts per inch across the rows and 0.33 in (0.8 cm) of height per dc row.
Use the letter itself as your gauge swatch. Work Row 1 and measure it before you continue.
Checkpoints:
- After Row 1: 3 in (7.6 cm) wide
- After Row 3: 3 in (7.6 cm) wide x 0.83 in (2.1 cm) tall
- After Row 11: stem 1.75 in (4.4 cm) wide; total height 3.5 in (8.9 cm)
- After Border Rnd 2: 3.5 in (8.9 cm) x 4 in (10.2 cm)
If your piece is too big, go down to a 2.5 mm hook. If it is too small, go up to a 3 mm hook. Change the hook, not the stitch counts, because the border only works if the counts stay exactly as written.
Letter L
With cream, ch 20.
Row 1: Sc in 2nd ch from hook and in each ch across, turn. (19 sc)
Row 2: Ch 3 (counts as dc here and throughout), skip next 2 sc, shell in next sc, skip next 3 sc, shell in next sc; repeat from * 2 more times, skip next 2 sc, dc in last sc, turn. (4 shells + 2 edge dc = 18 dc and 4 ch-1 sps)*
Check the math: 1 + 2 + 1 + (3 x 4) + 2 + 1 = 19 sc used.
Row 3: Ch 3, shell in ch-1 sp of each of next 4 shells, dc in top of turning ch, turn. (4 shells + 2 edge dc = 18 dc and 4 ch-1 sps)
The foot is complete. The last stitch of Row 3 sits at the edge where the stem will rise. Measure: 3 in (7.6 cm) x 0.83 in (2.1 cm).
Row 4 (stem begins): Ch 3, shell in ch-1 sp of each of next 2 shells, dc in the gap between shell 2 and shell 3 (between the last dc of one fan and the first dc of the next), turn. Leave the remaining 2 shells unworked. (2 shells + 2 edge dc = 10 dc and 2 ch-1 sps)
Rows 5–11: Ch 3, shell in ch-1 sp of each of next 2 shells, dc in top of turning ch, turn. (10 dc and 2 ch-1 sps each row)
After Row 11, fasten off. You now have 8 stem rows (Rows 4–11) stacked over 2 foot rows. Measure: stem 1.75 in (4.4 cm) wide, total height 3.5 in (8.9 cm).
Right side: Lay the piece so the stem is on the left and the foot points right. That face is the RS. Both faces look almost the same, so if your “L” reads backward, just turn it over.
Flower
Rnd 1: With yellow, make a magic ring, ch 1, 8 sc in ring, sl st to first sc. Fasten off. (8 sc)
Rnd 2: Join dark brown in any sc, ch 1, 2 sc in each sc around, sl st to first sc. Fasten off. (16 sc)
Rnd 3: Join orange in any sc, (hdc, 3 dc, hdc) in next sc, sl st in next sc; repeat from * 7 more times, ending with sl st in the joining st. (8 petals)*
Fasten off, leaving a 12 in (30.5 cm) tail for sewing. With yellow, embroider 5 small French knots over the yellow center. The flower measures about 1.5 in (3.8 cm) across.
Leaves (Make 2)
With sage green, ch 6.
Rnd 1: Sc in 2nd ch from hook, hdc in next ch, dc in next ch, hdc in next ch, sc in last ch, ch 2 for the tip; working along the other side of the foundation ch, sc in first ch, hdc in next ch, dc in next ch, hdc in next ch, sc in last ch, sl st to first sc. (10 sts + ch-2 tip)
Fasten off, leaving an 8 in (20.3 cm) tail. With a strand of the same green, backstitch a center vein from the base to the tip. Each leaf is about 0.75 in (1.9 cm) long.
Border
Border gauge: each sc round adds 0.125 in (0.3 cm) per side. Work 2 sc around each dc row end and 1 sc in each stitch along the top and bottom edges.
Rnd 1: With RS facing, join cream in the top of the turning ch at the beginning of Row 11 (top right corner of the stem). Work counterclockwise:
- Top right corner: Ch 1, 3 sc in the same st.
- Top edge: Sc in each of the next 10 sts and sps (the 2 shells).
- Top left corner: 3 sc in the last dc of Row 11.
- Left side: 2 sc around each dc row end of Rows 11–2, 1 sc in the end of Row 1. (21 sc)
- Bottom left corner: 3 sc in the first foundation ch loop.
- Bottom edge: Sc in each of the next 17 foundation loops.
- Bottom right corner: 3 sc in the last foundation loop.
- Foot end: 1 sc in the end of Row 1, 2 sc around each row end of Rows 2–3. (5 sc)
- Step corner: 3 sc in the turning ch at the beginning of Row 3.
- Step edge: Sc in each of the next 9 sts and sps of shells 4 and 3.
- Inside corner: Sc2tog over the last dc of shell 3 and the lower half of the Row 4 row end.
- Inside stem edge: 1 sc around the rest of the Row 4 row end, 2 sc around each row end of Rows 5–11. (15 sc)
- Sl st to first sc.
Count: 3 + 10 + 3 + 21 + 3 + 17 + 3 + 5 + 3 + 9 + 1 + 15 = 93 sts.
Rnd 2: Ch 1, sc in first sc, 3 sc in the next sc (corner center). Continue around, working 1 sc in each sc and 3 sc in the center sc of each of the 5 corner groups. At the inside corner, sc2tog over the last step-edge sc and the Rnd 1 sc2tog. Sl st to first sc. Fasten off and weave in the end.
Stitches on each side between corner groups: top 12, left 23, bottom 19, foot end 7, step 9 sc + sc2tog, inside stem 15.
Count: 86 sc worked one into one + 15 sc in the 5 corner centers + 1 sc2tog = 102 sts.
Why the math works:
- Flat sides: 2 sc per dc row end gives 6 sc per inch up the sides. That is close to the 6.33 sts per inch across the rows, so the sides lie flat.
- Square stem: On Rnd 1, the left side (21 sc) equals the foot end (5) plus the inside stem edge (16, counting the sc2tog).
- Clean corners: 3 sc at each outer corner turns it without cupping, and the sc2tog at the inside corner stops it from ruffling.
- Final size: Two rounds add 0.25 in (0.6 cm) per side. That gives 3 + 0.5 = 3.5 in (8.9 cm) wide and 3.5 + 0.5 = 4 in (10.2 cm) tall.
Hanging loop: Count the 12 sc on the top edge between the corner groups of Rnd 2. Join cream in the 6th sc, ch 8, sl st in the 7th sc. Turn, work 12 sc into the ch-8 loop, sl st in the 6th sc. Fasten off. The loop stands about 0.5 in (1.3 cm) tall.
Final Blocking
- Weave in all cream ends along the border, not through the lace.
- Lightly mist the letter until damp.
- Lay it RS up on the blocking mat, stem on the left.
- Pin the 5 outer corners and the inside corner square.
- Check measurements: 3.5 in (8.9 cm) wide, 4 in (10.2 cm) tall, stem 2.25 in (5.7 cm) wide.
- Use your fingertip to open each fan evenly.
- Let it dry completely, at least 4 hours.
- Unpin. Place the leaves on the upper left of the stem, one angled up and one angled down, both peeking past the left edge.
- Center the flower over the leaf bases so it overlaps the upper left corner. Sew on the leaves first, then the flower, with small stitches through the base of the petals.
- Open the split ring and slide it through the hanging loop.
Final Quality-Control Checklist
- Row 1 has 19 sc; Rows 2–3 have 4 shells each.
- Rows 4–11 have 2 shells each, 8 stem rows total.
- Border Rnd 1 has 93 sts; Rnd 2 has 102 sts.
- All 5 outer corners are rounded and flat.
- The inside corner is neat, without a gap or a pucker.
- The charm measures 3.5 in (8.9 cm) x 4 in (10.2 cm).
- The flower has 8 petals, a brown ring, and 5 yellow knots.
- Both leaves show a center vein and are firmly sewn.
- The loop is centered and the ring closes fully.
Troubleshooting
Fans lean to one side: Make sure every shell goes into the ch-1 sp, not beside it.
Stem is wider than 1.75 in (4.4 cm): Check that Row 4 ends with a dc in the gap, not a full shell.
Edges wave: There are too many sc on the sides. Use exactly 2 sc per dc row end.
Edges pull in: The border is too tight. Loosen your tension, or go up one hook size for the border only.
Inside corner gapes: Pull the sc2tog snug and add a stitch of yarn on the back.
Petals curl: Steam-block the flower flat before sewing.
Letter reads backward: Turn it over. The RS is whichever side shows the stem on the left.
Care
Remove the metal ring before washing. Hand wash in cool water with mild soap, press out the water in a towel, and dry flat, reshaping the corners while the charm is still damp.
Final Notes
The measurements build in three steps. First, 19 sc equals 3 in (7.6 cm). Next, 10 shell rows plus the base row reach 3.5 in (8.9 cm). Finally, 2 border rounds add 0.25 in (0.6 cm) per side, for a finished letter of 3.5 in (8.9 cm) x 4 in (10.2 cm). Check each checkpoint, keep the counts exact, and change only your hook if you need to. You can swap the flower colors to suit any bag.
Happy crocheting!