
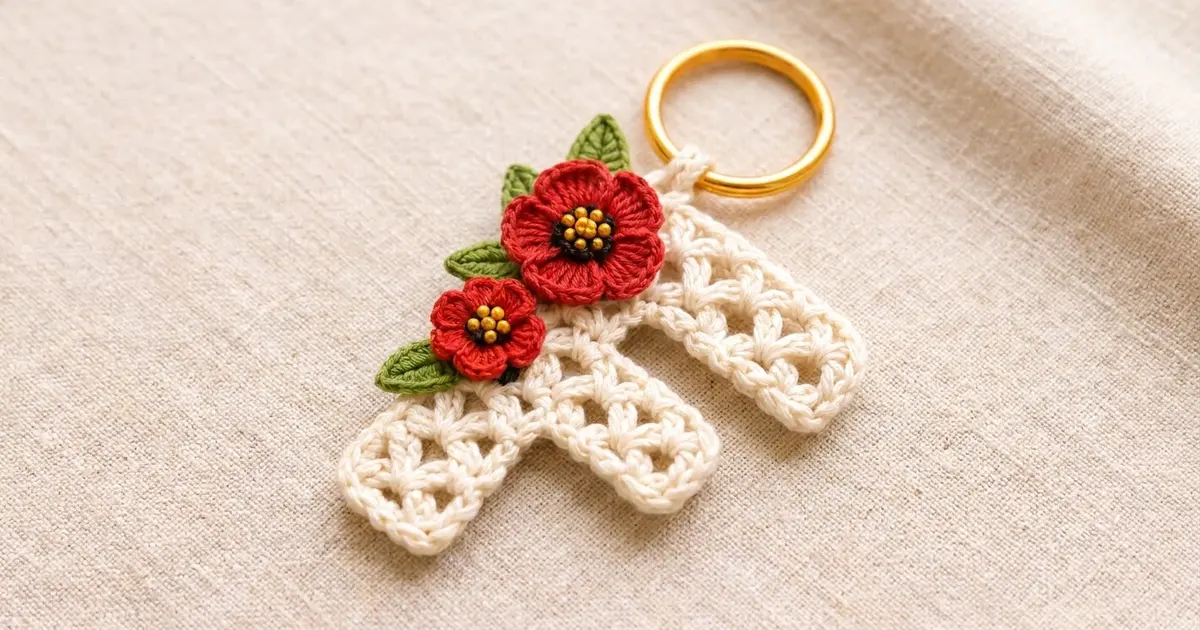
This letter F bag charm is small, lacy, and easy to personalize. The cream body is worked in classic shell stitch, which gives the letter an airy fan texture. A tidy single crochet border sharpens every corner.
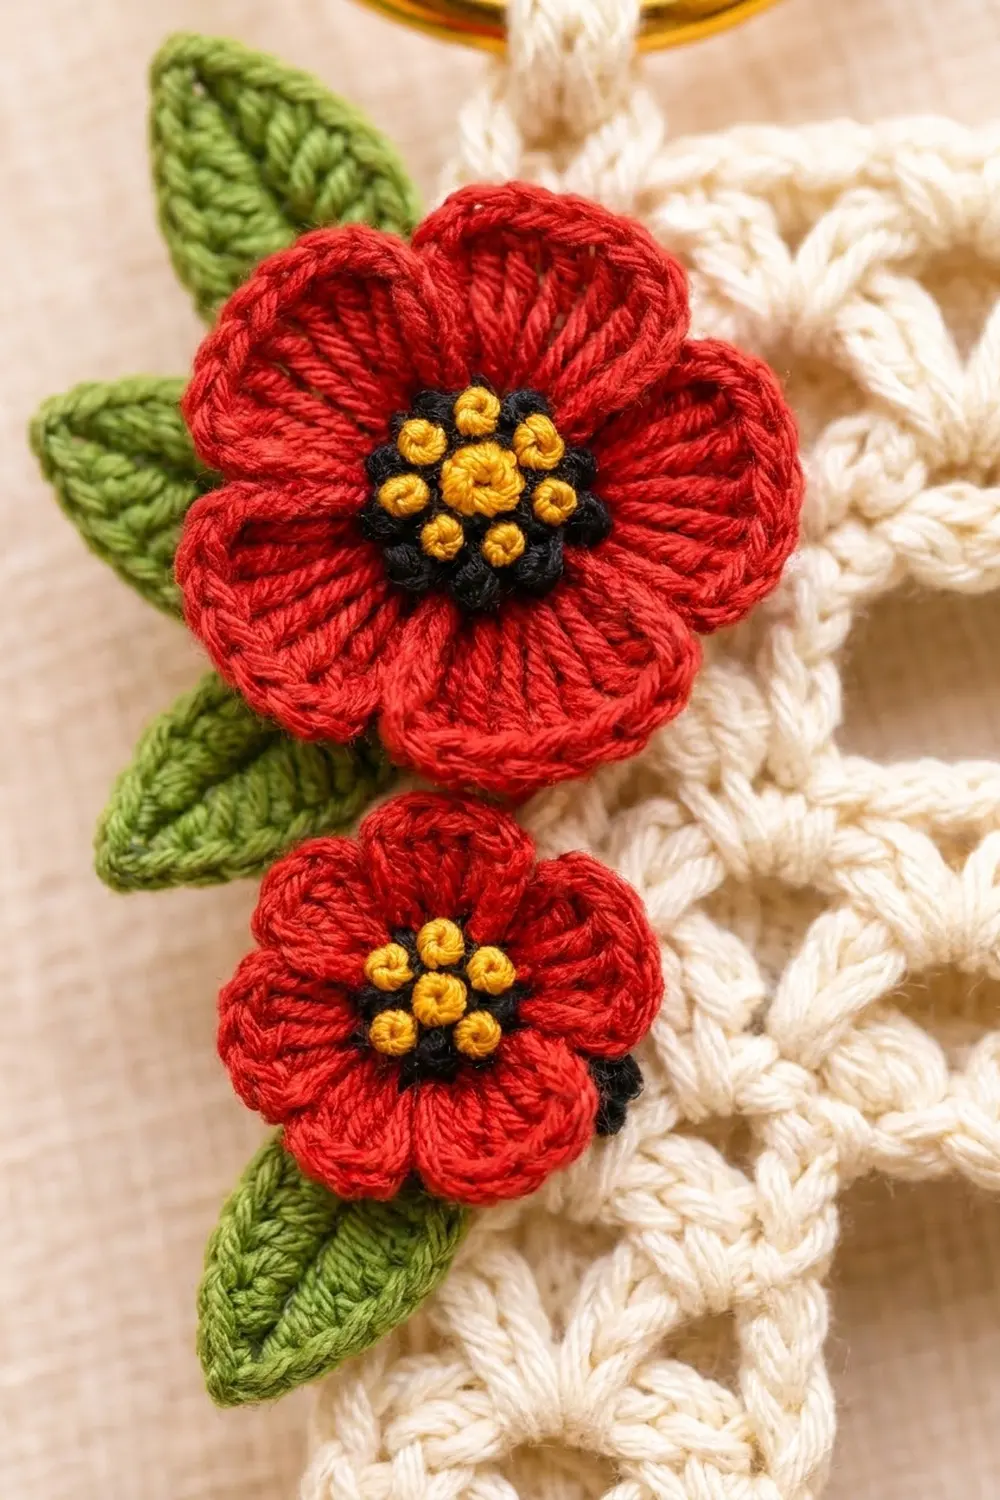
Two red poppy-style flowers with black-and-gold centers sit along the upper left edge, and three green leaves peek out from behind them. A gold split ring on a short tab lets you clip the charm to a bag handle, a zipper pull, or your keys.
The pattern uses US crochet terms. The finished charm measures 2.7 in (6.9 cm) wide by 3.4 in (8.6 cm) tall, not counting the ring.
You crochet the letter as one flat piece, in rows from the bottom of the stem up. Each arm grows out of a chain added at the end of a row. One round of single crochet borders the whole outline. After that, you add the tab, block the letter, and sew on the flowers and leaves.
Finished Size and Construction
- Finished size: 2.7 in (6.9 cm) x 3.4 in (8.6 cm), ring not included
- Skill level: Intermediate
- Terminology: US crochet terms
- Yarn weight: Fine (#2, sport weight) cotton
- Hook: 2.75 mm (US C-2)
- Number of pieces: 1 letter body (the tab is worked onto it), plus 2 flowers and 3 leaves sewn on
- Layout: Single piece, so there’s no joining
- Size before border: 2.5 in (6.4 cm) x 3.2 in (8.1 cm)
- Stem width: 1.3 in (3.3 cm). The middle arm reaches 1.9 in (4.8 cm) across and the top arm reaches 2.5 in (6.4 cm) across.
- Border depth: 0.1 in (0.3 cm)
Materials
Use a smooth, mercerized sport-weight cotton. It shows off the shells and holds sharp corners.
- Cream (body, border, tab): 12 g / 36 m
- Red (flowers): 4 g / 12 m
- Green (leaves): 2 g / 6 m
- Black (flower centers): 1 g / 3 m
- Golden yellow (French knots): 1 g / 3 m (embroidery floss also works)
The quantities include a margin of about 25%.
Tools:
- 2.75 mm (US C-2) hook
- Gold split ring, 1 in (2.5 cm) across
- Tapestry needle
- 2 stitch markers
- Rust-proof pins and a blocking mat
- Spray bottle, scissors, and a ruler
Abbreviations (US Terms)
- ch – chain
- sl st – slip stitch
- sc – single crochet
- hdc – half double crochet
- dc – double crochet
- st(s) – stitch(es)
- MR – magic ring
- RS / WS – right side / wrong side
- Rnd – round
Special stitches:
- Shell: 5 dc in the same stitch.
- Standing sc: Start with a slip knot on the hook, insert the hook into the stitch, and work a sc.
- French knot: Bring the needle up, wrap the yarn twice around it, and insert it back down right beside where it came up.
Gauge and Checkpoints
Gauge: In the shell pattern, 10 sts = 1 in (2.5 cm). One shell row is 0.3 in (0.8 cm) tall, and one sc row is 0.1 in (0.3 cm) tall.
Make the lower stem (Rows 1–5) first and measure it. It doubles as your gauge swatch.
Checkpoints:
- After Row 5: 1.3 in (3.3 cm) x 1.3 in (3.3 cm)
- After Row 7: 1.9 in (4.8 cm) across the middle arm x 1.9 in (4.8 cm) tall
- After Row 9: 2.5 in (6.4 cm) tall
- After Row 12: 2.5 in (6.4 cm) x 3.2 in (8.1 cm)
- After the border: 2.7 in (6.9 cm) x 3.4 in (8.6 cm)
If the stem is wider than 1.3 in (3.3 cm), go down half a hook size. If it is narrower, go up half a size. If only the height is off, pull each dc up to the full height of the turning chain.
Letter Body
Odd rows are WS rows and even rows are RS rows. Mark the RS after Row 2. When the RS faces you, the arms grow to the right.
Ch 14.
Row 1 (WS): Sc in the 2nd ch from the hook and in each ch across. Turn. (13 sc)
Row 2 (RS): Ch 1. Sc in the first sc. [Skip 2 sts, shell in the next st, skip 2 sts, sc in the next st] twice. Turn. (13 sts: 2 shells, 3 sc)
Row 3 (WS): Ch 3 (counts as dc). 2 dc in the first sc. Sc in the center dc of the next shell. Shell in the next sc. Sc in the center dc of the next shell. 3 dc in the last sc. Turn. (13 sts)
Row 4 (RS): Ch 1. Sc in the first dc. Skip 2 dc, shell in the next sc. Skip 2 dc, sc in the center dc. Skip 2 dc, shell in the next sc. Skip 2 sts, sc in the top of the turning ch. Turn. (13 sts)
Row 5 (WS): Repeat Row 3. (13 sts) At the end of the row, ch 7 for the middle arm. Turn.
Row 6 (RS): Sc in the 2nd ch from the hook. Skip 2 ch, shell in the next ch, skip the last 2 ch. That uses all 6 ch. Sc in the last dc made in Row 5, then finish the row as in Row 4, starting from “skip 2 dc.” Turn. (19 sts: 3 shells, 4 sc)
Row 7 (WS): Ch 3. 2 dc in the first sc. [Sc in the center dc of the next shell, shell in the next sc] twice. Sc in the center dc of the last shell. 3 dc in the last sc, which is at the arm tip. (19 sts) Fasten off.
Row 8 (RS): Hold the piece RS facing, with the arm tip on the right. Counting from the tip, skip 6 sts of Row 7. Join with a standing sc in the 7th st, which is the center dc of the shell above the edge of the stem. Skip 2 dc, shell in the next sc. Skip 2 dc, sc in the center dc. Skip 2 dc, shell in the next sc. Skip 2 sts, sc in the top of the turning ch. Turn. (13 sts) The 6 sts you skipped form the top of the middle arm.
Row 9 (WS): Repeat Row 3. (13 sts) At the end of the row, ch 13 for the top arm. Turn.
Row 10 (RS): Sc in the 2nd ch from the hook. Skip 2 ch, shell in the next ch. Skip 2 ch, sc in the next ch. Skip 2 ch, shell in the next ch. Skip the last 2 ch. That uses all 12 ch. Sc in the last dc made in Row 9, then finish the row as in Row 4, starting from “skip 2 dc.” Turn. (25 sts: 4 shells, 5 sc)
Row 11 (WS): Ch 3. 2 dc in the first sc. [Sc in the center dc of the next shell, shell in the next sc] 3 times. Sc in the center dc of the last shell. 3 dc in the last sc. Turn. (25 sts)
Row 12 (RS, leveling): Ch 1. Sc in each of the first 2 dc, hdc in the next dc. [Dc in the next sc, hdc in the next dc, sc in each of the next 3 dc, hdc in the next dc] 3 times. Dc in the next sc, hdc in the next dc, sc in the last dc and in the top of the turning ch. (25 sts = 3 + 18 + 4) Do not fasten off.
The letter should now measure 2.5 in (6.4 cm) x 3.2 in (8.1 cm):
- Lower stem: 1.3 in (3.3 cm) tall
- Middle arm and the gap above it: 0.6 in (1.5 cm) each
- Top arm: 0.7 in (1.8 cm) deep
Flowers
Large flower (make 1):
- Rnd 1 (black): MR, 10 sc in the ring, sl st to join. Fasten off. (10 sc)
- Rnd 2 (red): Join red. Ch 1, 2 sc in each st, sl st to join. (20 sc)
- Rnd 3: [Sc in the next st, (hdc, 2 dc) in the next st, (2 dc, hdc) in the next st, sc in the next st] 5 times, sl st to join. (40 sts, 5 petals)
Fasten off, leaving a 10 in (25.4 cm) tail. The flower measures about 1.2 in (3.0 cm) across.
Small flower (make 1):
- Rnd 1 (black): MR, 5 sc in the ring, sl st to join. Fasten off. (5 sc)
- Rnd 2 (red): Join red. Ch 1, 2 sc in each st, sl st to join. (10 sc)
- Rnd 3: [(Sc, hdc, dc) in the next st, (dc, hdc, sc) in the next st] 5 times, sl st to join. (30 sts, 5 petals)
Fasten off, leaving a 10 in (25.4 cm) tail. The flower measures about 0.8 in (2.0 cm) across.
Centers: Using yellow, work French knots on the black centers: 7 on the large flower (1 in the middle and 6 around it) and 5 on the small flower (1 in the middle and 4 around it). Let some black show between the knots.
Leaves
Make 3 in green.
- Ch 8.
- Working up one side of the chain: sl st in the 2nd ch from the hook, sc in the next ch, hdc in the next ch, dc in each of the next 2 ch, hdc in the next ch, 3 sc in the last ch (the base).
- Working down the other side of the chain: hdc in the next ch, dc in each of the next 2 ch, hdc in the next ch, sc in the next ch, sl st in the tip ch.
- Ch 2, then sl st in the same tip ch to make the point.
Fasten off, leaving a 6 in (15.2 cm) tail. Each leaf is about 0.8 in (2.0 cm) long and 0.45 in (1.1 cm) wide.
Border
Border gauge: 10 sc = 1 in (2.5 cm) along every edge.
Rnd 1 (RS): Ch 1 and rotate the piece so you can work down the left edge. “In the side of” a row means into that row’s end.
- Left edge: 1 sc in the side of Row 12, 3 sc in the side of each of Rows 11–2, 1 sc in the side of Row 1. (32 sc)
- Bottom (free loops of the foundation chain): 3 sc in the first loop, 1 sc in each of the next 11 loops, 3 sc in the last loop. (17 sc)
- Right side of the lower stem: 1 sc in the side of Row 1, 3 sc in the side of each of Rows 2–5. (13 sc)
- Underside of the middle arm (6 chain loops): 1 sc in each of the first 5 loops, 3 sc in the 6th loop. (8 sc)
- Middle arm tip: 3 sc in the side of Row 6 and 3 sc in the side of Row 7. (6 sc)
- Top of the middle arm: 3 sc in the last st of Row 7, then 1 sc in each of the next 5 sts. (8 sc)
- Stem between the arms: 3 sc in the side of Row 8 and 3 sc in the side of Row 9. (6 sc)
- Underside of the top arm (12 chain loops): 1 sc in each of the first 11 loops, 3 sc in the 12th loop. (14 sc)
- Top arm tip: 3 sc in the side of Row 10, 3 sc in the side of Row 11, 1 sc in the side of Row 12. (7 sc)
- Top edge: 3 sc in the first st of Row 12, 1 sc in each of the next 23 sts, 3 sc in the last st. (29 sc)
Sl st to the first sc to join. Total: 140 sc. Don’t add any stitches at the 3 inside corners.
Why the math works: Each place you work into covers 0.1 in (0.3 cm). That can be one body stitch, one chain loop, one sc-row end, or one third of a shell-row end. There are 126 of these places, and each gets 1 sc. The 7 outer corners each get 2 extra sc, so 126 + 14 = 140. For example, the left edge has 1 + 30 + 1 = 32 sc, which matches its height of 3.2 in (8.1 cm).
Hanging tab: With the RS facing, start at the top-left corner and count along the top edge. Skip the 3 corner sc and the next 4 sc. Join cream with a standing sc in the next st, then sc in each of the next 2 sts. (3 sc) Work 7 more rows of: ch 1, turn, 3 sc. That makes 8 rows, about 0.8 in (2.0 cm). Fasten off, leaving an 8 in (20.3 cm) tail.
Final Blocking
- Weave in all the ends except the tab tail.
- Pin the letter RS up on the mat, putting a pin at each of the 7 outer corners.
- Check the size: 2.7 in (6.9 cm) wide, 3.4 in (8.6 cm) tall, and a stem 1.5 in (3.8 cm) wide.
- Mist until damp, open each shell with a fingertip, and let it dry completely.
- Slide the ring onto the tab. Fold the tab to the WS so a 0.4 in (1.0 cm) loop holds the ring, and whipstitch the end down.
- Sew on the leaves, tucking their bases where the flowers will go. Point them up-left, left, and down-left.
- Sew the large flower so its center is 0.6 in (1.5 cm) below the top edge, with its petals extending 0.3 in (0.8 cm) past the left edge.
- Center the small flower 1.7 in (4.3 cm) below the top edge.
- Stitch around each flower’s center and tack down the edges of the petals.
Final Quality-Control Checklist
- The lower stem (Rows 1–5) is 1.3 in (3.3 cm) square.
- Rows 6–7 have 19 sts, and Rows 10–12 have 25 sts.
- The border has exactly 140 sc.
- The outer corners lie flat and the inside corners are crisp.
- The charm measures 2.7 in (6.9 cm) x 3.4 in (8.6 cm).
- The tab is centered over the stem.
- The flowers just touch each other.
- No ends show on the RS.
Troubleshooting
- Arms slant upward: The extension chains are too tight. Work them with a larger hook.
- Sides of the border ruffle: Work 5 sc across each pair of shell rows instead of 6.
- Sides of the border cup: Go down half a hook size for the body.
- Top edge dips: Recount Row 12 against its 25-stitch breakdown.
- Petals curl: Steam them lightly and pin them flat before sewing.
- Tab twists: Tack down both corners of the tab.
Care
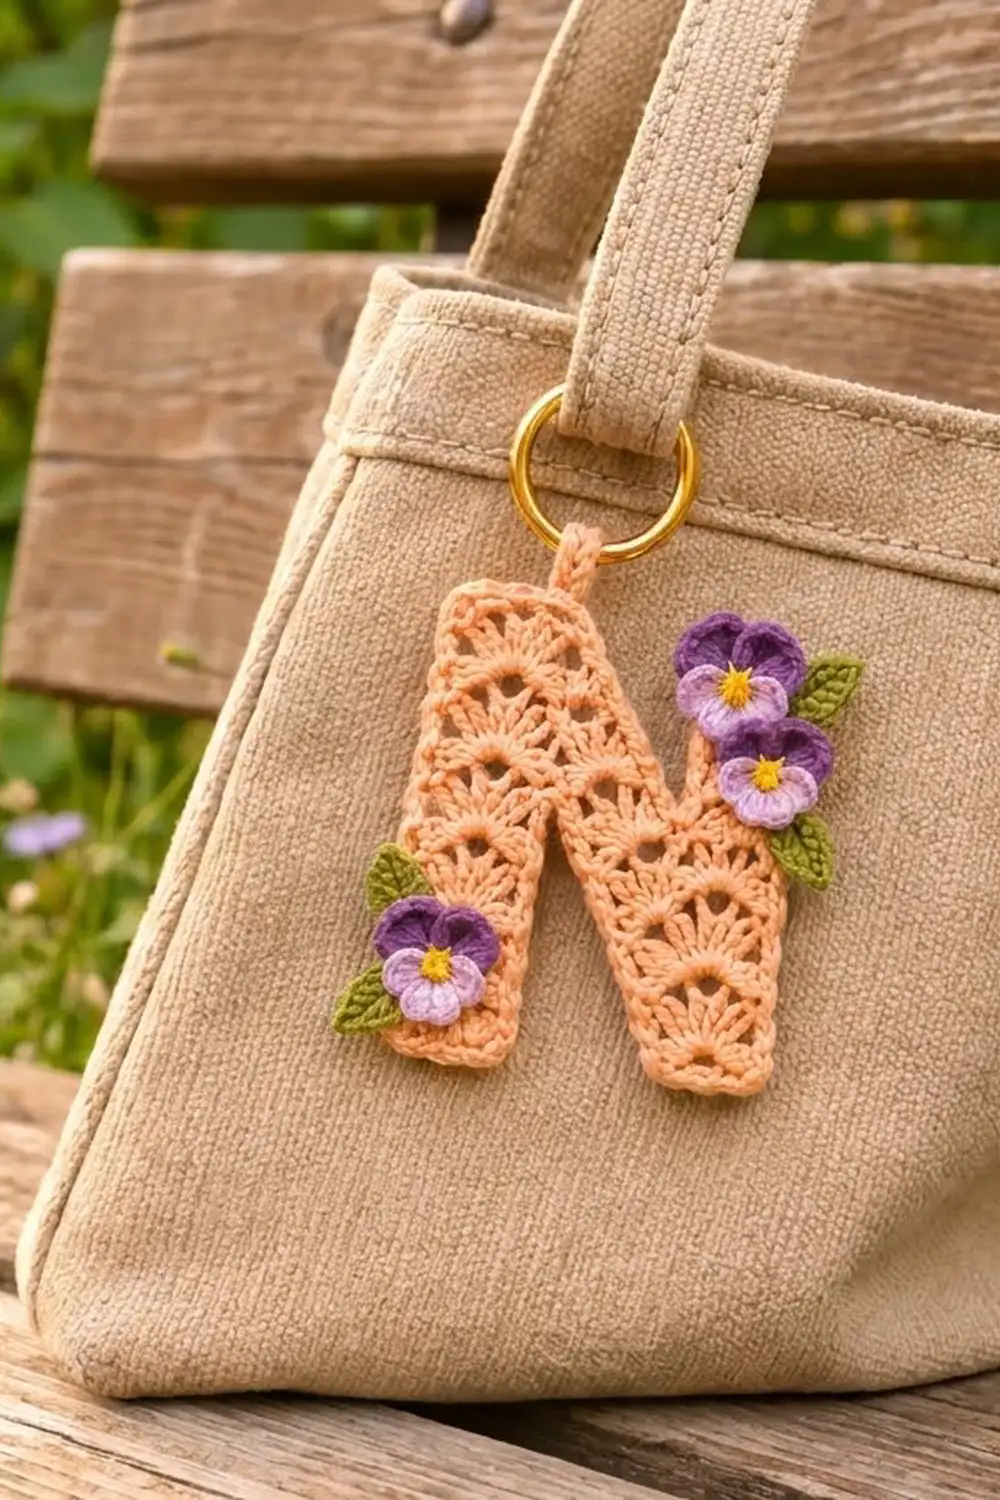
Hand wash in cool water with mild soap. Dry flat, reshaping the corners while the charm is damp.
Final Notes
Everything builds from the swatch. A 1.3 in (3.3 cm) stem gives a 2.5 in (6.4 cm) x 3.2 in (8.1 cm) letter. A 0.1 in (0.3 cm) border of 140 sc then brings it to 2.7 in (6.9 cm) x 3.4 in (8.6 cm). If each checkpoint matches, the flowers and tab will land exactly where they should.
Happy crocheting!