
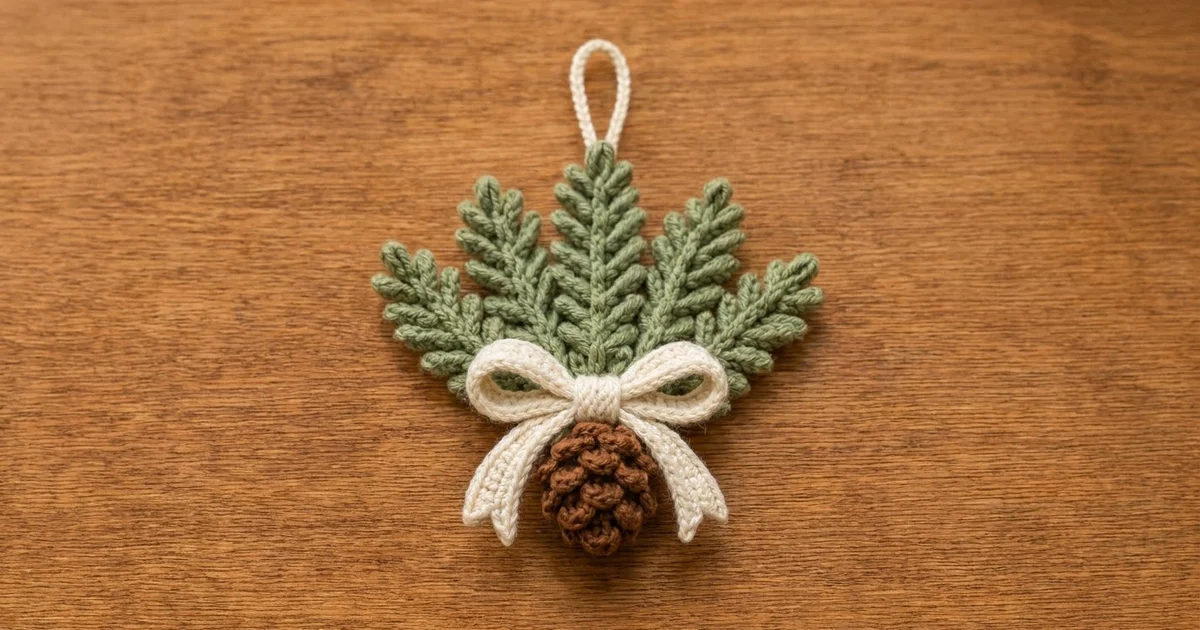
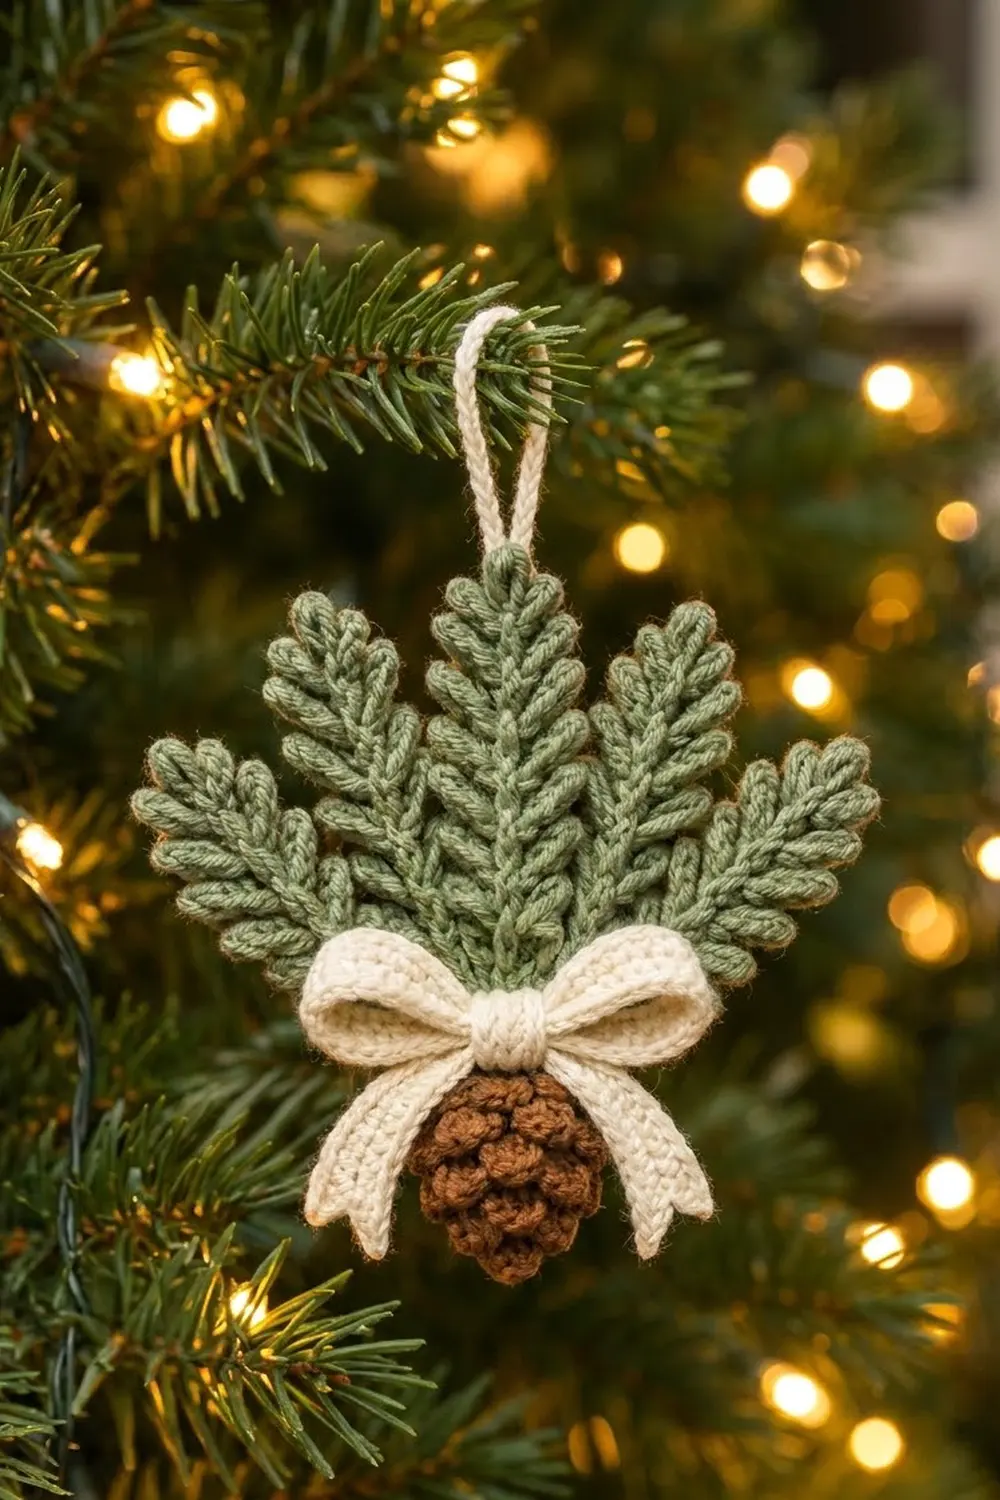
This little ornament is a fan of five sage green pine sprigs with a brown pine cone and a cream bow at the base. It hangs from a cream loop at the top. Every sprig has a raised center stem with short, pointed needles down both sides, and the cone is covered in small overlapping scales. Hang it on a tree and it looks like a bundle of greenery someone just picked.
The colors are a soft, muted sage green, a warm chestnut brown and a creamy off-white. That keeps the look rustic and calm instead of bright, so it fits well with natural wood and warm white lights.
The pattern uses US crochet terms. The finished ornament is about 5.5 in (14.0 cm) wide and 5.5 in (14.0 cm) tall, not counting the loop. The hanging loop adds about 1.75 in (4.4 cm) on top.
Here is how it goes together. You chain a stem for each sprig and work needles down one side and back up the other. Next you make the cone in the round, alternating base rounds and scale rounds. The bow is three flat strips and the hanging loop is a slip-stitch cord. Last, you sew everything into a fan.
Finished Size and Construction
- Finished size: 5.5 in (14.0 cm) wide x 5.5 in (14.0 cm) tall, plus a 1.75 in (4.4 cm) loop
- Skill level: Advanced beginner
- Terminology: US crochet terms
- Yarn weight: DK (#3), cotton or cotton blend
- Hook: 3.5 mm (E-4)
- Number of pieces: 10 (5 sprigs, 1 cone, 3 bow parts, 1 hanging loop)
- Layout: 5 sprigs fanned from one hub, with the cone, bow and loop sewn on
- Piece sizes:
- Center sprig: 4 in (10.2 cm) long
- Inner sprigs: 3.25 in (8.3 cm) long
- Outer sprigs: 2.75 in (7.0 cm) long
- All sprigs: about 1.25 in (3.2 cm) wide
- Cone: 1.5 in (3.8 cm) wide x 1.75 in (4.4 cm) tall
- Size before border: 5.5 in (14.0 cm) x 5.5 in (14.0 cm). The assembled size is the finished size.
- Border depth: 0 in (0.0 cm). There is no border, because the needles are the finished edge.
Materials
Choose a smooth, tightly plied DK cotton or cotton blend. Cotton keeps every needle crisp and pointed, while fuzzy yarn blurs the needle shapes.
- Sage green (sprigs): 10 g, about 24 m
- Chestnut brown (cone): 5 g, about 12 m
- Cream (bow and loop): 5 g, about 12 m
These quantities include extra for your gauge swatch and sewing tails.
Tools:
- 3.5 mm (E-4) crochet hook
- Tapestry needle
- A pinch of polyester fiberfill
- 2 stitch markers
- Rustproof pins and a foam blocking mat
- Scissors
- Optional: spray starch or fabric stiffener
Abbreviations (US Terms)
- ch – chain
- sl st – slip stitch
- sc – single crochet
- hdc – half double crochet
- dc – double crochet
- sc2tog – single crochet 2 together
- MR – magic ring
- FLO / BLO – front loop only / back loop only
- st(s) – stitch(es)
Special stitches:
- Needle (ndl): Ch 4, sl st in 2nd ch from hook, sc in next 2 ch. This makes one pointed needle, 3 sts long, that ends back at the stem.
- Shell: (hdc, dc, hdc) in the same st. Each shell is one cone scale.
Gauge and Checkpoints
- Gauge: 20 sc x 22 rows = 4 in (10.2 cm) in sc
- Chain gauge: 5 ch = 1 in (2.5 cm) when you slip stitch along a chain
Test one piece first. Ch 11, then sl st in the 2nd ch from hook and in each ch across (10 sl sts). The strip should measure 2 in (5.1 cm). Then make one outer sprig and measure it before you make the rest.
Checkpoints:
- Test strip: 2 in (5.1 cm)
- Outer sprig: 2.75 in (7.0 cm) long
- Center sprig: 4 in (10.2 cm) long
- Cone: 1.5 in (3.8 cm) wide x 1.75 in (4.4 cm) tall
- Bow loop strip: 6 in (15.2 cm) long
- Assembled ornament: 5.5 in (14.0 cm) x 5.5 in (14.0 cm)
If your pieces come out too big, go down to a 3.25 mm hook. If they’re too small, go up to a 3.75 mm hook. Slip stitches tighten easily, so keep each one loose enough that your hook goes back in without forcing.
Pine Sprigs
You make all five sprigs the same way:
- Chain the stem.
- Work Side 1 from the tip down to the base.
- Turn and work Side 2 along the free loops, from the base back up.
- Finish with a needle at the tip.
The needles on Side 2 sit one chain lower than the needles on Side 1, so the two sides alternate and give the herringbone look. Each sprig ends in 3 bare chains at the base, which you use for sewing.
Center Sprig (make 1, sage green)
Ch 19.
Side 1: Sl st in 2nd ch from hook (this is the tip point). [Ndl, sl st in next 2 ch] 7 times. Sl st in last 3 ch.
Count: 7 needles, 18 ch used (1 + 14 + 3).
Side 2: Ch 1. Turn the work so you can reach the free loops on the other side of the foundation chain. Sl st in the first 3 free loops (bare stem). [Sl st in next 2 free loops, ndl] 7 times.
Count: 7 needles, 17 free loops used (3 + 14).
Tip: Sl st in the last free loop, under the tip point. Ndl, then sl st in the skipped top ch.
Count: 1 tip needle. Sprig total: 15 needles.
Fasten off, leaving an 8 in (20.3 cm) tail for sewing.
Checkpoint: The stem is 18 ch, or 3.6 in (9.1 cm). The tip needle adds about 0.4 in (1.0 cm), so the sprig is 4 in (10.2 cm) long in total. It’s about 1.25 in (3.2 cm) wide across the needles.
Inner Sprigs (make 2, sage green)
Ch 15.
Side 1: Sl st in 2nd ch from hook. [Ndl, sl st in next 2 ch] 5 times. Sl st in last 3 ch.
Count: 5 needles, 14 ch used (1 + 10 + 3).
Side 2: Ch 1, turn. Sl st in the first 3 free loops. [Sl st in next 2 free loops, ndl] 5 times.
Count: 5 needles, 13 free loops used (3 + 10).
Tip: Sl st in the last free loop, ndl, sl st in the skipped top ch.
Sprig total: 11 needles.
Fasten off, leaving an 8 in (20.3 cm) tail.
Checkpoint: 3.25 in (8.3 cm) long.
Outer Sprigs (make 2, sage green)
Ch 13.
Side 1: Sl st in 2nd ch from hook. [Ndl, sl st in next 2 ch] 4 times. Sl st in last 3 ch.
Count: 4 needles, 12 ch used (1 + 8 + 3).
Side 2: Ch 1, turn. Sl st in the first 3 free loops. [Sl st in next 2 free loops, ndl] 4 times.
Count: 4 needles, 11 free loops used (3 + 8).
Tip: Sl st in the last free loop, ndl, sl st in the skipped top ch.
Sprig total: 9 needles.
Fasten off, leaving an 8 in (20.3 cm) tail.
Checkpoint: 2.75 in (7.0 cm) long.
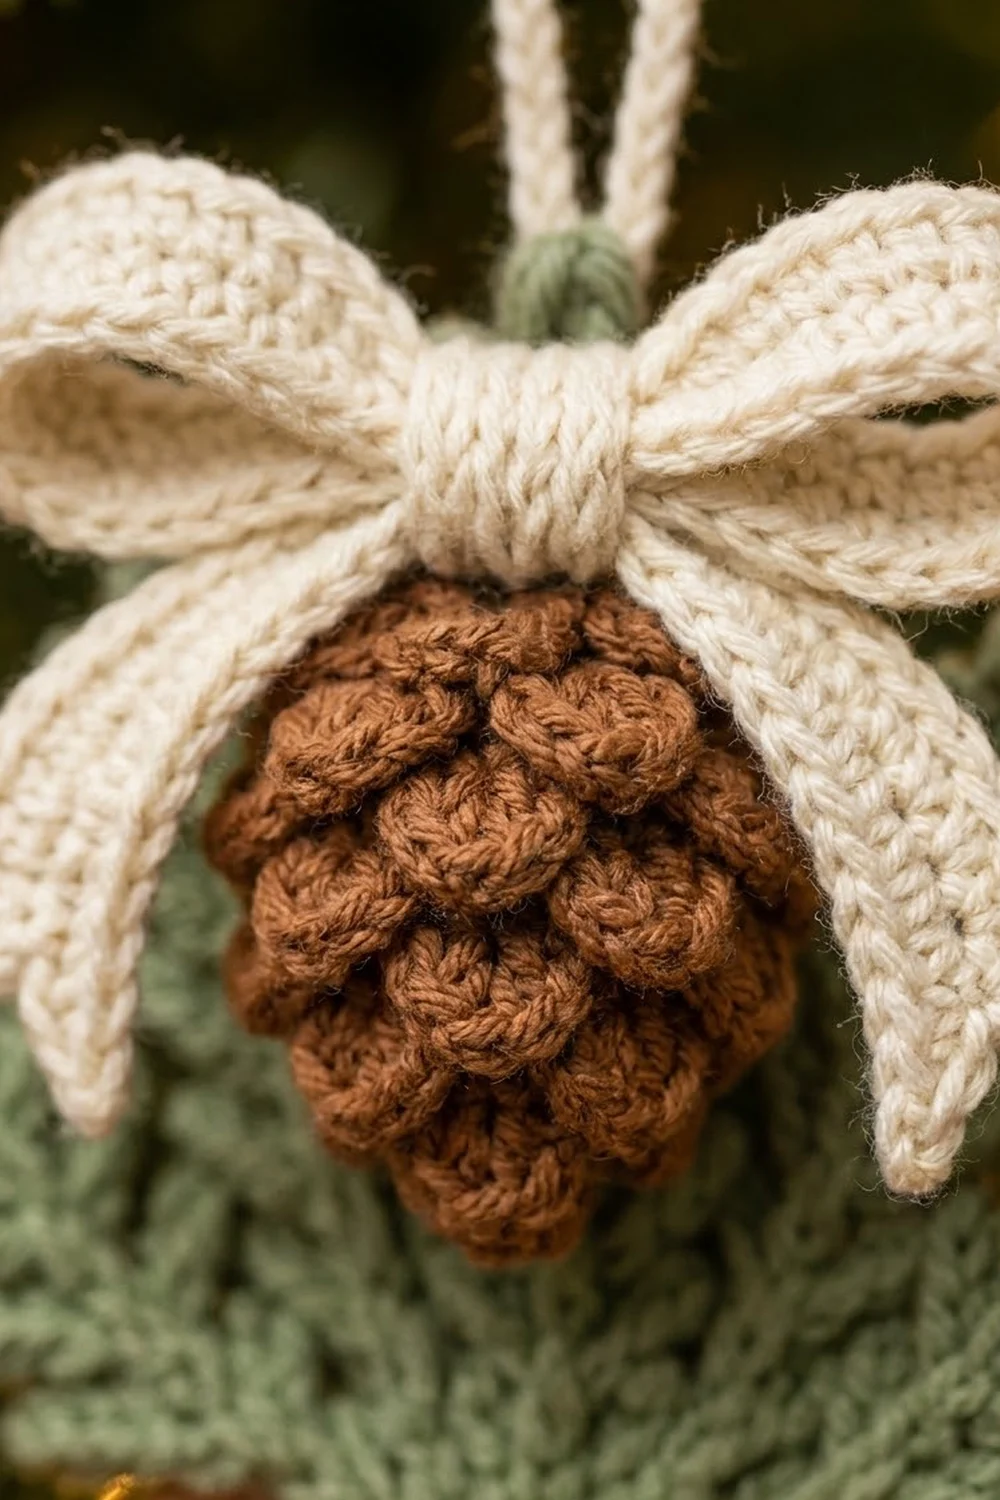
Pine Cone (make 1, brown)
You work the cone from the bottom tip upward. The base rounds hold its shape. Each scale round goes into the front loops of the base round below it. The next base round then goes into the back loops of that same base round. Since all the scales are attached at the front loops, they stack in layers.
Rnd 1: 6 sc in MR. (6)
Rnd 2: 2 sc in each st around. (12)
Rnd 3 (scales): Work in FLO of Rnd 2. [Sl st in next st, shell in next st] 6 times. (6 scales)
Rnd 4: Fold the scales down and work in the unused BLO of Rnd 2. [Sc in next 5 sts, 2 sc in next st] 2 times. (14)
Rnd 5 (scales): Work in FLO of Rnd 4. [Sl st in next st, shell in next st] 7 times. (7 scales)
Rnd 6: Work in BLO of Rnd 4. Sc in each st around. (14)
Rnd 7 (scales): Work in FLO of Rnd 6. [Shell in next st, sl st in next st] 7 times. (7 scales) Starting with the shell shifts these scales so they sit between the scales of Rnd 5.
Rnd 8: Work in BLO of Rnd 6. Sc in each st around. (14)
Rnd 9 (scales): Work in FLO of Rnd 8. [Sl st in next st, shell in next st] 7 times. (7 scales)
Stuff the cone lightly. Keep it slightly flat so it sits against the sprigs.
Rnd 10: Work in BLO of Rnd 8. Sc2tog 7 times. (7)
Rnd 11: Working through both loops, sc2tog 3 times, then sl st in last st. (4)
Fasten off, leaving a 10 in (25.4 cm) tail. Weave the tail through the 4 remaining sts and pull the top closed.
Checkpoint: The cone has 27 scales in total (6 + 7 + 7 + 7). It measures 1.5 in (3.8 cm) wide when pressed flat and 1.75 in (4.4 cm) tall.
Bow and Hanging Loop (cream)
Bow Loops (make 1)
Ch 31.
Row 1: Sc in 2nd ch from hook and in each ch across. (30)
Rows 2–4: Ch 1, turn, sc in each st across. (30)
Fasten off. The strip measures 6 in (15.2 cm) x 0.75 in (1.9 cm). Sew the short ends together to make a ring. Flatten the ring with the seam at the center back. It should be 3 in (7.6 cm) wide.
Bow Tails (make 1)
Ch 21.
Row 1: Sc in 2nd ch from hook and in each ch across. (20)
Rows 2–3: Ch 1, turn, sc in each st across. (20)
Fasten off. The strip measures 4 in (10.2 cm) x 0.5 in (1.3 cm). Fold it in half into an upside-down V. This gives two tails, each 2 in (5.1 cm) long.
Center Wrap (make 1)
Ch 7.
Row 1: Sc in 2nd ch from hook and in each ch across. (6)
Rows 2–3: Ch 1, turn, sc in each st across. (6)
Fasten off, leaving an 8 in (20.3 cm) tail. The wrap measures 1.2 in (3.0 cm) x 0.5 in (1.3 cm).
Bow assembly: Place the flattened ring on top of the folded tails and pinch them together at the center. Wrap the center wrap around the pinch and sew its ends together at the back. The pinched bow is 2.75 in (7.0 cm) wide and 2.5 in (6.4 cm) tall, including the tails.
Hanging Loop (make 1)
Ch 21. Sl st in the back bump of the 2nd ch from hook and in each ch across. (20)
Fasten off, leaving a 6 in (15.2 cm) tail. The cord is 4 in (10.2 cm) long.
Make All Pieces
Before you assemble, check that you have all 10 pieces:
- Sage green: 1 center sprig, 2 inner sprigs, 2 outer sprigs
- Brown: 1 cone
- Cream: 1 bow loop ring, 1 tail strip, 1 center wrap, 1 hanging loop
Lay them out face up in this arrangement:
                    [ hanging loop ]
                   Center sprig (0 deg)
   Inner L (-32 deg)       |       Inner R (+32 deg)
 Outer L (-65 deg)         |         Outer R (+65 deg)
                       [  HUB  ]
                       [  BOW  ]
                       [ CONE  ]
All five bare stems meet at one hub point. The center sprig points straight up. The inner sprigs lean about 32° out to each side, and the outer sprigs lean about 65°.
Joining
Method: Whipstitch with the sage green tails, working from the wrong side.
Stitch-to-stitch logic:
- Stack the five bare stems at the hub with the center sprig on top. Whipstitch through all five 3-ch stems, 0.6 in (1.5 cm) long, with 3 passes.
- Neighboring sprigs touch about 1 in (2.5 cm) above the hub. At each of these points, tack the lowest needle of one sprig to the lowest needle of the next with 1 stitch. That makes 4 tacks.
- Center the cone over the hub with its closed top facing up, so it covers the stems. Sew around the cone’s top round into the stems.
- Sew the bow over the top of the cone so the tails fall down on either side of it.
- Fold the hanging loop in half. Sew both ends to the back of the center sprig, 0.25 in (0.6 cm) below the tip. About 1.75 in (4.4 cm) of loop shows above the top.
Tension: Make your stitches snug, but don’t pull hard enough to pucker the needles. If the tacks are too tight, the fan will curl forward.
Size checkpoint: The assembled ornament measures 5.5 in (14.0 cm) from one outer tip to the other. It also measures 5.5 in (14.0 cm) from the center tip to the bottom of the cone.
Border
This ornament doesn’t have a border round. A border would fill in the spaces between the needles and lose the pine shape. The needles themselves are the finished edge.
Edge gauge: 1 needle for every 2 stem chains, or 0.4 in (1.0 cm), on each side.
Edge count per sprig:
- Center sprig: 7 needles on Side 1, 7 on Side 2, 1 at the tip (15)
- Inner sprigs: 5 + 5 + 1 (11 each)
- Outer sprigs: 4 + 4 + 1 (9 each)
- Ornament total: 15 + 22 + 18 = 55 needles
Why the math works: Each stem’s starting chain is (2 x needles per side) + 1 tip chain + 3 bare chains + 1 skipped chain:
- Center sprig: 14 + 1 + 3 + 1 = Ch 19
- Inner sprigs: 10 + 1 + 3 + 1 = Ch 15
- Outer sprigs: 8 + 1 + 3 + 1 = Ch 13
Side 2 puts each needle one chain lower than Side 1, so the needles alternate every 0.2 in (0.5 cm) and both sides lie flat.
Final Blocking
- Lightly mist the assembled ornament with water, or with starch if you want it stiffer.
- Pin it face up on the blocking mat with the hub at the bottom.
- Pin the sprig tips at their angles: 0°, about 32° and about 65°.
- On each sprig, pin out every second needle so it points up and away from the stem.
- Fluff the bow loops and pin the tails straight down.
- Press the cone scales with your fingertips so they point downward.
- Let the ornament dry completely, then take out the pins.
Final Quality-Control Checklist
- [ ] 55 needles in total, none flattened or missing
- [ ] 27 cone scales, and the cone sits flat against the hub
- [ ] Bow centered, with even tails
- [ ] Hanging loop centered above the center sprig
- [ ] Ornament measures 5.5 in (14.0 cm) x 5.5 in (14.0 cm)
- [ ] All tails woven in on the back
Troubleshooting
- Sprig curls: Your slip stitches are too tight. Use a larger hook for the stem sl sts, then block the sprig flat.
- Needles are floppy: Work the sc on each needle a little firmer, or starch the sprig.
- Scales lie flat: Check that the scale rounds are worked in FLO and the base rounds in BLO.
- Cone is too round: Use less stuffing, and press the cone flat while you sew it on.
- Bow droops: Tack the bow ring to the cone at two points next to the center wrap.
- Ornament hangs crooked: Move the hanging loop until the ornament balances when you hold it up by the loop.
Care
Spot clean with cool water and mild soap, then reshape the ornament and let it dry flat. Store it flat in a box so the needles keep their shape.
Final Notes
Everything is sized from the chain gauge of 5 ch = 1 in (2.5 cm):
- Sprigs: 2.75 in (7.0 cm), 3.25 in (8.3 cm) and 4 in (10.2 cm) long
- Cone: 1.5 in (3.8 cm) x 1.75 in (4.4 cm)
- Bow: 2.75 in (7.0 cm) wide
- Assembled ornament: 5.5 in (14.0 cm) x 5.5 in (14.0 cm), with a 1.75 in (4.4 cm) loop
If you check your measurements at each stage, the pieces will fit together.
Happy crocheting!