

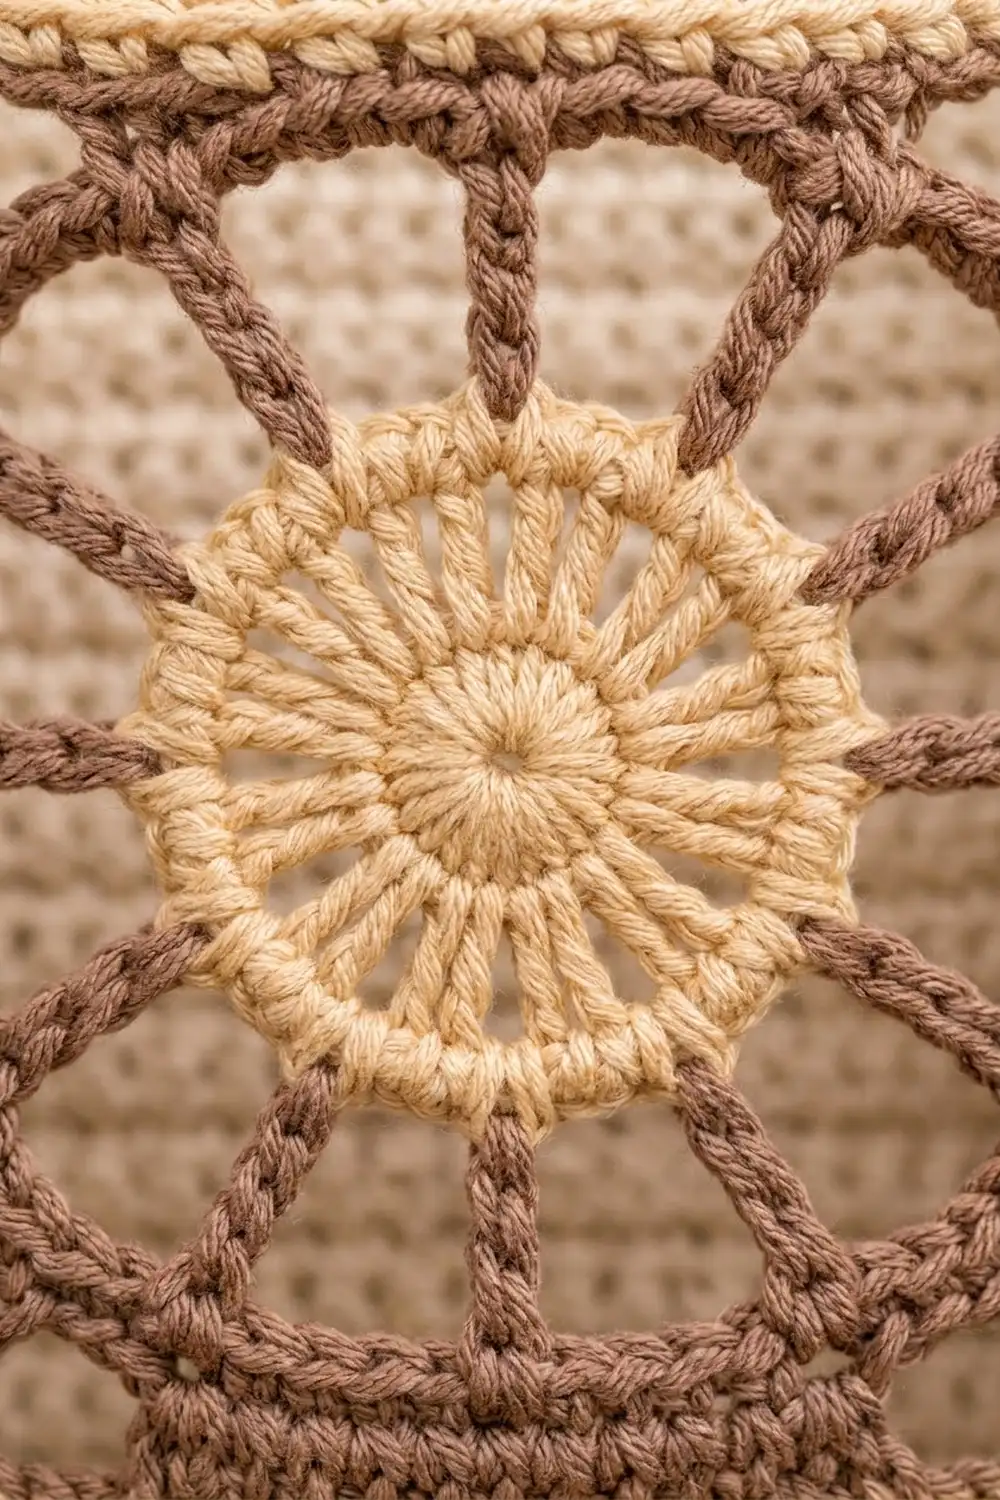
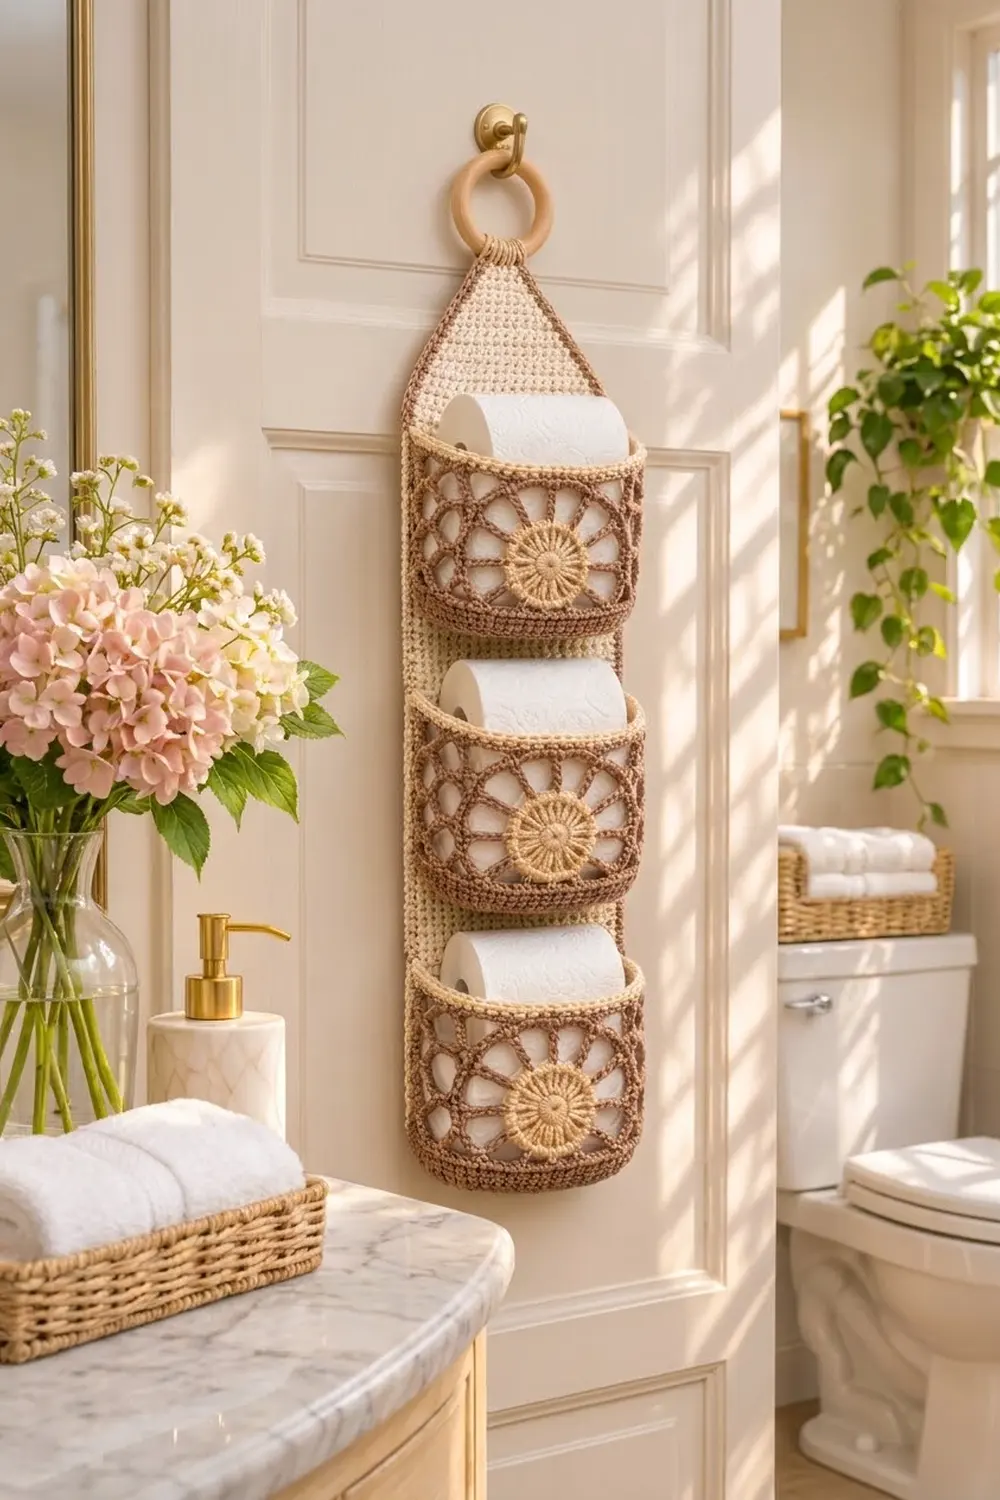
This hanging toilet paper holder keeps three spare rolls tidy on the back of a bathroom door. A long ivory panel with a mocha brown edge tapers to a point and hangs from a wooden ring. Three rounded pockets run down the front. Each one has a solid brown base, an open brown lattice wall, a wheat beige sunburst medallion, and a wheat beige rim.
The palette is warm and soft: ivory, mocha brown, and wheat beige. Dense single crochet keeps the panel firm, and airy chain arches let the rolls show through the pockets.
This pattern uses US crochet terms. The finished panel measures 6 in (15.2 cm) wide and 29 in (73.7 cm) long, or about 31.5 in (80.0 cm) including the ring. Each pocket holds a standard roll upright, with about 1.5 in (3.8 cm) of the roll showing above the rim.
Here’s the construction order: crochet the panel in rows, crochet three oval-based pockets in the round, and make three medallions. Sew the medallions to the pockets and the pockets to the panel. Then work the border and attach the ring.
Finished Size and Construction
- Finished size: 6 in x 29 in (15.2 cm x 73.7 cm), plus a 2.5 in (6.4 cm) ring
- Skill level: Intermediate
- Terminology: US
- Yarn weight: Worsted (#4) cotton
- Hook: 5.0 mm (H-8)
- Number of pieces: 7 crocheted pieces (1 panel, 3 pockets, 3 medallions) plus 1 wooden ring
- Layout: 3 pockets stacked vertically on 1 panel
- Pocket size: base about 6 in x 4.5 in (15.2 cm x 11.4 cm); wall about 3 in (7.6 cm) tall
- Panel size before border: 5 in x 28 in (12.7 cm x 71.1 cm)
- Border depth: about 0.5 in (1.3 cm)
Materials
Use a smooth, firm worsted-weight cotton or cotton blend. Cotton holds the pocket shape and copes well with bathroom humidity. The meter amounts below assume about 1.8 m per gram.
- Color A, Ivory (panel): 110 g, about 198 m
- Color B, Mocha Brown (pocket bases, lattice, border, ring tab): 120 g, about 216 m
- Color C, Wheat Beige (medallions, rims): 40 g, about 72 m
Tools:
- 5.0 mm (H-8) crochet hook
- Wooden ring, 2.5 in (6.4 cm) outside diameter
- Tapestry needle
- 6 locking stitch markers
- Tape measure
- Rust-proof pins and a blocking mat
- Scissors
All quantities include a margin of about 15 percent for swatching and weaving in ends.
Abbreviations (US Terms)
- ch: chain
- sl st: slip stitch
- sc: single crochet
- dc: double crochet
- sc2tog: single crochet 2 together
- BLO: back loop only
- sk: skip
- st(s): stitch(es)
- RS: right side
Special stitch, sc2tog: Insert the hook in the next st and pull up a loop. Insert the hook in the following st and pull up a loop. Yarn over and pull through all 3 loops on the hook.
Gauge and Checkpoints
Gauge: 16 sc and 18 rows = 4 in (10.2 cm) in sc worked in rows.
Make one pocket first. It tests your tension quickly, and the pocket is where size matters most.
Checkpoints:
- Pocket base, after Rnd 10: 72 sts, about 6 in x 4.5 in (15.2 cm x 11.4 cm)
- Pocket, after Rnd 18: wall about 3 in (7.6 cm) tall; rim circumference 18 in (45.7 cm)
- Medallion, after Rnd 3: about 2.25 in (5.7 cm) across
- Panel, after Row 18: 5 in (12.7 cm) wide, 4 in (10.2 cm) tall
- Panel, after Row 108: 24 in (61.0 cm) tall
- Panel, after Row 126: 28 in (71.1 cm) tall
Too big? Switch to a 4.5 mm hook. Too small? Switch to a 5.5 mm hook. Change the hook, not the stitch counts, so every later calculation still holds.
Pocket (Make 3)
Work in joined rounds without turning. Join each round with a sl st to the first sc. The ch 1 at the start of a round does not count as a stitch.
Oval Base
With Color B, ch 9.
Rnd 1: Sc in the 2nd ch from the hook and in the next 6 ch, then 3 sc in the last ch. Working in the bottom loops of the foundation, sc in the next 6 ch, then 2 sc in the ch holding the first sc. Join. (18 sts)
The base now has 3 sts at each end and 6 straight sts along each side.
Rnd 2: Ch 1, 2 sc in the first st, sc in the next 6, 2 sc in each of the next 3, sc in the next 6, 2 sc in each of the last 2. Join. (24 sts)
Rnd 3: Ch 1, (sc in next st, 2 sc in next st) once, sc in next 6, (sc in next st, 2 sc in next st) 3 times, sc in next 6, (sc in next st, 2 sc in next st) twice. Join. (30 sts)
Rnds 4–10: For round number n, ch 1, (sc in next n–2 sts, 2 sc in next st) once, sc in next 6, (sc in next n–2 sts, 2 sc in next st) 3 times, sc in next 6, (sc in next n–2 sts, 2 sc in next st) twice. Join.
Round totals: Rnd 4: 36. Rnd 5: 42. Rnd 6: 48. Rnd 7: 54. Rnd 8: 60. Rnd 9: 66. Rnd 10: 72.
Each round adds 6 sts, 3 at each curved end, so the straight sides stay at 6 sts. At Rnd 10, each side has 6 straight sts and each end has 30 sts: 6 + 30 + 6 + 30 = 72.
Wall
Rnd 11: Ch 1, sc in the BLO of each st around. Join. (72 sts) This round turns the edge upward.
Rnd 12: Ch 1, sc in each st around. Join. (72 sts) Rnds 11–12 form the solid brown band.
Rnd 13 (lattice set-up): Ch 1, sc in the first st, ch 5, sk 3. Sc in the next st, ch 5, sk 3; repeat from * around. Join. (18 ch-5 loops)* Each repeat uses 4 sts, and 72 ÷ 4 = 18 loops.
Rnds 14–16: Sl st in the next 3 ch to reach the center of the first loop. Ch 1, sc in the same loop, ch 5. Sc in the next loop, ch 5; repeat from * around. Join. (18 loops)*
Each sc sits at the top of the arch below it, which forms an open diamond lattice. Fasten off Color B.
Rim
Rnd 17: Join Color C in any loop. Ch 1, 4 sc in each loop around. Join. (72 sts) This is a conversion round: 18 loops x 4 sc = 72 sts. That matches Rnd 12, so the wall doesn’t flare or pull in.
Rnd 18: Ch 1, sc in each st around. Join. (72 sts) Fasten off.
Sunburst Medallion (Make 3)
With Color C, make a magic ring.
Rnd 1: Ch 3 (counts as dc), 15 dc in the ring. Pull the ring tight. Join to the top of the ch-3. (16 dc)
Rnd 2: Ch 3 (counts as dc), dc in the same st, then 2 dc in each st around. Join. (32 dc) The paired dc fan out like rays.
Rnd 3: Ch 1, sc in the BLO of each st around. Join. (32 sc) Fasten off, leaving a 12 in (30.5 cm) tail for sewing.
Back Panel
With Color A, ch 21.
Row 1 (RS): Sc in the 2nd ch from the hook and in each ch across. (20 sts)
Rows 2–108: Ch 1, turn, sc in each st across. (20 sts)
Taper
Row 109: Ch 1, turn, sc2tog, sc in each st to the last 2 sts, sc2tog. (18 sts)
Row 110: Ch 1, turn, sc in each st across. (18 sts)
Rows 111–124: Repeat Rows 109–110 seven more times. Counts after each decrease row: 16 (Row 111), 14 (Row 113), 12 (Row 115), 10 (Row 117), 8 (Row 119), 6 (Row 121), and 4 (Row 123). Row 124 also has 4 sts.
Rows 125–126: Ch 1, turn, sc in each st across. (4 sts) Fasten off.
Checkpoint: The panel is 28 in (71.1 cm) tall and narrows from 5 in (12.7 cm) to 1 in (2.5 cm) over the top 4 in (10.2 cm).
Make All Pieces
- Color A: 1 back panel
- Color B, with a Color C rim: 3 pockets
- Color C: 3 medallions
Front view, top to bottom:
        ( O )      wooden ring
          |        ring tab
         /  \      taper: Rows 109–126
        | P3 |     pocket 3: Rows 75–88
        | P2 |     pocket 2: Rows 39–52
        | P1 |     pocket 1: Rows 3–16
        |____|     bottom edge
Joining
Medallions: Flatten a pocket so one straight side of the base is at the back. Center a medallion on the front, over lattice Rnds 13–16, with its lower edge touching the brown band. Whipstitch through the front loops left behind by Rnd 3, catching the lattice chains underneath. The lattice arches will look as if they radiate from the medallion.
Mark the back: On Rnd 18, mark the 20 sts centered at the back. Then mark the 20 sts of Rnd 11 directly below them.
Pockets to panel: Lay the panel RS up.
- Align the 20 marked sts of Pocket 1’s Rnd 11 with the 20 sts of Row 3. Whipstitch with Color B, one pocket st to one panel st.
- Align the 20 marked sts of Rnd 18 with the 20 sts of Row 16. Whipstitch with Color C, 20 sts to 20 sts.
- Repeat for Pocket 2 on Rows 39 and 52, and for Pocket 3 on Rows 75 and 88.
Rows 3 and 16 are 13 rows apart, about 2.9 in (7.4 cm). That matches the 3 in (7.6 cm) wall, so the back lies flat. The other 52 sts of each round, 13 in (33.0 cm), bow out to make the front. That gives the pocket a depth of about 5 in (12.7 cm), enough for a roll 4.3 in (10.9 cm) wide.
Tension: Make the whipstitches snug but not tight, so the panel stays flat. Leave the panel’s row ends free for the border.
Size checkpoint: The pockets start 36 rows, or 8 in (20.3 cm), apart. After the border, the rims sit about 4 in, 12 in, and 20 in (10.2 cm, 30.5 cm, and 50.8 cm) above the bottom edge.
Border
Border gauge: 16 sc = 4 in (10.2 cm). Along the straight sides, 9 rows measure 2 in (5.1 cm), which equals 8 sc. Work 8 sc for every 9 row ends.
Rnd 1: With the RS facing, join Color B in the first st of Row 126.
- Top: Ch 1, sc in the same st and the next 3 sts. (4 sc) Ch 1 for the corner.
- Left side: Work 1 sc in each of the 18 taper row ends; bias edges need the extra sts. Then, along Rows 108–1, sc in 8 row ends and skip the 9th, 12 times. That’s 18 + 96 = 114 sc. Ch 1.
- Bottom: Sc in each of the 20 foundation loops. (20 sc) Ch 1.
- Right side: Work as for the left side. (114 sc) Ch 1, then join to the first sc.
Rnd 1 total: 4 + 114 + 20 + 114 = 252 sc, plus 4 corner ch-1 spaces.
Rnd 2: Sl st into the corner space. Ch 1, then (sc, ch 1, sc) in the same space. *Sc in each sc to the next corner, then (sc, ch 1, sc) in the corner space; repeat from * around, leaving out the final corner. Join.
Per-side counts: top 6, left 116, bottom 22, right 116. Total: 260 sc. Check: 252 + (4 corners x 2) = 260.
Why the math works: The 96 sc along each straight side span the 24 in (61.0 cm) of straight rows at 4 sc per inch. The 18 taper sc cover an edge of about 4.5 in (11.4 cm). The 5 in (12.7 cm) panel plus 0.5 in (1.3 cm) of border on each side makes 6 in (15.2 cm). The edge lies flat without ruffling. Fasten off.
Ring Tab
With Color B, join in the first sc of the 6-st top edge.
Rows 1–6: Ch 1, sc in each st across, turn. (6 sts)
Fold the tab through the ring to the back and whipstitch it down. Wrap Color B 8 times around the neck below the ring and secure it.
Final Blocking
- Weave in all ends, going back through your stitches at least once.
- Mist the panel until it is damp.
- Pin it to 6 in x 29 in (15.2 cm x 73.7 cm), with a pin every 2 in (5.1 cm) along the border.
- Fill each pocket with a folded hand towel so the front curves evenly.
- Mist the pockets lightly and press the medallions flat.
- Let everything dry completely before unpinning.
Final Quality-Control Checklist
- The panel measures 6 in x 29 in (15.2 cm x 73.7 cm).
- The taper is symmetrical.
- The border counts are 6, 116, 22, and 116.
- Each base had 72 sts at Rnd 10.
- Each lattice has 18 even loops.
- Each rim has 72 sts and doesn’t flare.
- The medallions are centered and fully stitched.
- The pockets are level and 8 in (20.3 cm) apart.
- The ring tab is secure.
Troubleshooting
The base cups: Check that each round adds exactly 6 sts, or go up one hook size for the base.
The base ruffles: You have extra increases. Each end gets exactly 3 per round.
The lattice twists: Work each sc into the center of a loop.
The rim flares: Rnd 17 must total 72 sts.
The panel edge waves: Stick to 8 sc per 9 row ends.
A pocket sags: Re-sew the rim seam more firmly, exactly 13 rows above the base seam.
Care
Hand wash in cool water, gently squeeze out the water, and dry flat, reshaping the pockets while they’re damp. Remove the ring first if it is unsealed wood.
Final Notes
The measurement chain: a gauge of 16 sc and 18 rows to 4 in (10.2 cm) gives a 5 in x 28 in (12.7 cm x 71.1 cm) panel. Two border rounds bring it to 6 in x 29 in (15.2 cm x 73.7 cm). Each pocket keeps 72 sts from the base through the 18-loop lattice to the rim. A 20-st back seam leaves 13 in (33.0 cm) of front, enough to hold a full roll. If the base, the panel width, and the border counts are right, the rest will fit.
Happy crocheting!