

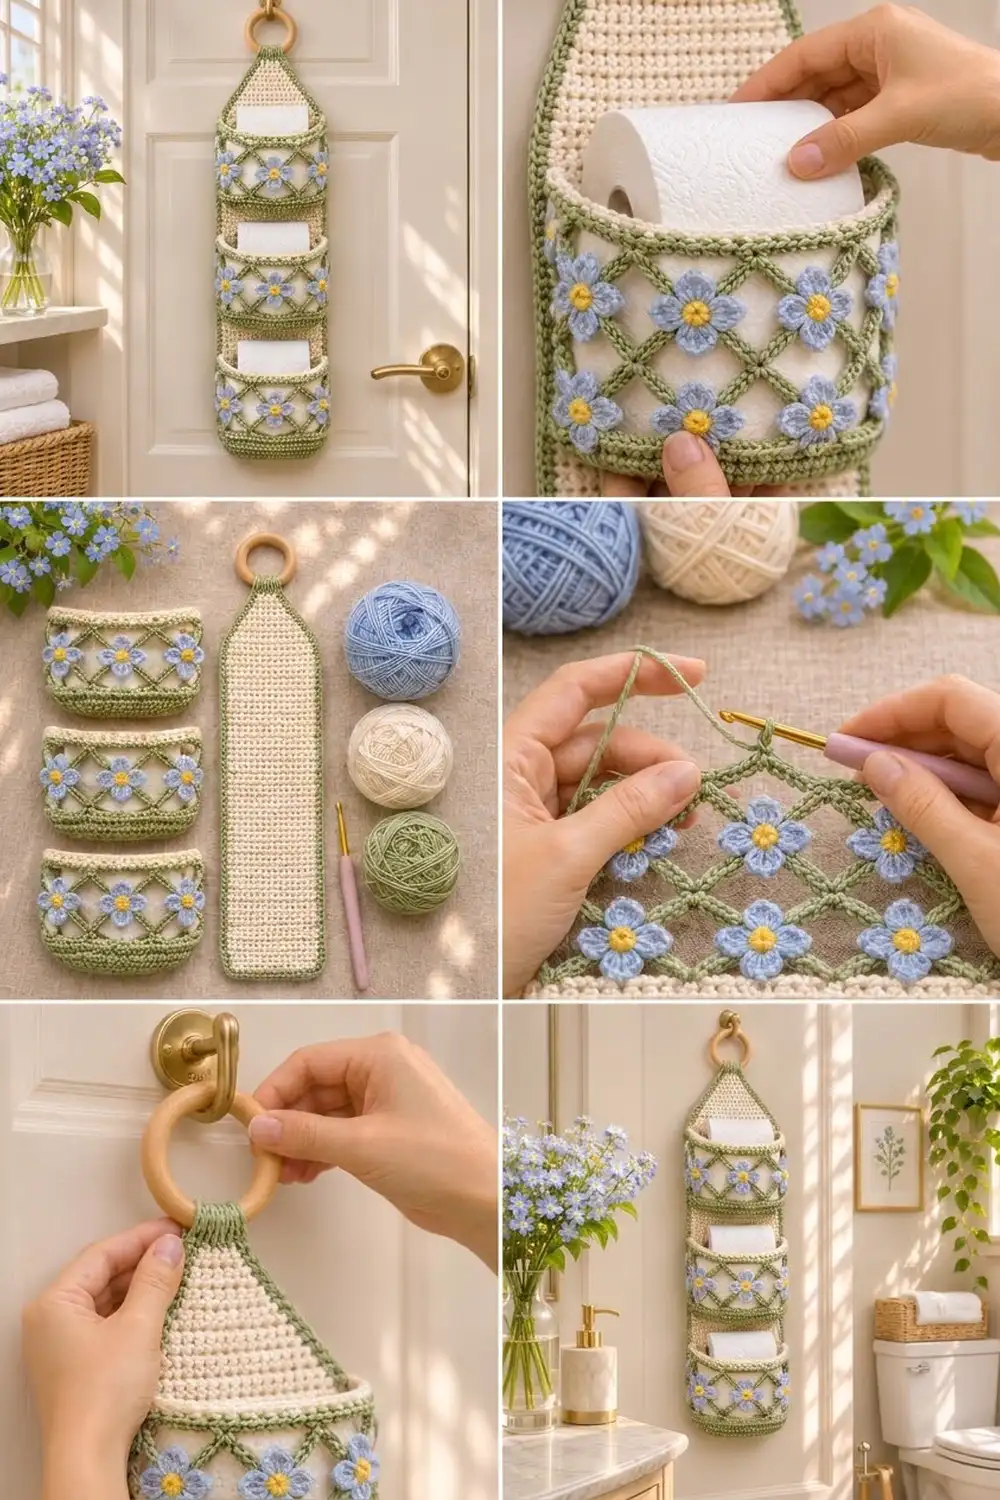
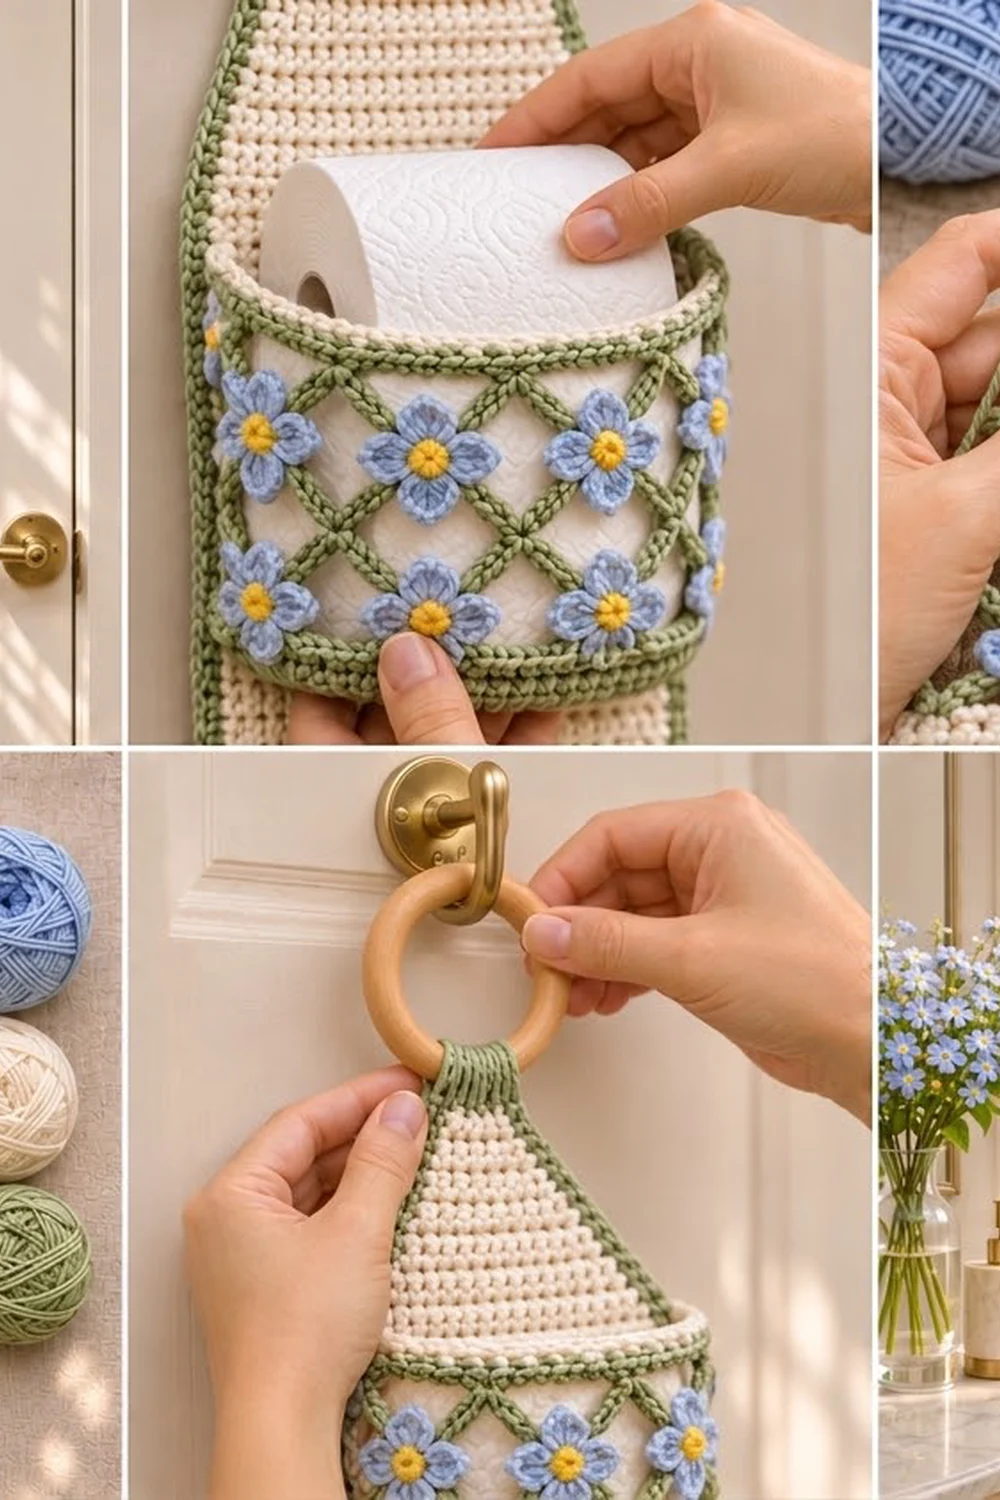
This hanging holder stores three spare rolls on the back of a door or on a wall hook. It has a slim cream backing panel with a twisted sage-green edge and three rounded pockets. Each pocket is wrapped in an open green lattice with small blue forget-me-not flowers.
The colors are soft and springlike: cream, sage green, periwinkle blue and a touch of yellow. A natural wooden ring at the top finishes the cottage look.
The pattern uses US crochet terms. The finished backing panel measures 5 in (12.7 cm) wide by about 17.25 in (43.8 cm) tall, not counting the strap. With the ring, the holder hangs about 20 in (50.8 cm) long. Each pocket is about 4.5 in (11.4 cm) across and 3.25 in (8.3 cm) tall.
You will work the backing panel in rows of single crochet and taper it to a strap. Each pocket is worked in the round, starting with a flat circle base and ending with a lattice wall. The small flowers are made separately and sewn onto the lattice. You then sew the pockets onto the panel, add a two-round border, and fold the strap around the ring.
Finished Size and Construction
- Finished panel size: 5 in × 17.25 in (12.7 cm × 43.8 cm)
- Overall hanging length with ring: about 20 in (50.8 cm)
- Skill level: Intermediate
- Terminology: US
- Yarn weight: Worsted (#4) cotton
- Hook: 4.0 mm (G-6)
- Number of pieces: 1 panel, 3 pockets, 42 flowers
- Layout: 3 pockets stacked vertically on one panel
- Pocket size: 4.5 in (11.4 cm) base diameter × 3.25 in (8.3 cm) tall
- Panel size before border: 4.5 in × 17 in (11.4 cm × 43.2 cm)
- Border depth: 0.25 in (0.6 cm)
Materials
Use a worsted-weight cotton or cotton blend. Cotton holds its shape well and works well in a bathroom. The amounts below assume about 90 m per 50 g (1.8 m per gram).
- Cream: 70 g (126 m), for the panel and pocket rims
- Sage green: 100 g (180 m), for the pocket bases, lattice, strap and border
- Periwinkle blue: 30 g (54 m), for the flower petals
- Yellow: 10 g (18 m), for the flower centers
All amounts include a safety margin of about 20 percent.
Tools:
– 4.0 mm (G-6) crochet hook
– Wooden ring, 2 in (5.1 cm) outer diameter
– Tapestry needle
– 6 locking stitch markers
– Measuring tape
– Blocking mat and pins
– Spray bottle
Abbreviations (US Terms)
- ch – chain
- sl st – slip stitch
- sc – single crochet
- dc – double crochet
- sc2tog – single crochet 2 together
- BLO – back loop only
- MR – magic ring
- st(s) – stitch(es)
- rev sc – reverse single crochet
Special stitch: reverse single crochet (rev sc). Work from left to right. Insert the hook into the next stitch to the right, yarn over and pull up a loop, then yarn over and pull through both loops. This makes the twisted, cord-like edge.
Gauge and Checkpoints
Gauge: 16 sc and 18 rows = 4 in (10.2 cm) in sc worked in rows.
Make one pocket first, because it is the best gauge test. Check these measurements as you go:
- After Rnd 10 of the pocket base: 4.5 in (11.4 cm) across.
- After Rnd 17 (end of the lattice): the wall is about 2.75 in (7.0 cm) tall from the base fold.
- Finished pocket: 3.25 in (8.3 cm) tall. A standard roll about 4.25 in (10.8 cm) wide should slide in easily.
- Panel after Row 63: 4.5 in × 14 in (11.4 cm × 35.6 cm).
If your piece is too big, go down to a 3.75 mm hook. If it is too small, or a roll will not fit, go up to a 4.5 mm hook. Do not change the stitch counts, because the border math depends on them.
Backing Panel
Use cream throughout.
Row 1: Ch 19. Sc in the 2nd ch from the hook and in each ch across. Turn. (18 sc)
Rows 2–63: Ch 1, sc in each st across. Turn. (18 sc)
Checkpoint: 4.5 in × 14 in (11.4 cm × 35.6 cm).
Taper
Row 64: Ch 1, sc2tog, sc in each st to the last 2 sts, sc2tog. Turn. (16 sc)
Row 65: Ch 1, sc in each st across. Turn. (16 sc)
Rows 66–77: Repeat Rows 64–65 six more times. The counts after each decrease row are 14, 12, 10, 8, 6 and 4 sc. Row 77 is 4 sc.
Checkpoint: the taper adds about 3 in (7.6 cm). The panel measures 4.5 in × 17 in (11.4 cm × 43.2 cm).
Strap
Change to green on the last pull-through of Row 77.
Rows 78–89: Ch 1, sc in each st across. Turn. (4 sc)
The strap is about 2.75 in (7.0 cm) long. Fasten off and weave in the ends.
Pocket (make 3)
Each pocket is worked in continuous joined rounds. Join each round with a sl st to the first st. Do not turn.
Base (green)
Rnd 1: Work 6 sc in a MR. (6)
Rnd 2: 2 sc in each st. (12)
Rnd 3: Sc in the next st, 2 sc in the next st; repeat from * around. (18)
Rnd 4: Sc in the next 2 sts, 2 sc in the next st; repeat around. (24)
Rnd 5: Sc in the next 3 sts, 2 sc in the next st; repeat around. (30)
Rnd 6: Sc in the next 4 sts, 2 sc in the next st; repeat around. (36)
Rnd 7: Sc in the next 5 sts, 2 sc in the next st; repeat around. (42)
Rnd 8: Sc in the next 6 sts, 2 sc in the next st; repeat around. (48)
Rnd 9: Sc in the next 7 sts, 2 sc in the next st; repeat around. (54)
Rnd 10: Sc in the next 8 sts, 2 sc in the next st; repeat around. (60)
Checkpoint: 4.5 in (11.4 cm) across, lying flat.
Lower Wall (green)
Rnd 11: Ch 1, sc in the BLO of each st around. (60) This makes a crisp fold between the base and the wall.
Rnds 12–13: Ch 1, sc in each st around. (60)
Lattice (green)
Rnd 14: Ch 1, sc in the first st. Ch 5, skip 4 sts, sc in the next st; repeat from * around, ending with ch 5 and skip 4. Join to the first sc. (12 sc, 12 ch-5 loops)
Rnd 15: Sl st into the first 3 ch of the next loop. Ch 1, sc in the same loop. Ch 5, sc in the next loop; repeat around, ending with ch 5. Join. (12 sc, 12 loops)
Rnds 16–17: Repeat Rnd 15. (12 sc, 12 loops)
Each sc in Rnds 15–17 sits in the center of a loop from the round below. This creates crossing points (nodes) that form diamonds. The nodes in Rnds 15 and 17 line up vertically. The nodes in Rnd 16 sit halfway between them.
Checkpoint: the wall is about 2.75 in (7.0 cm) tall.
Rim
Rnd 18 (green): Ch 1, work 5 sc in each ch-5 loop around. (12 loops × 5 sc = 60) Change to cream.
Rnds 19–20 (cream): Ch 1, sc in each st around. (60) Fasten off and leave a 24 in (61.0 cm) tail for sewing.
Checkpoint: the pocket is 3.25 in (8.3 cm) tall.
Forget-Me-Not Flower (make 42)
Rnd 1 (yellow): Work 5 sc in a MR, then join to the first sc. (5 sc) Fasten off.
Rnd 2 (blue): Join with a sl st in any sc. In that same st, work (ch 2, 2 dc, ch 2, sl st) for the first petal. Work (sl st, ch 2, 2 dc, ch 2, sl st) in the next sc; repeat from * 3 more times. (5 petals)
Fasten off and leave a 10 in (25.4 cm) blue tail. Each flower measures about 1.25 in (3.2 cm) across.
Make All Pieces
Totals:
– Cream: 1 panel, plus the rims of 3 pockets
– Green: 3 pocket bases and lattices, 1 strap, 1 border
– Blue and yellow: 42 flowers (14 per pocket)
Sewing the flowers: Lay each pocket with its seam at the back. Count the 12 nodes in Rnd 15 and mark the 3 at the back. Those 3 will sit against the panel. Of the 9 nodes left, skip the first and the last. Sew a flower onto each of the 7 center nodes, with the yellow center over the sc. Do the same on Rnd 17. Leave the Rnd 16 nodes plain so they show as open crossings.
Use the blue tail to tack each flower down at its center and at 2 petal tips.
Layout (front view):
        [ring]
         |  |   green strap
        /    \  cream taper
       |      |
       | ---- |  plain cream
       |[ P3 ]|  Rows 41–55
       |[ P2 ]|  Rows 21–35
       |[ P1 ]|  Rows 1–15
        ------
Joining
Sew each pocket to the panel with a green whipstitch.
Stitch-to-stitch logic: Mark the 16 back sts of Rnd 20 on the pocket. On the panel, mark sts 2 through 17 of the placement row, leaving 1 st free at each edge. Sew those 16 pocket sts to those 16 panel sts, one to one. Then sew the matching 16 back sts of Rnd 11 to the same panel sts on the base row. Finish by whipstitching the 2 vertical lines that connect the top and bottom seams.
Placement rows:
– Pocket 1: base at Row 1, top at about Row 15
– Pocket 2: base at Row 21, about 4.5 in (11.4 cm) from the bottom
– Pocket 3: base at Row 41, about 9 in (22.9 cm) from the bottom
Tension: Keep each stitch snug but flat. If you pull too tight, the panel will pucker. If the stitches are too loose, the pocket will sag forward when it is full.
Size checkpoint: the panel still measures 4.5 in (11.4 cm) wide at every pocket.
Border
Work the border in green with the panel facing you.
Border gauge: Along the straight sides, 16 sc = 4 in (10.2 cm). This matches the stitch gauge, so the edges lie flat.
Rnd 1: Join at the first st of Row 1, in the bottom right corner. Work as follows:
– Bottom: 3 sc in the corner st, 1 sc in each of the next 16 sts, 3 sc in the last st. (22 sts, including both corner groups)
– Left side: 56 sc along the rectangle, working 1 sc in each row end but skipping every 9th row (63 rows − 7 = 56). Then 14 sc along the taper (1 per row) and 12 sc along the strap (1 per row). (82 sts)
– Top of strap: 3 sc in the first st, 1 sc in each of the next 2 sts, 3 sc in the last st. (8 sts)
– Right side: Work as for the left side, ending at the bottom corner group. (82 sts)
Join. (22 + 82 + 8 + 82 = 194 sts)
Rnd 2: Ch 1, rev sc in each st around. Join and fasten off. (194 sts)
Why the math works: Rows are taller than stitches are wide, at a ratio of 18 to 16. Along the 63-row rectangle, 63 × 16 ÷ 18 = 56, so 56 sc keeps the side the same length as the fabric. The taper is diagonal, so 1 sc per row lies flat there. The strap is short and gets folded, so 1 sc per row is fine. Rev sc never needs extra stitches at the corners.
Each round adds about 0.125 in (0.3 cm), so the finished panel is 5 in (12.7 cm) wide.
Attaching the ring: Pass the strap through the ring from front to back. Fold it down 1.25 in (3.2 cm) behind the taper and whipstitch it securely.
Final Blocking
- Fill each pocket with a roll so it holds its round shape.
- Lay the holder face up and pin the panel straight at 5 in (12.7 cm) wide.
- Mist with water until damp but not soaked.
- Pat the flower petals flat and open the lattice diamonds evenly.
- Let it dry completely, at least 12 hours.
- Remove the rolls and pins.
Final Quality-Control Checklist
- The panel is 5 in × 17.25 in (12.7 cm × 43.8 cm).
- Each pocket is 3.25 in (8.3 cm) tall and holds a roll easily.
- There are 14 flowers on each pocket, and all are secure.
- The Rnd 16 crossings are visible between the two flower rows.
- The border lies flat with no ruffles.
- The ring is firmly attached.
- All ends are woven in.
Troubleshooting
- Pocket base cups up: Your tension is too tight. Go up a hook size for Rnds 1–10.
- Lattice sags: Use ch 4 instead of ch 5, but keep 12 loops per round.
- Border ruffles on the sides: Skip every 8th row instead of every 9th.
- Border pulls in on the sides: Skip every 10th row.
- Pocket tips forward: Add a few tacking stitches at the center back of Rnd 17.
- Flowers flop: Tack each one at 2 more petal tips.
Care
Hand wash in cool water and lay flat to dry. Reshape the pockets with rolls while they are damp.
Final Notes
The measurement chain is simple. Gauge sets the 4.5 in (11.4 cm) pocket base. The base sets the 60-stitch wall and its 12 lattice loops. The 18-stitch panel gives the 4.5 in (11.4 cm) width and the 16-stitch sewing zone. The 194-stitch border brings the panel to 5 in (12.7 cm). If you check each stage, the holder will hang straight and hold three rolls neatly.
Happy crocheting!