

This hanging holder stores two spare rolls in a cottage-style frame. A solid dusty-rose arch sits behind two lacy pockets of cream flower motifs. Raised rose seams frame each flower, and a soft cream scallop runs around every outer edge.
The look is vintage and warm. Rose and cream are the only colors, so the holder suits most bathroom palettes. A plain wooden ring at the top lets it hang from a simple hook.
The pattern uses US crochet terms. The finished holder is 15.5 in (39.4 cm) wide and 15.5 in (39.4 cm) tall. With the tab and ring, it measures about 19 in (48.3 cm) tall.
You’ll make an arched back panel, eight flower motifs, two gussets and a hanging tab. You join the motifs into two pocket fronts, add the borders, then sew everything together.
Finished Size and Construction
- Finished size: 15.5 x 15.5 in (39.4 x 39.4 cm), plus about 3.5 in (8.9 cm) for the tab and ring
- Skill level: Intermediate
- Terminology: US
- Yarn weight: DK (#3)
- Hook: 3.5 mm (US E-4)
- Number of pieces: 12 (1 back, 8 motifs, 2 gussets, 1 tab)
- Layout: two pockets, each 2 x 2 motifs
- Motif size: 3.25 in (8.3 cm) square
- Pocket front before border: 6.5 in (16.5 cm) square
- Back panel before border: 14 x 14 in (35.6 x 35.6 cm)
- Border depth: 0.75 in (1.9 cm): 0.25 in (0.6 cm) for the single crochet round and 0.5 in (1.3 cm) for the scallop
Materials
Choose a smooth DK cotton or cotton blend. Cotton keeps the arch flat and shows the stitches crisply. Acrylic also works, but the pockets will stretch more.
- Dusty rose: 130 g, about 300 m
- Cream: 60 g, about 140 m
Both quantities include a margin of about 20 percent.
Tools:
– 3.5 mm (US E-4) crochet hook
– 2 in (5.1 cm) unfinished wooden ring
– Tapestry needle
– Stitch markers
– Scissors
– Blocking mat and rust-proof pins
– Spray bottle
Abbreviations (US Terms)
- ch: chain
- sl st: slip stitch
- sc: single crochet
- hdc: half double crochet
- dc: double crochet
- tr: treble crochet
- sc2tog: single crochet 2 together
- sp: space
- st(s): stitch(es)
- RS / WS: right side / wrong side
3-dc cluster: [yo, insert hook in st, pull up a loop, yo, pull through 2 loops] 3 times, then yo and pull through all 4 loops on the hook.
Beginning cluster: Ch 2, [yo, insert hook in st, pull up a loop, yo, pull through 2 loops] twice, then yo and pull through all 3 loops.
Shell: 5 dc in the same st.
Gauge and Checkpoints
- Hdc gauge: 16 sts and 12 rows = 4 in (10.2 cm). One hdc row is 1/3 in (0.8 cm) tall.
- Sc gauge (gussets and tab): 7 sc = 1.5 in (3.8 cm), and 5 rows = 1 in (2.5 cm).
- Motif: one finished motif = 3.25 in (8.3 cm) square.
Make and measure one motif before anything else. If it’s bigger than 3.25 in (8.3 cm), go down a hook size. If it’s smaller, go up a size. Being off by 1/8 in (0.3 cm) per motif adds up to 1/4 in (0.6 cm) across a pocket and 1/2 in (1.3 cm) across the holder.
Checkpoints:
– Motif after Rnd 2: about 2 in (5.1 cm) across
– Arch after Row 6: 4 in (10.2 cm) along the straight edge
– Arch after Row 12: 8 in (20.3 cm) along the straight edge
– Arch after Row 21: 14 in (35.6 cm) along the straight edge
– Rectangle after Row 21: 7 in (17.8 cm) tall
– Joined pocket front: 6.5 in (16.5 cm) square
If the arch ruffles, your hdc is tight compared with the gauge, so go up a hook size. If it cups, go down a size.
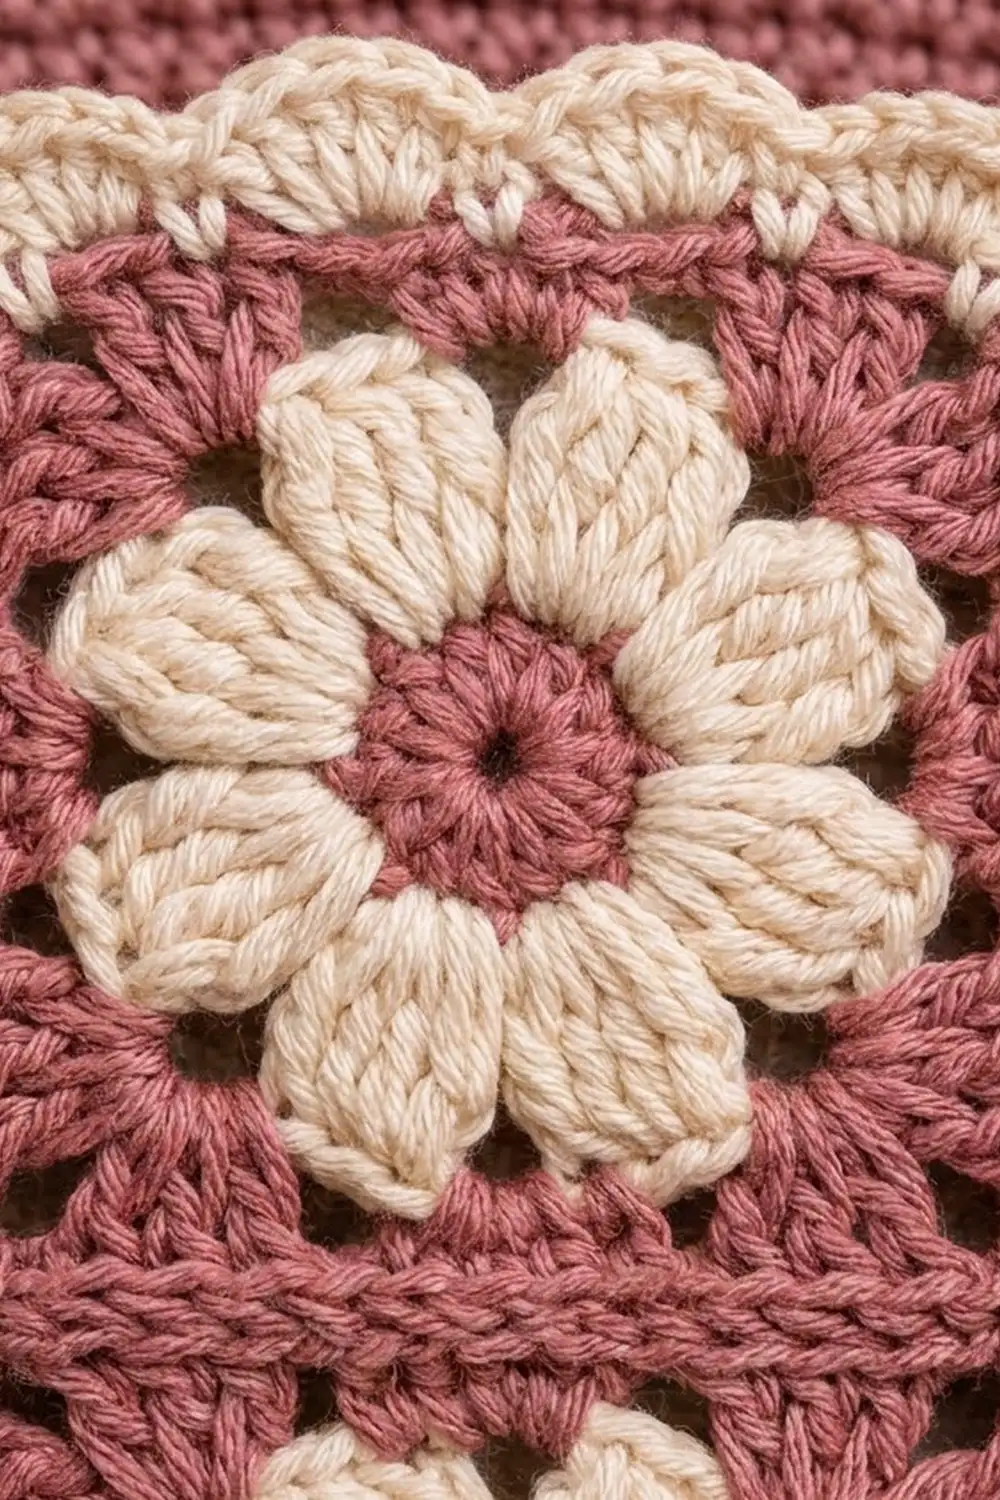
Flower Motif (Make 8)
Rnd 1 (rose): Make a magic ring, ch 1, work 16 sc in the ring, then join with a sl st to the first sc. Pull the ring closed. (16 sc) Fasten off.
Rnd 2 (cream): Join cream in any sc. Work a beginning cluster in the same st, ch 3, skip the next sc. 3-dc cluster in the next sc, ch 3, skip the next sc; repeat from * 6 more times. Join to the top of the first cluster. (8 clusters, 8 ch-3 sps)* Fasten off.
These eight clusters are the petals. Push them toward the RS so they puff out.
Rnd 3 (rose): Join rose in any ch-3 sp. Ch 1, sc in the same sp. Ch 4, (tr, ch 3, tr) in the next ch-3 sp, ch 4, sc in the next ch-3 sp; repeat from * 3 more times, leaving out the last sc. Join to the first sc. (4 sc, 8 tr, 8 ch-4 sps, 4 ch-3 corner sps)*
The tr pairs set the four corners, and each sc marks the middle of a side.
Rnd 4 (rose): Ch 3 (counts as dc), then dc in the same sc. 4 dc in the next ch-4 sp, dc in the next tr, (2 dc, ch 2, 2 dc) in the corner ch-3 sp, dc in the next tr, 4 dc in the next ch-4 sp, 2 dc in the next sc; repeat from * 3 more times, leaving out the last 2 dc. Join to the top of the ch-3. (64 dc, 4 ch-2 corner sps)* Fasten off.
Per-side count: Each side has 2 + 1 + 4 + 2 + 4 + 1 + 2 = 16 dc between the corner ch-2 sps. The corner sps are spaces, not stitches, and aren’t included in the 16.
Make All Pieces
- Motifs: 8 (each uses rose for Rnds 1, 3 and 4, and cream for Rnd 2)
- Back panel: 1, rose
- Gussets: 2, rose
- Hanging tab: 1, rose
Layout (as seen from the front):
 Left pocket      Right pocket
[ M1 ][ M2 ]     [ M5 ][ M6 ]
[ M3 ][ M4 ]     [ M7 ][ M8 ]
Back Panel: Arch
The arch is worked in turned rows from a magic ring, so it forms concentric half circles. Ch 2 at the start of each row doesn’t count as a stitch.
Row 1 (rose): Magic ring, ch 2, 8 hdc in the ring. Turn. (8 hdc)
Row 2: Ch 2, hdc in the first 2 sts, [2 hdc in the next st] 4 times, hdc in the last 2 sts. Turn. (12 hdc)
Rows 3–21: Ch 2, hdc in the first 2 sts, *hdc in the next (row number minus 2) sts, 2 hdc in the next st; repeat from * 3 more times, hdc in the last 2 sts. Turn.
Each row ends with (4 x row number) + 4 sts. For example, Row 3 has 16 sts and Row 6 has 28.
- Row 12: 52 hdc
- Row 21: 88 hdc
A half circle with a 7 in (17.8 cm) radius has an outer edge of about 22 in (55.9 cm). At 4 hdc per inch, that’s 88 sts, so the arch lies flat. Shift the increase positions slightly on alternate rows to keep the curve round.
Back Panel: Rectangle
Rotate the arch so the straight edge, made of row ends, faces up.
Row 1: Working across the straight edge, put 28 hdc into the 21 row ends on one half: 1 hdc in each row end, plus a second hdc in every third row end. Pass over the ring, then work 28 hdc into the other half the same way. Turn. (56 hdc)
Rows 2–21: Ch 2, hdc in each st across. Turn. (56 hdc)
Fasten off. The back measures 14 x 14 in (35.6 x 35.6 cm).
Gussets (Make 2)
Row 1 (rose): Ch 8, sc in the 2nd ch from the hook and in each ch across. Turn. (7 sc)
Rows 2–105: Ch 1, sc in each st across. Turn. (7 sc)
Each gusset measures 1.5 x 21 in (3.8 x 53.3 cm).
Hanging Tab
Row 1 (rose): Ch 7, sc in the 2nd ch from the hook and in each ch across. Turn. (6 sc)
Rows 2–30: Ch 1, 6 sc. Turn.
The tab measures 1.25 x 6 in (3.2 x 15.2 cm).
Joining
Motifs: Use rose. Hold two motifs WS together so the seam ridge sits on the RS and forms the raised rose grid. Working through both layers, sc in the corner sp, sc in each of the 16 matched dc pairs, then sc in the next corner sp. (18 sc per seam)
Join M1 to M2 and M3 to M4 along their vertical sides. Then join the top pair to the bottom pair across both motifs: sc in the corner sp, 16 sc, 1 sc through all the joined corner sps at the center, 16 sc, then sc in the last corner sp. (35 sc) Repeat with M5–M8.
Match stitch to stitch and don’t skip any. Keep your tension even, and match the motifs’ own dc tension so the seam doesn’t pucker.
Size checkpoint: Each pocket front should measure 6.5 in (16.5 cm) square, which is 2 motifs x 3.25 in (8.3 cm).
Border
The border uses the same gauge as the motifs: about 5 sc per inch along the edge.
Pocket Front Border (Each Pocket)
Rnd 1 (cream): Join cream in the top-left corner ch-2 sp. Ch 1, 3 sc in the same sp. On each side, work sc in the 16 dc of the first motif, sc2tog across the two joined corner sps at the seam (1 st), then sc in the 16 dc of the second motif. Work 3 sc in each outer corner sp. Join to the first sc.
- Per side: 2 motifs x 16 dc = 32, plus 1 seam sc2tog = 33 sc
- Corners: 4 x 3 sc = 12
- Total: (4 x 33) + 12 = 144 sc
The seam stitch is shown separately and isn’t included in the motif count. The middle sc of each 3-sc corner group is the corner center. There are 35 sts between corner centers: 1 + 33 + 1.
Rnd 2 (scallop): Sl st into the corner center sc. Ch 3 (counts as dc), then 4 dc in the same st to make the corner shell. [Skip 1, sc in the next st, skip 1, shell in the next st] 8 times, skip 1, sc in the next st, skip 1, shell in the corner center; repeat from * 3 more times, ending the last repeat at . Join to the top of the ch-3. (36 shells, 36 sc)* Fasten off.
Why it works: Each side uses 8 x 4 = 32 sts, plus 3 more to reach the next corner, for 35 sts. That lands every corner exactly on a shell.
The pocket front now measures 8 in (20.3 cm) square, or 7 in (17.8 cm) at the edge of Rnd 1.
Back Panel Border
Rnd 1 (cream): Join cream in the first st of rectangle Row 21. Ch 1 and work:
- Bottom: 3 sc in the first st, sc in the next 54 sts, 3 sc in the last st. (60 sc)
- Each straight side: 1 sc in each of the 21 row ends, plus a second sc in every third row end. (28 sc per side)
- Arch: 1 sc in each of the 88 sts of arch Row 21. (88 sc)
Join to the first sc. (60 + 28 + 88 + 28 = 204 sc)
Rnd 2 (scallop): Ch 1, sc in the same st. Skip 1, shell in the next st, skip 1, sc in the next st; repeat from * 49 more times. Skip 1, shell in the next st, skip 1, join to the first sc. (51 shells, 51 sc)* Fasten off.
Since 204 ÷ 4 = 51 exactly, the scallop closes without crowding. The bottom-corner shells are hidden behind the pockets.
The back now measures 15.5 x 15.5 in (39.4 x 39.4 cm).
Assembly
- Gusset to pocket front: Sew one long edge of a gusset behind the scallop, into the Rnd 1 sc. Start at the sc after the top-left corner center and work down the side, across the bottom and up the other side to the sc before the top-right corner center. That’s 107 sc against 105 row ends. At each bottom corner, catch 2 sc with one row end.
- Pocket to back: Sew the free edge of the left gusset to the back’s left side and to the left half of the bottom, both along Rnd 1. Then sew it up the center column of the back, between hdc 28 and 29. Repeat for the right pocket.
- Divider: Tack the two inner gussets together at the top and bottom.
- Tab: Fold the tab around the ring. Sew both ends to the RS at the arch’s top center, so they extend 1 in (2.5 cm) down onto the arch.
Final Blocking
- Pin the back flat, with the arch round and the sides straight, at 15.5 x 15.5 in (39.4 x 39.4 cm).
- Open each scallop shell into an even fan.
- Push each flower’s petals forward from behind.
- Spray until damp, but not soaked.
- Stuff each pocket with a towel shaped like a roll.
- Let it dry completely, at least 12 hours.
- Unpin it and check all measurements again.
Final Quality-Control Checklist
- Every motif is 3.25 in (8.3 cm) square with 16 dc per side.
- All seams are raised on the RS and have no gaps.
- The pocket front Rnd 1 has 144 sc, and Rnd 2 has 36 shells.
- The back Rnd 1 has 204 sc, and Rnd 2 has 51 shells.
- The arch lies flat with no ruffling or cupping.
- Both pockets sit level, with their bottoms aligned.
- The tab is centered and the ring hangs straight.
- All ends are woven in securely.
Troubleshooting
- Arch ruffles: Your hdc is too loose for the increases. Go down a hook size or redo the last few rows.
- Arch cups: Go up a hook size and check that each row has (4 x row number) + 4 sts.
- Petals look flat: Pull each cluster’s final loop snug, and push the petals forward while blocking.
- Motifs vary in size: Block them all to 3.25 in (8.3 cm) before joining.
- Corner shells miss the corners: Recount Rnd 1. Each side needs 33 sc between the corner groups.
- Pocket too tight for a roll: The gusset is short. Add rows in multiples of 5, which adds 1 in (2.5 cm) each time.
- Holder tilts: Re-center the tab and make sure both pockets hold rolls.
Care
Hand wash in cool water, then reshape and dry flat. Don’t tumble dry, because heat can distort the arch and the scallops.
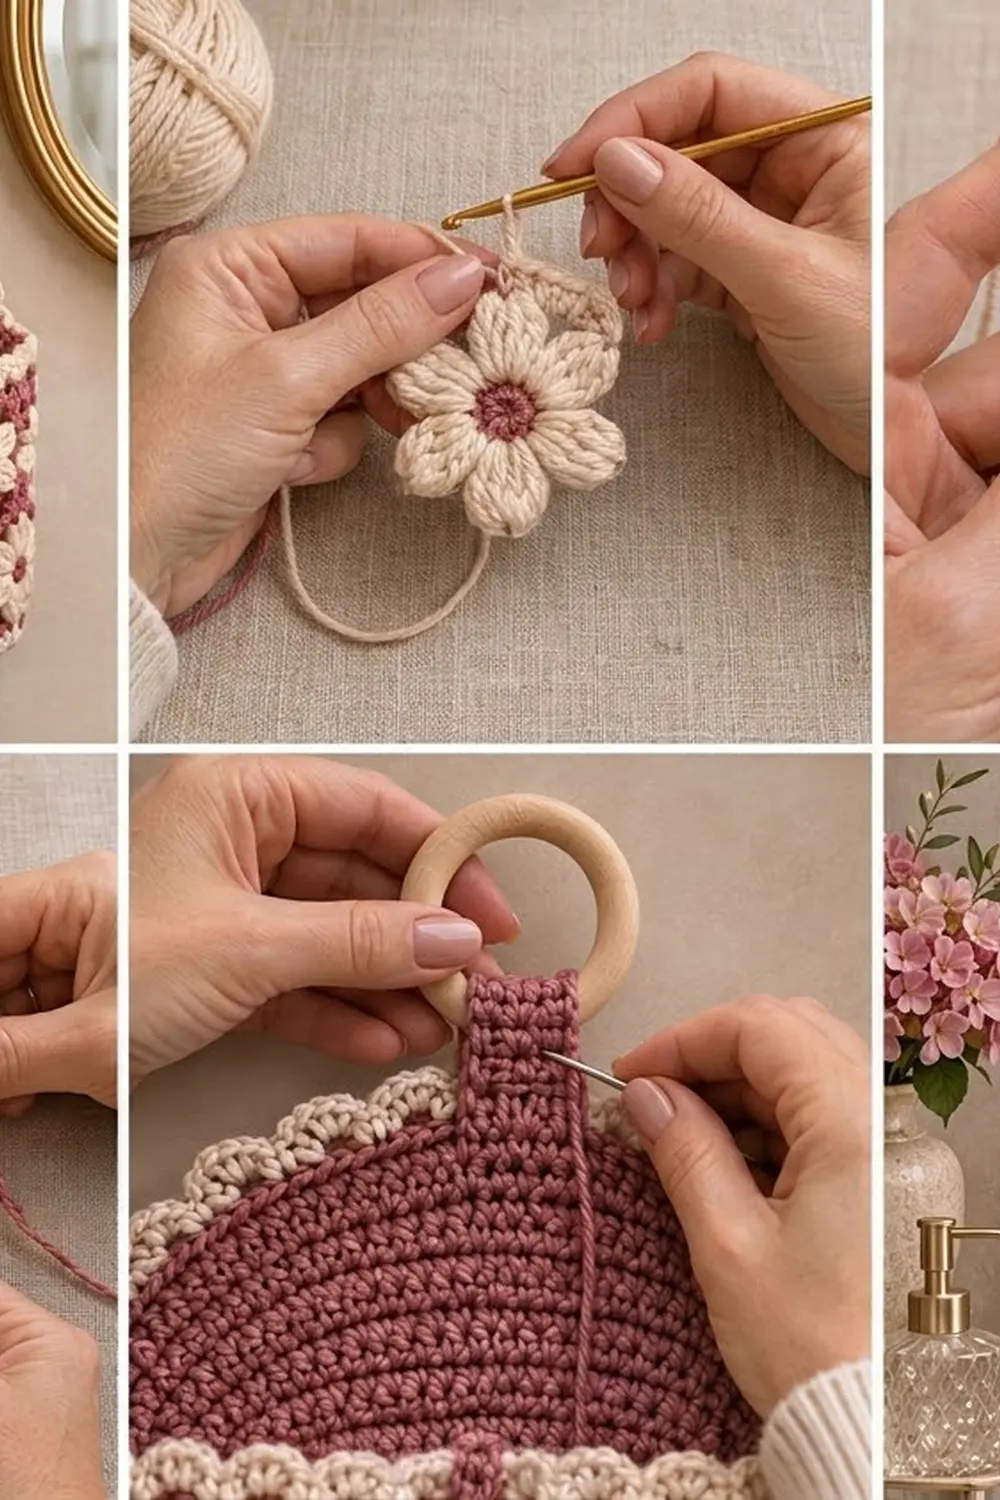
Final Notes
The measurements build in order. One motif is 3.25 in (8.3 cm), so 2 x 2 motifs make a 6.5 in (16.5 cm) pocket front. The 0.25 in (0.6 cm) sc round brings it to 7 in (17.8 cm), and the scallop brings it to 8 in (20.3 cm). Two 7 in (17.8 cm) pockets fit the 14 in (35.6 cm) back, and its two-round border brings the holder to 15.5 in (39.4 cm). If your first motif and arch gauge match, everything else will line up.
Happy crocheting!