

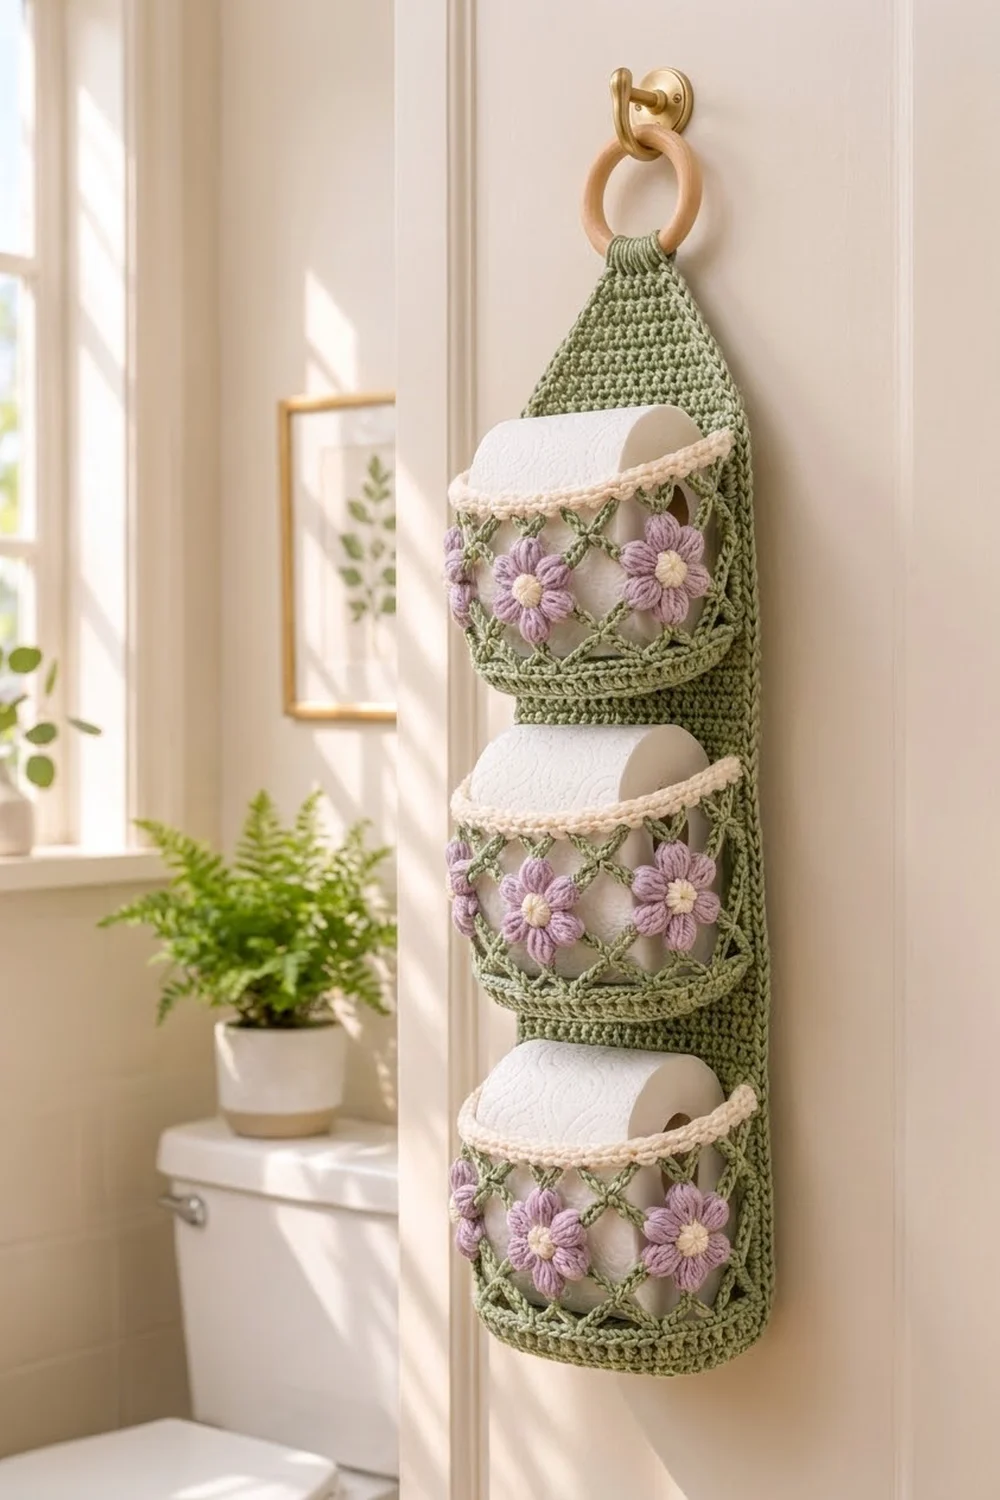
The Lilac Lattice holder keeps three spare rolls tidy on the back of a bathroom door. A sage green panel hangs from a wooden ring, and three pockets with open lattice walls are sewn down its front. Each pocket has a row of lavender puff flowers with cream centers.
The colors are soft and springlike: sage, lavender, and cream. Solid single crochet in the panel and pocket bases holds the weight of the rolls. The chain-loop lattice keeps the pockets light and lets the white paper show through.
This pattern uses US crochet terms. The finished panel measures 6.75 in (17.1 cm) wide by 30.1 in (76.5 cm) long. It hangs about 29 in (73.7 cm) below a 3 in (7.6 cm) ring.
You make one panel in rows, three pockets in the round, and fifteen small flowers. The flowers are sewn to the pockets, the panel gets a one-round border, the pockets are sewn on stitch to stitch, and the tab is folded around the ring.
Finished Size and Construction
- Finished size: 6.75 in × 30.1 in (17.1 cm × 76.5 cm) panel; about 29 in (73.7 cm) hanging length below the ring
- Skill level: Easy-Intermediate
- Terminology: US
- Yarn weight: Worsted (#4) cotton
- Hook: 5.0 mm (H-8)
- Number of pieces: 19 (1 panel, 3 pockets, 15 flowers)
- Layout: 3 pockets stacked in one vertical column, spaced 8 in (20.3 cm) apart
- Pocket size: 15 in (38.1 cm) around, 4 in (10.2 cm) tall, base 6 in × 2.25 in (15.2 cm × 5.7 cm)
- Panel size before border: 6.25 in × 29.6 in (15.9 cm × 75.2 cm)
- Border depth: 0.25 in (0.6 cm)
Materials
Use a smooth worsted-weight cotton or cotton blend. It holds its shape under the weight of the rolls and copes with bathroom humidity. Quantities assume about 170 m per 100 g.
- Sage green: 320 g (544 m) for the panel, pocket bases, lattice, and bands
- Lavender: 55 g (94 m) for the flower petals
- Cream: 50 g (85 m) for the pocket rims and flower centers
All quantities include a margin of about 10%.
Tools:
– 5.0 mm (H-8) crochet hook
– One 3 in (7.6 cm) wooden ring
– Tapestry needle
– 6 stitch markers
– Measuring tape
– Blocking mat and rust-proof pins
Abbreviations (US Terms)
- ch – chain
- sc – single crochet
- sc2tog – single crochet 2 together
- sl st – slip stitch
- st(s) – stitch(es)
- BLO – back loop only
- MR – magic ring
- rev sc – reverse single crochet (crab stitch): sc worked from left to right
- puff – (yarn over, insert hook in st, yarn over, pull up a loop) 4 times, yarn over, pull through all 9 loops
Gauge and Checkpoints
Gauge: 16 sc × 18 rows = 4 in (10.2 cm), worked in rows.
Make one pocket before you start the panel. It is the most gauge-sensitive piece and also works as your swatch.
Checkpoints:
– Pocket base after Rnd 5: 6 in × 2.25 in (15.2 cm × 5.7 cm)
– Pocket circumference: 15 in (38.1 cm)
– Pocket wall after Rnd 9: 0.9 in (2.3 cm) tall
– Pocket wall after Rnd 13: 3.1 in (7.9 cm) tall
– Finished pocket height: 4 in (10.2 cm)
– Flower: 1.4 in (3.6 cm) across
– Panel after 18 rows: 6.25 in × 4 in (15.9 cm × 10.2 cm)
If your pieces are too big, go down 0.5 mm in hook size. If they are too small, go up 0.5 mm. Panel width matters most, because each pocket back has to match the panel’s 25 stitches.
Pocket (Make 3)
With sage, ch 18.
Rnd 1: Sc in 2nd ch from hook, sc in next 15 ch, 3 sc in last ch. Working along the other side of the chain, sc in next 15 ch, 2 sc in same ch as first sc; sl st to first sc. (36 sts)
Rnd 2: Ch 1, 2 sc in each of next 2 sts, sc in next 15, 2 sc in each of next 3, sc in next 15, 2 sc in each of last 2…
Stop: worked exactly as written above, Rnd 2 starts with a 2-sc increase in the first stitch only. Use this version:
Rnd 2: Ch 1, 2 sc in first st, sc in next 15, 2 sc in each of next 3, sc in next 15, 2 sc in each of last 2; sl st to first sc. (42 sts)
Rnd 3: Ch 1, (2 sc in next st, sc in next st), sc in next 15, (2 sc in next st, sc in next st) 3 times, sc in next 15, (2 sc in next st, sc in next st) 2 times; sl st to first sc. (48 sts)
Rnd 4: Ch 1, (2 sc in next st, sc in next 2), sc in next 15, (2 sc in next st, sc in next 2) 3 times, sc in next 15, (2 sc in next st, sc in next 2) 2 times; sl st to first sc. (54 sts)
Rnd 5: Ch 1, (2 sc in next st, sc in next 3), sc in next 15, (2 sc in next st, sc in next 3) 3 times, sc in next 15, (2 sc in next st, sc in next 3) 2 times; sl st to first sc. (60 sts)
The base now has two straight sides of 15 sts each and two curved ends of 15 sts each.
Rnd 6: Ch 1, sc BLO in each st around; sl st to first sc. (60 sts) The unused front loops form a ridge that marks the edge of the base.
Rnds 7–9: Ch 1, sc in each st around; sl st to first sc. (60 sts)
Rnd 10 (lattice set-up): Ch 1, sc in first st, ch 5, skip 3 sts, sc in next st; repeat from * 13 more times, ch 5, skip 3 sts; sl st to first sc. (15 ch-5 loops)*
Rnd 11: Sl st in each of first 3 ch of the first loop, ch 1, sc in same loop, ch 5, sc in next ch-5 loop; repeat from * 13 more times, ch 5; sl st to first sc. (15 ch-5 loops)*
Rnds 12–13: Repeat Rnd 11. (15 ch-5 loops each)
Each round of loops sits over the middle of the loops below it, so the chains cross into a diamond lattice.
Rnd 14 (conversion): Ch 1, 4 sc in each ch-5 loop around; sl st to first sc. (60 sts = 15 loops × 4 sc + 0 extra)
Rnd 15: Ch 1, sc in each st around; sl st to first sc. (60 sts) Fasten off sage.
Rnd 16: Join cream in any st. Ch 1, sc in each st around; sl st to first sc. (60 sts)
Rnd 17: Ch 1, rev sc in each st around; sl st to first st. (60 sts) Fasten off and weave in ends.
The crab stitch gives the rim its rope texture.
Flower (Make 15)
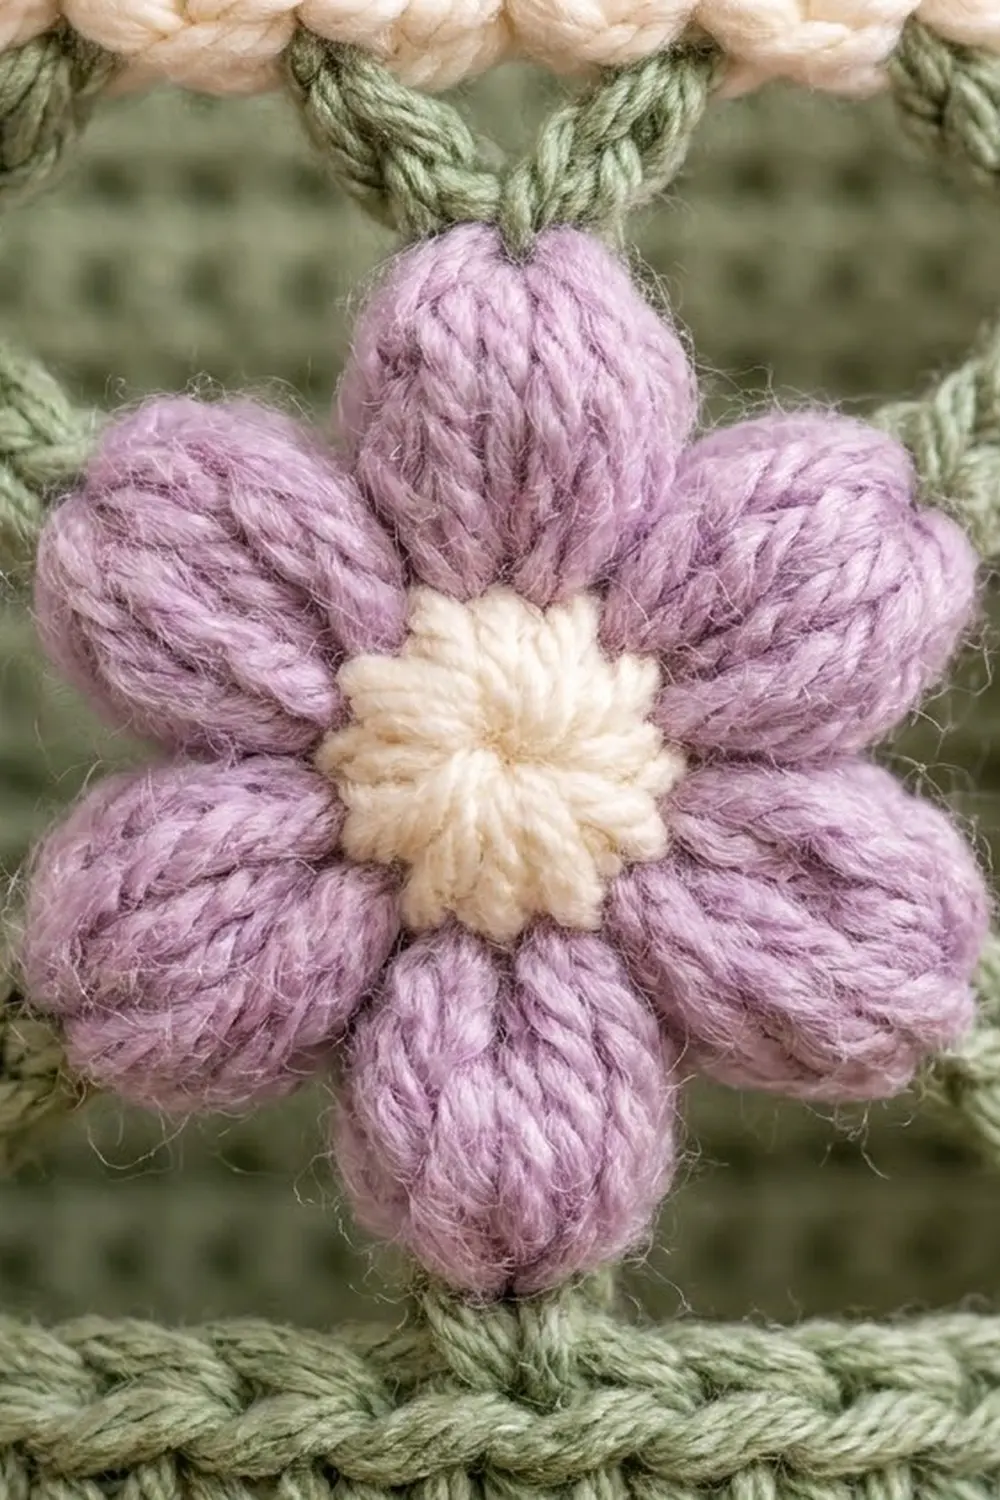
Rnd 1: With cream, MR, ch 1, 10 sc in ring, pull tight; sl st to first sc. (10 sts) The center measures 0.6 in (1.5 cm). Fasten off.
Rnd 2: Join lavender in any sc. Ch 2, puff in next st, ch 2, sl st in next st; repeat from * 4 more times, placing the last sl st in the joining st. (5 petals)* Fasten off and leave a 12 in (30.5 cm) tail for sewing.
The puffs crowd around the small center and push the cream up into a raised button.
Panel
With sage, ch 26.
Row 1: Sc in 2nd ch from hook and in each ch across; turn. (25 sts)
Rows 2–108: Ch 1, sc in each st across; turn. (25 sts) The panel measures 24 in (61.0 cm).
Row 109 (decrease): Ch 1, sc2tog, sc to last 2 sts, sc2tog; turn. (23 sts)
Row 110: Ch 1, sc in each st across; turn. (23 sts)
Rows 111–124: Repeat Rows 109–110 seven more times. After each decrease row the count drops by 2: 21, 19, 17, 15, 13, 11, 9. (9 sts after Row 124) The taper is 16 rows, or 3.6 in (9.1 cm).
Rows 125–133 (tab): Ch 1, sc in each st across; turn. (9 sts) The tab is 2.25 in (5.7 cm) wide and 2 in (5.1 cm) long.
Do not fasten off. Go straight on to the border.
Checkpoint: The panel measures 6.25 in × 29.6 in (15.9 cm × 75.2 cm).
Make All Pieces
Totals by color:
– Sage: 1 panel, plus Rnds 1–15 of 3 pockets
– Cream: Rnds 16–17 of 3 pockets, plus 15 flower centers
– Lavender: 15 flower petal rounds
Sewing flowers on: Place markers on 25 sts of Rnd 9 along one straight side plus 5 sts at each end next to it. That is the back of the pocket. The other 35 sts are the front.
Count the front sts from left to right. Center one flower over each of front sts 4, 11, 18, 25, and 32, at the height of Rnds 11–12. The flowers are 7 sts, or 1.75 in (4.4 cm), apart. The outer two curve around the ends of the pocket. Sew each petal to the lattice chains under it.
Layout (front view, measured from the bottom of the finished border):
        (  ring  )
        [  tab   ]
        [ taper  ]   starts at 24.25 in / 61.6 cm
        |        |
        [POCKET 3]   base 16.5 in / 41.9 cm, rim 20.5 in / 52.1 cm
        |        |
        [POCKET 2]   base 8.5 in / 21.6 cm,  rim 12.5 in / 31.8 cm
        |        |
        [POCKET 1]   base 0.5 in / 1.3 cm,   rim 4.5 in / 11.4 cm
        ----------
Border
Work the border before joining the pockets, so the panel’s edges are stable when you measure placement.
Border gauge: Along the straight sides, 18 rows measure 4 in (10.2 cm), but 16 sc measure the same length. So work 8 sc for every 9 row ends.
Rnd 1: Ch 1. You are now at the top of the tab. Work as follows:
- Top edge: 3 sc in first st, sc in next 7, 3 sc in last st. (13 sts, including both corner groups)
- First long side: Work down the row ends. On the tab (9 rows), work 8 sc, skipping 1 row end. On the taper (16 rows), work 1 sc in every row end for 16 sc. On the rectangle (108 rows), work 1 sc in each row end but skip every 9th one, for 96 sc. (120 sts)
- Bottom edge: 3 sc in first st, sc in next 23, 3 sc in last st. (29 sts, including both corner groups)
- Second long side: Repeat the first long side in reverse: 96 + 16 + 8. (120 sts)
Sl st to first sc. (282 sts total = 13 + 120 + 29 + 120) Fasten off.
Why the math works:
– The 96 sc on the rectangle are 8 for every 9 rows, which matches the 16:18 gauge, so the edge neither ruffles nor pulls.
– On the taper, every 2 rows move in by one stitch (0.25 in) and rise 0.44 in. That makes the slanted edge about 0.25 in per row, which is exactly one sc wide, so no skips are needed there.
– The corner groups each add 2 sts and turn the edge 90°.
– The finished width is 25 + 2 = 27 sts, or 6.75 in (17.1 cm).
Joining
Method: Whipstitch with sage, stitch to stitch.
- Measure up from the bottom edge of the border and mark a panel row at 0.5 in (1.3 cm) for Pocket 1.
- Line up the 25 back front loops from Rnd 6 of the pocket (the base ridge) with the 25 interior sts of that panel row. Leave out the 2 border sts.
- Whipstitch one pocket loop to one panel st, all the way across.
- Lay the back wall of the pocket flat against the panel. The back 25 sts of Rnd 15 land about 16 rows higher. Whipstitch them to that row, stitch to stitch.
- Tack the two vertical edges of the back wall (at your markers) to the panel every 0.5 in (1.3 cm).
- Repeat for Pocket 2 at 8.5 in (21.6 cm) and Pocket 3 at 16.5 in (41.9 cm).
Tension: Pull each stitch snug but not tight. If you pull too hard, the panel puckers across its width.
Size checkpoint: The panel should still measure 6.75 in (17.1 cm) wide at each pocket line. The pockets’ curved ends bulge slightly past the edges.
Ring: Fold the tab from front to back around the wooden ring. Whipstitch the top edge of the border to the back of the panel at the base of the tab.
Final Blocking
- Before joining, spray the panel lightly with water and pin it to 6.75 in × 30.1 in (17.1 cm × 76.5 cm).
- Pin the taper so its edges are straight and even on both sides.
- Stuff each pocket with a towel shaped like a roll, mist it, and let the lattice dry open.
- Pin each flower flat to 1.4 in (3.6 cm) across, with the petals evenly spaced.
- Let everything dry completely before sewing and joining.
Final Quality-Control Checklist
- Panel is 25 sts wide before the border and 27 sts wide after it
- Taper ends at 9 sts, and both sides slant evenly
- Each pocket has 60 sts in Rnds 5–9 and 14–17, and 15 loops in each of Rnds 10–13
- 15 flowers, 5 per pocket, centered 7 sts apart
- Pocket bases sit at 0.5 in, 8.5 in, and 16.5 in (1.3 cm, 21.6 cm, 41.9 cm)
- The ring tab is sewn securely through both layers
- All ends are woven in and hidden on the back
Troubleshooting
- Pocket base is cupping: Your tension is tight. Go up 0.5 mm in hook size for Rnds 1–5.
- Base is rippling: Check that each increase round adds exactly 6 sts.
- Lattice is drooping: Your chains are loose. Use ch 4 instead of ch 5 in Rnds 10–13. The Rnd 14 count stays at 60 sts.
- Long side edges are wavy: You are skipping too few row ends. Recount for 96 sc on the rectangle.
- Taper edge is tight: Make sure you worked into every one of the taper’s row ends.
- Puffs are lopsided: Pull each loop up to the same height before you close the puff.
- Pocket sags forward: Add more tacking stitches along the two vertical edges of the back wall.
Care
Hand wash in cool water and lay flat to dry. Reshape the pockets around a roll while they are damp.
Final Notes
Here is the measurement chain from start to finish:
– Gauge: 16 sc × 18 rows = 4 in (10.2 cm)
– Pocket: 60 sts = 15 in (38.1 cm) around and 4 in (10.2 cm) tall
– Panel before border: 25 sts × 133 rows = 6.25 in × 29.6 in (15.9 cm × 75.2 cm)
– Panel after a 282-st border: 6.75 in × 30.1 in (17.1 cm × 76.5 cm)
– Each pocket’s 25 back sts are sewn to the panel’s 25 interior sts, 8 in (20.3 cm) apart
If your gauge matches at the start, every later count fits.
Happy crocheting!