

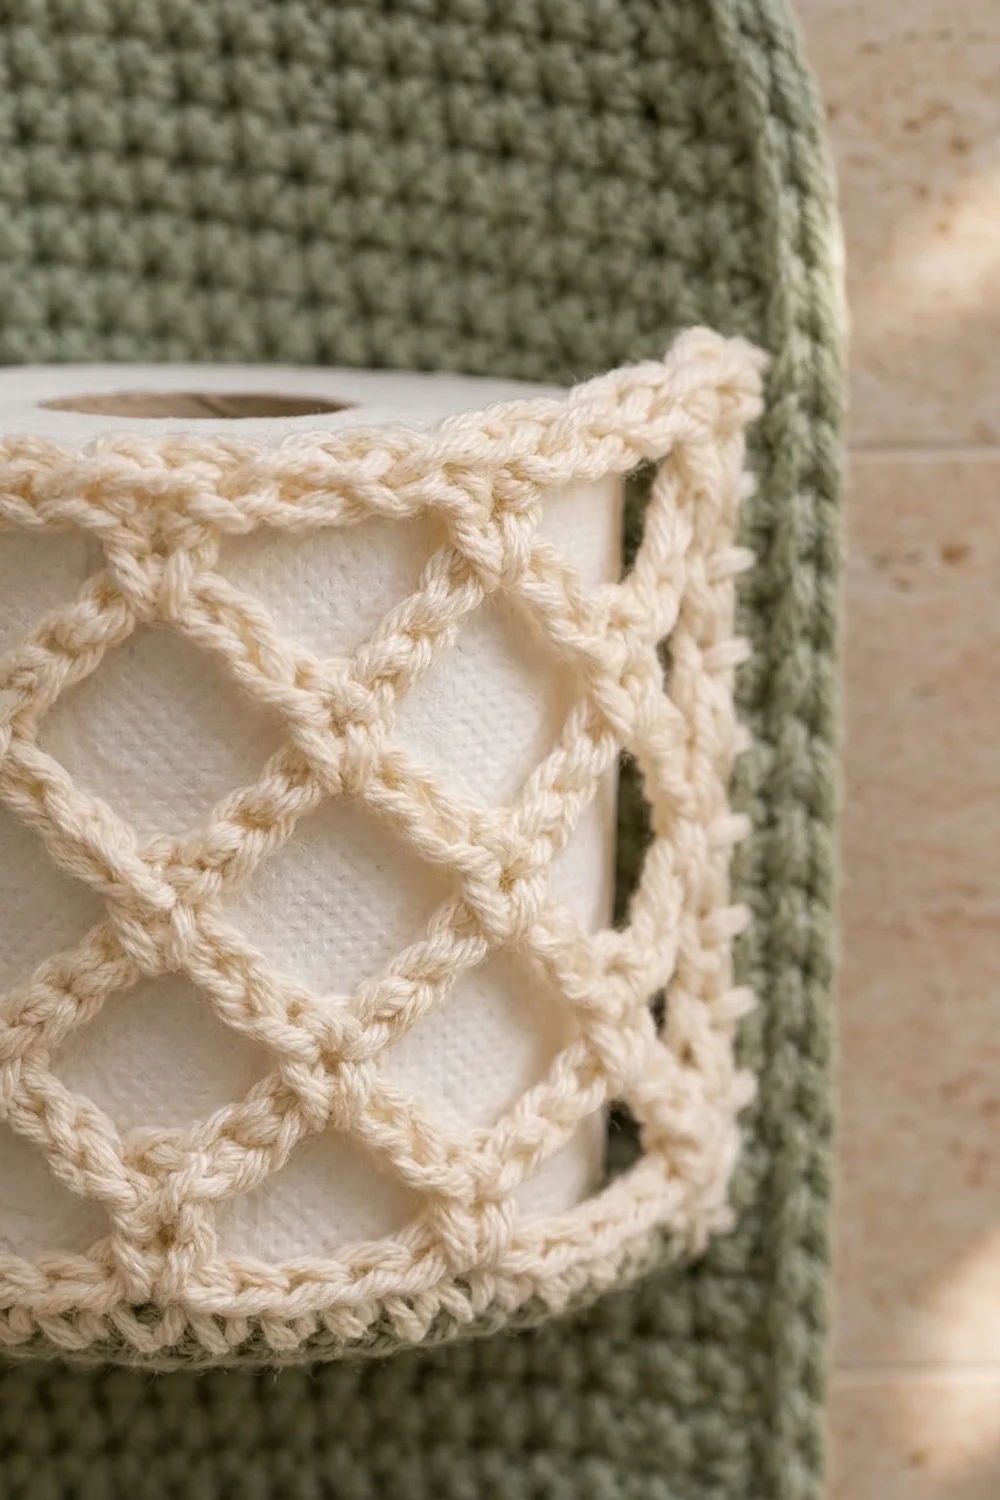
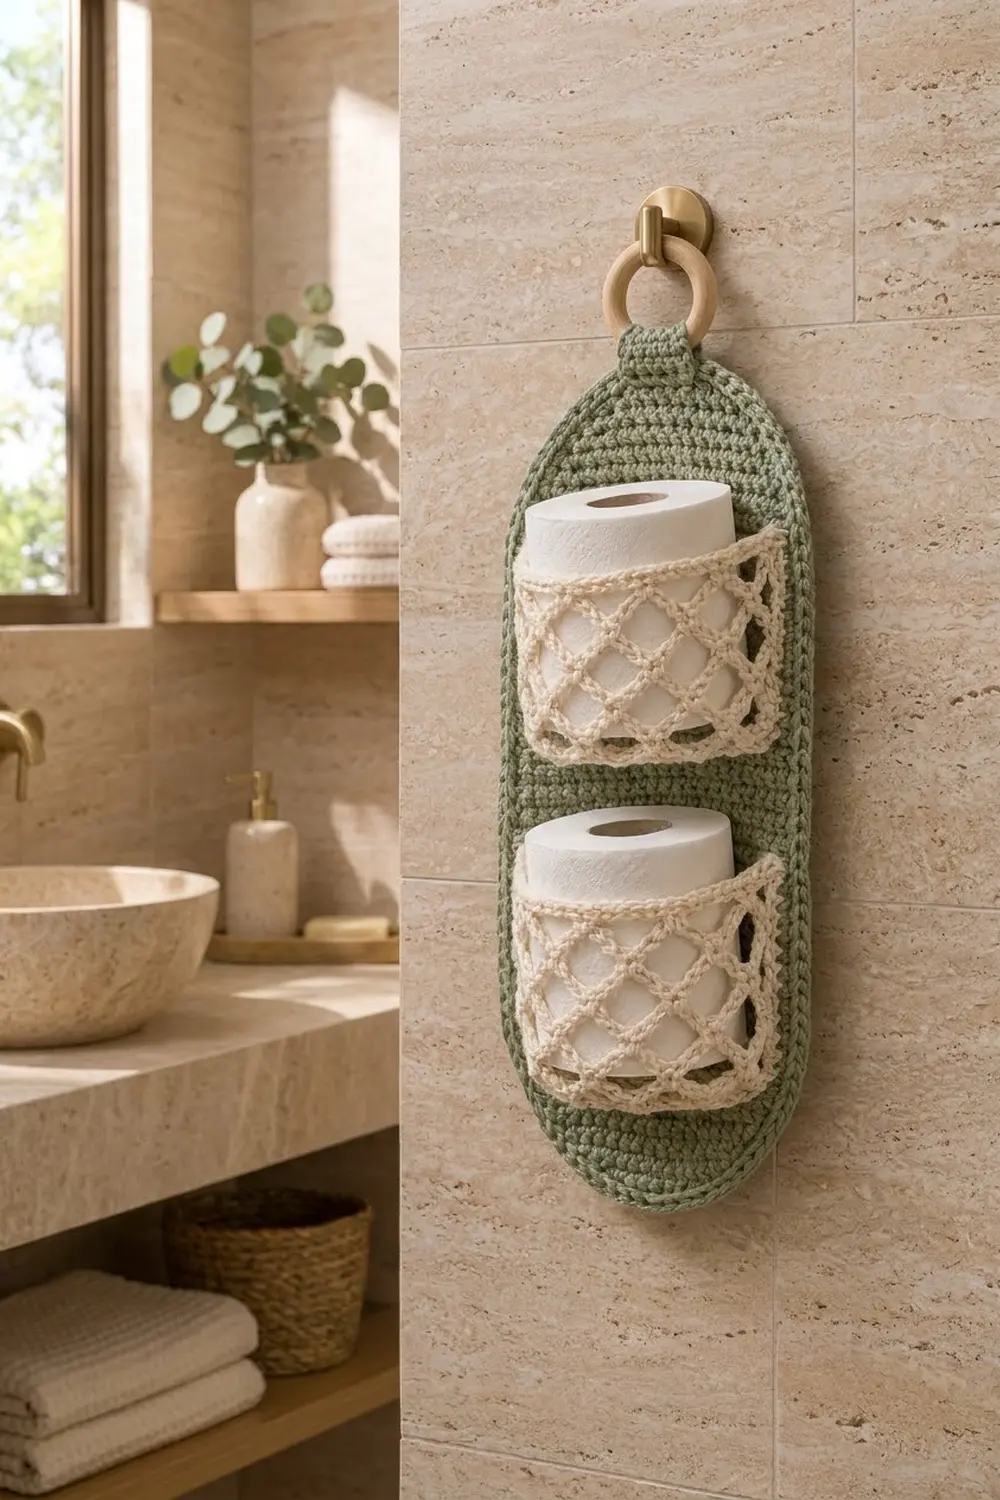
This hanging toilet paper holder looks soft and natural. A sage green capsule-shaped panel hangs from a wooden ring, and two cream lattice pockets on the front each hold one spare roll. The open diamond net lets the white paper show through, so the design feels light and doesn’t look bulky.
The colors suit a spa-style bathroom: muted green, warm cream and natural wood. The solid single crochet panel is firm enough to keep its shape on the wall. The pockets add texture and contrast.
The pattern uses US crochet terms. The finished holder is 7 in (17.8 cm) wide and 22 in (55.9 cm) long, not counting the ring. Each pocket is 9 in (22.9 cm) wide and 4.5 in (11.4 cm) tall before it is sewn on.
How it’s made: you crochet the panel flat in rows, with rounded ends shaped by increases and decreases. Next, you work a border and a hanging tab directly onto the panel. The two lattice pockets are made separately and sewn on with boxed bottom corners, so each one cups a roll.
Finished Size and Construction
- Finished size: 7 in × 22 in (17.8 cm × 55.9 cm)
- Skill level: Easy-intermediate
- Terminology: US
- Yarn weight: Worsted (#4), cotton or cotton blend
- Hook: 5 mm (H-8)
- Number of pieces: 3 crocheted pieces (1 panel with its tab worked on, plus 2 pockets) and 1 wooden ring
- Layout: One vertical panel with 2 pockets stacked in the center
- Panel size before border: 6.5 in × 21.5 in (16.5 cm × 54.6 cm)
- Border depth: 0.25 in (0.6 cm) on each edge
- Pocket size (flat): 9 in × 4.5 in (22.9 cm × 11.4 cm)
Materials
Choose a smooth worsted-weight cotton. Cotton holds its shape, handles bathroom humidity well, and shows the lattice clearly. Acrylic also works, but it is more likely to stretch under the weight of the rolls.
- Sage green (panel, tab): 150 g / about 285 m
- Cream (pockets): 80 g / about 152 m
The quantities include a margin of about 15% for your gauge swatch and seaming.
Tools:
- 5 mm (H-8) crochet hook
- 1 wooden ring, 2.5 in (6.4 cm) outside diameter
- Tapestry needle
- 8 locking stitch markers
- Rigid ruler or tape measure
- Rust-proof pins and a blocking mat
Abbreviations (US Terms)
- ch – chain
- sc – single crochet
- dc – double crochet
- sl st – slip stitch
- st(s) – stitch(es)
- sk – skip
- sp – space
- inc – 2 sc in the same st
- sc2tog – single crochet 2 together: (insert hook in next st, yarn over, pull up a loop) twice, yarn over, pull through all 3 loops
- * * – repeat the steps between asterisks as directed
Special stitch, ch-5 net loop: ch 5, then sc in the next ch-5 space (or in the stitch named). Over several rows, these loops stack into the diagonal diamond lattice.
Gauge and Checkpoints
Gauge: 16 sc and 18 rows = 4 in (10.2 cm) in sc rows.
Make one pocket before you start the panel. It’s quick, and it tests your gauge for both the solid rows and the open mesh. The pocket should measure 9 in (22.9 cm) wide after Row 3.
Checkpoints:
- Panel after Row 10: 6.5 in (16.5 cm) wide, about 2.2 in (5.6 cm) tall
- Panel after Row 50: about 11.1 in (28.2 cm) tall
- Panel after Row 97: about 21.5 in (54.6 cm) tall
- After the border: 7 in × 22 in (17.8 cm × 55.9 cm)
- Pocket after Row 13: 9 in × 4.5 in (22.9 cm × 11.4 cm)
If your swatch is too big (fewer than 16 sts per 4 in), go down to a 4.5 mm hook. If it’s too small (more than 16 sts per 4 in), go up to a 5.5 mm hook. Measure again after 10 rows, and don’t change the stitch counts.
Backing Panel
Use sage green. Each row starts with a turning ch 1, which does not count as a stitch.
Bottom curve
- Foundation: Ch 15.
- Row 1: Sc in the 2nd ch from the hook and in each ch across, turn. (14 sts) This edge measures 3.5 in (8.9 cm).
- Row 2: Ch 1, inc in the first st, sc in the next 12 sts, inc in the last st, turn. (16 sts)
- Row 3: Ch 1, inc, sc 14, inc, turn. (18 sts)
- Row 4: Ch 1, inc, sc 16, inc, turn. (20 sts)
- Row 5: Ch 1, inc, sc 18, inc, turn. (22 sts)
- Row 6: Ch 1, sc in each st across, turn. (22 sts)
- Row 7: Ch 1, inc, sc 20, inc, turn. (24 sts)
- Rows 8–9: Ch 1, sc in each st across, turn. (24 sts)
- Row 10: Ch 1, inc, sc 22, inc, turn. (26 sts)
Checkpoint: the panel should be 6.5 in (16.5 cm) wide.
Straight body
- Rows 11–88: Ch 1, sc in each st across, turn. (26 sts)
Rows 10–88 make 79 rows at full width. Check your length at Row 50.
Top curve (this mirrors the bottom curve)
- Rows 89–91: Ch 1, work as follows, turn.
- Row 89: sc2tog, sc 22, sc2tog. (24 sts)
- Rows 90–91: sc in each st across. (24 sts)
- Row 92: Ch 1, sc2tog, sc 20, sc2tog, turn. (22 sts)
- Row 93: Ch 1, sc in each st across, turn. (22 sts)
- Row 94: Ch 1, sc2tog, sc 18, sc2tog, turn. (20 sts)
- Row 95: Ch 1, sc2tog, sc 16, sc2tog, turn. (18 sts)
- Row 96: Ch 1, sc2tog, sc 14, sc2tog, turn. (16 sts)
- Row 97: Ch 1, sc2tog, sc 12, sc2tog. (14 sts) Don’t fasten off.
Rows 89–97 have the same widths as Rows 1–9 in reverse, so the two ends match. The total is 9 + 79 + 9 = 97 rows, which is about 21.5 in (54.6 cm) at 4.5 rows per inch.
Pockets (Make 2)
Use cream. Each row starts with a turning ch 1, which does not count as a stitch, unless the row says otherwise.
- Foundation: Ch 37.
- Row 1: Sc in the 2nd ch from the hook and in each ch across, turn. (36 sts)
- Rows 2–3: Ch 1, sc in each st across, turn. (36 sts) Checkpoint: 9 in (22.9 cm) wide.
- Row 4 (mesh set-up): Ch 1, sc in the first st, *ch 5, sk 4 sts, sc in the next st* 7 times, turn. (8 sc, 7 ch-5 loops) The stitches used are 1 + (7 × 5) = 36.
- Row 5 (offset row): Ch 5 (counts as dc + ch 2), sc in the first ch-5 sp, *ch 5, sc in the next ch-5 sp* 6 times, ch 2, dc in the last sc, turn. (6 full loops, 2 half loops)
- Row 6 (full row): Ch 1, sc in the dc, *ch 5, sc in the next ch-5 sp* 6 times, ch 5, sc in the 3rd ch of the turning ch-5, turn. (8 sc, 7 ch-5 loops)
- Rows 7–10: Repeat Rows 5 and 6 twice. Row 10 ends with 7 full loops.
You now have 7 mesh rows (Rows 4–10). Together they measure about 3.2 in (8.1 cm), and the loops form diagonal diamonds.
- Row 11 (conversion row): Ch 1, sc in the first sc, *4 sc in the next ch-5 sp, sc in the next sc* 7 times, turn. Count: 8 sc worked into the 8 existing sc + 28 sc worked into the 7 loops = 36 sts.
- Rows 12–13: Ch 1, sc in each st across. (36 sts) Fasten off.
Side edging: With the right side facing, join cream at the top corner of one side edge. Work down the row ends as follows:
- 1 sc in each end of Rows 13–11 (3 sts)
- 2 sc in each end of Rows 10–4 (14 sts)
- 1 sc in each end of Rows 3–1 (3 sts)
That makes 20 sc. Fasten off and repeat on the other side. The mesh rows get 2 sc each because each one is about twice as tall as a sc row.
Pocket checkpoint: 9 in × 4.5 in (22.9 cm × 11.4 cm). This is 3 + 7 + 3 rows: about 1.3 in (3.3 cm) of solid bands plus 3.2 in (8.1 cm) of mesh.
Make All Pieces
- Sage green: 1 backing panel, with its border and tab added below
- Cream: 2 pockets
Layout grid (from top to bottom on the panel):
[ wooden ring ]
[   tab       ]
[ green top curve, 5 in / 12.7 cm clear ]
[ POCKET 1 ]  top 16 in / 40.6 cm above bottom edge
[ green gap ]
[ POCKET 2 ]  top 6.5 in / 16.5 cm above bottom edge
[ green bottom curve ]
Border
Work the border before attaching the pockets. Use sage green, and make sure the right side of the panel faces you.
Border gauge: use 1 sc per stitch along the flat ends and 1 sc per row end along the sides. A sc row is about as tall as a sc is wide, so working 1 sc per row end keeps the long sides flat without ruffling or pulling in.
Round 1: Continue from Row 97.
- Top edge: 3 sc in the first st, sc in the next 12 sts, 3 sc in the last st. (18 sts)
- First side: Work 1 sc in the end of each of Rows 96–2. (95 sts)
- Bottom edge: Working into the foundation ch, 3 sc in the first st, sc in the next 12 sts, 3 sc in the last st. (18 sts)
- Second side: Work 1 sc in the end of each of Rows 2–96. (95 sts)
- Sl st to the first sc to join. Total: 18 + 95 + 18 + 95 = 226 sts.
Round 2: Loosely sl st in each sc around. (226 sl sts) Join and fasten off.
Why the math works: each flat end has 14 sts. The 3-sc groups add 2 sts at each end of each flat edge, so each end goes from 14 to 18 and the curve can turn smoothly. The corner stitches in Rows 1 and 97 are already covered by those 3-sc groups, so each side only picks up Rows 2–96, which is 95 row ends. Nothing is counted twice. The sl st round adds a crisp raised edge but almost no width.
Hanging tab: Count the 18 sts across the top of Round 1. Join sage green in the 7th st and work in the sl sts of Round 2.
- Row 1: Ch 1, sc in the 7th–12th sts, turn. (6 sts)
- Rows 2–20: Ch 1, sc 6, turn. (6 sts)
The tab measures 1.5 in × 4.4 in (3.8 cm × 11.2 cm). Pass it through the ring from front to back, fold it down, and sew Row 20 to the back of the panel about 1 in (2.5 cm) below the border. About 2 in (5.1 cm) of the tab shows above the panel.
Joining
You sew the pockets on with sage green yarn so the stitches blend into the panel. Using a whipstitch through the outer loops, sew 1 stitch on the pocket to 1 sc row (or 1 sc) on the panel.
- Mark the placement. Center each pocket on the panel. Its side edges sit 5 in (12.7 cm) apart, which leaves 0.75 in (1.9 cm) of green panel plus the 0.25 in (0.6 cm) border on each side.
- Lower pocket: bottom 2 in (5.1 cm) above the panel’s bottom edge, top at 6.5 in (16.5 cm)
- Upper pocket: bottom at 11.5 in (29.2 cm), top at 16 in (40.6 cm)
- Sew the sides. Sew each side edging (20 sc) straight up its marked line, which is 4.5 in (11.4 cm) tall. That works out to about 1 sc per panel row.
- Box the bottom. Of the 36 bottom stitches, sew the center 20 (5 in / 12.7 cm) flat along the bottom line. The 8 stitches left at each end fold forward into a triangular tuck. Tack each tuck closed on the inside.
- Leave the top band free. Because a 9 in (22.9 cm) front spans 5 in (12.7 cm) of panel, the pocket bulges out and holds a roll.
Tension: pull each stitch snug but not tight. If the seam puckers, the panel will ripple.
Size checkpoint: after joining, the panel should still measure 7 in × 22 in (17.8 cm × 55.9 cm) when laid flat.
Final Blocking
- Pin the panel to the mat at 7 in × 22 in (17.8 cm × 55.9 cm), following the curves.
- Mist it with water until it is damp but not soaked.
- Stuff each pocket loosely with a rolled towel so the lattice opens evenly.
- Smooth the diamonds with your fingers until the loops line up diagonally.
- Let it dry completely, about 24 hours.
- Remove the pins and hang the holder.
Final Quality-Control Checklist
- [ ] The panel has 26 sts in every row from Row 10 to Row 88
- [ ] The top and bottom curves match
- [ ] Border Round 1 has 226 sts
- [ ] The tab is centered over sts 7–12 and sewn securely
- [ ] Each pocket has 36 sts across and 20 edging sc per side
- [ ] The pockets are centered, level and 5 in (12.7 cm) apart at the sides
- [ ] The boxed tucks are tacked closed
- [ ] The finished holder measures 7 in × 22 in (17.8 cm × 55.9 cm)
Troubleshooting
- Panel edges are wavy: you have extra stitches. Count Rows 11–88 again; each row should have exactly 26.
- Curves look pointed: you may have worked the even rows (6, 8–9, 90–91 and 93) as increase or decrease rows.
- Lattice looks lopsided: check that each offset row starts with ch 5 and ends with a dc.
- Pocket is too tight for a roll: move the side seams 0.5 in (1.3 cm) closer together.
- Panel sags on the hook: the tab seam is too loose. Sew it again through both layers.
Care
Hand wash in cool water, press out the water in a towel, and dry flat. Reshape the pockets while they are damp.
Final Notes
The sizes build on each other. The gauge of 16 sc and 18 rows per 4 in (10.2 cm) gives a 6.5 in × 21.5 in (16.5 cm × 54.6 cm) panel. The border brings it to 7 in × 22 in (17.8 cm × 55.9 cm). Each 9 in (22.9 cm) pocket is sewn over a 5 in (12.7 cm) span, which leaves enough room for a full roll. If you check your measurements at each checkpoint, the finished holder will hang straight and look tidy.
Happy crocheting!