

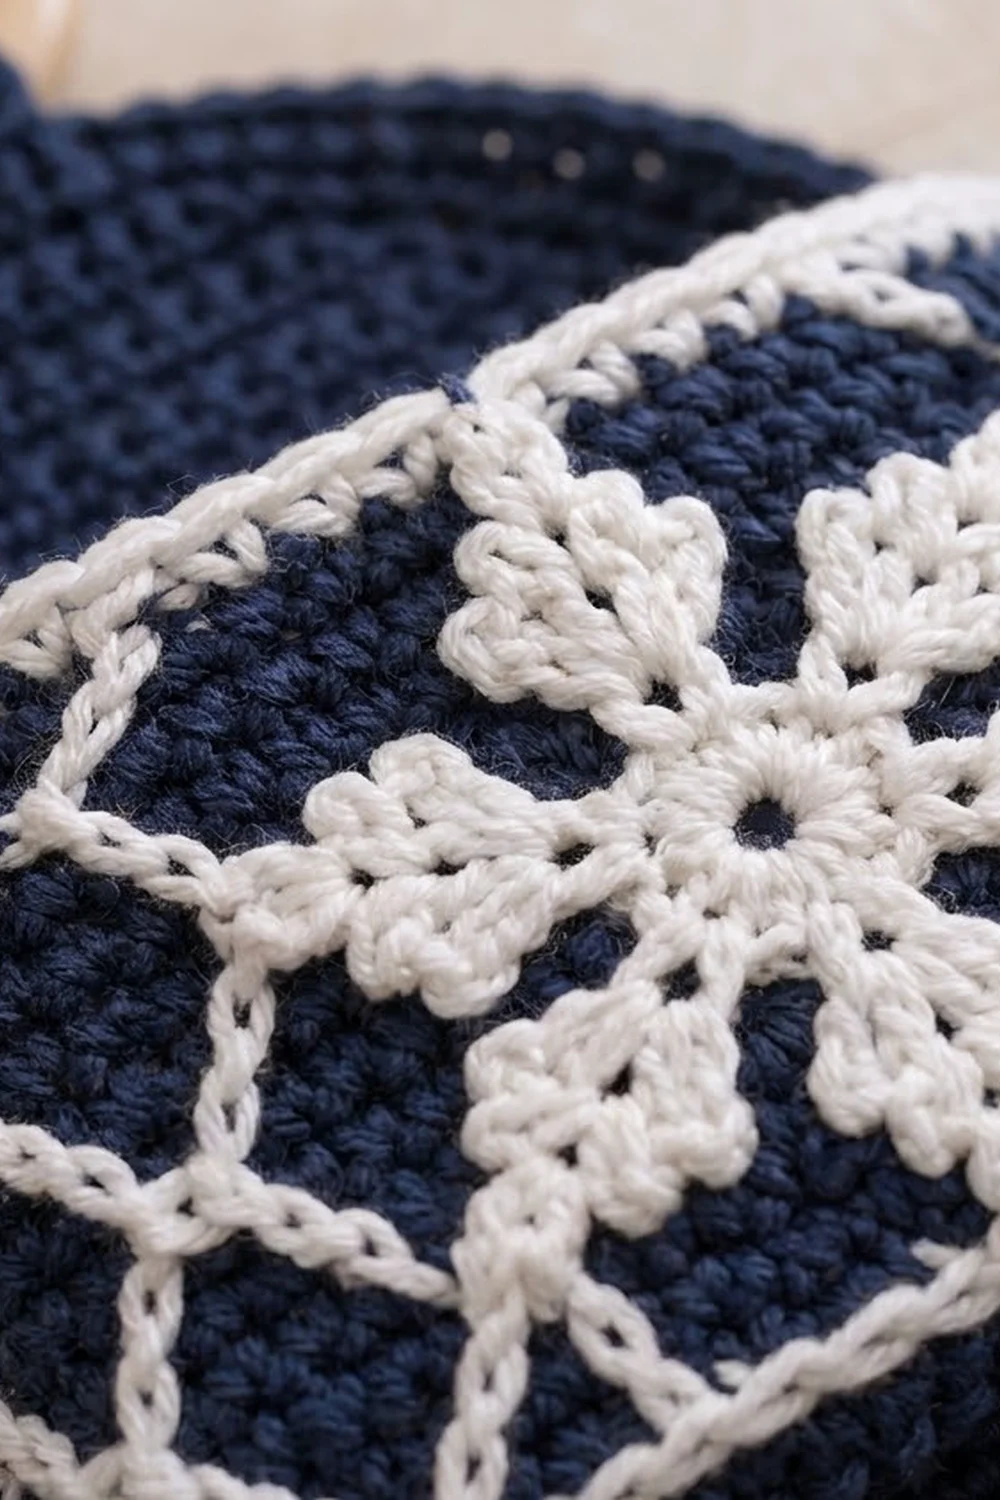
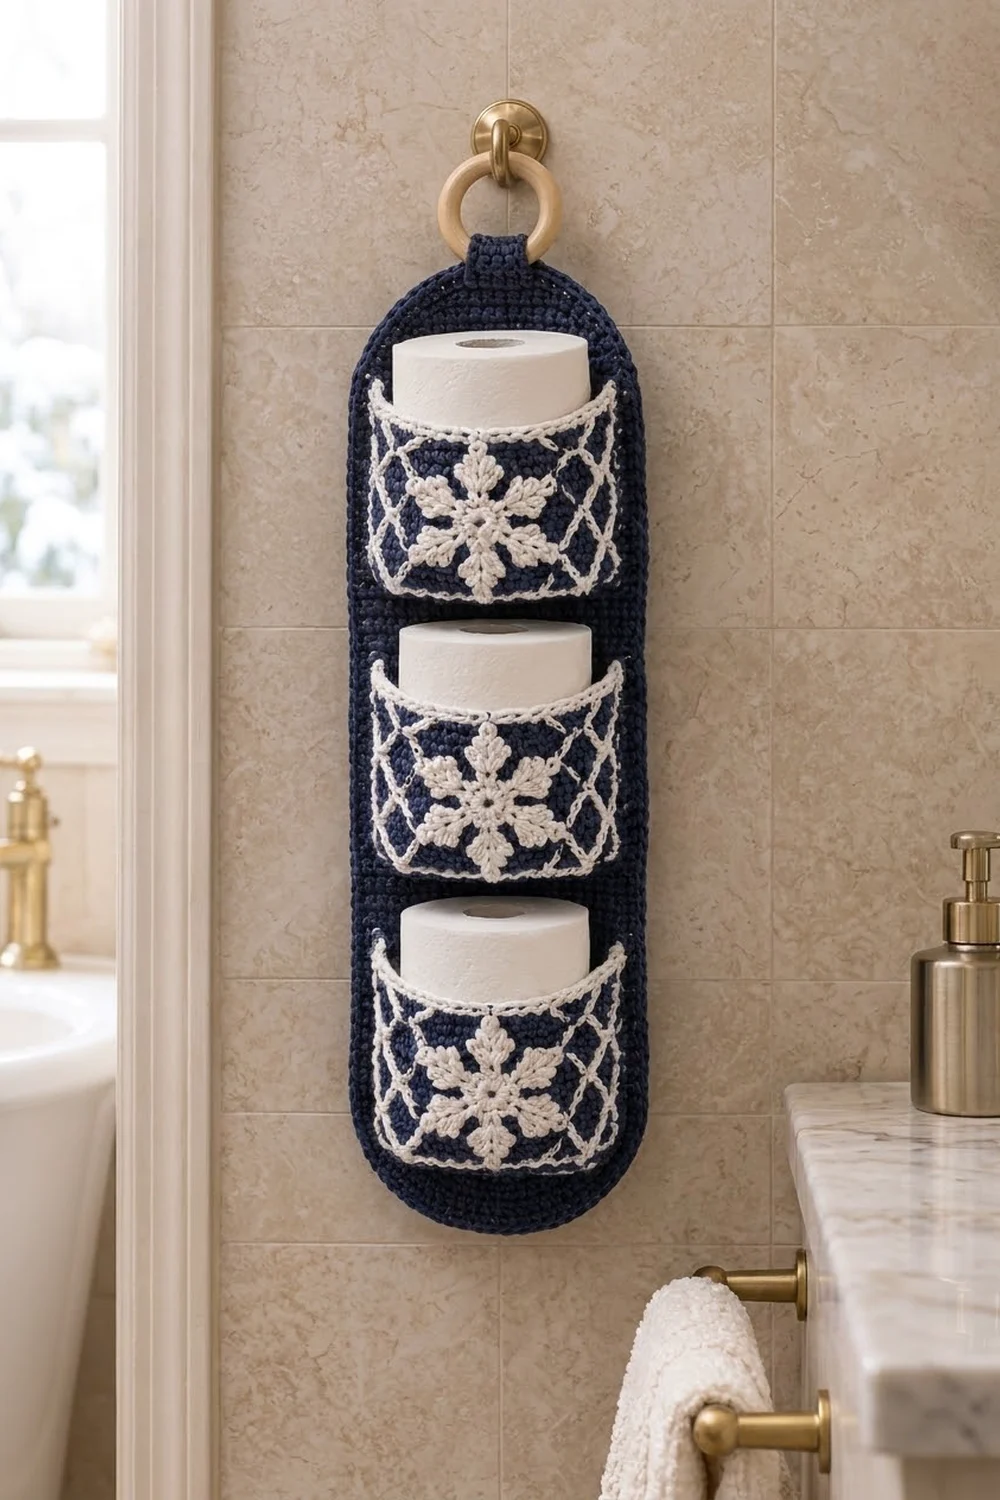
This hanging holder stores three rolls of toilet paper on a tall navy backing panel with rounded ends. Three curved navy pockets are sewn across the front. Each pocket has a white diamond lattice, a chunky white snowflake in the center, and a white edging all the way around.
There are only two colors, deep navy and soft white. The look is wintry and Nordic, so it suits a holiday bathroom, but it works all year. A navy tab at the top wraps around a wooden ring so the holder hangs from a hook or towel knob.
The pattern uses US crochet terms. The finished panel measures 7 in wide x 21 in tall (17.8 cm x 53.3 cm), not counting the hanging tab and ring.
The construction is simple. You crochet the panel in single crochet rows, increasing for the bottom curve and decreasing for the top curve. Next you make three flat pockets, add the lattice with surface slip stitch, and work a white edging round. Then you sew on the snowflakes, attach the pockets, work a navy border around the panel, and add the tab.
Finished Size and Construction
- Finished size: 7 in x 21 in (17.8 cm x 53.3 cm), plus hanging tab
- Skill level: Intermediate
- Terminology: US
- Yarn weight: Worsted (#4)
- Hook: 4.5 mm (US 7)
- Number of pieces: 7 (1 backing panel, 3 pockets, 3 snowflakes)
- Layout: 3 pockets stacked vertically on one panel
- Pocket size: 12.5 in x 3.6 in (31.8 cm x 9.1 cm) flat, with edging
- Panel size before border: 6 in x 20 in (15.2 cm x 50.8 cm)
- Border depth: about 0.5 in (1.3 cm) on every edge
Materials
Use a smooth worsted cotton or cotton blend. Cotton holds its shape in a humid bathroom and shows the lattice and snowflakes clearly. Acrylic also works, but it makes a softer, less structured holder.
- Navy: 200 g (about 360 m)
- White: 60 g (about 108 m)
These amounts assume about 180 m per 100 g. They include a margin of roughly 15% for swatching and seaming.
Tools:
- 4.5 mm (US 7) crochet hook
- Wooden ring, 3 in (7.6 cm) across
- Tapestry needle
- Locking stitch markers (at least 10)
- Rustproof pins
- Scissors and a measuring tape
- Blocking mat and a spray bottle
Abbreviations (US Terms)
- ch – chain
- sc – single crochet
- dc – double crochet
- sl st – slip stitch
- sc2tog – single crochet 2 together
- st(s) – stitch(es)
- rnd – round
- RS – right side
Surface slip stitch: Hold the yarn behind the work. Insert the hook from front to back through the fabric, pull up a loop, and draw it through the loop on your hook. Repeat at the next point along the line.
Snow Arm: Ch 8. Sl st in the 4th ch from the hook, then [ch 3, sl st in same ch] twice. This makes a tip with 3 picots. Sl st in the next ch. Sl st in the next ch, then [ch 3, sl st in same ch] twice to make a pair of side picots. Sl st in the last 2 ch.
Gauge and Checkpoints
Gauge: 16 sc and 18 rows = 4 in (10.2 cm) in sc rows.
Make one pocket before you start the panel. It is small, it shows your gauge quickly, and every later measurement depends on it.
- Pocket before edging: 12 in x 3.1 in (30.5 cm x 7.9 cm)
- Pocket with edging: 12.5 in x 3.6 in (31.8 cm x 9.1 cm)
- Snowflake: about 3 in (7.6 cm) from tip to tip
- Panel at Row 8: 6 in (15.2 cm) wide
- Panel at Row 45: 10 in (25.4 cm) tall
- Panel at Row 90: 20 in (50.8 cm) tall
If your pocket comes out too wide, switch to a 4 mm hook. If it comes out too narrow, switch to a 5 mm hook. Check the row height too, because row gauge controls the panel length and the border math.
Backing Panel
Use navy. Work every row in sc. The ch 1 at the start of each row does not count as a stitch.
Row 1 (RS): Ch 11. Sc in 2nd ch from hook and in each ch across. Turn. (10 sts)
Row 2: Ch 1, 2 sc in first st, sc in each st to last st, 2 sc in last st. Turn. (12 sts)
Rows 3–8: Repeat Row 2. The counts are 14, 16, 18, 20, 22, and 24 sts. (Row 8: 24 sts)
These rows form the rounded bottom end. Row 8 should measure 6 in (15.2 cm) across.
Rows 9–82: Ch 1, sc in each st across. Turn. (24 sts each row, 74 rows)
At Row 45, the panel should measure 10 in (25.4 cm) tall.
Row 83: Ch 1, sc2tog, sc in each st to last 2 sts, sc2tog. Turn. (22 sts)
Rows 84–89: Repeat Row 83. The counts are 20, 18, 16, 14, 12, and 10 sts. (Row 89: 10 sts)
Row 90: Ch 1, sc in each st across. (10 sts)
Fasten off. The panel should measure 6 in x 20 in (15.2 cm x 50.8 cm). Do not add the border yet.
Use navy. Work every row in sc.
Row 1 (RS): Ch 49. Sc in 2nd ch from hook and in each ch across. Turn. (48 sts)
Rows 2–14: Ch 1, sc in each st across. Turn. (48 sts each row)
Fasten off. The pocket should measure 12 in x 3.1 in (30.5 cm x 7.9 cm).
Lattice
Use white. Lay the pocket RS up with Row 1 at the bottom.
- Place markers in Row 1 at sts 1, 7, 13, 19, 25, 31, 37, and 43.
- From each marker, work surface slip stitch up and to the right, moving 1 st right in each row. Stop when you reach the top edge or the right edge. Fasten off each line on the back.
- Place markers in Row 1 at sts 6, 12, 18, 24, 30, 36, 42, and 48. From each one, work a mirrored line up and to the left, moving 1 st left in each row.
- To fill the corners, start one up-right line at the left edge in Row 7 and one up-left line at the right edge in Row 7.
The lines cross to form diamonds 6 sts wide and 6 rows tall. The pattern is mirrored around the center, between sts 24 and 25. Keep the loops loose so the pocket stays flat.
Pocket Edging
Use white, with the RS facing.
Rnd 1: Join in the top-right corner st and work 3 sc in it. Sc in the next 46 sts across the top. Work 3 sc in the corner st. Down the side, [sc in next 6 row ends, skip 1 row end] twice (12 sc). Work 3 sc in the corner. Sc in the next 46 sts across the bottom. Work 3 sc in the corner. Up the second side, [sc in next 6 row ends, skip 1 row end] twice (12 sc). Join with a sl st.
Count: 46 + 46 sts on the long edges + 12 + 12 sts on the sides + 4 corners x 3 sts = 128 sts.
Fasten off. The middle sc of each 3-sc corner is the corner center. Between corner centers, each long edge has 48 sts (46 + 1 corner st at each end). Each side has 14 sts (12 + 1 corner st at each end). The pocket should measure 12.5 in x 3.6 in (31.8 cm x 9.1 cm).
Snowflake
Use white.
Rnd 1: Make a magic ring. Ch 3 (counts as dc), work 11 dc in the ring, and join with a sl st to the top of the ch-3. Pull the ring snug, but leave a small hole in the center. (12 dc)
Rnd 2: Ch 1, [sc in next dc, Snow Arm, sc in next dc] 6 times, and join with a sl st to the first sc. (12 sc, 6 arms)
Fasten off and leave a 12 in (30.5 cm) tail. Pin the snowflake out to about 3 in (7.6 cm) and open every picot.
Make All Pieces
- Navy: 1 backing panel and 3 pockets
- White: lattice and edging on all 3 pockets, plus 3 snowflakes
Center a snowflake on each pocket, between sts 24 and 25 and between Rows 7 and 8. It covers about sts 19–30 and nearly the full height of the pocket. Sew it down around the center ring and through each arm tip.
Placement on the panel (rows counted from the bottom):
Rows 83–90   top curve (no pocket)
Rows 72–82   space for top roll
Rows 56–71   TOP POCKET     [ lattice | snowflake | lattice ]
Rows 50–55   gap
Rows 34–49   MIDDLE POCKET  [ lattice | snowflake | lattice ]
Rows 28–33   gap
Rows 12–27   BOTTOM POCKET  [ lattice | snowflake | lattice ]
Rows 1–11    bottom curve and base
Joining
Use navy and a tapestry needle. Whipstitch through the back loops of the pocket edging and through the panel fabric.
Bottom seam: Pin the pocket’s bottom edge along the lowest row of its section (Row 12, 34, or 56). Sew the 48 bottom-edge sts to the 24 panel sts, 2 pocket sts to each panel st. This gathers the base into a cup.
Side seams: Each side seam takes 16 pocket sts: the bottom corner center, the 14 side sts, and the top corner center. Sew them to the 16 rows of the pocket’s section, 1 st per row, along the outer column of the panel (st 1 or st 24).
Pull each stitch snug but not tight. The seams should lie flat without puckering the panel. When it holds a roll, the front of the pocket bows out about 2 in (5.1 cm).
Checkpoint: A standard roll, about 4.5 in (11.4 cm) across, should drop in easily and stay in place.
Border
Use navy, with the RS facing. The border gauge matches the body: 4 sts per inch (2.5 cm).
Rnd 1: Join at the bottom end. Work across the 10 foundation sts: 2 sc in the first st, sc in the next 8 sts, 2 sc in the last st (12 sts). Up the side, [sc in next 8 row ends, skip 1 row end] 10 times (80 sts). Work across the 10 sts of Row 90: 2 sc in the first st, sc in the next 8 sts, 2 sc in the last st (12 sts). Down the second side, [sc in next 8 row ends, skip 1 row end] 10 times (80 sts). Join with a sl st.
Count: 12 + 80 + 12 + 80 = 184 sts.
Rnd 2: Ch 1. On each 80-st side, sc in each st (80). On each 12-st end, [sc in next st, 2 sc in next st] 6 times (18). Join with a sl st.
Count: 18 + 80 + 18 + 80 = 196 sts.
Why the math works: The gauge ratio is 16 sts to 18 rows, which simplifies to 8:9. Working 80 sc into 90 row ends matches that ratio exactly, so the sides neither ruffle nor pull in. At 4 sts per inch, 80 sts measure 20 in (50.8 cm), the same as the panel height. The extra stitches in Rnd 2 keep the rounded ends from cupping.
Hanging Tab
Count across the 18 top-end sts of Rnd 2 and join navy in st 7.
Rows 1–16: Ch 1, sc in 6 sts. Turn. (6 sts each row)
The tab measures 1.5 in x 3.6 in (3.8 cm x 9.1 cm). Pass it through the wooden ring to the back of the panel. Whipstitch Row 16 to the back of the panel, directly behind the base of the tab.
Final Blocking
- Weave in all the ends inside the seams or behind the lattice.
- Spray the whole holder evenly until it is damp but not soaked.
- Pin the panel flat to 7 in x 21 in (17.8 cm x 53.3 cm).
- Tuck a rolled hand towel into each pocket so the pockets dry curved.
- Pin out the snowflake picots.
- Let everything dry completely, for at least 24 hours.
Final Quality-Control Checklist
- The panel measures 7 in x 21 in (17.8 cm x 53.3 cm).
- The border counts are 184 sts and 196 sts.
- Each pocket measures 12.5 in (31.8 cm) wide when laid flat.
- The lattice diamonds are evenly spaced and mirrored around the center.
- The snowflakes are centered, and every picot is open.
- The pocket seams are even, with no gaps at the corners.
- The tab is centered and firmly sewn.
Troubleshooting
- Rippling panel sides: Rnd 1 has too many sts. Skip 1 row end after every 7 instead of every 8.
- Puckered lattice: Your surface slip stitch is too tight. Rework it with a 5 mm hook.
- Rolls slip out: The bottom seam is loose. Restitch it more firmly.
- Curling snowflake: Wet-block it again and pin it flat.
- Sagging panel: Use cotton yarn, or line the back with felt cut to 7 in x 21 in (17.8 cm x 53.3 cm).
- Pocket too short for your rolls: Add 2 rows to each pocket and add 2 rows to each section on the panel.
Care
Hand wash in cool water and dry flat. While the pockets are damp, reshape them over rolled towels.
Final Notes
Every measurement follows from the gauge. At 16 sts and 18 rows per 4 in (10.2 cm), the panel’s 24 sts and 90 rows measure 6 in x 20 in (15.2 cm x 50.8 cm). The border adds 0.5 in (1.3 cm) on every edge, for a finished size of 7 in x 21 in (17.8 cm x 53.3 cm). Each 48-st pocket measures 12 in (30.5 cm) wide and gathers 2:1 onto the 24-st panel, and each 16-st side edge matches its 16 panel rows. If your first pocket measures correctly, everything else will fit.
Happy crocheting!